Practical, budget-friendly framing methods for tiny houses — material choices, efficient layouts, roof and wall techniques, and step-by-step sequencing.
Tiny House Framing Guide: Efficient Techniques
Tiny house framing matters because the framing system sets weight, thermal performance, airtightness, and cost for the whole build. This guide to tiny house framing lays out practical, budget-friendly methods you can use to save material, speed construction, and avoid common mistakes while keeping durability and moisture control front of mind. Readers will learn how to size a simple footprint for structural efficiency, compare stick framing and SIPs, pick lumber and connectors, apply advanced framing techniques, detail roofs for lofts and snow, and follow a step-by-step framing sequence from foundation to roof.
TL;DR:
- Use a compact, rectangular layout and simple roof form to cut framing complexity and labor by up to 30% on small footprints.
- Choose the framing system that matches your goals: platform stick framing for low cost and flexibility; SIPs for speed and airtightness; hybrid or Larsen truss for high R-value and reduced thermal bridging.
- Prioritize airtightness, continuous insulation, and correct flashing; these steps reduce heat loss, condensation risk, and long-term maintenance.
Intro: Why Efficient Tiny House Framing Matters
A typical tiny house footprint ranges from about 100 to 400 sq ft, and each square foot of wall or roof framed inefficiently adds cost, weight, and thermal bridging. Efficient tiny house framing means using the least material and labor to meet structural loads, while maximizing insulation space, airtightness, and durability. For budget DIY builders this often translates to selecting straightforward shapes, reducing unnecessary headers and corners, and choosing wall thickness that balances insulation goals with trailer or foundation weight limits.
Research into small footprint housing points to the social and environmental benefits of downsized construction and also highlights the need for safer, better-performing assemblies; see the overview of tiny-home case studies and design considerations for broader context (Tiny homes—big movement: building a permanent and ...). Industry practice shows advanced framing can reduce lumber use and waste by roughly 10–20% while increasing cavity space for insulation, though it requires tighter tolerances and careful detailing to maintain structural performance.
This article is a practical, step-by-step guide aimed at owner-builders and small teams. It references common standards (IRC, IECC) and Passive House principles as performance targets for airtightness and thermal continuity. The content focuses on what to plan, what to buy, how to sequence work, and where to be extra careful.
Planning Your Tiny House Framing: Loads, Codes, and Layout
Sizing the Footprint and Layout for Structural Efficiency
A compact, simple footprint—square or long rectangle—reduces corner count, fewer headers, and shorter runs of framing members. For tiny houses under about 300 sq ft, aim for widths that keep standard lumber spans economical (typically 8–12 ft clear spans). Narrower builds make floor and roof framing easier and reduce the need for engineered joists.
Common tiny-house footprints:
- Small: 100–160 sq ft (single room) — straightforward single-span joists and rafters
- Medium: 160–300 sq ft — may need engineered joists (TJI) for lofts or longer runs
- Large: 300–400 sq ft — consider 2x6 walls and additional structural headers
Lay out interior partitions to follow stud locations where possible; continuous load-bearing lines should stack from roof to foundation in the load path.
Basic Load Paths and Why They Matter
Follow simple load paths so forces travel directly to the foundation or trailer: roof → rafters/joists → top plate → studs → bottom plate → foundation or trailer frame. Discontinuous load paths (unsupported headers, long unsupported cantilevers) increase deflection and risk. For lofts or vaulted ceilings, include ridge beams or engineered headers sized for the span.
Check local snow loads and wind exposure using building department maps or design tables. Snow load and wind load drive rafter sizing and tie-down requirements more than dead loads do.
Permits and Code Checkpoints for Small/self-builds
Most jurisdictions apply the International Residential Code (IRC) and energy codes (IECC) to tiny houses on foundations; towable units may fall under different regulations. Verify:
- Permit requirements for foundations or permanent occupancy
- Egress window and ceiling height minimums
- Anchorage and foundation details if the unit is on a trailer
For newcomers, the building basics primer helps with site prep and permitting steps. Businesses and builders often find a pre-application meeting with the local building department saves time.
Choosing a Framing System for Tiny House Framing: Stick Framing, Sips, and Alternatives
Platform vs Balloon Framing — Pros and Cons
Platform framing is the standard for tiny houses: floors are framed and subfloored, then walls are raised on the platform. It is safe, uses common lumber, and fits tight budgets. Balloon framing is uncommon in tiny houses because it requires tall studs and specialized joins; it can reduce some vertical thermal breaks but is harder for DIYers.
Sips and Panel Systems: When They Pay Off
SIPs (structural insulated panels) combine structure and insulation into factory-made panels. They provide high R-values, excellent airtightness, and rapid assembly. SIPs can reduce on-site labor dramatically but require precise planning, specialized fasteners, and may be costlier upfront. SIPs are often a good fit when airtightness and speed outweigh initial material cost.
Lightweight Timber Framing and Hybrid Approaches
Larsen truss walls, open-web timber trusses, and hybrid assemblies mix stick framing with continuous exterior insulation to reduce thermal bridging and increase R-value. These systems are attractive when passive-house level performance is targeted but may increase framing complexity.
| System | Typical wall R-value achievable | Labor skill level | Material cost (relative) | Speed of build | Airtightness | Waste level | Best-use case |
|---|---|---|---|---|---|---|---|
| Platform stick (2x4 16" OC) | R-13–R-15 (cavity) | Low | Low | Moderate | Medium | Medium | Towable, flexible layouts |
| Advanced stick (2x4 24" OC) | R-13–R-15 (cavity) | Moderate | Lower | Moderate | Medium | Low | Budget builds, low thermal-bridge |
| Platform stick (2x6) | R-19–R-23 (cavity) | Moderate | Moderate | Moderate | Medium | Medium | Cold climates, higher insulation need |
| SIPs | R-24–R-32+ (panel dependent) | Moderate | Higher | Fast | High | Low | Off-grid, airtight, rapid assembly |
| Larsen truss | R-30–R-40+ (with CI) | Higher | Moderate–High | Moderate | High | Low | Passive-house targets, cold climates |
| Timber frame | Variable | High | High | Slow | Medium–High | Low | High-end, long-span lofts |
The comparison above helps weigh tradeoffs between cost, speed, airtightness, and insulation. For mobile tiny houses, weight limits and connection details make platform stick framing common. For a fixed foundation where airtightness and thermal performance matter most, SIPs or Larsen truss assemblies can be worth the premium.
For suppliers and fabrication options, industry publications and small-panel manufacturers supply SIP kits. For an introduction to truss-based wall systems, see the larsen truss details. For general framing type comparisons, a quick guide to framing types provides practical perspective (A quick guide to tiny house framing | garden shed plans).
Include "SIP vs stick framing" decisions based on your priorities: if airtightness and speed are top priorities, SIPs often win; if flexibility and local material access matter, stick framing is usually better.
Material Selection: Lumber Sizes, Sheathing, Fasteners, and Connectors
Choosing Lumber: 2x4 vs 2x6 and Engineered Lumber
Choose lumber species like SPF or pine depending on local availability and price. Use 2x4 walls at 24" OC for material savings and acceptable R-values in mild climates; move to 2x6 walls when you need higher cavity R-values or longer spans for lofts. Engineered members (TJI, LVL) are a good choice for floor joists and beams where deeper, lighter sections are needed to clear long spans while maximizing headroom.
Refer to wall thickness comparison for guidance on when to select 2x6 or deeper walls.
Sheathing and Bracing Options (OSB vs Plywood vs Structural Panels)
OSB is economical and performs well in most tiny-house uses. Plywood costs more but can be more tolerant of moisture cycles and is preferred for roof sheathing in wet climates. For high-performance builds, structural sheathing panels or SIPs reduce the need for separate insulation. Use sheathing to establish a continuous shear plane; taped sheathing can also form part of an air-barrier.
Fastener Schedules, Metal Connectors, and Hinge Points
Use code-approved fasteners and Simpson Strong-Tie style connectors for critical connections: anchor bolts at sill plates, joist hangers, hurricane ties at rafters, and hold-downs where uplift or racking is expected. Typical fastener schedules:
- Top plate to stud: two 8d nails per stud (verify local code)
- Rim joist to floor joist: joist hangers with specified nails
- Anchor bolts: 1/2" bolts at 6 ft on center or as required by local code
For SIPs, use long screws recommended by the panel supplier and follow manufacturer fastener spacing. In coastal or high-humidity sites, choose galvanized or stainless fasteners for corrosion resistance.
Green Building Advisor discusses framing in contact with steel trailers and recommends a continuous thermal break between trailer steel and wood framing to limit condensation and thermal bridging (Tiny house wooden framing in contact with steel trailer?). For sustainable material options, see the internal resource on sustainable material choices.
Space-efficient Wall and Floor Framing Techniques for Tiny House Framing
Advanced Framing Strategies (24" OC, Two-stud Corners)
Advanced framing saves material and opens up cavity space for insulation. Key techniques:
- 24" on-center stud spacing reduces studs by about 20% compared with 16" OC, while maintaining load capacity for narrow walls.
- Two-stud corners with insulated backing reduce thermal bridging and simplify drywall backing.
- Single top plates with engineered blocking and continuous blocking at corners reduce lumber use.
These techniques require precise layout and good nailing practices. For step-by-step instructions, consult the advanced framing techniques guide and the step-by-step advanced walls article.
Open-web Floor Systems and Cantilevers
Open-web floor joists (metal or wooden) and engineered TJI joists let mechanicals run inside the floor and reduce the need for notching or drilling. Cantilevers can create usable exterior space (tiny decks or overhangs) but keep cantilever lengths conservative—typically no more than one-quarter of the joist span without engineered reinforcement.
Pair open-web systems with floor insulation choices; learn floor insulation methods in insulating a shed floor.
Platform Framing Details to Maximize Usable Interior Space
To maximize headroom and loft usability:
- Keep floor buildup shallow: use TJI or 2x8/2x10 where a longer span is needed without deep floor thickness.
- Use rim-joist insulation and air-seal at the sill to reduce drafts under the subfloor.
- Plan loft supports so they align with studs below and avoid mid-span cantilevers that require extra reinforcement.
The choice between 24" OC and 16" OC affects r-values achievable with common batts: a 2x4 wall at 24" OC can still accept R-13 batt, but continuous exterior insulation or thicker walls are needed for colder climates to reach R-20+ performance. Recent research on tiny house structural and thermal behavior highlights the value of design tools for safety and performance in compact designs (Development of a tiny house design tool to increase safety, ...).
Roof Framing Options and Detailing for Tiny Houses
Shed, Gable, and Gambrel Roof Choices — Structural and Space Tradeoffs
Shed roofs are simple to frame and shed water and snow effectively on narrow buildings. Gable roofs provide symmetrical aesthetics and attic or loft ventilation. Gambrel roofs create extra loft space but require more complex framing.
A shed roof is often the fastest and lightest choice for tiny houses—see the shed roof framing walk-through for step-by-step guidance. For snowy climates choose a steeper pitch and design rafters per local snow-load tables.
Roof Insulation and Breathable Assemblies
Decide between cavity insulation and continuous exterior insulation. Continuous exterior insulation reduces thermal bridging and simplifies air-barrier continuity. SIP roofs offer both insulation and structure in one product.
For passive-house level performance, exterior roof insulation combined with a ventilated top layer can be effective; consult exterior roof insulation for assembly options. Aim for a ventilated cold roof or an unvented, well-sealed assembly with a vapor-control layer chosen for your climate.
Flashing, Eaves, and Roof-to-wall Connections
Good flashing prevents leaks at roof-to-wall intersections, dormers, and windows. Use step flashing at eaves and counterflashing at parapets. Tie roof diaphragms to walls using hurricane ties or straps in wind-prone areas. For roofing underlayment, choose products rated for your climate and follow manufacturer fastener and overlap instructions.
Market trends and design choices for tiny homes, including popular roof styles and loft strategies, are summarized in industry surveys and market reports (Tiny house statistics: market & trends (2026)). These can help inform stylistic and structural choices.
Airtightness, Thermal Bridging, and Moisture Control in Framed Tiny Houses
Sealing Strategies: Tapes, Membranes, and Taped Sheathing
Airtightness begins at continuous air-barrier lines: sill plate, top plate, window and door perimeters, and service penetrations. Use taped sheathing, self-adhered membranes, or liquid-applied air barriers at the exterior. For interior air barriers, taped gypsum or interior membranes can work when coordinated with the exterior.
Aim for a measurable airtightness target: Passive House recommends 0.6 ACH50; while many tiny-house projects set realistic targets in the 1.0–3.0 ACH50 range depending on budget and systems. A simple airtightness checklist helps builders cover common leak points.
Thermal Bridge Reduction and Compact Details
Thermal bridges are minimized by continuous exterior insulation, wider stud spacing, or disconnecting the cold structure with an exterior thermal break. Larsen truss walls are one method to put insulation outside the primary structural members and reduce bridging; see larsen truss details and climate-specific guidance in the cold-climate larsen truss article.
Vapor Control and Drying Potential
Vapor profiles depend on climate. In cold climates, prioritize interior vapor retarders and exterior drying; in mixed or warm-humid climates avoid interior vapor barriers that trap moisture. Provide a rainscreen behind cladding to allow water drainage and drying. Proper flashing and window installation further reduce water ingress; guidance on window installation is available in window selection and installation.
Include mechanical ventilation sized to the building volume—balanced systems with heat recovery are ideal but may be costly; simpler exhaust-only or supply-only systems can work if airtightness is moderate and moisture sources are controlled. See ventilation for off-grid cabins for practical approaches that match airtight assemblies.
Step-by-step Framing Sequence: Foundation to Roof (with Checklist and Video)
Foundation or Trailer Prep and Anchorage
Decide early: trailer-based or foundation. For trailers, protect the wooden subfloor from direct contact with steel and include a continuous thermal break between steel frame and wood framing. Anchor posts or piers require concrete footings sized per local frost depth and load.
Key foundation/trailer prep tasks:
- Clean and level site; verify trailer frame is square
- Install sill plates with sill sealer; bolt plate to foundation or trailer per spacing required by code
- Run major service penetrations before subfloor installation where possible
See the site prep checklist in the site prep checklist article.
Floor Framing and Subfloor Installation
Common sequence and estimated hours for a 200 sq ft tiny house:
- Floor joists layout and hangers — 6–10 hours with two people
- Subfloor sheathing and adhesive — 4–6 hours
- Rim-joist blocking and sill anchorage — 2–4 hours
Use construction adhesive under tongue-and-groove subfloor panels and stagger seams for strength. Add underfloor insulation where appropriate and air-seal the rim-joist.
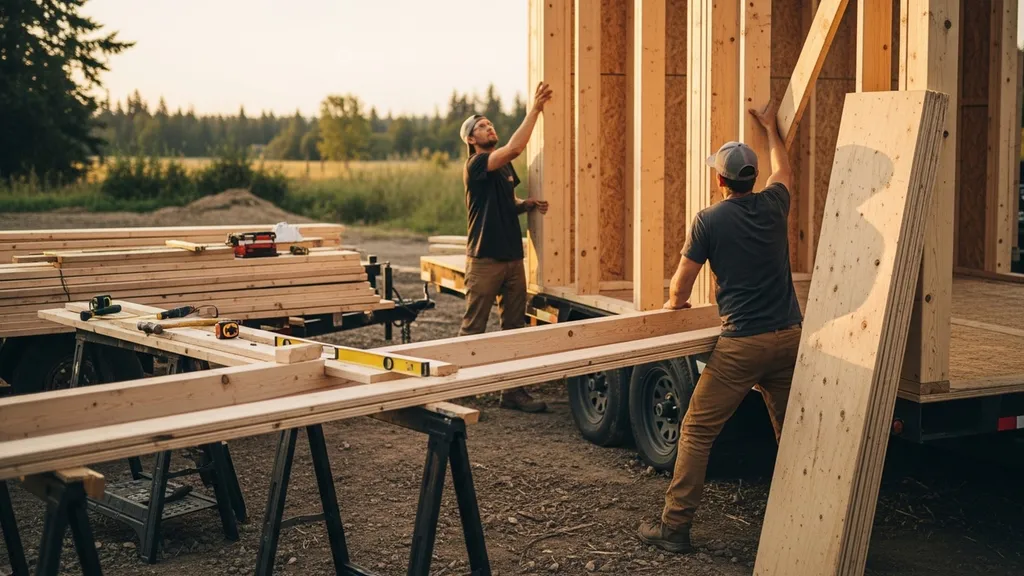
Wall Layout, Raising Walls, Sheathing, and Bracing
Typical wall sequence:
- Mark plate and stud locations on subfloor using full-scale layout from plans
- Assemble wall sections flat with plates and studs, confirm square
- Raise and temporarily brace walls (2–3 braces per wall depending on length)
- Sheath walls once braced; nail sheathing per manufacturer pattern and tape as needed
Common pitfalls: insufficient anchor bolts at sill plates, cutting corners on temporary bracing, and failing to pre-plan rough openings for windows and services. Temporary diagonal bracing should be removed only after permanent bracing or sheathing is completed.
Include framing and electrical coordination early; rough in electrical runs after wall framing and before insulation. For routing and systems planning see tiny house electrical options.
Before wall raising, review framing dimensions on plans; the reading blueprints article helps builders interpret framing and layout instructions.
Watch this step-by-step guide on building a tiny house - wall framing:
The video above demonstrates team wall-raising techniques, sheathing nailing patterns, and temporary bracing—useful visual guidance to complement this checklist.
Roof Framing, Sheathing, and Rough Openings
Roof steps:
- Install ridge beam or plate as required for the roof type
- Lay out and cut rafters or set prefabricated trusses
- Install rafters, blocking, and hurricane ties
- Sheath roof panels and install underlayment; flash penetrations
Estimate labor for a shed or gable roof on a 200 sq ft tiny house: 12–24 hours for a small crew depending on complexity. Factor in time for flashing, vents, and roof finishing.
Below is a small material takeoff example for a 200 sq ft wall run (approximate):
- Studs (2x4 at 24" OC): ~36 studs
- Top/bottom plates (2x4): ~12 linear ft each wall plate length per floor
- Sheathing: ~200 sq ft plus waste (order 10–15% extra)
- Anchor bolts: 6–8 (depending on perimeter and code)
Check fastener counts and exact material needs against your plan and local code.
Common Mistakes, Code Traps, and Cost-saving Tips for Tiny House Framing
Top 8 Common Framing Mistakes (quick Checklist)
- Overdriven nails: weak connections and split lumber
- Insufficient anchor bolts: failure to secure sill plates properly
- Poor flashing at openings: leads to water intrusion and rot
- Skipping temporary bracing: walls can fall or twist during sheathing
- Mismatched stud layout and openings: causes rework at window/door rough openings
- Ignoring ventilation and vapor profiles: leads to condensation in cavities
- Underestimating weight for towable homes: axle load and hitch limits exceeded
- Incorrect fastener or connector selection in corrosive environments: early failure in coastal builds
Where to Spend vs Where to Save
Spend on:
- Airtightness details and quality windows
- Proper connectors and corrosion-resistant fasteners in wet sites
- A good subfloor and sill anchorage system
Save on:
- Using 24" OC studs where loads allow
- Buying standard-length lumber in bulk to reduce cuts and waste
- Considering pre-cut panel kits or SIPs for labor savings if you have a small crew
Pre-cut or panelized kits can reduce waste and time; compare labor cost savings against material premiums before deciding. Hidden costs and scheduling pitfalls are covered in the internal piece on 10 hidden costs in DIY eco home building and the building basics primer.
Maintenance Tips to Protect the Framed Structure
- Keep roof and flashing in good repair—inspect annually
- Maintain siding and finish to prevent water reaching sheathing
- Check for insect or rot damage in sill plate areas periodically
- Re-caulk joints after seasonal movement if necessary
The Bottom Line
Tiny house framing success starts with matching the framing system to your goals: choose platform stick framing for low cost and flexibility, SIPs or Larsen truss for superior airtightness and insulation. Use advanced framing where tolerances and skill allow to cut material and thermal bridging, and treat airtightness, flashing, and ventilation as high-priority details to avoid long-term problems.
Frequently Asked Questions
How thick should tiny house walls be for good insulation?
Wall thickness depends on climate and performance goals. In mild climates, 2x4 walls (with 24" OC advanced framing) plus a modest continuous exterior board can reach acceptable performance. In cold climates, 2x6 walls (allowing R-19 to R-23 cavity fill) or deeper assemblies with continuous exterior insulation are recommended. For Passive House–level targets, truss-based walls or SIPs with combined R-values in the R-30+ range are common.
Can I use 24-inch on-center spacing in a tiny house?
Yes, 24" on-center (OC) stud spacing is commonly used in tiny houses and can reduce lumber use by roughly 10–20% compared with 16" OC. It works well for load-bearing walls on short spans and is compatible with many sheathing and drywall products, but it requires precise layout and attention to fastener schedules and header sizing.
What framing system is best for a towable tiny home?
For towable tiny homes, platform stick framing (2x4 or 2x6) on a well-designed trailer frame is most common because it balances weight, flexibility, and repairability. SIPs add weight and require secure attachment to the trailer; they can be used, but check axle capacity and trailer engineer specs. Always include a thermal break between the steel trailer and wood framing to reduce condensation risk.
How do I prevent thermal bridging in a framed tiny house?
Reduce thermal bridging by adding continuous exterior insulation, choosing wider stud spacing, or using truss-based walls (Larsen truss) that move structure inward and insulation outward. Taping sheathing and minimizing repeated timber members through the insulation layer also help. Detail corners and window openings so insulation remains continuous or is reasonably bridged.
Do I need a separate foundation if I build a tiny house on land?
It depends on permanence and local code. Permanent occupancy usually requires a foundation sized to local frost depth and load requirements; temporary or movable units may be permitted on piers or a trailer. Check local building department rules for foundation requirements and tie-downs. If using a trailer, plan for anchorage and moisture protection at the sill.