Practical guide to designing and building Larsen truss walls for energy-efficient, low-cost DIY homes — materials, thermal detailing, step-by-step assembly.
Larsen Truss Wall Assembly: Complete Guide
A Larsen truss wall is an exterior secondary framing system that creates a deep, continuous insulation cavity outside the primary structural wall. For budget-conscious DIY builders, a larsen truss wall offers an accessible route to high thermal performance, reduced thermal bridging, and retrofit flexibility — often delivering Passive House–level envelopes when detailed correctly. This guide explains what a larsen truss wall is, componentry and fastener rules, insulation choices, step-by-step assembly, cost and procurement advice, common installation mistakes, and how the system stacks up against stud walls, double-stud builds, and SIPs.
TL;DR:
- A larsen truss wall creates a separated exterior insulation cavity (50–200+ mm) to cut thermal bridging and reach U-values as low as 0.12–0.18 W/m²K with 150–300 mm of mineral wool or polyiso.
- Build sequence: confirm air/vapor strategy and permits, install continuous air barrier on the structural wall, attach vertical battens (trusses) with correct fastener embedment, fill cavity with chosen insulation, install rainscreen and cladding.
- Best uses: retrofits and new light-frame or timber-frame builds in cold climates; avoid careless detailing around windows and drainage planes to prevent moisture issues.
Quick Take: Key Points About Larsen Truss Wall
One-paragraph Summary
A larsen truss wall is a secondary exterior furring system—usually a vertical batten assembly—fastened through the primary sheathing to create a deep, ventilated cavity for insulation. That cavity allows large thermal resistance without thickening interior walls and separates the cladding from the primary structure, reducing thermal bridging and providing an integrated rainscreen. The approach works well in cold and mixed climates and is common on timber-frame, light-frame, and retrofit projects where adding continuous exterior insulation would be more disruptive.
When a Larsen Truss is a Good Choice
- Key takeaways:
- High insulation depth without interior disruption: Add 100–300 mm of insulation outside existing studs.
- Reduced thermal bridging: Vertical trusses isolate cladding fixings from the structural studs, improving whole-wall R-value.
- Retrofit-friendly: Works on existing houses where interior renovation is limited or undesirable.
- Compatible with rainscreen systems: Allows a ventilated drainage gap and simpler cladding attachment.
Industry papers describe larsen-type assemblies as a double-wall variant with gusset plates or battens spaced at 600–900 mm o.c.; see the technical overview from Brikbase for a performance example (double wall framing technique PDF). For Passive House–oriented readers who want the theory behind larsen trusses in very low-energy envelopes, see the passive-house larsen trusses build update.
What is a Larsen Truss Wall and When to Use It
Definition and Core Idea
A larsen truss wall is an exterior secondary frame that creates a deep cavity between the structural wall and cladding. Typical batten depths start at 50 mm for small improvements and extend to 200–300+ mm for high-performance builds. The structural wall carries loads; the trusses carry cladding load paths and provide a place for continuous insulation. The system reduces thermal bridging because the continuous layer of insulation is decoupled from studs by the batten web.
History and Typical Applications
The method traces to Scandinavia and northern Europe where timber construction and cold climates encouraged exterior insulation solutions. In North America, larsen trusses appear on timber-frame homes, energy-retrofit projects, and small cabins. Building research groups document larsen-type assemblies used with 9-inch I-joists or deep battens to create thick exterior cavities for loose-fill or board insulation (see example project data from the Building America Solution Center: Larsen truss wall example).
Suitability: New Build vs Retrofit
- New builds: Allow clean integration of air barrier and service runs; choose if wall thickness is acceptable and you want a high-performing envelope.
- Retrofits: Ideal when interior finishes must remain; attach trusses to existing sheathing and add insulation externally.
- Climate fit: Best in cold and mixed climates where large exterior R-values and drainage/ventilation help manage winter condensation risk.
Consider whether permits or historic-preservation rules restrict exterior thickness or changes; if so, a partial larsen approach or interior strategies may be needed. For small cabin examples using this approach, see the small cabin build guide.
Larsen Truss Wall Components and Cross-section
Typical Cross-section (inside → Outside)
A standard cross-section (interior to exterior) reads:
- Interior finish (drywall)
- Interior air barrier and vapor control (location depends on climate and hygrothermal design)
- Structural stud wall with sheathing
- Continuous air barrier or taped sheathing (if used)
- Service cavity (optional)
- Larsen truss battens (vertical members forming the insulation cavity)
- Insulation (mineral wool, cellulose, blown fiberglass, or rigid boards)
- Rainscreen furring/strapping above insulation where needed
- Cladding (wood, fiber cement, metal, etc.) with an air gap for drainage
For rainscreen detailing and the required drainage gap, consult our cross-section detailing and rainscreens guide.
Fasteners, Bracing, and Edge Details
- Fastener selection: Choose fasteners long enough to penetrate the batten, sheathing, and reach at least 40–60 mm into solid framing. Corrosion-resistant screws (stainless or hot-dipped galvanized) are recommended for exterior use.
- Spacing: Typical batten spacing is 600–900 mm o.c.; cladding support and wind loads may dictate closer centers.
- Bracing: At corners and openings, add blocking or plywood gussets to carry torsion and wind loads and to anchor long screws.
- Edge details: Flashings and head jambs must be integrated with the drainage plane; terminate the rainscreen above foundation flashings and allow a 10–20 mm ventilation gap behind the cladding.
Cladding, Rainscreen, and Drainage Plane
A ventilated rainscreen keeps the cladding dry and allows the outer face of the insulation to equalize with ambient humidity. Use breathable membranes behind battens where the insulation type permits it. Choose cladding finishes that tolerate ventilation gaps and use compatible coatings; see our eco-friendly exterior coatings guide for finish options and maintenance considerations.
Refer to standard R-value targets in our attic guide for context on how wall R-values compare: attic insulation R-values.
Thermal, Air, and Moisture Performance
How Larsen Trusses Reduce Thermal Bridging
By placing continuous insulation in the truss cavity and decoupling the cladding fixings from studs, heat flow across studs is reduced substantially. A properly detailed larsen truss wall lowers linear thermal bridges and raises whole-wall effective R-value. Example: a 200 mm mineral wool cavity plus an insulated stud bay can approach U-values of 0.12–0.18 W/m²K (depending on cladding and interior details), similar to many Passive House targets.
Choosing Insulation: Mineral Wool, Mineral Fibre, Fibrous, and Board Options
Insulation choices affect performance, moisture tolerance, and cost:
| Insulation type | R-value per 25 mm | Moisture tolerance | Typical cost range (material/m2) |
|---|---|---|---|
| Mineral wool (batt/rock) | ~0.72–0.79 | High tolerance, vapor-open | Low–medium |
| Cellulose (blown) | ~0.70 | Good hygric buffering, settles slightly | Low–medium |
| Fiberglass (batts/blown) | ~0.65–0.72 | Moderate tolerance, cheaper | Low |
| Polyiso board (rigid) | ~1.1–1.3 | Low water tolerance, high R/in | Medium–high |
For foam board comparisons with trade-offs on R/in and moisture behavior, see our foam board comparison.
When selecting, consider compressibility and the ability to fill the cavity without gaps. Blown or dense-packed materials are easier to install in deep cavities and reduce thermal bypass risk.
Vapour Control, Drying Strategies, and Moisture Risks
Moisture management is critical. Two common strategies:
- Place the primary air barrier on the interior with a controlled vapor retarder in cold climates; allow the exterior cavity and cladding to dry outward.
- Locate a continuous exterior membrane (breathable weather resistive barrier) over sheathing and make the larsen cavity ventilated to promote drying.
A hygrothermal analysis may be necessary for extreme climates or mixed driving rain exposures. Industry guidance from IECC, ASHRAE, and Passive House Institute provides airtightness and moisture targets; aim for n50 targets consistent with high-performance projects (e.g., Passive House or local code goals). For airtightness procedures and targets, consult air-sealing for passive homes.
Step-by-step Larsen Truss Wall Assembly
Planning, Layout, and Permit Checklist
- Permit and code check: Review local building codes and confirm allowable exterior thickness and cladding changes. See the building permit guide for common requirements.
- Design the assembly: Decide insulation type, batten depth, fastener sizes, and air/vapor strategy. Produce a detail drawing for window and foundation transitions.
- Site and material prep: Order battens, fasteners, membranes, insulation, flashings, and cladding. Confirm delivery and storage plans to keep materials dry.
Key permit items: structural attachment method (fastener loads), fire separation for cladding, and energy compliance paths (IECC/Local).
Framing and Attaching the Trusses to the Structure
- Install or confirm continuous sheathing and primary air barrier on the structural wall.
- Mark batten positions at chosen spacing (600–900 mm o.c.). Stagger joints where practical.
- Pre-drill pilot holes through battens and sheathing where using long screws to avoid splitting and ensure straight fastening.
- Fasten battens using screws sized to penetrate the batten, sheathing, and embed a minimum of 40–60 mm into studs or blocking.
- Add blocking at openings and corners and install any required gussets to transfer cladding loads.
Practical tip: For long screws, drive slowly and check for plumb. Avoid over-driving which compresses insulation cavities.
Insulation Installation, Air-sealing, and Cladding
- Seal service penetrations and seams in the primary air barrier before insulation.
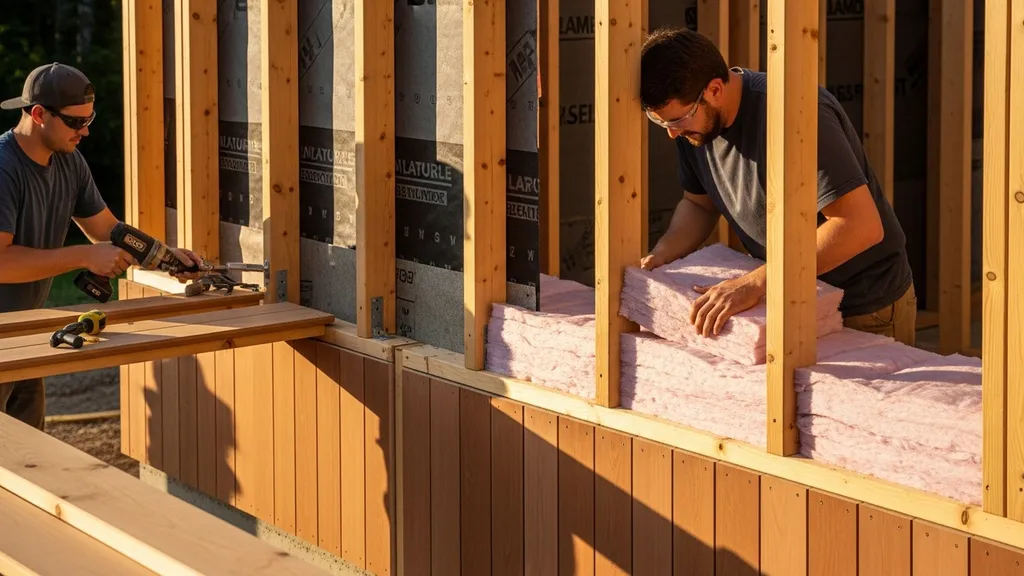
- Install insulation in the truss cavity: dense-pack or batts cut to fit without compression. Fill the full depth to avoid gaps and cavities.
- Run services in the structural wall or an inner service cavity; avoid penetrations through the truss layer unless fully detailed and sealed.
- Install a rainscreen batten or capillary break over the insulation where cladding requires it, maintaining a drainage gap (10–20 mm).
- Integrate flashings and window transitions with the drainage plane. Seal around windows with flexible flashing and a backdam at sills.
- Finish with cladding installation according to manufacturer instructions.
For framing specifics that apply when installing battens and strapping, see the advanced wall framing guide. For air-barrier and membrane techniques referred to above, review airtight membrane installation.
For a visual demonstration, check out this video on enbix wall library - larsen truss retrofit assembly:
The video shows typical fastening cadence, batten alignment, and insulation filling methods that complement this written sequence — useful for pacing and crew organization.
Materials checklist (per 10 m² wall area approximate):
- Battens: vertical timber/strapping sized for insulation depth (e.g., 50×150 mm for 150 mm cavity)
- Fasteners: stainless or HDG screws, 120–200 mm length depending on batten + sheathing + embed
- Weather resistive barrier: 1 sheet per sheathed area
- Insulation: mineral wool blankets or dense-packed loosefill by volume
- Rainscreen batten/ventilation strips and cladding fixings
- Flashing tape and sealants
Tools list:
- Cordless drill/impact with long bit extender
- Screw gauges and countersink attachments
- Insulation blower (if dense-packed) or staple gun for batts
- Laser level or chalk line for plumb batten installation
- Blower-door test access (for airtightness checks)
Materials, Sizing Rules, Costs, and Procurement
Bill of Materials: Battens, Fasteners, Membranes, Insulation, Cladding
Estimate per m² (example for 150 mm cavity):
- Battens: 3.0–4.0 lm of 50×150 mm timber (varies by spacing)
- Fasteners: 6–10 screws per m² depending on wind loads and spacing
- Weather membrane: 1.05 m² per m² (overlap allowance)
- Insulation: 0.15 m³ per m² for a 150 mm cavity
- Rainscreen strips and cladding fixings: dependent on cladding type
Sizing Rules and Structural Considerations
- Batten depth = required insulation thickness + 10–20 mm for drainage/ventilation.
- Fastener embedment = batten thickness + sheathing + minimum 40–60 mm into framing; consult manufacturer for pull-out values where wind uplift is a concern.
- Stagger long fasteners where possible to avoid splitting studs and to improve load distribution.
- When using heavy cladding (stone veneer, heavy terracotta), consult a structural engineer for tie-back systems.
Example rule: For a 150 mm insulation batten and 12 mm sheathing, choose screws at least 150 + 12 + 60 = 222 mm long; round up to available standard length (e.g., 225–240 mm).
Rough Cost Ranges and Where to Save
Material-only ballparks for exterior upgrade per m² (wide regional variance):
- Low-cost (fiberglass batts, standard timber battens): $20–$40/m²
- Mid-range (mineral wool, stainless fasteners, breathable membrane): $40–$80/m²
- High-end (polyiso boards, engineered battens, premium cladding): $80–$150+/m²
Ways to save:
- Use reclaimed or sustainably sourced timber for battens when structurally suitable.
- Choose blown-in cellulose or mineral wool for deep cavities rather than expensive rigid boards.
- Buy insulation in bulk or during supplier sales.
For budget insulation options tailored to small projects, see insulation for small builds. When integrating penetrations such as solar tubes through high-performance walls and roofs, follow detailed manufacturer instructions: solar tube installation.
Common Mistakes, Inspection Checklist, and Repairs
Top 7 Installation Mistakes to Avoid
- Compressing insulation in the cavity, cutting R-value.
- Failing to maintain a continuous air barrier and leaving seams unsealed.
- Using undersized or non-corrosion-resistant fasteners for exterior exposure.
- Blocking the rainscreen drainage gap with insulation or debris.
- Incorrect vapor control placement, trapping moisture in assemblies.
- Poorly flashed windows and details that bypass the drainage plane.
- Running services through the truss cavity without creating sealed penetrations.
A Field Inspection Checklist for DIY Builders
- Visual: Are battens plumb and fastener heads flush? Are batten joints staggered?
- Airtightness: Are seams in the primary air barrier taped and penetrations sealed? Consider a blower-door test pre-cladding.
- Moisture control: Are window flashings integrated with the drainage plane? Is the rainscreen gap continuous?
- Insulation: Is cavity fully filled and uncompressed? Are voids visible from inspection ports?
- Fasteners: Are screws corrosion resistant and embedded to the designed depth?
For common leakage locations to inspect, consult air leakage hotspots.
Typical Repairs and Retrofit Upgrades
- Re-battening to correct sagging or rot: remove cladding locally, check for decay, replace battens and fasteners.
- Adding exterior rigid insulation over existing trusses to boost R-value and improve continuity.
- Resealing or replacing damaged membranes and re-flashing windows to restore drainage function.
- Installing ventilated soffit and top vents to restore airflow through the rainscreen cavity.
If structural issues or persistent moisture are found, consult a structural or building science professional before continuing repairs.
How a Larsen Truss Compares with Other Wall Systems
Comparison Table: Larsen Truss vs Stud Wall vs Double-stud vs Sips
| Feature | Larsen truss wall | Conventional stud wall | Double-stud wall | SIPs (structural insulated panels) |
|---|---|---|---|---|
| Assembly depth | Medium–deep (50–300+ mm) | Shallow (90–140 mm) | Deep (200–400 mm) | Varies (panel thickness) |
| Thermal performance potential | High with continuous CI | Low–moderate | High (thick cavity) | Very high (panel R-value) |
| Cost range (materials only) | Medium | Low | Medium–high | High |
| Labor difficulty | Medium | Low | Medium | Low–medium (requires precision) |
| Airtightness potential | High with proper detailing | Moderate | High | Very high (factory sealed) |
| Moisture risk | Moderate if detailed | Moderate | Moderate–low | Low–moderate depending on connections |
| Ideal project types | Retrofits, timber-frame | New low-cost builds | Ultra-low-energy new builds | Prefab, tight schedules |
Pros and Cons in DIY Contexts
- Larsen truss advantages: Retrofit-friendly, flexible with insulation types, compatible with rainscreens, accessible to DIYers with carpentry skills.
- Larsen truss disadvantages: Requires careful air, moisture, and fastener detailing; deeper wall increases cladding edge complexity; may need longer lead times for materials.
SIPs provide rapid enclosure assembly with consistent R-values but demand precise openings and panel handling; double-stud walls give very high thermal mass but need careful attention to shrinkage and insulation settling.
Decision Guide: When to Choose Larsen Truss
- Do you need to add substantial insulation without disturbing interiors? Choose larsen truss.
- Is speed and factory precision more important than on-site flexibility? Consider SIPs.
- Are budget and simplicity the highest priorities? Traditional stud wall with added CI may be better.
- Want maximum cavity depth with low material cost? Double-stud can work but requires more wall thickness.
Also review foam board choices for exterior continuous insulation trade-offs: polyiso vs EPS vs XPS.
The Bottom Line
A larsen truss wall offers DIY builders a practical path to high thermal performance and reduced thermal bridging, especially for retrofits and timber-frame projects. Before committing, prototype a short wall section, verify the hygrothermal behavior for your climate, and plan airtightness and flashing details to avoid moisture problems.
Frequently Asked Questions
How thick should the insulation cavity be for a larsen truss wall?
For modest upgrades, 50–100 mm improves performance; for high-performance or Passive House targets, 150–300 mm is common. The right thickness depends on available exterior depth, target U-value, and insulation type (rigid boards have higher R/in than fibrous materials).
Can you retrofit a larsen truss onto an existing house?
Yes. One common retrofit approach is to attach vertical battens through existing sheathing into studs, add insulation in the new cavity, and finish with a ventilated rainscreen and cladding. Confirm local permit requirements and check for rot or existing moisture issues before covering walls.
What insulation types work best in a larsen truss?
Mineral wool and cellulose are popular for deep cavities because they tolerate moisture and are easy to install without compression. Rigid polyiso offers higher R/in but needs careful moisture control. Blown dense-pack options help avoid gaps in irregular cavities.
Do larsen trusses require special fasteners or connectors?
Use long, corrosion-resistant screws sized to penetrate battens, sheathing, and at least 40–60 mm into the structural framing. Where wind loads or heavy cladding are factors, select fasteners with verified pull-out ratings and consult structural guidance.
How do you handle windows and penetrations with a larsen truss?
Integrate window flashings with the primary drainage plane on the structural wall and build out jambs so the window sits at the correct thermal plane. Use flexible flashing tape, backdams at sills, and ensure the rainscreen gap continues around openings to drain water away from the wall.