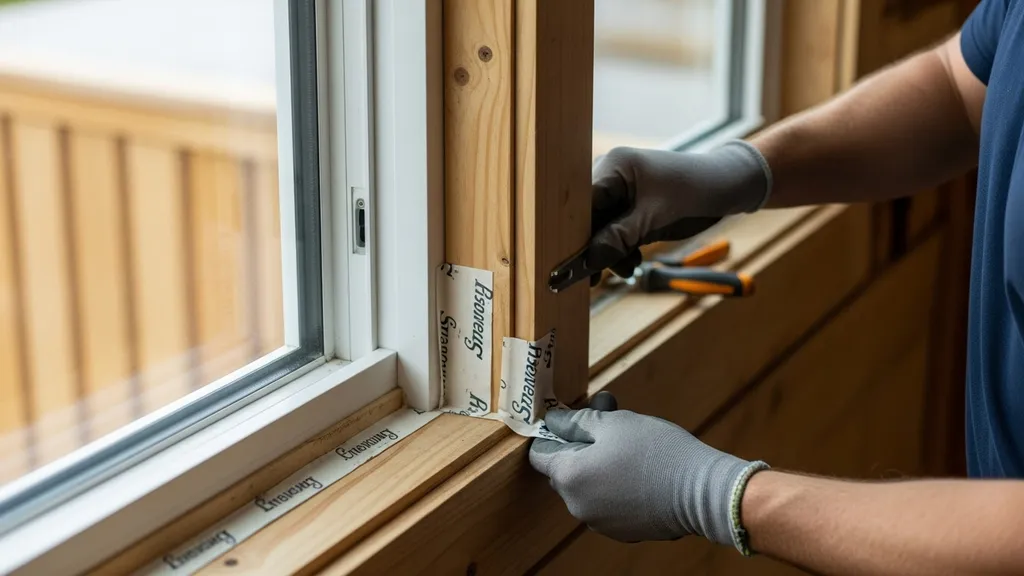
How to choose, size, and install passive house windows for airtight, low-energy homes — specs, step‑by‑step install tips, and testing guidance.
Passive House Windows: Selection and Installation Guide
Passive house windows are high-performance assemblies that control heat loss, reduce drafts, and support airtight, low-energy buildings. For a DIY or self-build project, choosing the right windows and installing them correctly can cut heating loads by 20–50% compared with standard units and prevent common failure modes like cold corners and moisture damage. This guide explains measurable targets (U-value, g-value, airtightness), material and glazing choices, siting and shading strategies, detailed flashing and air-barrier integration, on-site installation steps, commissioning checks, retrofit options, and cost trade-offs so you can specify and install windows that meet passive house performance.
TL;DR:
- Aim for whole-window U-values of ~0.6–0.8 W/m²K in cold climates and use triple glazed windows plus warm-edge spacers for best results.
- Integrate the window flange or frame into the continuous air barrier; always do a sill pan first and tie flashing to sheathing tape to avoid leaks.
- Test with a blower door and IR scan; fix infiltration paths greater than ~1 L/s·m² at test pressure and verify no cold spots at corners.
What Makes a Window Meet Passive House Standards?
Passive house windows are defined by measurable performance: low heat transfer (U-value), controlled solar gains (g-value or SHGC), and very limited air leakage at the unit level. Center-of-glass numbers are useful, but passive design relies on whole-window U-values (frame + glazing) and installed performance.
Key Performance Targets: U-value, G-value, and Airtightness
- U-value: In cold climates, target whole-window U-values around 0.6–0.8 W/m²K. Moderate climates can accept 0.8–1.1 W/m²K; warm climates often prioritize lower g-value over ultra-low U-values. These ranges are typical design targets for passive projects and appear in passive house literature.
- G-value (SHGC): Solar heat gain coefficient (SHGC or g-value) controls how much solar energy passes through glazing. South-facing glazing in cold climates benefits from higher SHGC (0.5–0.6) to gain heat in winter, while east/west or unshaded glazing should use lower SHGC (0.25–0.4) or shading strategies to avoid overheating.
- Airtightness: Windows should have minimal unit leakage. Passive house projects expect window assemblies to be installed so they don't compromise the wall air barrier; local depressurization tests and smoke-pencil checks are standard. At the whole-building level, passive house airtightness targets are often 0.6 ACH50 (PHI) or better; window assemblies must not introduce measurable leaks that cause test failures.
Industry bodies provide guidance and certification. The Passive House Institute (PHI) and Passive House Institute US (PHIUS) set performance frameworks and testing procedures; manufacturers list component data in databases. For technical vendor guidance on passive house window properties, see the passive house windows guide from a fiber-reinforced window supplier which summarizes technical criteria and test methods. For broader performance standards and interpretation, consult the performance standards overview that explains Passive House Institute US criteria.
Certification Bodies and Labels (PHI, PHIUS, National Programs)
- PHI (Germany) issues component listings and window certifications with verified whole-window U-values and edge-of-glass data.
- PHIUS (U.S.) provides climate-specific targets and certification for whole buildings and components.
- National programs (Energy Star, local labeling) can supplement but often have less stringent requirements than passive house standards.
Certification is useful for comparison but not required for a successful passive build. Manufacturer test data, third-party lab reports, and installed performance (blower door and IR) are the ultimate proof.
Quick Key Points: What to Remember When Choosing Passive House Windows
- Prioritize whole-window U-value over center-glass numbers.
- Choose triple glazed windows for cold climates.
- Use warm-edge spacers to reduce edge heat loss and condensation risk.
- Match g-value to orientation: higher on south, lower on east/west.
- Ensure frames have thermal breaks or are high-performance materials.
- Integrate the frame into the air-barrier; do not rely on sealant alone.
- Plan shading (overhangs or external shades) before sizing windows.
- Verify with a blower door and thermal imaging after installation.
- Consider durability and maintenance—wood requires upkeep, fiberglass and aluminum with thermal breaks are lower maintenance.
- Balance embodied carbon against operational savings; refer to our sustainable building materials guide for more on materials choices.
Selecting the Right Window: Frame Materials, Glazing, and Spacers
Choosing the right assembly starts with frame material, glazing layers, gas fills, low-E coatings, and spacers. Each choice affects whole-window U-value, condensation risk, durability, and cost.
Frame Materials Compared: Wood, Fiberglass, Vinyl, Aluminum with Thermal Breaks
- Wood frames: Good thermal performance and low embodied energy compared with aluminum. Require regular exterior maintenance unless clad. Pair well with triple glazing in cold climates.
- Fiberglass frames: Low expansion, stable, low maintenance, good thermal properties; often used in passive-certified units. Higher upfront cost than vinyl but durable and dimensionally stable.
- Vinyl frames: Cost-effective with decent thermal performance, but long-term durability and recyclability vary. Avoid low-quality vinyl in very large openings where rigid stability matters.
- Aluminum with thermal breaks: Strong and slim profiles maximize glass area but must have effective thermal breaks and insulating polyurethane cores to reach passive targets.
Choose frame material based on climate, budget, and maintenance willingness. For high south glazing where view and slim sightlines matter, aluminum with effective thermal breaks is common; for cold, small-scale builds, wood or fiberglass often gives best value.
Glazing Options: Double vs Triple Glazing, Low-e Coatings, Gas Fills
- Double glazing: May be acceptable in moderate climates when combined with high-performance frames and low-U coatings.
- Triple glazing: Standard for cold passive projects; adds a third pane and two insulating cavities (argon or krypton fill) and significantly reduces U-values.
- Low-E coatings: Use selective low-E coatings tuned to climate: high solar gain low-E on south in cold climates, lower SHGC low-E on other orientations.
- Gas fills: Argon is common and cost-effective; krypton improves center-of-glass U-values in narrow cavity assemblies but is more expensive.
Spacer Systems, Edge Seals, and the Role of Warm-edge Technology
Warm-edge spacers (stainless steel, composite spacers) reduce thermal bridging at the glass edge and cut condensation risk versus conventional aluminum spacers. Edge seals must be compatible with glazing edge materials; look for certified sealed units with low edge conductivity.
Comparison/specs Table: Typical Whole-window U-values by Configuration
| Assembly | Typical whole-window U-value (W/m²K) | Typical g-value (SHGC) |
|---|---|---|
| Wood frame + triple glazed, argon, warm-edge spacer | 0.6–0.8 | 0.45–0.6 |
| Fiberglass frame + triple glazed, krypton, warm-edge | 0.5–0.7 | 0.4–0.55 |
| Aluminum with thermal break + triple glazed, argon | 0.7–0.9 | 0.35–0.5 |
| Vinyl frame + double glazed, argon, warm-edge | 0.9–1.2 | 0.4–0.6 |
These figures are approximate; always use manufacturer whole-window U-values for specification. For product comparisons and examples, see a general market guide like the Passive House Windows overview from Build with Rise, which summarizes typical assemblies and trade-offs. For integrating deep jambs or thick cavity insulation, consult wall assembly examples such as the Larsen truss wall guide.
Sizing, Placement, and Solar Gain Strategies for Passive House Windows
Correct placement and size control seasonal performance. Window-to-wall ratio (WWR), orientation, and shading must be balanced for comfort and energy goals.
Window-to-wall Ratio and Daylighting Considerations
- Rule of thumb: 20–40% WWR overall works for many passive houses, but distribution matters—more glazing on the sun-facing elevation, less on north.
- Prioritize daylight in occupied spaces. Use higher-performance glazing for frequently used rooms to improve comfort and reduce artificial lighting loads.
- Consider view corridors and escape routes; sizing also affects ventilation potential.
Orientation: Maximizing Passive Solar Gain While Avoiding Overheating
- South-facing windows in cold climates should be larger and have higher SHGC to capture winter sun.
- East and west glazing cause morning and late-afternoon heat; limit size or use vertical shading/low SHGC glass.
- North glazing provides diffuse daylight with minimal solar gain—use moderate U-values but lighter frames are acceptable.
Simple sunny-site example: a small cabin in a cold climate might use 40% of glazing on the south elevation with deep overhangs, 10% on east/west, and 20% on north to balance daylight and solar input.
For basic modeling, PHPP is the passive house planner’s spreadsheet; more accessible solar geometry tools or simple sun-angle charts can help size overhangs. The Passive House Portal component database is useful for comparing window components and expected gains; see their list of window components for examples and test values: Passive House Portal component database - windows. For early-stage siting and orientation guidance, review the basic housebuilding steps article.
Shading Devices, Overhangs, and Seasonal Performance
- Fixed overhang depth-to-height ratios are a simple way to shade summer sun while allowing winter sun. A depth-to-height of 0.4–0.6 is common, but exact numbers depend on latitude and window elevation.
- External adjustable shading (awnings, louvers) gives flexibility; internal blinds only reduce glare and internal gains, not solar heat at the glass.
- Use roof overhang detail guides such as our clay tile roofing steps when integrating long overhangs that double as shading elements.
Installation Planning: Rough Openings, Flashing Sequence, and Air Barrier Integration
A well-planned installation avoids leaks and thermal bridging. This section describes pre-install checks, flashing order, materials, and tying window assemblies into the continuous air barrier.
Before watching an installation, review the sequence below and the linked guides. For detailed sealing products and tapes, see our article on window sealing techniques. For how to tie flange and flashing into ZIP sheathing or similar systems, review the air barrier sheathing guide. The following YouTube walkthrough demonstrates proper flashing and air-barrier tie-in so readers can visualize key steps.
Watch this step-by-step guide on installing windows: passive house ep 10:
Preparing Rough Openings and Structural Considerations
- Verify rough opening is square, plumb, and level within ±3 mm across diagonals for small windows; larger openings need tighter control.
- Provide a sloped sill (minimum 1:40) or a back dam to direct water to the exterior.
- Ensure structural loads are transferred independent of the window unless the product is rated as load-bearing.
- For deep insulation walls (Larsen truss, double-stud), plan for extension jambs or block frames to reach interior finished surfaces without compressing insulation. See the Larsen truss wall assembly guide for examples.
Recommended Flashing Sequence for Passive House Detailing
- Install a full-width sill pan (formed with flexible membrane or premade pan) to catch drainage.
- Apply sill flashing continuous across the opening, up each jamb a minimum of 50–100 mm.
- Attach side (jamb) flashing next, overlapping the sill flashing like shingles.
- Install head flashing last, overlapping jamb flashing and integrating with the upper sheathing/membrane.
- Tie exterior flashing to the primary cladding drainage plane.
Use self-adhesive membranes rated for long-term UV exposure behind cladding, and flexible flashing tapes compatible with sheathing materials.
Integrating Windows with Continuous Air and Vapor Barriers
- Tie the window flange or exterior face to the air barrier with compatible tape, ensuring continuity from wall sheathing to window frame. If using through-frame (no flange) installations, tape the frame-to-sheathing junction on the interior and exterior as appropriate.
- Avoid relying on sealants alone for airtightness; mechanical connections plus taped joints are more reliable.
- Revisit our air barrier sheathing guide for product-specific sequences and detailing around corners.
- For sills and thresholds that use concrete or masonry elements, consider recycled-aggregate concrete guidance for compatibility with flashing: see the recycled aggregate concrete guide.
On-site Installation Steps: a Step-by-step Guide for Passive House Windows
This section gives an ordered checklist of installation steps, focusing on protecting thermal breaks and maintaining air-barrier continuity.
- Unpack and inspect the unit for glazing damage, glazing edge desiccant integrity, and correct hardware.
- Prepare opening: clear debris, check sill slope, install sill pan and back dam.
- Position the window into the opening temporarily. Center it, check plumb and level. Use non-compressible shims at specified points (often at 150–300 mm in from corners and at intermediate supports).
- Shim to set even reveal around the frame; avoid compressing thermal break areas. Use plastic or phenolic shims that resist settling.
- Anchor according to manufacturer pattern—usually through the main frame body, avoiding the thermal break zone. Do not drive fasteners through insulating spacer inserts.
- Check operation: openers, casements, hardware clearance. Adjust before sealing.
- Apply jamb insulation around the frame as recommended—use low-expanding foam with backer rod controls or closed-cell foam on narrow gaps. Avoid over-pressurizing the cavity which can distort frames.
- Tape or gasket the frame to the air barrier on the exterior and/or interior per your chosen detail. Use compatible tapes where the sheathing tape contacts the window substrate.
- Install flashings and cladding up against the flashing to maintain drainage plane continuity.
Sealing Details: Compression Seals, Backer Rod, and Sealant Selection
- Use a closed-cell backer rod sized to provide a 2:1 joint width-to-depth ratio for sealant joints.
- Select low-modulus, neutral-curing silicone or polyurethane sealants compatible with substrates and rated for exterior movement.
- Use continuous compression gaskets where the window design includes factory gaskets; do not overlay incompatible tapes that void gaskets' compression.
Fastening Patterns, Thermal Bridging Avoidance, and Protecting Finishes
- Follow manufacturer torque and fastening specifications. Overdriven screws can crush corners and warp frames.
- Offset through-bolts from thermal breaks where possible; use insulated thermal pads for heavy anchoring methods.
- Protect finishes during construction with removable protective film and install temporary covers if trades will be working nearby.
Final Temporary Protections and First-weather Checks
- Cover openings if rain is forecast before cladding is installed.
- After initial rains, inspect flashings and interior for signs of seepage.
- Document installation with photos of flashing layers, tape terminations, and fastening patterns for commissioning and warranty records.
For product-specific sealing techniques and tapes, see our guide to window sealing techniques.
Testing and Commissioning Passive House Windows: Airtightness and Performance Verification
Commissioning confirms the installed performance matches expectations. Focus here is on airtightness, thermal performance, and water tightness.
Blower Door Testing Focused on Window Assemblies
- Perform a whole-house blower door test after envelope closure but before interior finishes where possible.
- Use localized depressurization (zonal fan) tests at suspect windows if whole-house results are higher than expected.
- Industry practice is to locate and seal infiltration paths that produce measurable flow—repair any infiltration >1 L/s·m² at test pressure thresholds or other local acceptance thresholds set by your project.
- For detailed blower door methodology, consult our deeper guide on blower-door testing.
Infrared (thermal Imaging) Inspection and What to Look For
- Run an IR scan with a 10°C or greater indoor/outdoor delta to highlight cold spots, thermal bridging, and wet areas.
- Look for cold corners near glazing edges (sign of poor spacers or framing) and linear cold lines indicating flashing or insulation gaps.
- Re-scan after repairs to confirm improved continuity.
Acceptance Checklist: Drafts, Water Test, and Operational Checks
- No drafts at sash/frame interfaces on smoke-pencil tests.
- No leaks in controlled water test (hose or water column) in sill, jambs, and head.
- Glass and hardware operate smoothly; locks engage fully.
- Interior condensation checks: monitor for several cold nights to ensure no persistent condensation at frames or edges.
Also coordinate ventilation commissioning—window airtightness affects whole-house ventilation loads; see our ventilation guide for how airtightness ties into mechanical ventilation sizing.
Common Pitfalls, Retrofit Considerations, and Cost-saving Tradeoffs
This section covers recurring errors, retrofit options, and where to invest your budget for best return.
Typical Installation Mistakes and How to Avoid Them
- Poor sill drainage: make a sill pan and back dam mandatory in your sequence.
- Interrupting the air barrier: always detail tape transitions before cladding.
- Overcompressing insulation at jambs, which reduces local R-value—use non-compressible shims and correct foam techniques.
- Fasteners through thermal breaks: avoid heat path creation by following manufacturer anchor zones.
Retrofit Strategies: Insert Window, Full-frame Replacement, or Upgrade Glazing
- Insert (pocket) replacement: Faster and cheaper, leaves jamb and flashing in place. Acceptable when existing framing and sills are sound and drainage is correct. Often adequate for modest upgrades.
- Full-frame replacement: Required when sills, framing, or flashing are degraded, or when moving to a through-wall air-barrier tie-in is needed. Gives best opportunity to improve air barrier and insulation continuity.
- Glazing upgrade: Replacing insulated glass units (IGUs) in existing frames can be cost-effective but only works if frames are in good condition and frames are thermally acceptable.
For detailed retrofit decision criteria and DIY workflows, see the retrofit strategies guide.
Where to Spend More vs Where to Save (value-based Decisions)
- Spend more on fenestration on cold, occupied elevations and south facades where performance yields heating savings and comfort.
- Save on small, north-facing windows by using simpler frames with adequate U-values.
- Consider lifecycle costs: higher upfront for better frames often pays back over time through lower heating bills and fewer replacements.
- When budget is tight, prioritize high-performance glazing and warm-edge spacers over ultra-slim sightlines.
Coordinate window upgrades with wall insulation improvements. Our insulation R-values guide helps match window upgrades to surrounding wall performance. For budget-conscious builds seeking reclaimed materials for jambs or trim, our recycled materials guide lists low-cost options.
The Bottom Line
Select windows to meet whole-window U-value targets for your climate, prioritize triple glazed windows with warm-edge spacers in cold regions, and integrate the frame into the continuous air barrier during installation. Four immediate actions: confirm whole-window U-values on quotes, plan orientation and shading before ordering, use the recommended flashing sequence, and verify with blower door and IR tests.
Frequently Asked Questions
Are triple-glazed windows always required for passive house projects?
Not always. Triple glazed windows are standard in cold-climate passive projects because they deliver lower whole-window U-values and reduce condensation risk, but in moderate climates a high-quality double-glazed unit with low-E coatings and a warm-edge spacer can meet targets. The choice depends on climate, orientation, and budget; use whole-window U-values from manufacturers to compare assemblies.
How much do passive house windows cost compared with standard windows?
Costs vary widely by region and assembly. Expect passive-capable triple-glazed units to cost 1.5–3× more than commodity double-glazed windows. Higher-cost frames (fiberglass, thermally broken aluminum) and krypton fills increase price. Factor in lifecycle savings on heating, reduced condensation risk, and potential for longer warranties when comparing value.
Can I retrofit my existing frames to meet passive house airtightness?
Sometimes. Insert replacements and improved flashing and jamb insulation can bring existing frames closer to passive targets if the frames and sills are structurally sound and the drainage plane is intact. Full-frame replacement is necessary when flashing, sills, or framing are damaged or when you need to tie a new continuous air barrier through the opening. See our retrofit strategies guide for options.
What airtightness targets should windows meet at the unit level?
There is no single unit-level number universally required, but windows must not compromise whole-house airtightness goals. In practice, address any detectable leakage on smoke-pencil tests and fix infiltration paths that contribute measurable flow during a blower door test (commonly repairs are made when local flows exceed ~1 L/s·m² at test pressure). Manufacturer air leakage ratings (cubic feet per minute per square foot at test pressure) are useful for comparison but installed performance matters most.
How do I prevent condensation on passive house windows?
Prevent condensation by using low whole-window U-values, warm-edge spacers, proper frame insulation, and maintaining indoor relative humidity appropriate for the season. Ensure ventilation is commissioned correctly—mechanical ventilation with heat recovery helps control humidity. If condensation appears at corners or edges, inspect for thermal bridging at spacers or gaps in jamb insulation and address via improved seals or insulation.