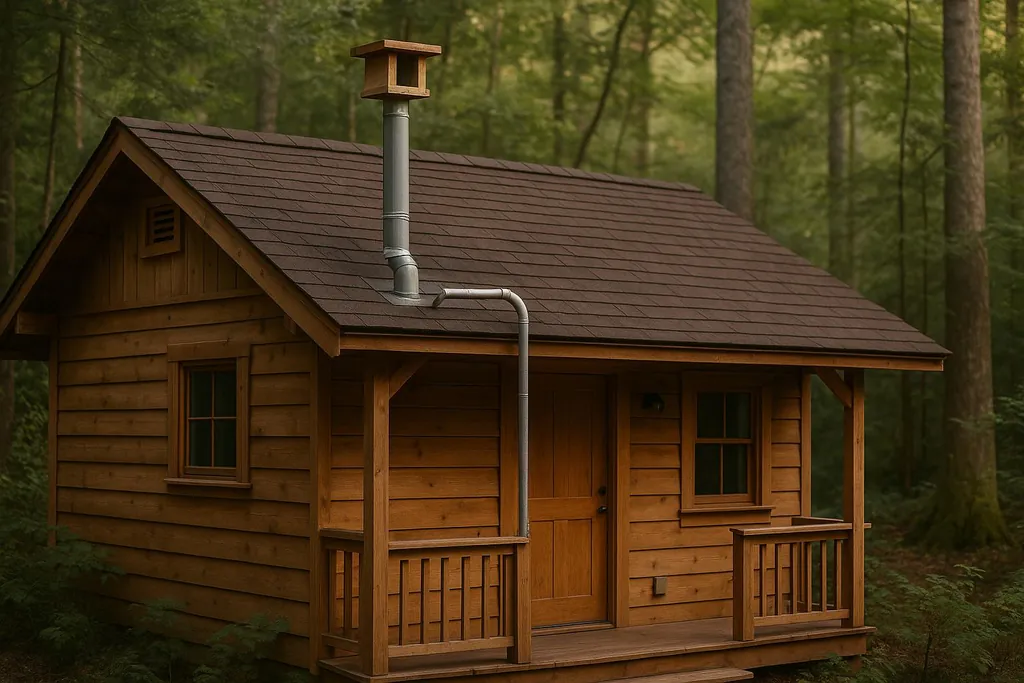
Learn how to build an efficient DIY ventilation system for off-grid cabins to ensure air quality, manage moisture, and protect your structure.
DIY Ventilation for Off-Grid Cabins
Living in an off-grid cabin? Proper ventilation isn’t just about comfort - it’s critical for maintaining air quality, managing moisture, and protecting your cabin’s structure. Without it, you risk mold, rot, and poor indoor air. The challenge? Off-grid setups can’t rely on energy-hungry systems. But with smart planning, you can build an efficient, low-power ventilation system using simple materials.
Here’s what you need to know:
- Why it matters: Poor ventilation traps moisture, leading to condensation, wood damage, and mold. Aim for 30%-60% humidity and 0.35 air changes per hour (ACH) for a healthy cabin.
- Active vs. passive systems: Active systems, like DC fans or heat recovery ventilators (HRVs), use minimal power. Passive methods rely on natural airflow but can be less consistent.
- DIY essentials: Design a balanced airflow system with intake and exhaust vents. Use reclaimed materials, 12V fans, and weatherproof ducting to keep costs low.
- Maintenance tips: Clean vents and filters monthly, seal duct leaks, and monitor air quality with basic tools like hygrometers and CO detectors.
A well-planned system saves energy, protects your cabin, and ensures clean air year-round. Let’s dive into the details.
SHED TO CABIN Ep 7: Gable Vents for Air Intake and Exhaust #diy #offgrid #cabin #ranch #vent
How Ventilation Systems Work in Off-Grid Cabins
Off-grid cabins operate without the luxury of energy-heavy HVAC systems, so they rely on smart and efficient ventilation solutions to manage limited power. Let’s look at why ventilation is essential and how various systems tackle the unique challenges of off-grid living.
Why Ventilation Is Essential
Proper ventilation is about more than just comfort - it’s key to maintaining a healthy, livable space. It helps control moisture, keeps air quality in check, and prevents structural damage. Ideally, humidity levels should stay between 30%–60%, oxygen levels should fall within 19.5%–23.5%, and air exchange rates should hit at least 0.35 ACH (15 cfm). These benchmarks help prevent mold growth and protect the cabin’s structure from long-term damage .
Challenges in Off-Grid Ventilation
Off-grid cabins come with their own set of hurdles. Limited power supply, difficulty accessing repair services, and exposure to harsh weather conditions make traditional HVAC systems impractical. Additionally, airtight cabin designs - while great for insulation - can trap moisture and stale air, making mechanical ventilation a necessity to maintain a healthy environment .
Active and Passive Ventilation Systems
A balanced approach often works best, combining active and passive ventilation methods to suit off-grid needs.
- Active Ventilation: These systems use DC-powered fans, running on batteries to conserve energy. Heat Recovery Ventilators (HRVs) like the Lunos e²60 are particularly effective in cold climates, offering up to 22 cfm airflow and 90.6% heat recovery efficiency .
- Passive Ventilation: This method relies on natural forces like wind and thermal buoyancy to circulate air. While it’s energy-free, it’s less reliable compared to active systems .
For cold climates, HRVs are a smart pick, while Energy Recovery Ventilators (ERVs) are better suited for humid environments. Additionally, mini-split systems can help manage humidity, removing up to 1.3 pints of moisture per hour .
How to Build Your Own Off-Grid Ventilation System
Creating a ventilation system for your off-grid cabin takes some planning and careful execution. The process involves mapping out an efficient design, installing the necessary components, hooking everything up to your power system, and fine-tuning the airflow for optimal performance. Here's how to get started.
Planning Your System Layout
Think of your ventilation system as a complete circuit, ensuring air flows in and out evenly. This balance is key to maintaining proper air circulation throughout your cabin.
> "It is useful to think of a natural ventilation system as a circuit, with equal consideration given to supply and exhaust."
Space Design Keep your cabin's width narrow - ideally no more than 45 feet. This helps air move efficiently and prevents pockets of stale air from forming .
Strategic Orientation Position the cabin's ridge perpendicular to prevailing summer winds. This setup can reduce energy use by 10%-30% compared to relying solely on mechanical systems . Ensure that each room has two openings: one for air intake and another for exhaust. Place the exhaust higher to use the stack effect, where warm air naturally rises.
Window Placement Install operable windows in staggered positions to encourage better air mixing. Adding clerestories or vented skylights can also help stale air escape naturally .
Power Planning Estimate your total energy needs before finalizing the layout. Most 12V DC fans use 0.5–1.5 A each . Calculate the load to ensure your solar panels and batteries can handle continuous operation. Once your layout is ready, move on to installing vents, fans, and ducts.
Installing Vents, Fans, and Ducts
Proper installation is crucial for a system that works efficiently. Gather the right tools, such as a drill, hole saw, tape measure, caulk gun, and ladders .
Materials Checklist
- Vent fans rated for your space (calculate the required CFM by multiplying the room's square footage by 1.1).
- 4-inch flexible duct and 90-degree duct elbows.
- Wall cap kits, foil duct tape, drywall screws, stainless steel screws, silicone adhesive, and foam-rubber gaskets .
Fan Placement Install bathroom fans between the shower and toilet to handle moisture effectively. For general ventilation, place intake fans on the cooler north side of the cabin and exhaust fans on the warmer side. This setup takes advantage of natural temperature differences.
Ductwork Tips Keep duct bends to a minimum to maintain strong airflow. Use durable foil duct tape and seal connections with silicone adhesive and foam gaskets to prevent leaks .
Exterior Venting Mount wall caps with weatherproofing to keep moisture out. Use stainless steel screws for durability and ensure vents are clear of rooflines or other obstructions. Once everything is installed, connect the system to your off-grid power supply.
Wiring to Your Off-Grid Power System
Connecting your ventilation system to your power source requires attention to detail and safety.
Safety Measures Proper grounding is essential to avoid electrical shocks and protect your equipment. Always follow the manufacturer's instructions, and if you're unsure, consult a qualified electrician .
> "Operating an off-grid generator system safely is crucial for your well-being and the longevity of your equipment." - EcoFlow
Wiring Steps Install inline fuses rated at 25% above the total amperage of your fans. Use wire nuts for secure connections.
Testing and Balancing Airflow
Once installed, test your system to ensure everything runs smoothly and adjust airflow for maximum comfort.
Initial Test Run Turn on all fans to confirm they’re functioning correctly. Intake fans should pull air in, and exhaust fans should push it out. Listen for any unusual noises that might indicate loose mounts or blockages.
Measuring Airflow Perform a simple tissue test at each vent to check the direction and strength of airflow. For more precise measurements, use an anemometer to gauge air velocity. Aim for speeds around 160 feet per minute, which can make indoor temperatures feel about 5°F cooler .
Pressure Adjustments If doors are difficult to open or close, it might mean the airflow isn’t balanced. Adjust fan speeds or vent openings as needed to fix the issue.
Fine-Tuning Performance Test the system under different weather conditions. For example, during hot days, run exhaust fans at higher speeds and adjust intake fans at night when it’s cooler. Over the first few weeks, tweak settings gradually until you achieve consistent and comfortable airflow throughout your cabin.
Choosing Materials for Your DIY Ventilation Project
Picking the right materials for your off-grid ventilation system is all about finding the sweet spot between cost, durability, and energy efficiency. By using smart, budget-conscious options, you can create a system that's reliable and sustainable for your cabin.
Budget-Friendly Material Choices
One way to save money and reduce waste is by using salvaged materials. Look into local demolition sites, architectural salvage yards, or online marketplaces for reusable components .
Reclaimed HVAC ducting, like galvanized steel or aluminum, is a great alternative to buying new flexible ducts. These materials are durable and often much cheaper. Likewise, reclaimed wood from old barns or buildings can work well for custom vent housings, often costing less than new lumber .
For a low-cost powered option, consider repurposing computer cooling fans. When wired to small solar panels, these fans run efficiently on low current and can connect directly to your battery bank, helping you avoid energy losses from inverters .
Passive ventilation is another smart choice. It doesn’t require electricity, making it ideal for off-grid setups. For instance, Venturi-type caps naturally boost airflow, while a 4-inch plastic ball valve - available for about $50 - lets you control ventilation as needed .
If insulation is part of your project, natural materials like hemp, wool, or recycled paper are eco-friendly and manage moisture effectively. Hemp insulation, in particular, is often a more affordable option compared to traditional fiberglass batts .
Finding Materials Near You
Sourcing materials locally not only cuts down on transportation costs but also supports your community and aligns with sustainable living principles . Start by reaching out to local HVAC contractors. They often have surplus ductwork, fittings, and fans from previous jobs, which they sell at discounted prices.
Check out clearance sections at building supply stores for items with damaged packaging or discontinued stock. For specialized components like heat recovery ventilators, contacting manufacturers directly can be worthwhile. For example, Vents-US sometimes offers refurbished units, so it’s worth inquiring.
Agricultural supply stores are another hidden gem. Equipment like barn fans, vents for livestock buildings, and greenhouse exhaust systems can work just as well for cabins and are usually cheaper than residential-grade options.
Bamboo is a great sustainable material for custom vent covers or duct supports. It’s naturally antimicrobial, which helps prevent mold in humid environments . Additionally, local sawmills often have wood waste or kiln-dried scraps available in bulk, which can be a budget-friendly choice for vent housings or mounting blocks.
Energy-Saving Low-Power Components
Off-grid systems thrive on efficiency, so it’s important to choose components that deliver strong performance without draining power. For example, single-room heat recovery ventilators like the Lunos e²60 provide balanced ventilation with 90.6% heat recovery efficiency and only use about 22 CFM continuously. While these units cost around $475 at retailers like Home Depot, the energy savings can make them a worthwhile investment .
For a more DIY approach, you can build a ventilation system using a 12V relay, ceramic soldering pads, and two computer fans. This setup mimics commercial heat recovery ventilators and costs roughly $130, consuming just a fraction of the power .
Another option is to pair DC fans with dedicated photovoltaic panels. This eliminates the need for batteries or inverters and works well for daylight ventilation, such as in bathrooms .
If you’re open to passive solutions, consider installing earth tubes. These require some excavation but can naturally cool incoming air by 10–15°F in the summer and warm it in the winter. Additionally, placing intake vents on the cooler north side of your cabin and exhaust vents on the warmer south side can encourage natural airflow without using any electricity .
> "I've lived in an off-grid home for 43 years, and have many friends who live in off-grid homes. None of us has a mechanical ventilation system. If we need ventilation, we crack a window." – Martin Holladay, GBA Editor
Before starting your project, make sure to check local building codes to confirm if mechanical ventilation is required.
Keeping Your DIY Ventilation System Running Well
A properly maintained ventilation system can serve your off-grid cabin for decades. But skipping routine care? That’s a recipe for costly repairs and poor air quality. The secret is staying proactive with upkeep and knowing how to catch small issues before they snowball.
Regular Maintenance Tasks
Consistent care keeps your ventilation system humming. Start by cleaning your vents monthly. Use a brush or vacuum attachment to clear out dust that could block airflow. Filters also need attention - check them every month and replace them roughly every 90 days. If you have pets or live in a particularly dusty area, you might need to swap them out even sooner. Kitchen and bathroom vents demand extra cleaning since they deal with grease and moisture. Wash them with warm water and a mild detergent to keep them in good shape. If you’re using HEPA filters, know they can improve air quality but come with a higher upfront cost.
Every six months, inspect your ductwork for leaks, kinks, or disconnections. Seal any leaks you find using duct tape or mastic sealant. Make sure return vents are clear - furniture or storage placed too close can restrict airflow and reduce efficiency.
The blower fan also needs attention. Clean it annually to prevent dust buildup that can overwork the motor. Always turn off the system before cleaning, and handle the fan blades gently to avoid damaging them.
For more complex components, like heat recovery ventilators, schedule an annual professional inspection. A technician can assess the entire system, check for leaks, and ensure everything is functioning as it should. Even with regular maintenance, small issues can pop up, so staying on top of them is key.
Fixing Common Issues
When problems arise, act quickly. Reduced airflow? Start with the basics - check your air filters. Clogged filters are a frequent culprit. Then, make sure all vents and registers are open and free of obstructions.
If airflow still seems off, inspect your ductwork for problems like kinked flexible ducts, disconnected joints, or collapsed sections. Even small leaks can hurt efficiency, so seal any gaps you spot.
Hearing unusual noises? That often points to loose or misaligned parts. Tighten screws and fasteners throughout the system, especially around fan mounting brackets. Also, check that fan blades are balanced and free of debris, as this can cause vibration and noise.
For off-grid setups, power issues are common. If your system won’t turn on, check the circuit breaker and power switch to ensure it’s receiving power. For battery-powered systems, inspect the battery voltage and connections - low voltage can slow down or stop the fans. If you’re using a thermostat or controller, check its batteries and settings. Addressing these issues promptly ensures your system stays reliable.
Checking Your Indoor Air Quality
Keeping tabs on your cabin’s air quality is crucial for your health and to ensure your ventilation system is doing its job. Since we spend so much time indoors, clean air is non-negotiable.
Basic air quality monitors, which cost around $50, can track dust, chemicals, and common allergens. If you want more detailed readings, advanced monitors are available for several hundred dollars, but a basic model is usually enough for off-grid cabins.
Humidity is another factor to watch, especially in small spaces where moisture can build up quickly. Aim to keep indoor humidity between 30% and 50% to prevent mold and mildew while staying comfortable. A simple digital hygrometer, available for under $20, can help you monitor these levels.
If your cabin uses wood stoves or propane appliances, a carbon monoxide detector is a must. These devices range from $20 to $100 and are essential for safety. Install them according to the manufacturer’s instructions, and don’t forget to test their batteries regularly.
Radon testing is worth considering too, particularly if your cabin has a basement or is earth-sheltered. Test kits start at around $15 and can detect this odorless, colorless gas that poses health risks. If initial results show elevated radon levels, follow up with professional testing.
You can also supplement mechanical ventilation with simple habits: open windows when the outdoor air is clean, use natural cleaners, and add air-purifying plants like spider plants or Boston ferns. These small steps can help reduce indoor pollutants.
Keeping an eye on your air quality can help you spot ventilation problems early. Affordable tools and regular checks make it easy to maintain a healthy, comfortable cabin environment. Even jotting down humidity levels or noting strange odors can reveal patterns that signal when your system needs attention.
Building Your Off-Grid Cabin Ventilation System
Designing a ventilation system for your off-grid cabin isn’t just about installing fans and ducts - it’s about thoughtful planning, proper execution, and regular upkeep.
Start by focusing on the design. Think about how your cabin is positioned on your land. The right orientation can naturally improve airflow, cutting down your reliance on powered ventilation. This simple step can make a big difference in your system's efficiency.
Energy efficiency is key when you're off the grid. With limited power from your solar panels or batteries, every watt matters. Conduct an energy audit early on to figure out your system's power needs. This will help you balance active components, like fans, with passive solutions, such as vents and natural airflow, without stretching your power system too thin.
> "Conserving is cheaper than making... Take the current power estimate calculators estimate and just double it... you will thank yourself in the future when you do. Too much is barely enough and overkill to the 2x is just right." - Daddy Tanuki, Emperor Of Solar
When integrating your system with your power sources, pay close attention to details. Use programmable thermostats and occupancy sensors to ensure fans only run when needed. If possible, combine wind and solar energy sources for more consistent power, no matter the weather.
Before you start building, make sure to follow local building codes and consider consulting with professionals experienced in off-grid projects. While this might seem like an added expense upfront, it can help you avoid costly mistakes and ensure your system is safe and effective.
Choose components specifically designed for off-grid use to keep everything running smoothly.
The building envelope - your cabin’s insulation, windows, and overall construction - plays a huge role in your ventilation system’s success. Invest in good thermal insulation, energy-efficient windows, and solar shading to reduce the load on your ventilation system. Seal any air leaks around doors, windows, and unfinished areas to prevent unnecessary strain on your HVAC components.
Plan for easy maintenance from the start. Design your system so that filters, fans, and ductwork are simple to access. Use sensors and smart meters to monitor energy use and system performance in real time. This makes it easier to catch problems early and keep your system running efficiently.
Living off-grid is all about reducing dependence on fossil fuels, lowering your carbon footprint, and saving on utility bills. With careful planning, high-quality materials, and regular maintenance, your ventilation system can keep your cabin comfortable and healthy for years to come - all while supporting your off-grid lifestyle.
FAQs
What’s the difference between active and passive ventilation for off-grid cabins, and how do I choose the right one?
Active ventilation systems use mechanical tools like fans to keep air moving consistently, regardless of the weather outside. On the other hand, passive ventilation relies on natural airflow through features like vents and windows. While passive systems are more energy-efficient, they depend heavily on the weather and the design of the space.
If you’re dealing with hot, humid conditions or a tightly sealed cabin, active ventilation provides steady and controllable airflow. However, for a low-maintenance and environmentally friendly approach, passive ventilation is ideal - especially in mild climates or well-ventilated cabins. When choosing between the two, think about your local climate, energy resources, and the size of your cabin to find the best fit.
How can I build an energy-efficient DIY ventilation system for my off-grid cabin that ensures good air quality?
To design an energy-efficient ventilation system for your off-grid cabin, you might want to explore passive ventilation or a mechanical ventilation system with heat recovery ([HRV](/glossary/hrv) or [ERV](/glossary/erv)). These options ensure fresh air circulates while keeping energy loss to a minimum.
Another great addition is solar-powered fans, which can enhance airflow without depending on conventional electricity. Make sure your cabin is well-sealed to block drafts and conserve heat, but also allow for controlled ventilation to prevent moisture problems. Keeping an eye on indoor humidity and air quality is essential for maintaining a comfortable and healthy living environment.
What are common problems with off-grid cabin ventilation systems, and how can I fix them?
Off-grid cabin ventilation systems often encounter challenges such as poor airflow, condensation buildup, clogged or dirty vents, and wear and tear on components. These issues not only affect the system's efficiency but can also compromise the air quality inside the cabin.
To address these problems, start by inspecting the vents for any blockages or dirt. Clean them thoroughly to restore proper airflow. Ensure the vents are positioned correctly to allow air to circulate effectively. It's also a good idea to check the electrical connections and test key components like batteries and inverters to confirm they’re in good working order. If condensation is an issue, consider improving insulation or repositioning the vents to reduce moisture buildup.
Resolving these common issues usually involves cleaning, replacing damaged parts, and sticking to a regular maintenance schedule. Routine inspections can go a long way in preventing future problems and keeping your ventilation system running efficiently for the long haul.