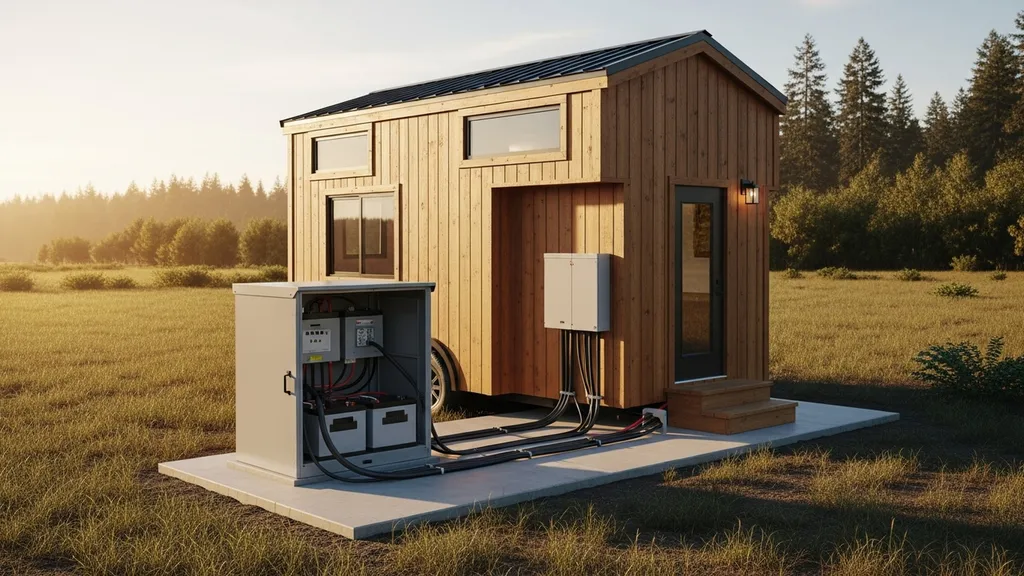
Practical guide to designing off-grid electrical systems for tiny houses — solar, batteries, wiring, costs, and safety for DIY builders.
Tiny House Electrical Systems: Off-Grid Options
Off-grid tiny house electrical systems let owners run lights, appliances, and heating without a utility connection. This article explains how to size loads, choose generation (solar, wind, micro-hydro), pick batteries and inverters, and wire a safe system for a budget-conscious DIY self-builder. Readers will get concrete numbers (typical tiny house use is roughly 3–20 kWh/day for 1–2 occupants), ballpark costs for panels and batteries, and the codes and tools to consult while planning.
TL;DR:
- Design the system from a load-first approach: most 1–2 person tiny homes need about 3–8 kWh/day; size solar to match that plus 20–30% margin.
- Choose solar PV + LiFePO4 (LFP) batteries for most sites; expect panels at $0.8–$1.5/W installed and batteries at $300–$700/kWh (ballpark).
- Phase the build: start with a small array and critical loads, add battery/inverter and automation later, and always follow NEC/NFPA and local permitting.
Related guides: 1kw solar system for tiny house complete sizing guide and Off grid refrigeration propane vs solar options.
Why Off-Grid Tiny House Electrical Systems Matter (Scope & Decisions)
A tiny house owner deciding between grid-tie, hybrid, or fully off-grid faces trade-offs: independence versus upfront cost, permitting complexity, and site constraints like sun and access. Research and case studies show tiny dwellings commonly house 1–2 people, and depending on heating and cooking choices, electrical consumption ranges roughly 3–20 kWh/day. For example, a basic off-grid tiny using propane for cooking and heating may stay near 3–6 kWh/day; a fully electric tiny with a mini-split and induction cooktop can approach 15–20 kWh/day.
Solar PV is the default for most tiny sites because of predictable installation and low maintenance; NREL's PVWatts tool is useful for yield estimates. Ballpark installed panel costs today typically range $0.8–$1.5 per watt (installed) for small DIY-friendly arrays; battery storage varies widely but expect installed battery costs from a few hundred to several hundred dollars per kWh depending on chemistry and balance-of-system. The trade-offs include independence from grid outages and monthly bills versus higher upfront capital, permitting hurdles, and site limits (roof angle, shading, or lack of a stream for micro-hydro).
Planning should reference standards and authorities: the National Electrical Code (NEC, NFPA 70) for wiring and disconnects, NFPA and CPSC guidance for battery safety, and local building and electrical inspectors for permit requirements. For an example of performance data and design lessons from tiny-house projects, see the University of California Berkeley study of the THIMBY project: energy and water performance of an off-grid tiny house.
Assessing and Sizing Loads for a Tiny House Electrical System
Accurate load assessment is the foundation. Start by listing every electrical device, its wattage, and estimated hours per day. Convert watts × hours to watt-hours (Wh) and sum to get daily Wh; divide by 1,000 for kWh/day. Add a safety margin of 20–30% to account for unforeseen use and inefficiencies.
Step-by-step load calculation
- List appliances and devices with rated watts (or measure with a Kill-A-Watt).
- Estimate daily hours of use for each item.
- Compute Wh/day = watts × hours.
- Sum all Wh/day and add 25% margin.
- Determine days of autonomy (typical 1–3 days for tiny homes).
- Size battery bank and solar array accordingly.
Example: common items and typical daily Wh
- LED lights: 40 W × 4 hours = 160 Wh
- Refrigerator (efficient, 12V DC or 120V low-power): 120 Wh–1,200 Wh/day (use specific model data)
- Laptop and chargers: 100–400 Wh
- Water pump: 50–200 Wh (intermittent)
- Mini-split heat pump (if used): variable; average heating load at - mild day might be 1–3 kWh/day, peak power 600–2,000 W
- Small induction cooktop (electric): 1,200–1,800 W peak; cooking energy depends on habits
Prioritizing critical vs optional loads
Classify loads into critical (lights, fridge, some outlets) and optional (washer, oven, electric cooktop) to size a smaller initial system. Design the battery and inverter to supply critical loads during limited generation. If cooking with propane, electrical demand drops substantially.
Sample load worksheet for a 1–2 person tiny house
- Total daily critical loads (lights, fridge, comms, pump): 3.5 kWh/day
- Optional daily loads (induction cooking occasional, laundry): 2.5 kWh/day
- Design target (critical + 25% margin): 4.4 kWh/day
- Battery bank for 2 days autonomy at 50% usable DoD: 4.4 kWh × 2 / 0.5 = 17.6 kWh nominal (lead-acid) — or ~10 kWh usable LFP at 80% DoD
For a practical small-scale example and scaling tips, see the 2 kW system example. Academic work highlights that tiny homes can dramatically reduce lifetime GHG emissions with compact designs; see the study on tiny house potential reductions: tiny house, tiny footprint?.
Off-Grid Power Generation Options for Tiny Houses
Most tiny houses will use solar PV. Other options—small wind and micro-hydro—are viable only on suitable sites.
Solar PV — rooftop and ground-mounted setups
Solar arrays for tiny homes typically range 500 W to 3 kW depending on loads. Rooftop mounting is common but requires attention to roof pitch, waterproof penetrations, and wind loading. Ground-mounted arrays give tilt optimization and easier maintenance but need more space and theft prevention. Panel types: monocrystalline (higher efficiency, smaller area) and polycrystalline (lower cost per watt). Use NREL PVWatts to estimate monthly yields for your location and orientation.
Small wind turbines — when they make sense
Small wind can supplement solar where average wind speeds exceed ~5–6 m/s and local codes permit turbines. Wind is more variable and requires tower rental/installation, maintenance, and permitting. Noise and setbacks can be regulatory hurdles.
Micro-hydro and hybrid sources (site-dependent)
Micro-hydro provides steady power if you have a perennial stream with sufficient flow and head. Permitting and environmental rules apply; installation is site-specific but can deliver predictable baseload power.
| System | Typical output (kWh/month for tiny house sites) | Best site | Approx cost range | Maintenance notes |
|---|---|---|---|---|
| Solar PV (1 kW) | 80–160 kWh/month (varies by location) | Sunny roof or ground with clear south exposure | $800–$1,500 installed per kW | Low, occasional cleaning; check roof penetrations |
| Small wind (1 kW turbine) | 50–300 kWh/month (highly site-dependent) | Open, windy rural sites | $3,000–$10,000 installed | Annual inspection, tower maintenance, noise concerns |
| Micro-hydro (small) | 200–1,000+ kWh/month when flow/head are sufficient | Mountain stream with steady flow | $5,000–$25,000+ | Mechanical maintenance, intake screening, permits |
For panel form-factor and mounting choices that match tiny-house roofs, consult the guide on choosing panels for your roof. For mounting, consider roof load limits and use ballasted racks on trailers where roof penetrations must be avoided; otherwise use penetrative racks with proper flashing.
Energy Storage: Battery Types, Sizing and Safety Considerations
Batteries convert intermittent generation into usable energy. Chemistry choice matters for lifespan, depth of discharge (DoD), and cost.
Compare battery chemistries (LFP, lead-acid, AGM)
- LiFePO4 (LFP): High cycle life (2,000–5,000 cycles), usable DoD ~80–90%, moderate temperature sensitivity, low maintenance, typical installed cost $300–$700/kWh depending on system. Recommended for most DIY tiny homes for long life and lower total cost of ownership.
- Flooded lead-acid: Lower upfront cost per nominal kWh but require ventilation, regular watering, limited DoD (30–50%), shorter life (300–1,200 cycles), heavy and space-consuming.
- AGM/gel (sealed lead-acid): Easier installation (no watering) but similar DoD limits and shorter lifespan than LFP.
Industry comparisons and consumer guidance for household battery safety are available; for context on household electricity patterns and energy use, see Tennessee Electric’s discussion of energy efficiency: energy efficiency and the tiny house movement.
How to size battery bank for days of autonomy
Sizing example: design requirement 5 kWh/day and 2 days autonomy.
- Required usable capacity = 5 kWh/day × 2 = 10 kWh usable
- If using LFP with 80% usable DoD: nominal capacity = 10 kWh / 0.8 = 12.5 kWh
- If using lead-acid with 50% DoD: nominal capacity = 10 / 0.5 = 20 kWh
Include inverter inefficiencies (10–15%) and battery charge/discharge losses when finalizing capacity. For larger autonomy targets or winter storage, scale accordingly.
Battery enclosure, ventilation and safety
LFP batteries require secure enclosures, battery management systems (BMS), and proper disconnects. Flooded lead-acid batteries need ventilation for hydrogen off-gassing and acid-safe containment. All battery installations should include:
- Battery isolator/ground fault protection
- Overcurrent protection and fusing
- Fire-rated enclosure and clearances per local code
- A dedicated battery monitor and BMS
For a step-by-step approach to building a safe battery enclosure, see the DIY battery enclosure. Consult NFPA guidance and CPSC safety literature before installation, and plan for inspections.
Wiring, Panels, and Safety: Practical Off-Grid Wiring Basics
This section shows how AC and DC circuits fit together and the wiring items a DIYer must understand. The video below demonstrates real wiring layouts, inverter/battery connections, transfer switches, and common installation patterns.
A suggested quick-view wiring layout: PV array → combiner/disconnect → charge controller → battery bank → inverter-charger → AC subpanel → loads. Include appropriate DC fuses on the positive conductors and AC breakers on the subpanel.
This DIY video shows you the hands-on process:
AC vs DC circuits and when to use each
DC distribution suits lighting, USB power, and some 12V appliances—avoiding inverter losses. But AC via a pure sine inverter is necessary for most household appliances and to use standard breakers and outlets. For efficient tiny-house design, run essential low-voltage circuits DC and larger loads AC.
Panel setup, breakers, grounding and transfer switches
- Use an inverter that outputs to an AC subpanel with appropriately sized breakers for each circuit.
- Include a main AC disconnect and a separate AC transfer switch or manual interlock when integrating a generator or shore connection.
- Grounding electrode systems must meet NEC rules: bond inverter/charger, battery negative, and grounding electrode conductor per local code.
- Expect motor starting currents: refrigerators and pumps often need 3–6× continuous current at startup; size inverter surge rating accordingly.
For a full wiring walkthrough, consult the hybrid wiring guide. If commissioning shows inverter faults, the inverter troubleshooting article is a helpful reference.
Permits, inspections and code essentials
Local jurisdictions vary. Many require permits for PV, battery systems, and new service panels. The Washington State tiny house guidance packet is a helpful example of code expectations and multiple-code compliance: FAS tiny house information packet. Some areas require a licensed electrician to sign off on final connections—check authority having jurisdiction early in planning.
Wire gauge examples (illustrative, not code prescriptions): a 30A DC run at 12V requires much heavier gauge than 120V runs due to higher current; always calculate current and voltage drop and follow NEC ampacity tables. Mistakes to avoid: undersized conductors, missing disconnects, and improper battery ventilation for flooded systems.
Inverters, Charge Controllers and System Topologies Explained
Understanding controller and inverter choices clarifies performance and expandability.
MPPT vs PWM charge controllers — real differences
MPPT (maximum power point tracking) controllers can extract more energy from panels, especially in cold or mismatched conditions, often improving harvest by 10–30% versus PWM. PWM is cheaper and acceptable for small low-voltage arrays where panel voltage closely matches battery voltage.
Off-grid, grid-tie and hybrid inverter choices
- Off-grid inverters operate independently and invert battery DC to AC; many include inverter-charger features for generator charging.
- Grid-tie inverters feed the grid and usually shut down during outages unless paired with an approved battery backup system.
- Hybrid inverters combine solar MPPT inputs, battery charging, and grid/generator connection points—useful for tiny homes that plan a later grid hookup.
Popular small-system inverter examples include Victron MultiPlus (inverter-charger series), OutBack Power FXR series, and SMA Sunny Island for off-grid/hybrid roles. For small roofs with shading, microinverters (Enphase) or power optimizers can help maximize yield.
Sizing an inverter: continuous vs surge power
Pick an inverter to handle continuous load plus motor starting surges. Typical sizing guide:
- 1 kW inverter: lights, laptop, small fridge (no large motors)
- 3 kW inverter: small fridge, coffee maker, basic loads; handle some motor starts
- 5 kW inverter: enables electric cooktop or larger appliances and multiple simultaneous loads
Surge ratings are often 3–6× continuous rating for a few seconds—useful for refrigerators and pump starts. For instructions on connecting panels to hybrid inverters, see connecting panels to an inverter. For troubleshooting inverter faults, refer to inverter troubleshooting.
Lower Demand, Smaller System: Efficiency Strategies and Low-Power Appliances
Reducing demand shrinks system size and cost. Small changes have outsized impact on required array and battery capacity.
High-impact efficiency upgrades
- Increase insulation and air sealing to reduce heating and cooling loads.
- Install LED lighting and efficient ventilation (heat recovery ventilators when practical).
- Choose a high-efficiency mini-split heat pump for heating/cooling with high seasonal performance.
- Use efficient plumbing fixtures and an on-demand propane water heater to avoid electric tank losses.
Choosing low-power cooking, refrigeration and heating
- Cooking: propane or small induction cooktops dramatically reduce electrical demand compared with full electric ovens. Induction is efficient but has high instantaneous power draws.
- Refrigeration: a 1.2–2.0 cu ft efficient DC fridge can use 100–400 Wh/day versus larger AC fridges that may use 800–1,200 Wh/day.
- Heating: a mini-split heat pump with high COP reduces kWh for heating compared to resistive electric heat.
Behavior and control: timers, smart loads and load-shedding
Use timers and smart relays to avoid simultaneous high-power draws. Implement a priority-load transfer panel or manual load-shedding plan so critical systems (fridge, lights) stay powered when battery voltage is low.
Applying passive-house principles—tight envelope, thermal mass, ventilation with heat recovery—reduces the off-grid system size and cost substantially.
Costs, Budgeting and Phased Build Approach for DIYers
Budgeting helps avoid surprises. Costs vary by region and supply chain, but these ballparks aid planning.
Typical cost ranges and sample budgets
- Solar panels: $0.8–$1.5 per watt installed for small systems (so a 1 kW array ≈ $800–$1,500).
- Batteries: $300–$700 per kWh installed (LFP ranges toward the higher end but with longer life).
- Inverter/inverter-charger: $600–$3,000 depending on size and features.
- Charge controller (MPPT): $200–$1,000 depending on amps and MPPT capability.
- Balance-of-system (racking, wiring, disconnects, permits): variable; budget 10–30% of equipment cost.
For a detailed breakdown when comparing hybrid options, consult the hybrid system costs guide and the broader context of system scaling in solar cost by house size.
How to phase an off-grid electrical system
- Phase 1 — Critical loads and basic solar: small array to support LED lighting, communications, fridge; keep a generator available.
- Phase 2 — Add batteries and inverter-charger: enable nighttime loads and smooth generation variability.
- Phase 3 — Expand array and automation: add more PV, install monitoring, refine load-shedding and smart controls.
Phasing lets cash-strapped DIYers start small and expand as budget allows.
Finding savings: used components, grant and rebate opportunities
Used inverters and battery modules can save money but require careful testing and warranty considerations. Check DSIRE and local utility programs for incentives and rebates; small-scale systems may qualify for equipment rebates depending on jurisdiction. Factor permit and inspection fees into the budget.
A simple 1-line system diagram is a valuable planning deliverable for quotes and permits—draw PV array, charge controller, battery bank, inverter, AC subpanel, and any generator or shore connection.
Key Components Checklist and Comparison Table
A concise purchasing checklist and recommended specs for starter through full-off-grid systems.
Essential components and minimum specs
- PV modules: rated wattage and VOC/ISC specs compatible with charge controller
- Racking and roof attachments: rated for local wind/snow loads
- Charge controller: MPPT recommended for small systems
- Inverter/inverter-charger: pure sine output, continuous and surge ratings matching expected loads
- Batteries: chemistry, nominal kWh, BMS, and recommended DoD
- Battery disconnects, fuses, and overcurrent protection
- AC subpanel, breakers, main disconnect, and transfer switch
- Grounding electrode and bonding equipment
- Monitoring device (battery monitor, inverter telemetry)
- Fire-rated battery enclosure or ventilated space for flooded batteries
| System Tier | Array size (approx) | Battery kWh (nominal) | Inverter size | Target kWh/day |
|---|---|---|---|---|
| Starter | 500 W–1 kW | 2–5 kWh | 1 kW | 1–4 kWh/day (critical loads only) |
| Moderate | 1.5–3 kW | 5–12 kWh | 3 kW | 4–10 kWh/day (comfort + basic cooking) |
| Full off-grid | 3–6 kW+ | 12–30 kWh+ | 5 kW+ | 10–20+ kWh/day (electric heating/cooking) |
For planning assistance, use the off-grid sizer to estimate array and battery needs.
Safety must not be skimped: always include disconnects, proper fusing, a BMS for battery protection, and a fire-response plan for battery incidents.
The Bottom Line
Start with a careful load audit, prioritize efficiency to shrink system size, and plan a phased build. For most tiny house projects, solar PV paired with LiFePO4 batteries offers the best balance of performance and lifecycle cost; follow NEC/NFPA requirements and secure permits early.
Next steps:
- Perform a complete load audit and target kWh/day.
- Check solar yield with NREL PVWatts for your site and draw a 1-line diagram.
- Get component quotes and confirm permit requirements with your local authority.
Frequently Asked Questions
How much solar do I need for a tiny house?
A typical tiny house used by 1–2 people needs roughly 3–20 kWh/day depending on heating and cooking choices. Start by calculating your daily kWh, add 20–30% margin, then size panels so expected monthly yield (using NREL PVWatts) meets that average. A common starting point is 1–3 kW of panels for modest usage.
Can I run a mini-split or electric stove off an off-grid tiny house system?
Mini-splits are a good fit because of their high coefficient of performance and relatively low daily kWh compared with resistive heating, but they can draw significant power at startup. Electric stoves and induction cooktops have high peak power and can require a much larger inverter and battery bank; many tiny-home builders choose propane for cooking and hot water to keep electrical needs low.
Are lithium batteries safe for small DIY tiny homes?
LiFePO4 (LFP) batteries are widely recommended for DIY tiny homes due to stable chemistry and long cycle life, but safety depends on correct installation: proper BMS, secure enclosures, correct fusing, and adherence to local codes. Flooded lead-acid batteries require ventilation and more maintenance, which can present other risks.
Do I need a licensed electrician for an off-grid build?
Requirements vary by jurisdiction; many areas require a licensed electrician to do final connections or to sign off on systems. Even when allowed to DIY much of the work, having a licensed pro inspect and connect key systems can speed permitting and reduce safety risk—check local electrical and building departments early in the project.
What's the easiest way to start small and expand later?
Phase the system: install a small PV array and inverter to cover critical loads, keep a generator for backup, then add batteries and a larger inverter later. Design wiring and mounting so adding panels and batteries is straightforward, and choose an inverter/charger that supports expansion so you won't need total replacement.