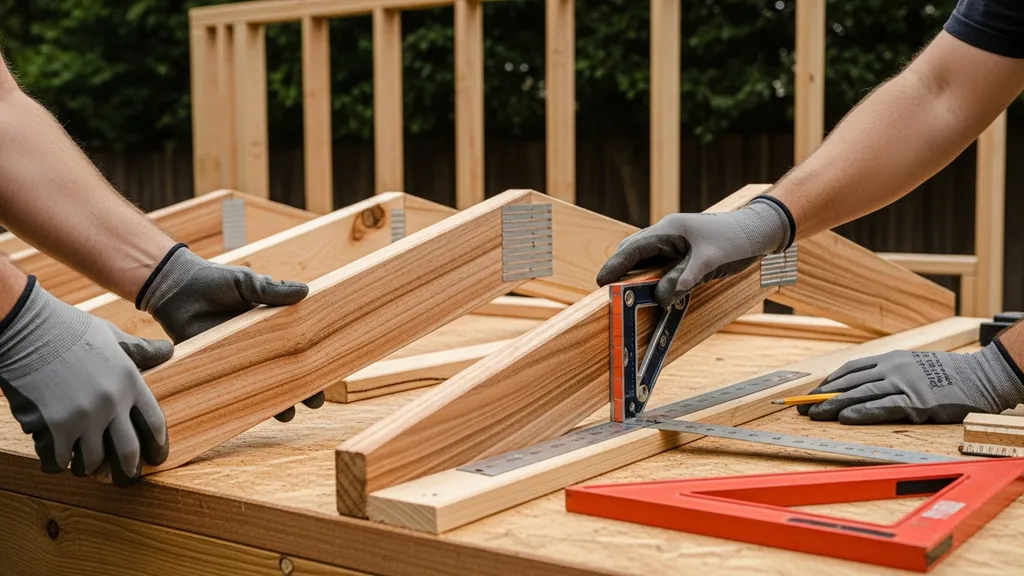
Clear, practical steps to plan and build a durable shed roof — rafters, trusses, bracing, and cost-saving material choices for DIY builders.
Shed Roof Framing: Step by Step Guide
Shed roof framing is the set of layout, cutting, fastening, and bracing steps that turn wall plates into a weatherproof roof structure. For a budget-conscious DIYer, good shed roof framing reduces wasted lumber, cuts hourly labor, and prevents early leaks or sagging that lead to expensive repairs. This guide shows what types of shed roofs work best for small buildings, how to plan loads and permits, how to lay out and cut rafters, and practical choices for materials and fasteners so you can build a durable roof without overspending.
TL;DR:
- Choose the simplest framing method that matches your span: common rafters (2x6–2x8) for ≤12 ft spans, prefab trusses for larger spans or fast install; expect 1–2 days for a 10'x12' shed roof framing crew of two.
- Use a clear layout routine: square plates, snap ridge line, mark birdsmouths from a template, cut one test rafter, then dry-fit; temporary bracing keeps the ridge straight.
- Prioritize correct flashing, underlayment, and balanced ventilation (intake at eaves, exhaust at ridge) to avoid condensation and extend roof life.
Shed Roof Framing Basics: Types, Key Terms, and How to Choose
Sheds commonly use a handful of roof types. Each has trade-offs in cost, complexity, usable interior height, and how they handle wind and snow.
Common Shed Roof Types (lean-to, Gable, Gambrel, Mono-pitch)
- Lean-to (mono-pitch): Single slope, also called a shed roof. Typical pitches range from 2:12 to 6:12. Pros: simplest framing, low cost, easy to shed water. Cons: limited attic space; low pitches need reliable underlayment in rainy climates.
- Gable: Two sloped sides with a ridge. Typical pitches are 4:12 to 9:12. Pros: more attic volume, straightforward rafter layout. Cons: more cuts and temporary bracing needed during assembly.
- Gambrel: Two different slopes per side (barn roof). Pros: maximizes upper storage for given footprint. Cons: several hip/valley joints, more complex cuts and connections.
- Mono-pitch with clerestory: One slope higher on one side to allow a wall of windows. Pros: daylight, usable high wall for windows. Cons: framing requires longer rafters and careful flashing at tall wall intersection.
For a quick overview and plan examples, see these shed design plans. For single-slope how-tos, RapidRafter’s practical walkthrough shows step-by-step framing for mono-pitch roofs: single-slope shed roof framing guide.
Essential Framing Terms Every Diyer Should Know
- Rafter: Diagonal member that spans from the plate to the ridge or opposing plate.
- Ridge beam: A beam at the roof peak that supports rafter heels; not always required for small sheds.
- Birdsmouth: The seat cut that lets the rafter rest on the wall plate.
- Collar tie: Horizontal member near the ridge to resist rafter spread.
- Heel cut / seat cut: Cuts at the rafter tail for the overhang and bearing.
- Jack rafter: Short rafter ending at a hip or valley or against a header.
Span guidance varies with lumber size and spacing. As a rule of thumb, 2x6 rafters often cover short spans (common on small sheds) while 2x8 or larger are used when the run or loads grow. Snow-load and wind-load requirements vary by location; consult your local code. The ICC’s framing tables are the reference for allowable spans and loading—see the IRC Chapter 8 roof-ceiling construction tables. A small diagram comparing roof types and typical pitches can help decide fast.
Planning and Permits: Loads, Pitch, and Materials Selection
A good roof starts on paper. Calculate loads, pick a pitch that suits your climate and purpose, and check permits before sawing lumber.
Calculating Basic Loads (dead, Live, Snow, Wind) for a Shed
- Dead load: Weight of roofing, sheathing, insulation, and framing—usually estimated from product data sheets.
- Live load: Temporary loads like installers or stored items on the roof during construction.
- Snow load: Local ground snow loads inform design snow load; flat sites with heavy snowfall need steeper pitches or stronger rafters/trusses.
- Wind load: Orientation and exposure (open fields vs sheltered yards) change uplift requirements and choice of connectors.
Use a rule-of-thumb approach for quick planning: choose lumber and spacing from span tables appropriate to your local snow and wind loads. Research shows span allowances can change significantly with every inch of increased snow load, so check the official tables. The International Residential Code contains span tables and design rules—consult the IRC Chapter 8 framing guidance for authoritative numbers.
Checking Local Permits and Code References
- Permit checklist: Site plan with setbacks, elevations (showing roof pitch), and a simple framing plan with member sizes and spacing.
- Where to verify: Your local building department, municipal website, or permit center will list submittal requirements.
Prepare a basic drawing that shows rafter size/spacing and ridge support; many jurisdictions accept this for small accessory buildings, but some require engineered drawings for larger spans or heavy snow zones.
Material Selection Trade-offs
- Lumber species: SPF (spruce-pine-fir) is usually economical; Douglas fir or hem-fir have higher strength and may cost more.
- Plates and sill: Use pressure-treated sill plates where the plate rests on foundation or concrete.
- Sheathing: OSB is economical; plywood is stronger in edge-nail holding and wet conditions. For metal roofs, use exposure-rated sheathing.
Cost impacts are real: better species, thicker sheathing, and premium underlayment raise initial cost but reduce repairs. Use the shed cost calculator to estimate materials and labor: estimate materials and labor.
Step-by-step Layout: Marking Plates, Rafter Spacing, and Ridge Lines
This section gives a clear on-site workflow you can follow in order.
Setting and Squaring Wall Plates and Ledger Positions
- Confirm walls are plumb and square before adding roof loads. Measure diagonals — they should match.
- Snap a centerline for the ridge using the measured run and chalk line. For gable roofs, divide the span to find ridge location.
- Mark rafter tails and ledger positions at the eaves using a speed square and framing square.
Essential tools: speed square, framing square, chalk line, circular saw, tape measure, ladder, nail gun, and a rafter square or sliding bevel. For safety, follow ladder and fall protection guidance from OSHA when working at height.
Laying Out Rafter Spacing and Marking Birdsmouth Locations
- Decide rafter spacing (commonly 16" or 24" on center). Wider spacing saves lumber but increases required rafter size and sheathing thickness.
- Using a rafter table or framing square, mark the birdsmouth and heel/seat cut onto a rafter template. Transfer the layout along the top plate.
- Check the rafter crown and straightness before cutting all rafters.
Cut one test rafter and dry-fit it in place. Check that the birdsmouth bears fully on the plate with no gaps; if the fit is tight on one end, plane the plate or rafter slightly.
Cutting Test Rafters and Dry-fitting
- Cut a single test rafter, install temporarily, and measure for plumb and ridge alignment.
- Use temporary bracing to hold the rafter while you cut the rest.
- Layout jack rafters and overhangs by marking from the main rafter template rather than measuring each individually.
Watch this step-by-step guide on building a shed - part 9 - install asphalt shingles on shed roof:
. For additional real-world photos of setting trusses and sheathing, consult the project's [roof trusses and sheathing photos](/blog/build-update-5-roof-trusses-sheathing). The CFSEI report on rational rafter design methods provides extra technical background on rafter behavior: [cold-formed steel and rafter design research](https://www.cfsei.org/assets/docs/research_report/RP06-2.pdf).Framing Methods: Individual Rafters, Ridge Beams, and Prefab Trusses
There are three practical approaches for small shed roofs: cut common rafters in place, install a ridge beam and rafters bearing on it, or use prefab trusses.
Standard Rafter Framing for Small Sheds
Cutting and installing individual rafters is flexible and low-cost for simple roofs. It works well when spans are modest and roof geometry is straightforward. It takes more time to cut each rafter but minimizes transport and handling issues.
Using a Ridge Beam vs Plate Ridge
A ridge beam carries load and prevents rafter spread without collar ties; it’s often used when the ceiling is open or when rafters carry loads from a heavy roof. A plate ridge (where opposing rafters meet at the ridge without a beam) needs collar ties or a ceiling diaphragm to resist outward thrust.
When Prefab Trusses Make Sense for a Shed
Prefab trusses speed installation for larger spans, produce consistent geometry, and can give long clear spans with engineered strength. Downsides: transport costs, lead time, and less attic access unless a raised heel or scissor trusses are specified.
| Method | Span capability | Typical material & size | Labor/time | Cost range | Insulation/ventilation considerations | Best-for scenarios |
|---|---|---|---|---|---|---|
| Individual rafters | Short to moderate (typical small sheds) | Dimensional lumber (2x6–2x10), spaced 16"–24" OC | Medium — more cutting on site | Low–Medium | Easy to ventilate with soffit + ridge vents | DIY builders, odd roof angles |
| Ridge beam + rafters | Moderate spans, roof loads with openings | Timber beam (LVL or solid) with dimensional rafters | Medium — beam setting may need help | Medium | Better for open vaulted ceilings; needs intake/exhaust balance | Vaulted ceilings, exposed ridge |
| Prefab trusses | Larger spans, quick installs | Engineered trusses (varied timber sizes) | Low on-site time, higher setup | Medium–High | Truss depth determines cavity insulation approach | Larger sheds, long clear spans, quick crew install |
When in doubt about spans or complex loads (long spans, heavy snow), consult an engineer. The Larsen truss techniques are useful if planning a cold-climate truss approach: cold-climate truss techniques. For many small sheds, the trade-off leans toward site-cut rafters for simplicity and cost control.
Fastening, Bracing, and Sheathing: Connectors, Nailing, and Stiffness
Correct connections give a roof its stiffness. Use the right fasteners and temporary bracing while raising the roof.
Nailing Patterns, Metal Connectors, and Hurricane Straps
- Use manufacturer-recommended nail types and spacing for sheathing—edge nail spacing is tighter than field spacing.
- Common connectors: hurricane ties, joist hangers, and rafter-to-plate straps. These resist uplift and rafter rotation under wind loads.
- For small sheds, use hurricane ties at every rafter-to-plate connection if wind uplift is a concern; they add minutes per rafter but increase resilience.
Local code may set minimum slope or fastening rules—Washington state rule WAC 246-359-250 calls out minimum slope and accepted framing methods; consult local laws for specifics: WAC 246-359-250 minimum slope guidance.
Temporary Bracing While You Frame
Temporary diagonal bracing along the length of the ridge and between rafters prevents racking until sheathing is installed. Install a temporary ridge brace and cross-brace at 8–10 ft intervals when lifting rafters on gable roofs. Remove temporary bracing only after sheathing and permanent blocking are in place.
Choosing and Installing Roof Sheathing
- OSB is economical; plywood performs better when exposure to moisture is likely and holds nails better at edges.
- Use exposure-rated sheathing under metal roofs and follow manufacturer instructions when attaching to rafters.
Sequence sheathing and any exterior insulation carefully—see guidance on passive-house roof insulation sequencing. For exterior insulation and wall overlaps, reference sequencing best practices: exterior insulation sequencing.
Waterproofing, Penetrations, and Roof Ventilation for Longevity
A framed roof becomes a durable roof with correct waterproofing and ventilation.
Flashing, Drip Edge, and Waterproof Underlayment Basics
- Install drip edge at eaves and rakes before underlayment; this routes water off sheathing and into gutters.
- Start with a starter strip at the eave for shingle roofs, or follow metal roofing starter requirements for metal panels.
- Use an underlayment compatible with your roof covering. For metal roofs, use exposure-rated underlayment and follow manufacturer specs.
For metal roofing flashing and fastener details, consult the practical installer guide: metal roofing installation guide.
Penetrations: Vents, Skylights, and Piping Boots
- Flash all roof penetrations with purpose-made boots or flashing kits rated for the roof pitch and covering.
- For skylights or wall-roof intersections, use step flashing layered with housewrap or underlayment to keep water diverted.
- Test pipe boot installations with a garden hose spray before finishing trim to find leaks early.
Shedking’s illustrated guides show practical flashing solutions for small shed roof features: detailed flashing and roofing examples.
Designing Ventilation: Intake and Exhaust Balance
Ventilation reduces condensation and moderates attic temperature. The rule of thumb is to provide balanced intake (soffit) and exhaust (ridge) ventilation with an appropriate net free area. The exact net free area per square foot varies by product—inspect vent product specs and local code. For cool roof strategies and interaction with ventilation, see the cool roof guide: cool roof strategies. For rainwater harvesting planning and roof drainage details, see rainwater collection basics.
Material Choices and Budget-saving Measures for DIY Builders
Small choices add up. This section walks through lumber grades, efficient spacing, and eco options.
Selecting Lumber Grade and Efficient Rafter Spacing
- Picking 2x6 vs 2x8 rafters depends on run, spacing, and loads. Wider rafter spacing (24" OC) reduces lumber cost but requires thicker sheathing and gives less nail holding at edges.
- Order rafter-cut lists to reduce waste. Cutting all rafters from matched stock minimizes crown and twist issues.
- For exposed rafter tails, pick straight-grained boards to avoid twists.
Affordable Sheathing and Roofing Material Options
- OSB sheathing with an economical underlayment and asphalt shingles is often the lowest installed-cost option.
- Recycled corrugated metal roofs are low-weight and durable—installation differs from shingles and needs appropriate underlayment and fasteners.
Use the shed cost calculator to compare a small build: estimate materials and labor.
Short example (relative costs only): A 10'x12' shed framed and sheathed with economy materials (OSB + asphalt shingles) might be 1x base cost, while premium choices (plywood, metal roofing, pressure-treated details) push cost to ~1.6x–2x of economy, depending on local prices.
Sustainable and Recycled Options for Sheds
- Consider reclaimed lumber for decorative rafters or non-structural elements.
- Recycled metal roofing reduces embodied carbon and lasts decades.
- Natural-fiber insulation or mineral wool cut environmental impact and improve fire resistance—see natural choices like mineral wool and hemp-based products: natural-fiber insulation options and mineral wool insulation guide.
If planning future solar panels, design framing and orientation to accept mounts—see tips on matching roof and solar: matching solar to roof.
Key Steps Checklist: Quick Reference for Framing a Shed Roof
This short list is a printable reference to keep on site.
Pre-build Checklist
- Permits and drawings: Submit site plan, elevations, and framing plan if required.
- Materials ordered: Rafters, sheathing, connectors, underlayment, roofing.
- Tools ready: Speed square, framing square, chalk line, circular saw, ladder, nail gun, personal protective equipment.
Day-of Framing Sequence
- Square plates: Verify wall squareness and plate straightness.
- Snap ridge and chalk lines: Mark rafter layout and overhangs.
- Cut test rafter: Fit birdsmouth and test ridge alignment.
- Raise rafters: Temporarily brace after every few rafters to maintain alignment.
- Install ridge/beam: Secure ridge beam per design or join opposing rafters at plate.
- Sheathe roof: Fasten per sheathing and roofing manufacturer specs.
Post-framing Checks
- Check nailing patterns: Ensure edge and field nailing meets product recommendations.
- Install permanent bracing and blocking: Tie rafters into diaphragm.
- Install underlayment and flashing: Complete waterproofing before roofing finish.
For layout templates and framing photos, see the roof trusses and sheathing photos and shed design plans.
Common Mistakes, Troubleshooting, and Quick Fixes
Even careful DIYers run into framing issues. Here are diagnostics and remedies.
How to Spot and Fix a Sagging Ridge or Uneven Rafters
- Symptom: ridge line dips where rafters are misaligned. Cause: difference in rafter length, crown orientation, or missing temporary bracing.
- Fix: measure from plate to ridge at multiple points, shim or plane the offending rafter ends, sister a new rafter where necessary, and add blocking under the ridge if bearing is insufficient.
Correcting Birdsmouth Errors and Mismatched Overhangs
- Symptom: birdsmouth doesn't seat fully or overhangs vary along eaves.
- Fix: recut birdsmouth slightly deeper for full bearing or plane high points on the top plate. For mismatched overhangs, trim rafter tails to match a measured template and secure consistent fascia.
When to Reframe vs Patch
- Small misalignments and a few damaged rafters are usually repairable with sistering or blocking.
- Reframe if multiple rafters show twist, widespread undersized members, or if the ridge beam is significantly out of level. If loads or spans were underdesigned relative to snow or wind in your area, consult an engineer before continuing. For framing repair approaches, see framing and insulation references: framing and insulation reference.
The Bottom Line: Build Smart, Safe, and for the Climate
Choose the framing method that fits your span, budget, and climate; prioritize accurate layout, proper connectors, and balanced ventilation; and confirm permits and span tables before final assembly. For most small sheds, well-cut rafters, correct birdsmouths, and simple sheathing paired with good flashing will give a long-lasting roof without excessive cost.
Frequently Asked Questions
How steep should my shed roof be?
Short answer: it depends on climate and roofing material. Typical pitches are 2:12–6:12 for lean-to/mono-pitch roofs and 4:12–9:12 for gable roofs. Low slopes under 3:12 often require more robust underlayment and careful flashing because they shed water more slowly. Check your roofing product recommendations and local code for minimum slopes, and pick a pitch that balances headroom, snow-shedding ability, and desired appearance.
Can I use 2x6 rafters for a 12-foot span?
Possibly, but it depends on rafter spacing, roof loads, species of lumber, and local code span tables. In practice, 2x6 rafters at 16" OC can cover short to moderate spans under typical dead/live loads; heavier snow loads or wider spacing often require 2x8 or larger. Always consult the IRC span tables or local building department before finalizing rafter size.
Are prefab trusses worth it for a small shed?
Prefab trusses are worth considering if you need a fast install, consistent geometry, or a long, clear span. They reduce on-site cutting time but add cost for manufacture and transport. For a tiny 8'x10' shed, site-cut rafters are usually cheaper and easier to handle. For larger sheds or when you want a vaulted ceiling without interior supports, trusses are a strong choice.
How do I prevent condensation in the roof?
Prevent condensation with proper ventilation (balanced intake at soffits and exhaust at ridge), a continuous air barrier under the roof deck, and appropriate insulation that keeps the roof deck warm enough to avoid cold spots. Mineral wool or exterior continuous insulation paired with proper ventilation reduces the risk of condensation. For high-humidity uses, ensure vents are sized per product specs and that vents remain unobstructed.
Do I need an engineer for a small shed roof?
Not usually for simple sheds with spans and loads that conform to prescriptive code tables. You should consult an engineer if your shed has long spans, irregular geometry, large snow or wind loads, or if you plan to install heavy rooftop equipment like a battery bank or large solar array. When in doubt, your local building department can advise whether engineered drawings are required.