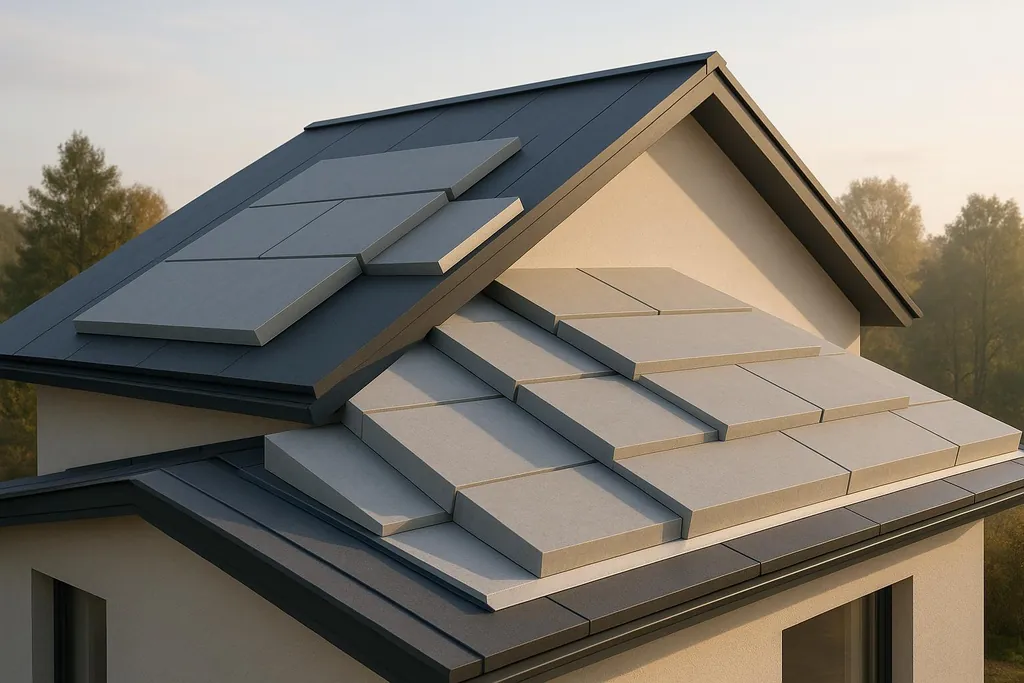
Explore the benefits of exterior roof insulation for achieving Passive House standards, enhancing energy efficiency, and reducing costs.
Exterior Roof Insulation: The Secret to Passive House-Level Performance
Exterior roof insulation is a game-changer for energy efficiency. It creates a continuous thermal barrier across your roof, reducing heat loss, eliminating air leaks, and helping achieve Passive House standards. This approach not only keeps indoor temperatures stable year-round but also cuts energy costs and improves HVAC performance.
Here’s the key takeaway: Proper insulation and airtight sealing are essential for minimizing energy use and maintaining comfort. Materials like stone wool, EPS, and cellulose offer varying benefits in thermal resistance, moisture control, and cost. When installed correctly, exterior roof insulation can reduce energy use by up to 90% compared to standard homes.
Key Points:
- Passive House standards require high thermal resistance (e.g., R-60 for roofs) and airtightness.
- Popular insulation options include stone wool (R-4.0–4.2/inch), EPS (R-3.8–4.4/inch), and eco-friendly cellulose (R-3.6–3.8/inch).
- Airtightness testing (e.g., blower door tests) ensures minimal air leakage.
- Preventing thermal bridges with continuous insulation is critical for performance.
Investing in proper exterior roof insulation may have higher upfront costs but leads to long-term savings and a more comfortable home. Whether you’re building new or upgrading, this is a practical step toward energy-efficient living.
How to Install Exterior Roof Insulation for High-End Energy-Efficient Homes (Polyiso + Mineral Wool)
Passive House Standards for Roof Insulation
Passive House certification demands energy efficiency standards that go well beyond typical building codes. A key focus is minimizing heating and cooling needs by creating a highly efficient building envelope, with roof insulation playing a crucial role in achieving these goals.
The certification process evaluates several aspects of a building's performance, such as thermal resistance, airtightness, and the reduction of thermal bridges. These factors work together to maintain consistent indoor temperatures while using minimal energy. This framework sets clear guidelines for insulation and sealing requirements.
Passive House Insulation Requirements
Roof insulation requirements for Passive House certification depend on the local climate and the building's overall design. Insulation must provide enough thermal resistance to reduce heat loss during winter and limit heat gain in summer. The exact specifications are calculated based on factors like the building’s location, orientation, and design.
However, achieving the required insulation levels is only part of the equation. Creating a tightly sealed building envelope is equally important for energy efficiency.
Thermal Control and Airtightness Basics
Thermal control ensures consistent indoor temperatures without heavy reliance on heating or cooling systems. Roof insulation plays a big part in this by forming a continuous barrier that minimizes unwanted heat transfer.
Airtightness is another critical aspect. To meet Passive House standards, the building envelope must be meticulously sealed to prevent uncontrolled air leakage. This involves careful attention to sealing all joints, penetrations, and other potential air pathways. Proper installation of roof insulation is key to achieving this level of airtightness.
Choosing Eco-Friendly Insulation Materials
If you're aiming for Passive House-level efficiency, picking the right insulation is essential. But it’s not just about meeting technical standards - it’s about finding materials that balance performance, environmental responsibility, and cost. Choosing eco-friendly insulation for your exterior roof means considering how well it insulates, how it impacts the environment, and how it fits your budget.
Each insulation material performs differently, influencing critical factors like thermal resistance, moisture control, and airtightness. These are key elements in achieving Passive House standards, so understanding the differences is crucial for making the best choice.
Common Insulation Materials for Exterior Roofs
Stone wool is a reliable and versatile option. It offers an R-value of 4.0–4.2 per inch, provides excellent fire resistance, and maintains its insulating properties even in damp conditions. It's particularly effective in continuous exterior applications where minimizing thermal bridging is a priority.
Expanded polystyrene (EPS) is another strong contender. It delivers solid thermal performance with an R-value between 3.8 and 4.4 per inch. EPS resists moisture absorption and holds its R-value over time, making it a good choice for continuous exterior insulation systems. It’s also relatively budget-friendly.
Cellulose insulation, made mostly from recycled paper, is an environmentally responsible option. With an R-value of 3.6 to 3.8 per inch, it also offers good air-sealing properties when installed correctly in specific roof configurations.
Fiberglass batts are widely used and easy to find. High-density versions designed for exterior applications provide R-values of 3.7 to 4.3 per inch. However, achieving proper air sealing is crucial for Passive House projects when using fiberglass.
Natural fiber insulations, such as hemp and wood fiber boards, stand out as sustainable alternatives. They offer R-values ranging from 3.5 to 4.0 per inch and excel at managing moisture while allowing breathability.
Material Comparison Chart
| Material | R-Value per Inch | Cost per sq ft\* | Fire Resistance | Moisture Performance | Environmental Impact |
|---|---|---|---|---|---|
| Stone Wool | 4.0-4.2 | $1.20-$1.80 | Excellent | Very Good | Moderate |
| EPS | 3.8-4.4 | $0.80-$1.20 | Good | Excellent | Moderate |
| Cellulose | 3.6-3.8 | $0.60-$1.00 | Good | Fair | Excellent |
| Fiberglass Batts | 3.7-4.3 | $0.50-$0.90 | Fair | Poor | Fair |
| Natural Fiber | 3.5-4.0 | $1.50-$2.50 | Fair | Good | Excellent |
\*Costs reflect 1-inch thickness, material only, based on November 2025 pricing.
_Note: Installation methods vary. EPS boards are simple to install, while cellulose requires specialized equipment to achieve proper density._
When choosing insulation, consider your specific project needs and the local climate. For example, stone wool and EPS are ideal when moisture resistance and consistent performance are priorities. On the other hand, cellulose and natural fiber options are better suited for those looking to reduce environmental impact, though they might need additional strategies to manage moisture effectively.
Always check local building codes and climate requirements, especially for fire resistance and vapor permeability, to ensure your chosen material aligns with both Passive House standards and regional regulations.
How to Install Exterior Roof Insulation
Installing exterior roof insulation involves a step-by-step process of preparation, installation, and sealing to ensure proper thermal performance and airtightness. This method is particularly effective for meeting Passive House standards.
Tools and Preparation
Before starting, gather the necessary tools: a cutting tool, drill, measuring tape, chalk line, and safety gear like gloves, safety glasses, and sturdy footwear. Make sure to use insulation fasteners that are specifically rated for your roof type.
Safety should always come first. Use temporary railings or a harness, and only work in calm, dry weather conditions to reduce risks.
Begin by inspecting the roof deck for any signs of damage, loose boards, or protruding nails. Replace any damaged sheathing and clean the surface thoroughly. If you're dealing with an existing roof, remove all old roofing materials down to the deck.
Carefully measure and mark the layout for your insulation. Plan the placement of insulation boards to minimize waste and ensure efficiency. Mark areas with roof penetrations such as vents, chimneys, and electrical connections, as these will need special attention during installation.
Once everything is prepared and marked, you’re ready to start installing the insulation.
Installing Insulation Layers
For above-deck installations, which are often used to meet Passive House standards, begin at the bottom edge of the roof and work your way upward.
Align the first row of insulation boards along the chalk line at the bottom edge of the roof. Ensure tight joints between the boards to reduce thermal bridging. If you’re using EPS boards, make sure the tongue-and-groove edges fit snugly. For stone wool boards, butt joints should be tight with no visible gaps.
Secure each board with fasteners spaced 12 to 16 inches apart along the edges and 24 inches apart in the center. Fasteners should penetrate the roof deck by at least 1 inch, and large washers should be used to prevent pull-through.
For additional insulation layers, stagger the joints of each layer by at least 6 inches to break thermal bridges and achieve the required R-values. This overlapping method ensures better insulation performance.
When working around roof penetrations, cut the insulation boards precisely to fit tightly. Aim for gaps smaller than 1/4 inch and seal any gaps with expanding foam or small pieces of insulation to maintain a continuous barrier.
Sealing for Airtightness
Achieving airtightness is a critical step, especially for Passive House standards. Begin by applying a continuous air barrier over the insulation layer. This is usually done with a weather-resistant barrier or building wrap designed for exterior insulation.
Seal all joints in the air barrier using 3-inch, high-temperature-rated tape. Press the tape firmly, especially around corners and edges, to ensure a secure seal and prevent air leaks.
For roof penetrations, use specialized flashing and sealing products. Install flashing boots around pipes, ensuring they integrate seamlessly with the air barrier. Generously apply sealant around these penetrations to ensure no gaps remain.
Pay special attention to areas where the roof insulation meets wall systems, such as around windows and doors. Use flexible sealants or gaskets that can accommodate slight building movements while maintaining an airtight seal. This connection is crucial for overall energy performance and may require custom solutions depending on your specific roof and wall assembly.
To check your work, use a smoke pencil to test for leaks. Address any issues immediately while you still have access to the materials and tools.
Once the sealing is complete, install the roofing material over the insulation and air barrier. Be cautious not to compromise the airtight seal, and follow the manufacturer’s guidelines for ventilation gaps if required.
Installing exterior roof insulation demands careful planning and attention to detail, but the improved energy efficiency and thermal performance make the effort well worth it, especially when aiming for Passive House standards.
Getting Maximum Energy Efficiency
Achieving Passive House performance goes beyond just adding insulation. It’s about eliminating heat loss and sealing the building envelope with precision. The real difference between decent insulation and top-tier energy performance lies in addressing thermal bridges and performing airtightness testing with care.
Preventing Thermal Bridges
Thermal bridges are sneaky pathways where heat escapes, bypassing your insulation through rafters, beams, or fasteners. To prevent this, you need an uninterrupted layer of insulation that spans your entire roof, including seamless connections at the critical roof-to-wall junctions. A common misstep is stopping roof insulation at the top plate, which creates a thermal bridge and undermines the building’s overall energy efficiency.
When fastening through insulation, steer clear of standard metal screws, as they act as mini thermal bridges. Instead, opt for plastic or composite thermal break fasteners, which significantly reduce heat loss.
Key structural areas like beam-to-wall and dormer intersections deserve extra attention. These spots often require tailored insulation solutions, such as precisely cut rigid foam layers, to maintain a continuous thermal barrier. Consistency in insulation thickness is equally important - any reduction in thickness at structural connections can weaken the insulation’s effectiveness. Wherever possible, maintain full insulation thickness, even if it means adjusting structural elements or using tapered insulation pieces to fit snugly.
Once you’ve established a continuous thermal barrier, the next step is to confirm the envelope’s airtightness through thorough testing.
Testing Airtightness
After addressing thermal bridges, airtightness testing ensures your building meets Passive House standards. The blower door test is the go-to method for measuring air leaks. This test pressurizes your home and calculates the number of air changes per hour, helping identify problem areas. Passive House standards demand extremely low leakage rates, so attention to detail is non-negotiable.
Schedule a blower door test right after installing the air barrier. This timing allows you to locate and fix leaks while the materials and tools are still easily accessible. To pinpoint leaks during the test, use a smoke pencil or theatrical smoke near suspected areas while the blower door creates negative pressure. This simple technique provides immediate feedback, making it easy to address leaks on the spot.
Typical leak-prone areas include roof vents, electrical conduits, and plumbing stacks. These penetrations often contribute significantly to overall air leakage. Use high-quality tape or liquid-applied membranes to seal these areas instead of caulk, which can shrink or crack over time.
Infrared thermography is another helpful tool, revealing thermal patterns that highlight weak spots in the building envelope. Even small gaps can have a noticeable impact on airtightness, so seal them promptly using appropriate materials - minor gaps may only need sealant, while larger openings may require more durable solutions.
Always retest after making repairs to confirm improvements. This iterative process often leads to substantial gains in airtightness, which are vital for meeting Passive House standards.
While investing extra time and resources into thermal bridge prevention and airtightness testing may slightly raise initial costs, the payoff is worth it. You’ll enjoy lower heating and cooling bills, a more comfortable indoor environment, and a home that aligns perfectly with Passive House principles. These steps ensure your building achieves both efficiency and comfort.
Cost Breakdown and Budget Planning
Understanding your costs upfront is crucial to avoid financial surprises. Planning your budget carefully is key to meeting Passive House standards. Factors like insulation type, roof size, labor, and regional pricing all play a role in determining the total expense.
Material and Installation Costs
Insulation materials will likely account for the largest portion of your expenses. Options such as rigid foam, mineral wool, spray foam, or eco-friendly alternatives vary in cost, quality, and thickness. Don’t forget to include additional materials like weather-resistant barriers, sealing tapes, and thermal break fasteners in your calculations.
Labor costs can also make a significant impact, especially if you hire professionals. While a DIY approach can save money, it often requires more time and effort. Investing in versatile tools can help reduce costs over multiple projects.
Here’s a quick look at how different insulation options compare:
| Insulation Type | Relative Material Cost | Impact on Total Cost | DIY Labor Savings Potential |
|---|---|---|---|
| Mineral Wool Batts | Lower cost range | Affordable and effective | High, if installed yourself |
| Rigid Foam Boards | Moderate cost range | Excellent thermal resistance | Significant with DIY efforts |
| Spray Foam (DIY) | Higher upfront cost | Outstanding performance | Notable savings if self-applied |
| Eco-Friendly Options | Moderate to high | Combines sustainability with performance | Varies by local pricing |
Beyond materials, factor in permit fees, waste disposal, and any structural modifications that might be necessary. Keep in mind that material prices and availability can fluctuate based on the season, so plan accordingly.
Budget Planning with [DIY Eco Homes](/) Tools

Once you’ve accounted for material and labor costs, precise budgeting becomes essential to ensure your project stays on track. DIY Eco Homes offers a detailed cost calculator tailored to your roof dimensions, regional material prices, and project specifics. Here’s how you can approach your budget planning:
- Measure Accurately: Start with exact measurements of your roof, including dormers, valleys, and irregular sections.
- Account for Waste: Add a material waste factor to avoid running out of supplies midway through the project.
- Phase Your Project: Breaking the work into stages can help spread out costs - many builders prioritize critical areas first.
Remember to budget for hidden expenses like permit fees, disposal costs, and structural adjustments. Shopping during off-season sales or buying materials in bulk can also help control expenses.
Lastly, explore financing options such as utility rebates or federal tax credits to make energy-efficient upgrades more affordable. Building a contingency fund into your budget ensures you’re prepared for any unexpected challenges along the way.
Conclusion: Achieving Passive House Performance
Exterior roof insulation plays a crucial role in cutting energy costs and ensuring consistent indoor comfort. By following proven techniques, it supports Passive House standards, which can reduce energy use by up to 90% compared to traditional homes .
Think of your roof insulation as a shield - one that keeps heat inside during winter and blocks excessive heat during summer. Achieving this requires a combination of high insulation levels (aiming for R-60 for roofs), airtight construction, and eliminating thermal bridges. Together, these elements create a seamless insulation envelope, maintaining comfortable temperatures indoors while using minimal energy .
This strategy isn’t just about meeting standards - it’s about real-world benefits. High-quality materials and proper installation can lower your utility bills, improve indoor comfort, and reduce your carbon footprint. For those ready to get started, DIY Eco Homes offers tools like cost calculators and step-by-step guides to simplify the process. While initial costs might seem high, the long-term savings and potential increase in home value make this upgrade a smart investment.
To begin, measure your roof area and calculate your insulation needs using the guidelines shared earlier. Whether you opt for mineral wool, rigid foam, or eco-friendly options, the goal remains the same: maximize thermal resistance, seal air leaks, and eliminate thermal bridges. Done right, your home will stay energy-efficient for decades.
Explore the resources from DIY Eco Homes today and take your first step toward building a sustainable, energy-efficient home that stands up to the highest performance standards.
FAQs
What are the key benefits of exterior roof insulation for meeting Passive House standards?
Exterior roof insulation plays a key role in meeting Passive House standards by boosting energy efficiency and enhancing indoor comfort. By reducing heat transfer, it helps keep indoor temperatures steady year-round, cutting down the need for heating and cooling systems.
This thermal improvement doesn't just lower energy costs - it also reduces the home's environmental footprint. Plus, it can contribute to better indoor air quality and a cozier living space, aligning seamlessly with the goals of Passive House design.
What factors should I consider when comparing insulation materials for cost, environmental impact, and thermal performance?
Choosing the right insulation material comes down to weighing a few key factors: cost, energy efficiency, and thermal performance. For example, materials like [ROCKWOOL](https://www.rockwool.com/north-america/) stone wool stand out because they offer strong thermal properties, resist fire, and are built to last. These qualities make them a popular pick for meeting [passive house](/blog/erv-vs-hrv-ventilation-system-better-home) standards.
When evaluating your options, think about factors like how well the material retains heat, how easy it is to install, its resistance to moisture, and how it holds up over time. If sustainability is a priority, look for eco-friendly choices that help reduce environmental impact while keeping your home energy efficient.
What steps should I follow to ensure my exterior roof insulation is airtight?
Airtightness plays a key role in achieving the energy efficiency required for [Passive House standards](/blog/how-to-seal-windows-for-passive-house-standards). To make sure your exterior roof insulation is airtight, begin by sealing every gap, crack, and joint with high-quality tapes or sealants specifically made for air barriers. Pay extra attention to tricky spots like vents, chimneys, and other penetrations - these areas are often the culprits behind air leaks.
After sealing, add a continuous air barrier layer either beneath or above the insulation, depending on your roof's design. Make sure to overlap and firmly tape all seams to block air infiltration. To confirm your work, perform a blower door test. This test will help you spot any remaining leaks so you can address them. Following these steps ensures better thermal performance and minimizes energy loss.