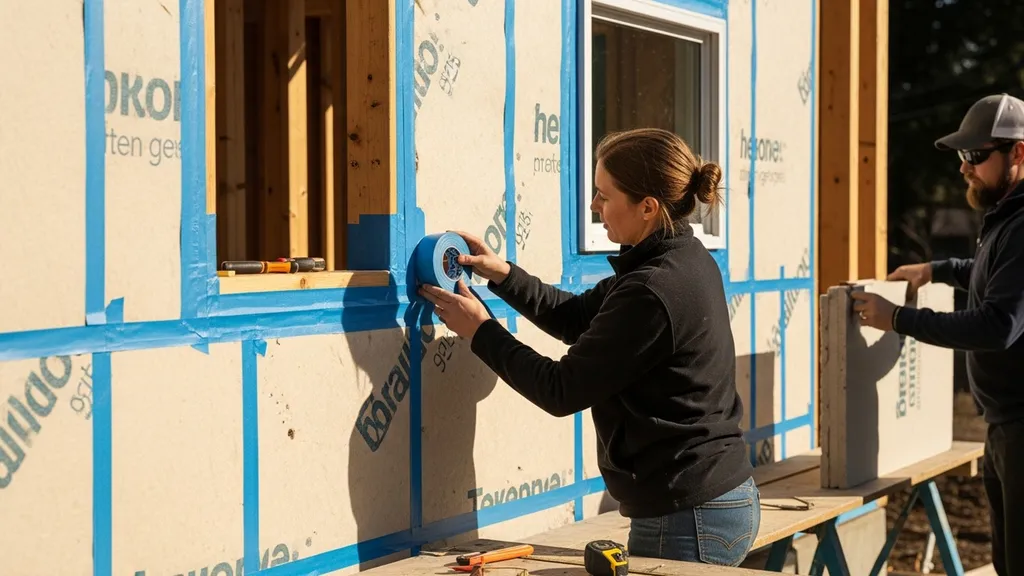
Step-by-step guide to designing a net zero home: set goals, use passive design, right-size systems, pick materials, and plan renewables for DIY builders.
How to Design a Net Zero Home: Step-by-Step Guide
Designing a net zero home starts with measurable goals: define annual energy or carbon targets, then plan the envelope, systems, and renewables so the house produces as much energy as it consumes. This guide shows how to design net zero home projects with clear numbers, practical trade-offs, and DIY-friendly steps—covering targets and budget, passive design targets, right-sized heat pumps and ventilation, PV and storage sizing, low-embodied materials, and commissioning. Follow these steps to move from a broad aspiration to a buildable plan with predictable performance.
TL;DR:
- Aim for a target annual energy use under 30 kWh/m²-year (or about 6–8 kWh/ft²-year) to make a small-family net zero feasible with 3–6 kW of PV in sunny temperate locations.
- Reduce demand first: passive design typically cuts heating energy 60–90%, then choose a high-efficiency heat pump (COP 3.5–4.5) sized by a simple heat-loss estimate to avoid oversizing.
- Size PV from annual kWh need using local yield (900–1,600 kWh/kW-year), plan batteries for days of autonomy only if off-grid, and include monitoring and commissioning to verify performance.
Step 1: Define Targets, Budget, and Site Constraints
Set a clear target: net zero energy (annual site energy balance) or net zero carbon (including embodied carbon or purchased offsets). For most DIY homebuilders, net zero energy is the practical start: design the building to use no more electricity than the PV array can produce over a year.
- Measurable target: Aim for <30 kWh/m²-year for small-family homes in temperate climates (roughly 6–8 kWh/ft²-year). Aggressive Passive House projects go much lower; Passive House uses 15 kWh/m²-year heating demand as a design reference. Research from the Department of Commerce and standards groups shows that setting a numeric target up front focuses decisions and prevents scope creep; see the NIST guidance on integrated NZE design for planning methods and checklists.
- Budgeting: Establish a base build budget and a project contingency of 10–20% for DIY and self-build projects. Prioritize a checklist of “must-haves” (airtight continuous insulation, balanced ventilation, PV-ready roof) versus “nice-to-haves” (high-end finishes, large glazing). This helps keep energy-focused items early in the budget.
- Required documents: Gather a plot plan, survey, utility connection information, local zoning setbacks, and applicable code information. Early permitting is non-negotiable—review local requirements for renewable energy interconnection and off-grid systems. For remote or off-grid projects, the off-grid permitting checklist is a useful reference.
- Site analysis: Map sun access (solar azimuth and elevation), shading from trees or neighboring structures, roof pitch and orientation, slope, and access for PV installation and potential battery delivery. Use a sun-path app or simple sketch for critical dates (winter solstice and summer solstice). Prioritize southern exposures (northern hemisphere) for main glazing and PV; note service access and the potential for future expansion of arrays.
- Prioritization: Create an ordered list: 1) reduce demand via orientation and insulation, 2) ensure airtightness and ventilation, 3) add efficient HVAC and hot water, 4) size PV and storage. If you plan to transition from design to build, see our wider guide on how to build a net zero home for construction sequencing and contractor selection.
Step 2: Apply Passive Design to Minimize Energy Demand
Passive design is the single most cost-effective way to cut energy use. Good passive choices can reduce heating loads by 60–90% compared with conventional construction, which then lets small renewable systems cover remaining loads.
Orient and Plan for Solar Gain and Daylighting
- Compact plan and south glazing: Favor a compact form factor with the long axis facing within 15–30° of true south (northern hemisphere). As a guideline, limit south glazing to roughly 15–25% of conditioned floor area to avoid excess heat loss—trade-offs vary by climate.
- Daylighting: Use clerestory windows and light shelves to move daylight deeper into the plan while controlling glare.
- YouTube walkthrough: Watch a passive-orientation walkthrough to visualize window placement and shading decisions: This video explains the fundamentals:
Insulation, Continuous Thermal Enclosure, and Airtightness Targets
- Insulation targets by climate (R-values, ranges):
- Cold climates (IECC zones 6–8): Walls R-24 to R-40, roofs R-50 to R-80, continuous insulation highly recommended.
- Mixed climates (zones 3–5): Walls R-18 to R-30, roofs R-38 to R-60.
- Hot climates (zones 1–2): Focus on roof R-30 to R-50 and reflective assemblies.
- Airtightness: Passive House standard is 0.6 ACH50. For DIY builders, set reachable targets: <1.5–3.0 ACH50 depending on ambition and budget. Use a blower door early and often; sealing big penetrations yields the largest gains.
- Window performance: Aim for U-values of 0.20–0.35 W/m²K (roughly U-0.35 to U-0.20) and look at solar heat gain coefficient (g-value) appropriate to climate—higher g-value for cold climates, lower for hot climates.
- Assemblies and trade-offs: Consider continuous exterior insulation via rigid foam or mineral wool over sheathing, or use double-stud or Larsen truss assemblies to reduce thermal bridging. Double-stud walls offer lower embodied carbon when filled with cellulose but take more depth; Larsen truss supports continuous exterior insulation while keeping structure inside—see our Larsen truss assembly for step-by-step details. Trade-offs are cost, embodied carbon, and buildability—cellulose insulation has lower embodied carbon than spray foam but requires careful moisture management.
- Thermal-bridge details: Seal and insulate rim joists, cantilevers, and window frames. Simple measures—insulating header pockets and using insulated window bucks—reduce heat loss significantly.
- Evidence and lessons: A decade of performance studies shows that well-executed passive design reduces annual space heating by large margins but that performance gaps occur when commissioning and occupant behavior are neglected; see ACEEE’s long-term NZE study for lessons learned.
- Design resources: See passive house floor plans for layout examples and consult our passive house cost breakdown to weigh upgrades.
Step 3: Right-size Heating, Cooling, Ventilation, and Hot Water Systems
After demand reduction, choose systems sized to the new low loads. Oversized HVAC and hot water systems are common errors that reduce efficiency and increase first cost.
Do a Simple Heat-loss/heat-gain Calculation
- Quick rules of thumb: For modestly insulated low-load homes, heating load often falls to 10–30 W/m² in cold climates; use area times a conservative per-square-meter load as a first estimate. When in doubt, hire a pro for Manual J calculations for accurate sizing.
- When to get a pro: If your design includes multiple zones, large open volumes, or solar gains that change the load profile, commission a Manual J and Manual D to size equipment and ducts correctly.
Choose High-efficiency Heat Pumps and Hot Water Systems
- Heat pump targets: Look for heat pumps with COP 3.5–4.5 at rated conditions and cold-climate models that maintain performance at low outdoor temps. Air-source heat pumps with HSPF 9+ (or cold-climate models) are a good baseline; ground-source heat pumps have higher upfront cost but can be more stable in very cold climates.
- Hot water: Consider heat pump water heaters (COP 2.5–3.5) or combining water heating with space heating in a hybrid system. Tankless electric resistance for backup is usually a poor return.
Design Balanced Ventilation: HRV vs ERV and Duct Layout
- HRV vs ERV: Use an HRV (heat recovery ventilator) in cold, dry climates for higher sensible recovery. Use an ERV (energy recovery ventilator) in mixed-humid climates to transfer moisture and reduce dehumidification load. See our balanced ventilation guide for duct layout and commissioning tips.
- Duct and distribution: Keep ducts inside conditioned envelope. A compact layout with short runs reduces fan power and leakage.
Controls, Zoning, and Commissioning
- Controls: Use simple thermostatic zoning with setback schedules and outdoor reset for hydronic systems. Avoid overspecifying controls; good native staging in modern heat pumps often suffices.
- Commissioning checks: Verify airflow for HRV/ERV, measure duct leakage, set heat pump refrigerant and charge per manufacturer instructions, and confirm water heater setpoints. Simple commissioning yields large performance benefits.
- Performance gains: Pairing passive design with a properly sized heat pump commonly reduces heating energy by 50–80% relative to electric resistance heating in retrofit and new-build cases. For more system-level advice see BriteHomes’ overview of net-zero elements.
Step 4: Design Your Renewable Energy and Storage Plan
Size PV and battery storage to match the expected annual energy use and your grid preference (grid-tied, net metering, or off-grid).
Estimate Annual Energy Use and Translate to PV Size
- Step-by-step method:
- Estimate annual kWh from Step 1 and Step 3 (example: 6,000 kWh/year).
- Divide by local solar yield (kWh produced per kW installed per year).
- Sample yields: Typical yields vary: 900 kWh/kW-year (cloudy northern climates) to 1,600 kWh/kW-year (sunny temperate areas). Using 1,200 kWh/kW-year, a 5 kW system yields ~6,000 kWh/year.
- Tool: Use PVWatts or local installers’ yield estimates for accuracy.
Decide Grid-tied, Net Metering, or Off-grid with Batteries
- Grid-tied with net metering: Best for most DIY builders—simpler, lower capital cost, and allows exporting excess production. Understand local policies; our net metering primer explains implications for sizing and economics (/blog/net-metering-selling-solar-back-to-grid).
- Off-grid: Requires larger batteries and backup generation. For guidance on fully off-grid systems, consult the off-grid solar design guide.
- Phasing strategy: It’s common to design the roof and electrical layout for future PV expansion and install panels in phases. Phasing is acceptable if the final installed system will meet the annual net zero target once expanded.
Select Inverter, Battery, and Components
- Inverter sizing: Small homes often use 5–15 kW inverters; pick an inverter that matches array voltage and backup needs. For backup, select an inverter with a built-in transfer switch.
- Battery sizing: For short outages, 5–20 kWh provides day-length backup; for multi-day autonomy increase battery bank proportionally. Balance battery cost against the value of uninterrupted power. A common strategy is to size PV to cover annual energy and add a small battery bank (5–10 kWh) for critical loads.
- Monitoring: Include a production and consumption meter for performance tracking. Monitoring helps validate assumptions and improve occupant behavior; see our monitoring guide for metrics and tools (monitoring and energy tracking).
Examples and References
- Sizing examples: For a tiny home, see the 10 kW tiny house guide and the 2 kW sizing example to scale expectations.
- Policy overview: Review net metering policies to decide whether to size a system to daytime load only or to produce a net annual surplus; our primer on net metering basics covers trade-offs.
Step 5: Choose Low-embodied, Durable Materials and Construct Details
Net zero performance must balance operational savings with embodied carbon and durability. Select materials that last and match your climate needs.
Compare Insulation Options by Performance and Carbon
- Spray foam: High R-value per inch and good air-seal but higher embodied carbon and cost. Use selectively for rim joists or tight cavities.
- Cellulose: Good thermal performance, low embodied carbon, and lower cost. Requires proper installation density to avoid settling.
- Mineral wool: Non-combustible, good vapor performance, and moderate embodied carbon.
- More detail: See our full comparison in insulation pros and cons.
Select Wall Systems: Advanced Framing, Larsen Truss, or Mass Options
- Advanced framing: Reduces lumber use and thermal bridging; works well with cavity-plus-exterior CI.
- Larsen truss: Enables continuous exterior insulation and a service cavity inside the structure—see the Larsen truss assembly for construction steps.
- Mass walls (rammed earth, masonry): Offer thermal mass and low operational energy in some climates. For readers considering mass options consult our rammed earth options.
- Trade-offs: Mass walls can reduce heating/cooling swings but carry high embodied carbon in cement-based elements unless low-carbon mixes or recycled aggregates are used. For foundations and hardscapes, consider recycled aggregate concrete mixes to reduce embodied emissions.
Finish Materials, Moisture Management, and Longevity
- Moisture control: Use capillary breaks, drainage planes, and proper flashing details. Vapor control should be climate appropriate—vapor-open layers toward the exterior in most climates.
- Lifecycle thinking: Prioritize materials with a long service life and easy maintainability. Durable claddings and accessible service cavities reduce lifecycle costs and the risk of premature retrofit.
- Product guidance: For product recommendations and low-embodied choices see the sustainable materials guide.
Step 6: Prepare Construction, Commissioning, and Monitoring Plans
A written plan for construction sequencing, testing, and long-term monitoring prevents the common performance gap between model and reality.
Create a Construction Checklist and Airtightness Test Plan
- Checklist items: Install continuous insulation, complete air barrier before service rough-ins, tape and seal all penetrations, and document flashing. Schedule a blower door test after air-barrier completion and again before final cladding for verification.
- Testing targets: Set an interim blower door goal (e.g., <3.0 ACH50) early on and a final target (e.g., <1.5 ACH50). Include duct leakage testing and HRV/ERV airflow verification.
Commission HVAC, PV, and Ventilation Systems
- HVAC commissioning: Confirm heat pump staging, refrigerant charge, and airflow. Check thermostat placement and program schedules.
- PV commissioning: Verify inverter commissioning, array orientation, string voltages, and rapid shutdown compliance. Confirm interconnection paperwork is filed.
- Battery safety: Ensure proper ventilation, thermal management, and labelled disconnects for emergency responders.
Set Up Long-term Monitoring and Occupant Guidance
- Monitoring metrics: Track daily kWh produced, daily kWh consumed, indoor temperatures, and indoor humidity. Use cloud-based monitoring or local data loggers.
- Occupant guidance: Provide a short manual: how to operate the HRV/ERV, where to find breaker and PV disconnects, recommended thermostat setpoints, and routine maintenance like filter changes and shading management.
- Incentives and permits: Document commissioning reports for incentive programs and code compliance. For off-grid permitting and paperwork, see our permitting checklist for remote projects (/blog/building-permit-guide-requirements-for-off-grid-homes-in-canada).
- Water systems: If integrating rainwater or greywater, link the commissioning and maintenance schedule to the rainwater system plan (see rainwater system how-to).
Step 7: Common Mistakes and Troubleshooting
Recognize frequent errors early and apply practical fixes. A few focused corrections often restore performance.
Top Design and Construction Errors to Avoid
- Underestimating infiltration and ignoring thermal bridges.
- Oversizing PV or HVAC without accurate load numbers.
- Poor ventilation leading to moisture or indoor air-quality problems.
- Choosing materials without considering maintenance or local durability.
Quick Fixes During Building and Early Operation
- Seal large leaks first: Use blower-door-driven smoke tests to locate and seal obvious leaks around penetrations.
- Trim shading: Remove or prune vegetation causing winter shading on PV and south glazing.
- Adjust controls: If a heat pump cycles frequently, reduce deadband or improve thermostat placement; short cycles often mean oversized equipment.
- Verify ventilation flows: Adjust HRV/ERV fans to designed CFM and rebalance supply/return where necessary.
When to Call in Specialized Testing or Consultants
- Persistent condensation on windows or interior surfaces.
- Blower door results above your design target after sealing attempts (>3.0 ACH50 for tight-build goals).
- Significant electrical or structural issues for PV or battery installations.
- If performance is substantially below modeled expectations during the first year—hire a building performance specialist for a diagnostic review.
The Bottom Line
Designing net zero homes starts with measurable targets and demand reduction: aim for low annual energy use (<30 kWh/m²-year), apply passive design strategies, then right-size efficient heat pumps and PV. Prioritize airtight continuous insulation, balanced ventilation, and a monitoring plan so you verify that the design performs as intended.
Frequently Asked Questions
[How do](https://britehomes.com/blog/how-to-build-net-zero-home/) I know if my design target is realistic?
Set a numeric annual energy target in kWh (or kWh/m²-year) and compare it to case studies in similar climates. Use a simple energy model or rules-of-thumb—small-family targets under 30 kWh/m²-year are realistic in many temperate locations if passive measures are applied. Validate assumptions with an early blower-door test and a preliminary load estimate; if numbers diverge, tighten the envelope before increasing PV capacity.
Standards and guidance like the NIST NZE handbook provide integrated methods to assess feasibility and trade-offs: [Specialpublications](https://nvlpubs.nist.gov/nistpubs/SpecialPublications/NIST.SP.1140.pdf).
What if my PV output is lower than expected?
First, confirm array orientation, tilt, and shading with an on-site inspection and inverter production logs. Compare actual kWh/kW-year to local yield estimates—yields can range 900–1,600 kWh/kW-year depending on climate. If output is low due to shading, trim vegetation or reposition panels. If the shortfall persists, adjust consumption (setback schedules, lighting upgrades) and consider adding panels later; phasing is an accepted strategy. See our net metering primer to assess whether exporting less and optimizing load timing is sufficient (/blog/net-metering-selling-solar-back-to-grid).
How tight should my house be for a DIY net zero project?
Aim for the tightest practical envelope for your skill level: many successful DIY net zero builds target 1.5–3.0 ACH50. Passive House-level airtightness (0.6 ACH50) is achievable but requires meticulous detailing and testing. Use staged blower-door tests to find and fix leaks as you go; prioritize big penetrations and service entries first. Balanced ventilation (HRV/ERV) is essential when you reduce infiltration so you maintain indoor air quality.
Can I phase renewables and still call the project net zero?
Phasing is common. Design the roof, electrical service, and conduit with future expansion in mind, then install PV in stages. You can only claim net zero once annual production equals or exceeds annual consumption over a 12-month period. In practice, document the final PV size and monitored annual performance before using the net zero label. For off-grid designs, plan battery and inverter capacity to accept later battery additions; our off-grid solar guide covers phasing details (/blog/designing-off-grid-solar-system-guide).