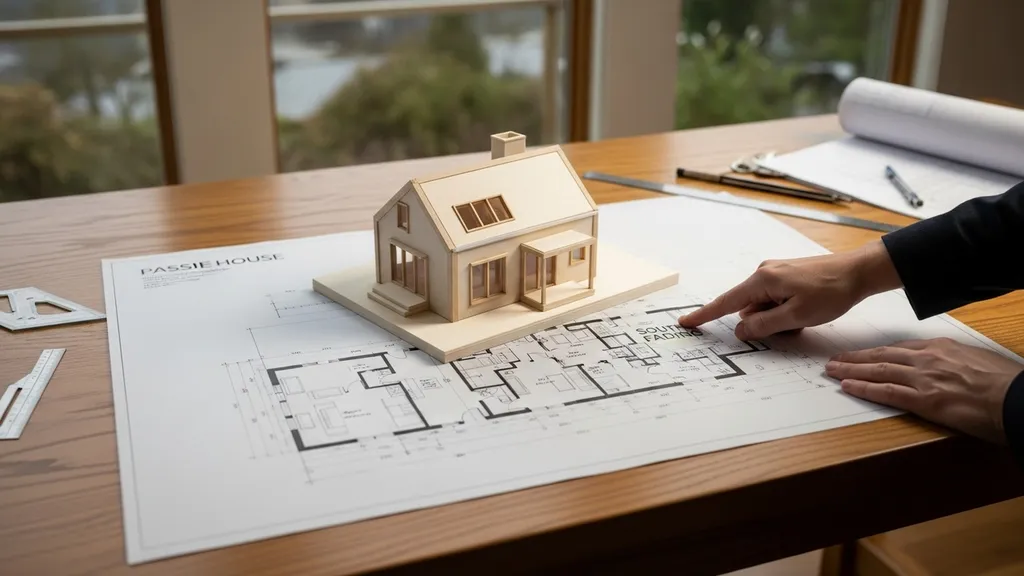
20 passive house floor plans that balance efficiency, layout, and buildability — plus planning tips, comparison table, and a DIY checklist.
Passive House Floor Plans: 20 Designs That Work
Passive house floor plans give DIY self-builders a clear path to low-energy homes: they guide glazing placement, room layout, and mechanical routing so you spend less on heating, cooling, and retrofit work. This guide walks through how to read passive house floor plans, presents 20 practical plan types (from tiny cabins to multi-gen houses), and shows how to match a plan to site, envelope, and mechanical systems. You’ll learn layout rules that affect daylight, thermal performance, and buildability, plus checklists and tables you can use when choosing or adapting a plan.
TL;DR:
- Choose compact passive house floor plans with a conditioned area under 60% exterior-surface-to-volume ratio for easier insulation and airtightness.
- Place living spaces on the south-facing long axis, cluster wet rooms in a central service core, and reserve a compact mechanical room to shorten duct and pipe runs.
- Use the printable checklist to verify solar access, glazing ratios (20–45% on living façades), and continuous air-barrier strategies before committing to a plan.
How to Read Passive House Floor Plans: Layout Principles That Work
The short answer: scan for compactness, orientation, and glazing balance first. When assessing any drawing, these three signals tell you whether a plan is inherently easy or expensive to make high-performance.
Key definitions:
- Compactness: surface-area-to-volume ratio of the conditioned envelope. Lower ratios (more compact shapes) reduce heat loss and thermal-bridge exposure.
- Window-to-wall ratio (WWR): percent of facade area that is glazed. For living façades in many passive designs the practical range is 20–45% to balance daylight with overheating risk.
- PHPP inputs: Passive House Planning Package uses plan geometry, glazing areas, orientation, and ventilation heat recovery parameters as primary inputs.
What to Look for at a Glance:
- South-facing long axis with most glazing; minimized north glazing.
- Continuous service core (kitchen, baths, mechanical room) stacked or centrally located to reduce plumbing and ventilation runs.
- Compact stair placement in multi-level designs; stairs that don’t create long conditioned corridors.
Key Symbols and Annotations:
- Check the airtightness notes and air-barrier lines. For practical air-sealing methods, see our airtightness guide.
- Look for dashed lines showing roof overhangs and shading devices; these affect solar gains.
- Pay attention to window labels (U-values, SHGC) when present — they indicate intent to control heat loss and heat gain.
Translating Plan Lines Into Thermal and Daylight Performance:
- A plan with a deep plan (more than ~6–8 m from glazing to rear wall) will need careful daylight and heat-distribution strategies.
- If living spaces are narrow and face south, expect better passive solar performance and simpler PHPP inputs.
- Plans showing exterior corners, L-shapes, or multiple projections increase linear thermal-bridge length and demand targeted detailing.
For practical guidance on air-sealing techniques shown in details, consult our best air-sealing materials and industry sources such as Ecohome’s passive-house overview for cost and build technique comparisons (How to Build a Passive House on a Budget).
20 Passive House Floor Plans That Work — Quick Gallery and Grouping
This gallery groups 20 plan summaries into four categories. Each entry includes conditioned area ranges, typical footprint, best-fit climate, orientation tip, and why the layout works.
Tiny and Micro Designs (5 Plans)
- Tiny North-Facing 1BR — 350–700 ft², 18–24 ft footprint, best for temperate climates with sunny south exposure; works because of compact footprint and south-facing living wall.
- Micro South Studio — 250–450 ft², 12–18 ft width, ideal for rural or alpine lots; open plan with loft to minimize conditioned envelope.
- Tiny Cabin with Porch — 400–600 ft², rectangular 14×28 ft, suits cold climates with strong passive solar gain; porch acts as thermal buffer.
- Tiny Off-Grid 1BR — 300–500 ft², narrow 12×25 ft, for remote lots; simple roof plane for solar panels and easy PV alignment.
- Micro Courtyard Cabin — 350–650 ft², U-shaped mini-courtyard, best for mild climates; sheltered south courtyard improves daylight without much glazing.
Small Family Homes (7 Plans)
- Compact 2BR Ranch — 800–1,200 ft², single-story rectangle, suitable for cold and temperate climates; living core faces south.
- Narrow-Lot Passive 3BR — 900–1,300 ft², skinny footprint for urban lots; stacked service core at one end reduces runs.
- Two-Story Compact 3BR — 1,000–1,400 ft², two-story box, for mixed climates; second floor bedrooms on the north side.
- Passive Solar Bungalow — 1,000–1,600 ft², shallow-plan bungalow, great for solar access on wide lots.
- Duplex-ready Small House — 1,000–1,600 ft² per unit, shared central service core, fits multi-family or rental use.
- South-Facing Open Plan — 950–1,500 ft², wide living area with light-shelf-ready glazing; good for temperate climates.
- Garden-to-Home 2BR — 850–1,200 ft², L-shape with protected courtyard; reduces wind exposure on cold sites.
Larger Family and Multi-generation Layouts (4 Plans)
- Two-Story Family Box — 1,600–2,200 ft², compact two-story rectangle, fits colder climates with minimal facade complexity.
- Multi-Gen Split — 1,800–2,500 ft², two-zone plan with separate suite, for suburban lots; shared mechanical core simplifies servicing.
- Long House 4BR — 1,800–2,400 ft², elongated south-facing plan, best on deep sites with clear southern exposure.
- Staircore-Centered 4BR — 1,900–2,600 ft², central stair + mechanical core, efficient vertical service routing.
Retrofit-friendly and Addition Plans (4 Plans)
- Retrofit Envelope Overbuild — 1,000–2,000 ft², works on existing rectangles by adding exterior insulation and south glazing shifts.
- Addition-as-Buffer — 600–1,200 ft², small addition used as thermal buffer and foyer for northern exposure.
- Basement-to-Living Conversion — varies, uses basement as conditioned thermal mass or mechanical space.
- Garage-to-Suite Retrofit — 500–900 ft², converts garage footprint with added insulation and south glazing.
Comparison/specs table for the 20 plans
| Plan type | Conditioned area (ft²) | Suggested glazing ratio | Best climate | DIY difficulty |
|---|---|---|---|---|
| Tiny North-Facing 1BR | 350–700 | 20–35% | Temperate | High |
| Micro South Studio | 250–450 | 30–45% | Alpine, temperate | High |
| Tiny Cabin with Porch | 400–600 | 25–40% | Cold | Medium |
| Tiny Off-Grid 1BR | 300–500 | 20–35% | Remote/mixed | High |
| Micro Courtyard Cabin | 350–650 | 30–45% | Mild | High |
| Compact 2BR Ranch | 800–1,200 | 25–40% | Cold/temperate | Medium |
| Narrow-Lot Passive 3BR | 900–1,300 | 20–35% | Urban/mixed | Medium |
| Two-Story Compact 3BR | 1,000–1,400 | 20–35% | Mixed | Medium |
| Passive Solar Bungalow | 1,000–1,600 | 30–45% | Temperate | Medium |
| Duplex-ready Small House | 1,000–1,600 | 20–35% | Urban | Low–Medium |
| South-Facing Open Plan | 950–1,500 | 30–45% | Temperate | Medium |
| Garden-to-Home 2BR | 850–1,200 | 25–40% | Mild | Medium |
| Two-Story Family Box | 1,600–2,200 | 20–30% | Cold | Low–Medium |
| Multi-Gen Split | 1,800–2,500 | 20–35% | Suburban | Low |
| Long House 4BR | 1,800–2,400 | 25–40% | Sunny deep sites | Medium |
| Staircore-Centered 4BR | 1,900–2,600 | 20–30% | Mixed | Low |
| Retrofit Envelope Overbuild | Varies | 20–40% | All | Medium |
| Addition-as-Buffer | Varies | 10–30% | Cold/mixed | Medium |
| Basement-to-Living Conversion | Varies | 0–25% | Cold | Medium |
| Garage-to-Suite Retrofit | 500–900 | 10–30% | Suburban | High |
For a technical perspective on Passive House requirements and mechanical expectations, Buildingscience provides a strong overview of the Passive House standard and HVAC implications (BSD-025: the passive house standard).
(Secondary keywords used in this section: passive house plans, small passive house designs)
Designing Passive House Floor Plans for Passive Solar Performance
Orientation is the single most important design decision tied to floor plans. A properly oriented plan can reduce heating energy by large fractions in cold climates and cut mechanical loads in temperate climates.
Orienting the Plan
- Place the long axis of living spaces to face within ±20° of true south where possible.
- Reduce glazing on the north façade; use smaller or high-performance windows there.
- Design overhangs sized for summer shading while allowing winter sun; shading offset lines are often shown on plans.
Site and street relationships
- If the lot forces a street-facing long façade, consider using clerestory glazing or light shelves to borrow daylight without large south glazing on the street side. For deep lots with usable south yards, push living rooms toward the south edge.
Room-by-room Placement
- Cluster kitchens, bathrooms, and utility rooms in a compact service core on the north side or in the center. That creates a continuous buffer and cuts plumbing/ventilation distances.
- Place bedrooms to the north or east to reduce overheating and take advantage of morning light.
- Use light shelves, high transom glazing, or interior glazing to distribute daylight from the south living wall into deeper plan areas. See our guide to light-shelf strategies for details.
Example comparison (qualitative)
- The same 1,200 ft² program laid out as a north-south oriented rectangle with a south-facing living room will have more usable daylight, simpler shading, and lower heating demand than the same program arranged east-west which requires more glazing on multiple façades and more complicated shading. The California Public Utilities Commission report on passive-house grid benefits discusses orientation and systemic energy effects on building stock (Grid benefits of passive houses).
Recommendation
- Use PHPP or a qualified passive-house designer to finalize glazing sizes and thermal gains; early-stage rules of thumb are helpful but not sufficient for certification or precise sizing.
(Internal link used: window orientation basics)
Space-planning Tips Within Passive House Floor Plans: Circulation, Zoning, and Multi-use Rooms
Good circulation reduces wasted floor area and lowers heat loss. Floor plans that prioritize compact movement paths will be easier to insulate and seal.
Circulation That Reduces Heat Loss
- Minimize long internal corridors that increase conditioned area and create more wall surface.
- Use a small entry vestibule or mudroom as a thermal buffer between outdoors and the living core.
- Position secondary external doors (garages, utility exits) away from main living façades to limit infiltration risk.
Zoning for Comfort
- Group bedrooms on a cooler side of the plan and keep living/dining where passive solar gains are highest.
- Use interior doors and insulated partitions to create temporary heating zones for night-time setback.
- Consider using interior thermal mass (tiled floors, concrete slab) aligned with south glazing to smooth daily temperature swings.
Designing Multifunction Rooms
- In tiny and small plans, design rooms to serve multiple functions: a guest bed that folds into storage, a study that converts to a nursery, or a living room with a demountable partition for occasional privacy.
- Lofts can increase usable area without increasing exterior surface area, but pay attention to staircase compactness and roof insulation continuity.
Basement and mechanical location impact
- Conditioning a basement moves the mechanical rooms to a convenient central location and adds thermal mass. For basement-specific considerations see basement finishing for energy efficiency.
For broader passive-house planning concepts and room placement guidance, see the Northeast Energy Efficiency Partnerships' resource on Passive House design (Guide to passive house).
Envelope, Thermal-bridge, and Foundation Choices Tied to Floor Plans
Your floor plan footprint determines how many corners and junctions you must detail — and those details control thermal bridging and airtightness.
How footprint determines thermal-bridge exposure
- Rectilinear floorplates in compact boxes have fewer linear junctions per square foot and are easiest to detail for continuous insulation.
- L-shapes, U-shapes, and multiple projections increase junction length and the number of foundations and roof tie-ins to detail.
Foundation and Slab Choices
- For compact tiny houses, an insulated slab-on-grade with perimeter insulation or a raised pier system with insulated floor panels can work well.
- Larger footprints often need traditional footings and basements; insulating the slab edge and providing a continuous insulation layer above the foundation wall reduces thermal bridging.
Comparing Wall Assemblies
- Double-stud walls provide thick cavity insulation with interior vapor control and are friendly to DIY builders who want to avoid structural exterior cladding changes.
- Exterior continuous insulation (CI) with sheathing-first assemblies reduce cold studs but may be more complex for flashing and detailing.
- For a side-by-side analysis of these methods, see our comparison: larsen truss vs exterior insulation and double-stud vs 2x6 walls.
Roof and lofts
- Simple rooflines reduce the number of rafter-to-wall junctions and are cheaper to insulate effectively. For strategies on attic and roof systems, see cabin roof insulation methods.
Practical guidance
- Match the wall assembly to the plan type and climate. In cold climates, prioritize exterior CI or very high cavity R-values; in mixed climates, careful vapor management and balanced assemblies matter more.
(External link embedded: Wilson Architectural Design resource on passive house principles (The five principles of passive house))
Mechanical Layouts and Ventilation Planning for Passive House Floor Plans
Reserve plan area early for mechanical services. A compact service core saves money and preserves performance.
Placing HRV/ERV, Ducts, and Service Cores
- Plan a central mechanical space near the kitchen and bathrooms so duct and pipe runs are short. A central HRV/ERV with short radial ducts is common for single-story layouts.
- For two-story homes, place the unit on an intermediate floor or in a conditioned attic with short distribution paths.
- For system choice details, refer to our comparison of ERV vs HRV.
Hot water and heating placement
- Locate hot water cylinders and heat sources close to the largest group of fixtures to reduce standby losses and pipe length.
- Consider on-demand recirculation or insulated short-loop systems; see hot water recirculation systems for routing tips.
Off-grid and hybrid considerations
- For off-grid or remote builds, plan for combined mechanical stacks and clustered services that allow simple heat and power routing. Our article on DIY ventilation options can help with low-power ventilation strategies.
- For larger passive homes considering ground source systems, reserve exterior space and trenching paths early; background on these systems is in ground source heat pump basics.
Practical layout rules of thumb
- Single-story: central HRV with 3–8 short ducts per floor quadrant, supply to living rooms and bedrooms, return from wet rooms.
- Two-story: place ducts and vertical runs near the staircore to consolidate penetrations.
- Always detail airtight penetrations where ducts pass through the air barrier.
(External link embedded: Australian government resource on passive design guidance and ventilation (Passive house))
Cost and Footprint Comparisons: Choosing the Right Passive House Floor Plan
Choosing a plan means balancing initial build complexity with long-term energy costs. Simpler shapes save on envelope costs.
Spec table: footprint, complexity, and DIY friendliness
| Plan category | Conditioned area | Framing/envelope complexity | DIY buildability score | Layout notes |
|---|---|---|---|---|
| Tiny | 250–700 ft² | Low–medium | High | Simple roofs, compact walls |
| Small | 800–1,600 ft² | Medium | Medium | May require skilled trades |
| Medium | 1,600–2,200 ft² | Medium–high | Low–Medium | Increased ducting and foundations |
| Large | 1,800–2,600 ft² | High | Low | Consider hiring mechanical designers |
When Bigger is Cheaper Per Square Foot
- Bigger homes can spread fixed costs (foundation, utilities) over more square feet. But complexity grows with non-rectilinear forms and roof intersections — both raise thermal-bridge and detailing costs.
Budget-saving Layout Choices That Preserve Performance
- Simplify rooflines and maintain rectilinear shapes where possible.
- Reduce window area on the north façade rather than the south.
- Centralize service cores and keep a small, dedicated mechanical room.
- Choose wall assemblies that match your skillset — double-stud walls are more forgiving for DIYers than some CI details.
Match roof orientation to PV plans
- When planning roof-mounted solar, align the simple roof plane to the preferred PV azimuth. For help selecting PV options that match your roof, see choosing solar panels for roofs.
Choosing or Adapting a Plan: a DIY-friendly Checklist
This section has a short walkthrough video suggestion and a printable checklist you can use when choosing or adapting a plan. The video highlights small passive-house plan tours and demonstrates glazing placement, service core location, and mechanical siting.
For a visual demonstration, check out this video on tiny passive house tour:
Site and Orientation Checklist Items
- Verify southern solar access across seasons.
- Confirm lot slope and prevailing winds.
- Check setbacks and local tree cover that affect shading.
- Note street orientation and driveway placement relative to the desired south façade.
Plan Adaptation Checklist for Retrofit or Unusual Lots
- Confirm the compactness metric before expanding irregularly shaped additions.
- Plan buffering zones (mudroom, enclosed porch) when north façades face road noise or wind.
- Evaluate moving wet rooms closer to existing plumbing stacks to reduce retrofit cost. See our retrofit checklist for stepwise actions.
Permits, Codes, and When to Bring a Passive-house Pro
- Review local building codes, IECC or equivalent energy codes, and passive-house certification requirements if you plan to certify.
- Bring a certified PHIUS/Passive House Institute professional for PHPP modeling, airtightness strategy validation, or complex mechanical designs.
- Use the checklist above to narrow plans before spending on professional modeling.
Real-world Adaptations: Retrofits and Tiny-house Conversions of Passive House Floor Plans
For existing homes, floor-plan-level changes can unlock big efficiency gains without a full rebuild.
Turning an Existing Layout Into a High-performance Passive Plan
- Add continuous exterior insulation where possible to reduce thermal bridging at studs.
- Shift major glazing to the south elevation if the lot allows or add south-facing additions.
- Reconfigure internal circulation to create a service core and reduce corridor heating loads.
Tiny-house Tips
- Keep the footprint narrow to minimize exposed envelope per floor area.
- Use lofts for sleeping to avoid increasing the exterior wall area.
- Design multifunctional furniture and storage to limit the conditioned volume required.
Examples (hypothetical)
- A 1,200 ft² bungalow with a 300 ft² south-glazed sunroom addition that becomes the living core will often see better daylight and reduced perimeter heat loss than a retrofit that only replaces windows.
- Converting a garage to a suite works if you add insulation to the slab edge and garage door opening and tie the mechanical to the main house or create an independent compact mechanical stack.
For step-by-step retrofit procedures, refer to our DIY passive-house retrofit guide (DIY passive house retrofit) and tiny-house electrical options for off-grid systems (tiny house electrical options).
The Bottom Line
Passive house floor plans that work follow four simple principles: compactness, correct orientation, a continuous service core, and an envelope matched to climate and plan shape. Pick the plan type that fits your site and DIY skill, use the checklist before committing, and bring PHPP or a certified designer into the process for final sizing and certification considerations.
Frequently Asked Questions
What is the difference between passive house plans and passive solar floor plans?
Passive house plans emphasize a tight, well-insulated envelope, controlled ventilation (HRV/ERV), and quantified performance using PHPP or similar tools. Passive solar floor plans prioritize solar orientation and glazing to collect heat and daylight. The two overlap: effective passive-house designs incorporate passive solar strategies but also add stringent airtightness and mechanical ventilation requirements. For mechanical ventilation choices, see our comparison of ERV vs HRV.
How do I choose the right glazing ratio for my plan?
Use 20–45% glazing on living façades as a starting guideline; colder climates tend toward the lower end to limit heat loss, while temperate climates can use higher ratios with shading controls. The final WWR should be determined with PHPP or a qualified designer to balance daylight, solar gains, and overheating risk. See the orientation section above and consult detailed modeling for precise values.
Can I adapt an existing plan to passive-house standards?
Yes. Typical adaptations include adding continuous insulation, reducing north glazing, creating a compact service core, and improving airtightness details around penetrations. Deeper retrofits can add exterior CI or a thermal envelope 'wrap'. For a stepwise approach, see our DIY passive house retrofit.
Where should I place the HRV/ERV in a single-story passive house?
Place the HRV/ERV in a compact mechanical room near the center of the plan, ideally close to the kitchen and bathrooms to minimize duct runs. Short, radial ducts to bedrooms and living spaces reduce pressure drop and complexity. For DIY off-grid options and routing tips, read our DIY ventilation options.
What plan features increase build costs most for passive designs?
Complex rooflines, irregular footprints (L- or U-shapes), and extensive glazing on multiple façades raise detailing costs and thermal-bridge mitigation work. Simpler, rectilinear plans with a single dominant south-facing living wall typically cost less to make high-performance. For envelope strategy comparisons, see larsen truss vs exterior insulation and double-stud vs 2x6 walls.