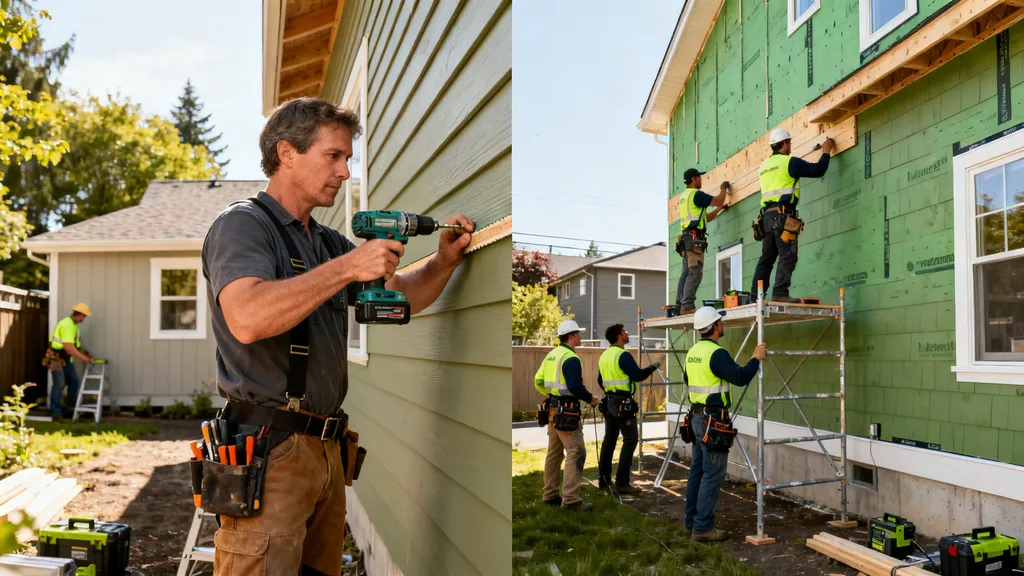
A practical cost-comparison guide to help budget-conscious self-builders decide when DIY saves money and when contractors are worth it.
DIY vs Contractor: Cost Savings Analysis
Choosing between DIY, hiring a general contractor, or a hybrid owner‑builder approach can change a self‑build budget by tens of thousands of dollars. This article compares "DIY vs contractor" costs, hidden expenses, and risk trade‑offs so budget‑conscious DIY homebuilders can make clearer decisions. Readers will learn which tasks typically produce real dollar savings when done by an owner, which trades almost always justify licensed pros, and a simple worksheet to compare bids and time value.
TL;DR:
- DIY can save 15–35% on labor-heavy finishes for small projects, but mistakes on structural, electrical, or plumbing work can add 20–100% in rework costs.
- Use a line‑item worksheet and calculate a break‑even labor rate: if your hourly opportunity cost is less than the contractor’s blended labor rate (often $50–$120/hr local trade rate + GC markup), DIY can be worth it.
- For code‑critical systems (electrical, HVAC sizing/manual J, gas, structural foundations), hire licensed trades or a GC; for painting, insulation, trim, and weatherstripping, doing it yourself usually saves money.
DIY vs Contractor: Quick Overview and Why This Comparison Matters
What This Article Compares
This guide compares three routes: full DIY (owner does most physical work and manages permits), hiring a general contractor (GC) to deliver a turn‑key project, and hybrid owner‑builder + subcontractors. It focuses on the main cost drivers: labor, material markup, permits and inspections, tool and equipment costs, time/opportunity cost, mistakes and rework, warranties, and financing. Regional wage and code differences change the equation, so readers should cross‑check local trade rates and permit fees with their building department.
Research and industry guides show the biggest DIY savings occur where labor makes up the largest share of cost and tasks are repetitive: painting, drywall finishing, flooring, and siding. On the other hand, specialized work—electrical, gas, HVAC, structural foundations—has high technical and code risk; hiring pros often reduces overall cost by avoiding rework, delays, or failed inspections. For additional context on homeowner vs GC tradeoffs, see this detailed homeowner guide comparing contractor vs DIY line items.
Who Benefits From Each Approach
- Owner‑builders with time, basic carpentry skills, and willingness to learn: benefit most from a hybrid approach, taking on non‑technical tasks and managing subcontractors.
- Owners with limited time, high project complexity, or certification goals (Passive House, LEED, net‑zero): generally better off hiring a GC or certified specialists.
- Small, focused projects or tiny houses: pure DIY can be efficient if the owner anticipates a long learning curve and modest complexity.
DIY vs Contractor: Side‑by‑side Cost Comparison (table)
Table: Core Cost Categories — DIY | Contractor | Hybrid
| Cost category | DIY | Contractor | Hybrid |
|---|---|---|---|
| Labor cost | Low to Medium (owner hours) | High (market rates + overhead) | Medium (owner + subcontractor hours) |
| Material markup | Low (retail) to Medium (no trade discounts) | Medium to High (supplier markups) | Medium (owner sources, subs use trade accounts) |
| Permits & inspections | Medium (owner files, risk of errors) | Low (GC handles) | Medium (owner coordinates subs) |
| Tools & equipment | Medium (buy/rent) | Low (included in bid) | Medium (rent for phases) |
| Time / opportunity cost | High (owner time) | Low | Medium |
| Warranty / liability | Low (limited) | High (contractor warranty & insurance) | Medium (sub warranties) |
| Quality risk | High (learning curve) | Low | Medium |
| Project duration | Long | Short | Medium |
Example numeric scenario (1,000 ft² remodel — illustrative only):
- DIY: Materials $30k, owner labor valued $20k (1,000 hours @ $20/hr), tools/rentals $2k — total ~$52k
- Contractor: Materials $32k (markup), labor/subs $35k, GC overhead $8k — total ~$75k
- Hybrid: Materials $31k, owner labor $8k, subs $20k — total ~$59k
How to read the table for your project: treat the example as a starting point. Swap local trade hourly rates, permit fees, and your own time value. For energy‑system specific comparisons, use tools like the site's solar cost calculators for DIY projects to estimate system costs under DIY vs installer quotes. Also see an impartial how‑to primer on project decision points in this complete DIY vs contractor guide.
Before the next section: watch this short video to see a line‑item bid comparison and owner‑builder cost walkthrough. The clip highlights scheduling differences and common surprises owners miss.
Check out these helpful tips and techniques:
DIY vs Contractor: the DIY Option — Realistic Cost Breakdown, Strengths, Weaknesses
Overview of the DIY Approach
DIY means the owner sources materials, performs tasks, obtains permits (if required), and schedules inspections. This route transfers time, coordination burden, and liability to the owner while reducing paid labor. Typical DIY tasks that produce savings include demolition, painting, insulation installation, drywall finishing, trim, simple carpentry, and landscaping.
Typical Cost Savings and Where They Come From
Savings stem from avoiding professional labor rates and contractor overhead. Example: drywall finishing by a pro may cost $1.50–$3.50/ft² installed; a determined DIYer with one weekend per wall can reduce labor to the value of personal time and a few tool rentals. Bulk material sourcing and strategic rentals (scaffolding, plaster tools) also cut costs. For solar DIYers, the savings vary—see the site's DIY solar installation guide for tradeoffs.
Common Hidden Costs and Risks
Hidden costs often erode perceived savings: permit delays, failed inspections, disposal fees, tool purchases, and learning‑curve rework. Track receipts and time closely. Our hidden DIY costs article lists the usual surprises: permit amendments, dumpster rentals, and specialty waste disposal. Small mistakes on structural framing can create large downstream expenses; likewise a missed electrical code detail can require a licensed rewire. Handy finish tasks like drywall can save money if you follow professional drywall finishing tips, while off‑grid subsystems like battery enclosures can be DIYed with the right safety and code knowledge—see the DIY battery enclosure guide.
Scale matters: a tiny house or single‑room retrofit has lower stakes for DIY. A full‑size passive‑house build amplifies risks—rework on airtightness or incorrect HVAC sizing will be costly.
DIY vs Contractor: Hiring a General Contractor — Cost Breakdown, Strengths, Weaknesses
What a General Contractor Covers
A GC typically manages permits, trade subcontractors, scheduling, inspections, procurement, and overall liability. Their bid usually includes overhead, profit margin, contingency, and material markups. That single point of responsibility reduces coordination burden and risks for the owner.
How GC Pricing is Structured (markup, Management Fees)
GCs either price as a lump‑sum or a cost‑plus contract. Cost components include subcontractor trade rates (framing, electrical, plumbing), GC overhead (office, insurance), material markup (5–20%), and contingency (5–15%). For specialized construction—ICF foundations, complex insulation systems—GCs often secure specialty subs and pass on premium rates. For context on foundation types that generally favor pros, see the ICF foundation basics.
Statistics indicate professional crews complete projects faster; faster completion can reduce financing and temporary housing costs. Industry blogs summarizing contractor vs DIY outcomes also show typical remodeling savings of 20–30% for DIY in small projects, but professional completion reduces schedule risk and rework exposure (see analysis at Diamond Contracting's comparison).
When a GC Saves Money
A GC often reduces total cost for complex projects or when the owner’s hourly opportunity cost is high. Hiring a GC pays when: multiple trades must be coordinated to avoid idle labor, code compliance is strict, or warranty and insurance coverage deliver resale value. In some regions, contractor trade discounts on materials offset markup costs—ask for supplier invoice transparency.
DIY vs Contractor: the Hybrid Approach — Owner‑builder + Subcontractors
What Hybrid (owner‑builder) Looks Like
A hybrid owner‑builder manages the site, performs non‑technical work (demolition, painting, insulation), and hires licensed pros for structural, electrical, plumbing, HVAC, and specialized systems like solar grid‑tie. The owner acts as general manager, scheduling subs and securing materials. For a full checklist of owner‑builder responsibilities, consult this build your own home guide.
Cost Mechanics: Where You Save and Where You Spend
Hybrids save on labor for finish and repetitive work while paying market rates for specialized trades. Example illustrative split for a 1,200 ft² build: owner labor 25–40% of labor hours (value $8–15k), subcontractors cover 60–75% of technical work (cost $30–45k). Savings come from reduced GC overhead and owner willingness to absorb coordination time. Downsides include scheduling conflicts and risk of double‑handling if scopes aren’t nailed down.
Practical tips: use advanced prefabrication (SIPs) for fast envelope assembly but hire experienced installers when recommended—see the SIPs construction guide. Advanced wall framing techniques can be taken on by experienced DIYers to reduce material costs—see advanced wall framing.
Project Types That Suit Hybrid Builds
Good hybrid candidates: net‑zero retrofits where the owner can install insulation and airtightness measures but hires HVAC sizing and heat pump install; new small homes where owner wants to handle finishing; remote off‑grid sites where owner performs site work and hires specialists for solar tie‑ins and septic. For considerations on remote projects and logistics, read practical planning on hybrid projects.
DIY vs Contractor: Specialist Contractors and Trades — When Pros Are Non‑negotiable
Trades Often Best Left to Licensed Pros
High‑risk trades include electrical, gas lines, structural framing for load‑bearing members, HVAC refrigerant work, and plumbing main connections. Mistakes are costly, dangerous, and may void insurance. For airtightness and Passive House‑level performance, certified testers and installers are often required—see the airtightness checklist.
Cost and Liability Considerations
Hiring licensed trades brings insurance, warranty, and code compliance. For HVAC, incorrect Manual J sizing leads to oversize equipment, poor comfort, and higher operating cost; consult a heat pump sizing Manual J guide. For windows, performance mistakes increase heating loads—see the window U‑factor guide to understand long‑term cost impact.
Examples
- Electrical: Improper installs may require full rewiring and present fire risk.
- Structural: Undersized beams or poor connections can mandate expensive corrective framing.
- Airtightness: Failures can ruin Passive House certification attempts and require whole‑house resealing.
The extra upfront cost for these trades often buys lower lifetime cost and insurance peace of mind.
DIY vs Contractor: How to Measure and Compare Real Project Costs
Line‑item Cost Worksheet to Use
Create a worksheet with these rows: materials, labor hours (owner & paid), tool purchases/rentals, permits, inspections, waste removal, contingency (10–15%), financing costs, and warranties/insurance. Convert owner labor into an hourly rate reflecting your opportunity cost. Use supplier quotes and capture subcontractor bids with identical scopes for apples‑to‑apples comparison.
Key Metrics: Cost Per Sq Ft, Cost Per Delivered System, Time/value of Labor
- Cost per sq ft: useful for rough benchmarking.
- Cost per delivered system: for HVAC, solar, or foundations, compare installed system price including commissioning.
- Break‑even labor rate: divide contractor blended labor premium by owner hours saved to find your minimum acceptable hourly value.
Run system examples using the site's solar cost calculator and reference a 5 kW DIY vs contractor size using the 5 kW solar sizing guide for realistic inputs.
Tools and Calculators to Run Your Numbers
Gather two to three contractor bids, record material supplier prices, and use local wage data (Bureau of Labor Statistics or local trade unions) for market labor rates. Document assumptions (warranty length, who pays for inspections) so comparisons are reproducible.
DIY vs Contractor: Cost‑saving Strategies Regardless of Route Chosen
Negotiation and Sourcing Tips
- Bulk buy materials and ask suppliers for price breaks.
- Ask contractors for supplier invoices if you suspect excessive markup.
- Rent specialty tools instead of buying for one‑off tasks.
Staging and Scheduling to Reduce Overhead
- Group subcontracted trades to minimize site visits and avoid idle time.
- Front‑load the building envelope and airtightness work to reduce heating/cooling costs during construction.
- Plan deliveries to avoid double handling and storage damages.
Quality‑first Savings: Where to Invest
Invest in the building envelope—insulation, airtightness, and high‑quality windows—because these reduce operating costs and increase asset value. For affordable sustainable product choices, see budget green materials. Low‑cost DIY weatherization such as door sealing returns quickly—follow door weatherstripping tips. Consider recycled aggregate concrete for cost and embodied carbon savings when suitable: recycled aggregate concrete.
DIY vs Contractor: Which Should You Choose? Scenario‑based Recommendations
Scenario a — Tight Budget, Lots of Time, Basic Skills
Recommendation: Choose a DIY‑heavy or hybrid route. Do demolition, insulation, painting, finish carpentry, and landscaping yourself. Hire licensed electrical and plumbing pros. Checklist: calculate your break‑even labor rate, secure required permits, and book inspectors early.
Scenario B — Limited Time, Technical Systems, Seeking Certification (passive House)
Recommendation: Hire a GC with Passive House experience or assemble certified subs. Passive House certification requires airtightness testing and meticulous detailing; hire certified PH designers/installers. See passive house costs and consider the value of certification on resale.
Scenario C — Remote Site or Off‑grid Systems
Recommendation: Hybrid approach. Owner handles site prep and basic shell work. Hire specialists for solar tie‑ins, battery systems, and septic. Plan logistics, because remote delivery and crew mobilization increase contractor rates. For net‑zero planning, consult the net-zero design guide.
Decision Checklist to Pick Your Route:
- Permits required? If yes, confirm who will file them.
- Is the work code‑critical? Hire pros for electrical, gas, structural.
- Value of your time? Convert to hourly and compare with contractor blended rates.
- Resale and warranty needs? Contractors add formal warranties.
- Access to tools and suppliers? Lack of trade accounts reduces DIY savings.
The Bottom Line
DIY vs contractor decisions hinge on task complexity, your time value, and tolerance for schedule and inspection risk. For repetitive finish work, DIY or hybrid approaches commonly save money; for code‑critical systems and certification builds, hiring contractors or specialists usually reduces total cost and risk. Use a line‑item worksheet and get 2–3 bids to make a local, data‑driven choice.
Frequently Asked Questions
Can a first-time DIYer save money on a full home build?
Short answer: sometimes, but it depends. A first‑time DIYer can save on finish trades and repetitive labor if they have time to learn and accept a slower schedule. However, full home builds amplify risks: code compliance, structural work, HVAC sizing, and inspections carry high stakes. Many homeowners find a hybrid approach—doing non‑technical work while hiring licensed pros for structure, electrical, plumbing, and HVAC—balances savings and risk.
Before committing, use a detailed worksheet, estimate your hourly opportunity cost, and get multiple contractor bids to compare apples to apples.
How do I account for my time in cost comparisons?
Convert your time into an hourly dollar figure that reflects what you could reasonably earn elsewhere or the value of time saved. Multiply estimated owner hours by that rate and add to material and tool costs. This break‑even calculation shows when DIY truly saves money versus when hiring a pro is cheaper once your time is valued.
When will a contractor actually reduce total project cost?
Contractors reduce total cost when they prevent rework, speed project completion, procure materials at trade rates, and coordinate trades to avoid idle labor. Complex builds, tight schedules, and projects requiring permits or certification (Passive House, net‑zero) typically benefit from hiring a GC or specialists.
Are warranties and insurance worth the contractor premium?
Often yes for technical and long‑life systems. Contractor warranties and liability insurance shift financial risk away from the owner and can protect against latent defects. For high‑risk trades (roofing, structural, HVAC, electrical), the premium is frequently justified by reduced exposure to expensive failures.
How do permits and inspections change the DIY math?
Permits and inspections add direct costs and time. Owners who handle permitting save GC filing fees but must factor in inspection delays, possible plan revisions, and permit rejections that cause rework. Always check your local building department early to understand permit fees, required licensed sign‑offs, and inspection windows before deciding to DIY critical tasks.