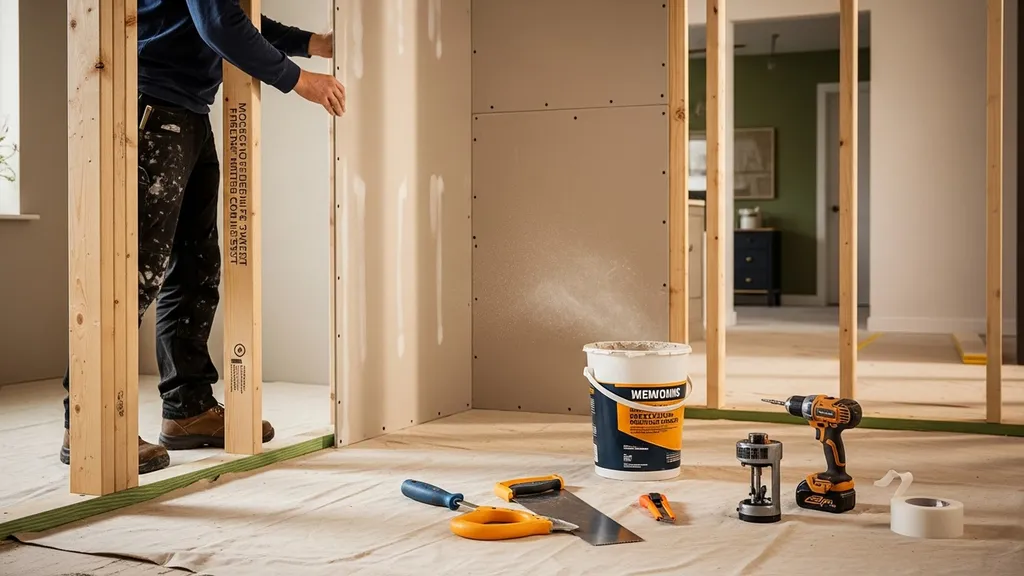
Learn how to install and finish drywall efficiently with this DIY guide, perfect for budget-conscious homebuilders and self-builders.
Drywall Installation and Finishing DIY
Drywall installation and finishing are core skills for self-builders and DIY home renovators. This guide to DIY drywall covers the whole process — from choosing panels and tools to taping, mudding, sanding, priming, and painting — so builders on a budget can achieve durable, low-waste results. Learn how to save hundreds to thousands of dollars, pick eco-friendly materials, avoid common mistakes, and finish walls that look professional.
TL;DR:
- Expect to save 30–60% on labor by doing drywall yourself for a typical 1,000 sq ft interior, with materials costing roughly $300–$800 depending on panel type.
- Use a three-coat taping and mudding sequence (setting compound, fill/tape, two topping coats), a 120–150 grit sanding sequence, and a PVA primer to ensure paint adhesion.
- For eco-friendly building, choose recycled gypsum or paperless panels, low-VOC joint compounds and paints, and source panels locally to cut embodied carbon and waste.
Introduction to DIY Drywall Projects
Drywall is the standard interior finish for most modern homes because it’s fast, affordable, and adaptable. For DIY drywall projects, the material provides a consistent flat surface that accepts paint, tile backer systems, and textured finishes. The most common panel sizes are 4x8 and 4x12 feet with thicknesses of 1/2" (walls) and 5/8" (ceilings or fire-rated assemblies). Using drywall lets self-builders finish rooms quickly and helps meet many interior fire and acoustic requirements.
Why choose drywall? It’s cost-effective, easy to cut, and available in specialty types — moisture- and mold-resistant (often called greenboard), Type X fire-rated, and paperless fiberglass-faced panels for damp areas. Research and hands-on guides explain tool choices and basic technique for beginners; see this beginner's guide to drywall tools and techniques for a practical checklist.
Worth noting: local regulations and permitting can affect when and how drywall is installed, especially in new builds. Review zoning and permit requirements in advance — for a starter checklist, consult guidance on zoning issues to consider. That saves rework and inspection delays.
Tools and Materials Needed
Essential Tools
- Drywall panels: 4x8, 4x12; 1/2" standard for interior walls, 5/8" for ceilings or fire-rated assemblies.
- Drywall lift or T-br ace: Especially useful for single-person ceiling work — rentals save money for one-off jobs.
- Collated drywall screw gun or screw gun: Use 1 1/4" coarse-thread screws for wood studs and 1"–1 1/4" fine-thread for metal studs.
- Utility knife and T-square: Score-and-snap is the standard cut method.
- Tape measure and chalk line: For layout and panel alignment.
- Taping knives (6", 10", 12") and hawk or mud pan: For applying joint compound.
- Joint tape: Paper tape for inside corners and butt joints, fiberglass mesh for patchwork where moisture is a concern.
- Setting compound and all-purpose topping compound: Setting compounds (like Durabond) cure chemically and are good for the first coat; lightweight topping compounds sand easier for finish layers.
- Sanding tools: Pole sander with 120–150 grit, or electric drywall sander with dust collection. Renting a powered sander with vacuum is common.
- Personal protective equipment: NIOSH-rated respirator (N95 or P100), goggles, gloves, and hearing protection.
- Corner bead and fasteners: Metal or plastic corner bead for outside corners.
Industry data shows many homeowners lack basic DIY skills for tasks like patching drywall; a national survey found roughly 38% feel unable to fix common household problems without help, which makes clear why starting with the right tools and guidance matters — see the survey on DIY skills and drywall repairs.
Choosing the Right Drywall Materials
- Standard gypsum board: Cheapest and suitable for most interior walls.
- Moisture-resistant (greenboard) or cement board: Use greenboard in bathrooms outside the shower area; cement board or fiberglass-faced panels behind tile in wet zones.
- Type X (fire-rated): Required by code in some assemblies; check local regulations.
- Paperless fiberglass-faced panels: Resist mold, good for high-humidity spaces.
- Eco options: Look for panels with recycled gypsum and recycled paper facing when available. Also choose low-VOC joint compounds and paints.
For small build projects and self-builders trying to cut embodied carbon, it's wise to find local building materials to reduce transport emissions and support quicker delivery. Also, tools such as drywall lifts and sanders are often cheaper to rent than buy; see rental guides and tool lists before committing.
Key points:
- Rent heavy, infrequently used tools like drywall lifts and powered sanders.
- Match panel thickness to ceiling or wall demands: 5/8" for ceilings or when fire rating is required.
- Choose tape type by joint: paper for permanence; fiberglass mesh for quick patches.
Step-by-step Drywall Installation
Preparing Your Space
Begin with a clean, framed, and inspected substrate. Ensure electrical boxes are set to the correct depth (flush with finished drywall face), insulation is installed where required, and vapor or air barriers are in place if part of the wall design. Mark stud lines with chalk so screw spacing is consistent.
Safety checks:
- Verify no wiring or plumbing will be damaged when screwing.
- Wear a respirator when cutting panels indoors; cutting outdoors with a utility knife reduces dust.
Cutting and Hanging Drywall
- Measure and mark cuts. Score the paper with a utility knife along a T-square, snap the board along the line, then cut the remaining paper.
- Start with ceilings first. Use a drywall lift or have two people raise 4x12 sheets. For single builders, 4x8 sheets are easier to handle.
- Place panels perpendicular to studs where possible to reduce butt joints. Stagger end joints by at least a stud bay.
- Leave a 1/8" gap at the floor to allow for expansion and to prevent moisture wicking from the floor; cover later with baseboard.
Securing Drywall with Screws
- Use drywall screws spaced 12"–16" on walls, 8"–12" on ceilings (depending on local code and panel thickness).
- Drive screws slightly below the paper surface without breaking the paper; a collated screw gun with depth adjustment helps.
- For metal studs use fine-thread screws; for wood studs use coarse-thread.
The U.S. Bureau of Labor Statistics provides context on professional installers and can be useful to estimate labor if deciding which tasks to DIY versus hire out — see the BLS overview of drywall installers and tapers.
Watch this step-by-step guide on installing drywall: easy step by step, with pro:
The video above demonstrates practical techniques for panel placement, screw spacing, and safe lifting. Watch it while preparing a practice wall to repeat moves and timing.
Drywall Finishing Techniques
Taping and Mudding
A standard three-coat method produces a professional finish:
- First coat (taping coat): Apply setting compound into the joint, embed paper tape, and press out bubbles. Use a 6" knife. Setting compound (e.g., 20–90 minute set times) helps speed the first stage and resists shrinkage.
- Second coat (fill coat): After the first coat cures, apply a wider coat (10" knife) to fill and feather the joint edges.
- Third coat (topping coat): Apply a final, thin coat with a 12" knife to smooth and feather out the joint to the wall plane.
Corners: Use paper tape for inside corners and metal or foam corners for outside edges. Apply corner bead for crisp external corners and fasten with screws or specialty nails.
Tools to rent or buy: If finishing many rooms, consider renting a powered taping banjo for embedding tape or a pole sander with vacuum. Tool rental firms often publish guides on which tools to rent for specific drywall tasks; see this tool rental guide for drywall projects for recommended equipment.
Sanding for a Smooth Finish
- Let each coat fully dry. Setting compounds speed the schedule but may require skill to blend.
- Use 120–150 grit sandpaper for leveling; finish with 180–220 grit only if needed — over-sanding can damage paper.
- Use a sanding pole or electric sander with dust extraction. Contain dust by sealing off HVAC returns and using a shop vacuum.
- Repair minor gouges with a thin skim coat before priming.
Applying Primer and Paint
- Use a PVA or drywall primer to seal joint compound and improve paint adhesion.
- Choose low- or zero-VOC primers and paints to reduce indoor pollutants; these are widely available from major brands such as Benjamin Moore and Sherwin-Williams.
- Prime before caulking trim and painting. For bathrooms and kitchens choose paints with mildew-resistant additives.
Eco-friendly finishing: use low-VOC compounds and paints, and consider recycled-content trim. For sustainable construction, minimizing waste and recycling offcuts helps reduce the project's footprint.
Common Mistakes and How to Avoid Them
Many DIYers make repeatable errors that are easy to prevent.
- Wrong screw depth: Over-driven screws tear paper exposing gypsum; under-driven screws leave bumps. Use a depth-adjustable screw gun and test on scrap boards.
- Poor taping technique: Wrinkles and bubbles under tape cause visible imperfections. Embed tape cleanly and remove excess compound.
- Skipping setting compound on joints: Using only all-purpose compound on initial coats causes long dry times and shrinkage. Use a short-setting compound for the first coat when speed or strength is needed.
- Sanding too aggressively: This removes paper and causes visible seams. Sand lightly and apply a skim coat if necessary.
- Ignoring moisture sources: Installing drywall in damp areas without proper moisture control leads to mold and failure. For crawl spaces or damp basements follow guidance on moisture mitigation — see effective crawl space repairs.
Plan time for drying between coats and schedule steps to let compounds cure properly. In humid climates, use dehumidifiers or heat to speed drying when safe.
Cost Comparison: DIY Vs. Professional Drywall Installation
Below is a compact cost comparison for a typical interior area of 1,000 sq ft of wall and ceiling surface (approximate figures; regional pricing varies).
| Item | DIY cost (materials + rentals) | Professional cost (materials + labor) |
|---|---|---|
| Drywall sheets (1/2" and 5/8") | $350–$700 | included |
| Joint compound, tape, fasteners | $60–$150 | included |
| Tool rentals (lift, sander, screw gun) | $80–$250 (one-time/rental) | included |
| Primer and paint (materials only) | $100–$300 | $100–$300 |
| Labor (if hiring finishers) | $0 (DIY) | $1,000–$3,000 |
| Estimated total | $590–$1,400 | $1,500–$4,250 |
Cost notes:
- Professionals typically charge $1.50–$4.00+ per sq ft for full hang and finish depending on finish level (Level 4–5 finish) and local labor rates.
- DIY saves on labor but requires time, learning, and possibly rework if inexperienced.
- For a single room or patchwork, DIY is almost always the cheaper route; for whole-house finishing, mixed approaches (DIY hang, hire tapers) balance cost and quality.
If the goal is broader renovation budgeting that includes other systems like solar power, use solar cost estimation tools to compare trade-offs and prioritize spending.
The Bottom Line
DIY drywall is an achievable way for self-builders to cut costs and learn lasting construction skills while supporting sustainable construction choices. With the right tools, a disciplined three-coat finishing process, and attention to moisture control, beginners can produce walls that meet professional standards.
Frequently Asked Questions
How long does a typical drywall installation take?
Timing varies by crew size and experience. For a two-person DIY team, hanging drywall for a 1,000 sq ft interior typically takes 1–2 days. Finishing with a three-coat mud schedule usually takes 2–4 days allowing for drying time between coats; setting compounds can shorten that schedule. Professionals often finish larger jobs faster because of specialized tools and coordinated crews.
Humidity, temperature, and compound type affect drying. Plan for extra time in winter or high-humidity seasons and use a dehumidifier if necessary.
What thickness of drywall should I use for walls and ceilings?
For most interior walls, 1/2" drywall is standard. Ceilings and fire-rated assemblies typically use 5/8" for added stiffness and fire resistance. Use moisture- or mold-resistant panels in bathrooms and basements. Local code may require specific thicknesses in multi-family or commercial construction.
Which joint compound should I choose for each coat?
Use a setting compound (chemical set) for the first coat where speed or minimal shrinkage is needed. For the second and third coats, lightweight topping compounds sand easily and finish smoothly. All-purpose compounds can be used for general work, but they take longer to dry and may shrink more during curing.
Can I finish drywall without a professional sander?
Yes. Manual sanding with a pole sander and hand sanding blocks works for small jobs. For larger areas, a rental electric sander with dust collection speeds work and reduces airborne dust — which is better for health. Use a vacuum and containment to protect adjacent areas and HVAC systems.
What are the best eco-friendly drywall options?
Look for gypsum panels with recycled content, paperless fiberglass-faced boards (for mold resistance), and low-VOC joint compounds and paints. Sourcing materials locally reduces transport emissions; consult local suppliers or the guide on how to find local building materials. Proper waste management — cutting efficiently, saving offcuts, and recycling gypsum where available — also lowers the environmental impact.