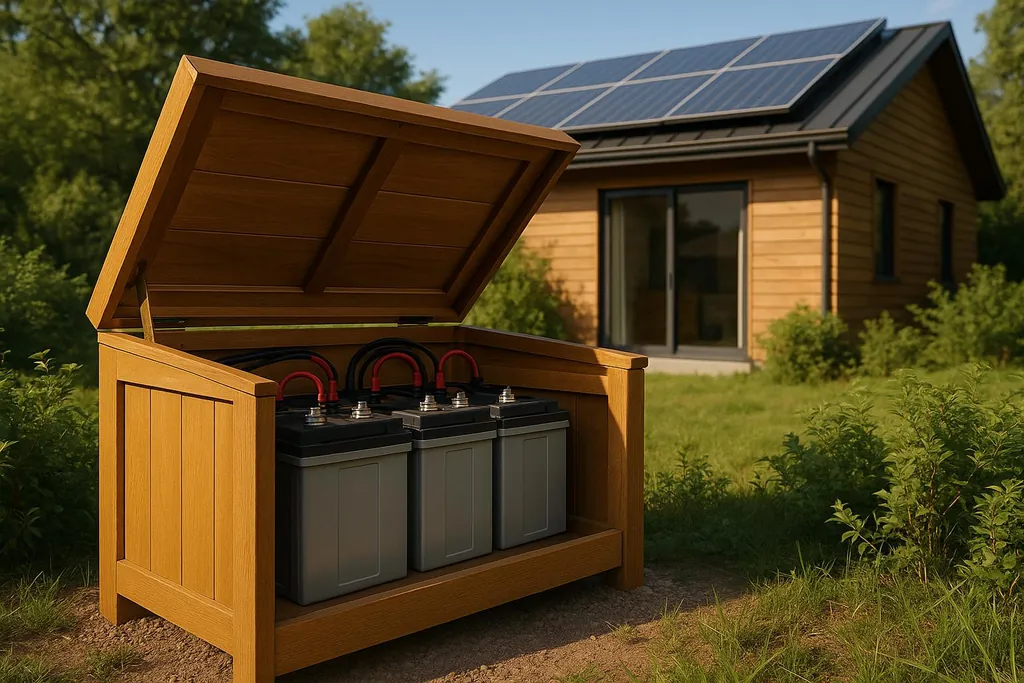
Learn how to build a DIY battery enclosure for off-grid homes to save money, protect batteries, and enhance energy system performance.
How to Build a DIY Battery Enclosure for Off-Grid Homes
Building your own battery enclosure can save money, protect your batteries, and improve the performance of your off-grid energy system. Here's a quick overview of the process:
- Why It’s Important: Battery enclosures shield batteries from weather, temperature changes, and physical damage. They also improve safety by preventing gas buildup and complying with building codes.
- Planning: Start by calculating your energy needs (e.g., daily usage and backup duration). Choose materials based on your setup - aluminum for outdoor durability or treated plywood for indoor use.
- Costs: DIY enclosures can save thousands compared to commercial systems. For example, an 8kWh LiFePO4 battery pack costs under $2,500 to build versus $6,000+ for pre-assembled options.
- Construction: Select a site, build a sturdy frame (steel or plywood), and ensure proper ventilation. Install batteries, wiring, and safety components like fuses and a Battery Management System (BMS).
- Maintenance: Regularly check connections, clean corrosion, and monitor ventilation to extend battery life. Plan for future upgrades by designing with extra space.
Save $ Thousands by building a DIY LiFePO4 battery- PCBWay

Planning Your Battery Enclosure Project
Careful planning is essential to avoid wasting time, money, and effort. Start by understanding your system's requirements and budget. This groundwork helps streamline decisions about battery size, materials, and costs.
Determining Your Battery Requirements
To figure out your battery needs, calculate your daily energy usage. List the wattage of your appliances and estimate how many hours each runs daily. For reference, the average U.S. household uses about 28 kWh per day (or 877 kWh monthly). Off-grid homes often aim for lower usage by managing energy consumption carefully .
> "The ideal battery size for a solar system depends on your daily energy consumption, desired backup duration, and available solar production capacity." - deyeess.com
Once you know your daily energy needs, decide how many days of backup power you want without solar charging. Many off-grid homeowners plan for 1–3 days of autonomy, striking a balance between cost and reliability. For instance, if you use 15 kWh daily and want two days of backup, you’ll need at least 30 kWh of usable battery capacity.
The type of battery you choose also impacts your enclosure design. Lead-acid batteries require about three times the space of lithium batteries for the same capacity and need regular maintenance. Lithium-ion batteries, on the other hand, allow for 80–100% depth of discharge and last 3,000–5,000 cycles, compared to lead-acid’s 500–1,000 cycles .
| Feature | Lead-Acid | Lithium-Ion |
|---|---|---|
| Cycles | 500–1,000 | 3,000–5,000 |
| Depth of Discharge | 50% | 80–100% |
| Maintenance | Regular | None |
| Lifespan | 3–7 years | 10–15 years |
You'll also need to calculate your system's peak load. Add up the wattage of appliances that may run simultaneously, including startup surges, to determine the right inverter size and ventilation needs for your enclosure .
Climate plays a role too. In colder regions, reduced solar production and higher heating demands may require a larger system . Designing your enclosure with room for future expansion is always a smart move.
Materials and Tools Selection
With your battery needs outlined, choose materials that suit the environment and ensure durability. For outdoor setups, metals like aluminum and stainless steel are excellent choices due to their weather resistance . Aluminum is lightweight and corrosion-resistant, making it ideal for wall or pole mounting. Stainless steel is better for harsher conditions, offering strong protection.
Indoor enclosures give you more flexibility. Treated plywood with proper ventilation works well in basements and is an affordable option. In humid or marine environments, fiberglass resists saltwater and moisture effectively . Plastic enclosures made from polycarbonate or ABS are lightweight, electrically insulated, and cost-effective for indoor use, though they’re less durable outdoors .
Some materials may require extra insulation. Metal enclosures, for example, benefit from foam board insulation to prevent condensation, while plastic naturally provides electrical insulation . In colder climates, insulating the enclosure helps maintain battery performance.
Essential tools for the project include a drill (with metal and wood bits), a jigsaw or circular saw, measuring tape, a level, and safety gear. For metal enclosures, you might also need a metal cutting blade, files, or welding equipment for strong joints.
Project Cost Planning
Once you’ve finalized your battery size and materials, align your design with a detailed cost plan to avoid unexpected expenses. Material costs vary based on your choices and local prices, but batteries often make up the largest portion of your budget.
Here’s a rough idea of battery costs:
- Single UPS batteries: $100–$400 each
- AGM lead-acid batteries: $100–$300 per unit
- Lithium-ion batteries: $300–$400 each
For a complete system, a 1 kW battery setup could cost around $1,000, scaling to about $4,000 for a 4 kW system .
Labor costs can be tricky to estimate, but keeping detailed time logs during your first project can help refine future budgets . Professional installation of a UPS battery system typically runs between $250 and $500 .
To save money, look for sales and plan your project carefully to avoid costly changes during construction. It’s also smart to set aside 20–30% of your budget for unexpected expenses . Defining your requirements before ordering materials can help prevent mid-project adjustments.
> "Properly sizing your battery capacity is key to a successful off-grid living experience." - Vatrer Power
If the total cost feels overwhelming, consider financing the project in phases. You could build the enclosure first and add batteries later as your budget allows. This approach spreads out expenses while ensuring the enclosure is ready for future upgrades.
Step-by-Step Construction Guide
Once you've determined your requirements and chosen the right materials, follow these steps to build your battery enclosure.
Site Preparation
The first step is picking the perfect spot. Look for a dry, well-ventilated area that's easy to access for maintenance and protected from harsh weather. Indoors, basements or utility rooms are ideal. For outdoor setups, make sure the location is shielded from direct rain or snow.
Measure the space to ensure there's enough room for ventilation and maintenance. The surface should be level and sturdy enough to handle the weight of your batteries and enclosure. A concrete floor or reinforced platform works best.
Clear the area of any flammable items, and make sure there's enough lighting to work safely. For outdoor projects, consider temporary weather protection to keep materials dry and prevent metal components from rusting.
Once your site is prepped and ready, you can move on to building the structural frame.
Building the Enclosure Frame
The frame is the foundation of your battery enclosure, so it needs to be strong and durable. Steel angle frames are a popular choice among DIY builders because they’re sturdy, affordable, and relatively easy to work with. Cut the steel to size using a metal cutting tool, and design a rectangular frame that fits your battery layout while leaving space for wiring and ventilation.
Assemble the frame using either welding or bolted connections. If welding isn’t an option, use galvanized bolts and nuts for strong, removable joints. Drill pilot holes slightly smaller than the bolts for a snug fit, and apply thread locker to prevent loosening from vibrations.
> "Making a sheet metal battery case is not really a 'minimal tools' kind of project... If I wanted to build a good battery box with minimal tooling, I'd use thin plywood jointed with wooden moldings, skinned outside and inside with fiberglass cloth and resin." - Chalo
For those who prefer wood, marine-grade plywood reinforced with fiberglass is a solid alternative. Cut the panels with a circular saw, ensure the corners are square, and join them using wood screws and waterproof glue. Reinforce the joints with metal brackets as needed.
Once the frame is assembled, apply a rust-resistant primer or clear finish to protect it. Let the coating fully cure before moving on. Be sure to include mounting points for your batteries and electrical components during this step. Threaded inserts or welded nuts work well for securing these elements.
With the frame complete, you're ready to install the batteries and electrical components.
Battery and Component Installation
Mount all electrical components on non-combustible surfaces like cement board to minimize fire risks and comply with local electrical codes . Design a secure system to keep the batteries in place, ensuring they won’t shift due to vibrations or impacts.
Position the batteries in their designated spots, leaving enough space for ventilation. Lithium batteries typically need a small gap between units, while lead-acid batteries require extra room to vent gases safely.
Connect your components using wires with the correct gauge for your system’s voltage, current, and cable length. Install fuses or circuit breakers near the positive terminal of each battery as a safety measure. Keep your wiring tidy by using adhesive cable mounts, split loom tubing, and clear labels.
Follow the manufacturer’s instructions to install your Battery Management System (BMS). Mount the BMS on a non-conductive surface away from the batteries, and connect the sensor wires to each terminal using the provided color codes.
Ensure proper ventilation by adding intake vents near the bottom and exhaust vents near the top of the enclosure to encourage natural airflow. For lead-acid batteries or other setups prone to heat, you might need active ventilation — fire-code requirements for stationary battery installations are addressed in NFPA 855.
Seal any points where wires enter or exit the enclosure with waterproof cable glands to keep moisture out. Test all connections with a volt-ohm meter to confirm everything is wired correctly and free of shorts. Check each battery individually, then verify that any series or parallel configurations are set up properly.
Ground your system using a dedicated grounding rod and appropriately sized wiring to reduce lightning risks and ensure a safe path for fault currents — for residential installations, follow the grounding and bonding rules in the International Residential Code (IRC) as adopted by your jurisdiction. Install any monitoring equipment, like battery monitors or remote displays, keeping these cables separate from power cables to avoid interference.
Finally, seal all joints and openings with a suitable sealant. Silicone works well for most applications, while butyl tape provides long-lasting weatherproofing for outdoor setups. With everything in place, you’re ready to maintain your system and plan for future upgrades.
Maintenance and Upgrades
Taking care of your battery enclosure after installation is just as important as building it. Regular maintenance can help your enclosure deliver reliable performance for years to come, while timely upgrades ensure it keeps up with your energy needs.
Regular Maintenance Tasks
Set aside time each month to inspect your enclosure. Look closely at the battery connections for any looseness or signs of corrosion. Corrosion often shows up as a powdery residue on the terminals, which can be a result of potassium hydroxide leaking from alkaline batteries . If you spot this, clean the terminals with vinegar or lemon juice, scrub gently, and finish by wiping with isopropyl alcohol .
Temperature monitoring is another critical step. Check that your ventilation system is working properly - vents should be clear, and airflow should remain unobstructed. If the batteries feel warmer than usual, it could signal problems like poor ventilation, overcharging, or internal issues that require immediate attention.
Don’t forget to keep your Battery Management System (BMS) software up to date. Updated software helps optimize charging cycles and ensures the battery cells remain balanced .
Staying consistent with these maintenance practices not only extends the life of your system but also makes future upgrades and troubleshooting much easier.
Expanding Your System
As your energy needs grow, you might find it necessary to expand your system. When planning for expansion, think about factors like your budget, increased energy usage (a DOE home energy assessment can help quantify this), or insufficient solar production .
Lithium batteries are generally easier to expand because they come equipped with built-in electronics for charge management and balancing . However, if you’re working with lead-acid batteries, it’s best to add newer batteries to avoid reducing the overall capacity of the system . Also, make sure your enclosure has enough ventilation to handle the extra heat generated by an expanded system .
If you’re using an off-grid inverter, many models are "stackable", meaning you can connect multiple units to boost power output . However, this may involve rewiring your setup and increasing your battery bank size . For solar array expansions, ensure the new panels match the existing ones in voltage, wattage, and amperage, staying within a 1-volt difference . Expansion is also a good moment to review our list of common solar inverter issues, since a larger battery bank stresses the inverter in new ways.
Safety is key when expanding your system. Add extra fuses, circuit breakers, and thermal protection devices to handle the increased load and maintain safe operation .
Common Problem Solutions
Tackling issues early can save your enclosure from long-term damage.
Overheating is one of the most serious problems to watch for. If your batteries are overheating, make sure all ventilation paths are clear. Persistent overheating might point to overcharging or internal faults. For smaller battery setups, switching to rechargeable Ni-MH cells can help avoid leakage issues commonly associated with alkaline batteries .
Moisture is another concern, as it can lead to corrosion and electrical issues. To reduce the risk, keep your batteries in a dry, room-temperature environment .
A gradual loss of capacity is normal as batteries age, but sudden drops in performance could indicate weak batteries. Avoid mixing different battery types, and when replacing batteries, try to replace all of them at the same time. If you won’t be using the system for an extended period, remove the batteries to help preserve their condition .
Conclusion
By following the steps for planning, building, and maintaining your DIY battery enclosure, you can create a cost-effective and reliable solution for your off-grid home. As Patrick from _Off Grid Living News_ shared back in December 2020, this project can be completed for under $50 using leftover materials and basic carpentry skills. The process involves leveling your site, building a sturdy base, framing an enclosure with proper ventilation, and waterproofing the top to ensure durability .
> "This is just another example of how you can save yourself a considerable amount of money if you are motivated to do things yourself and you have some basic tools and carpentry skills." > > - Patrick, Sustainable Living Expert
Safety should always be your top priority during both construction and ongoing maintenance. Invest in high-quality fuses and breakers to protect your system, as these components are essential for safe operation .
> "Never EVER Cheap out on Fuses or Breakers! This is one thing to NOT to screw around with!" > > - Steve\_S, Emperor Of Solar
After completing your enclosure, regular maintenance is key. Check your batteries' health, connections, and ventilation periodically. To extend battery life, keep them away from direct sunlight and avoid exposing them to extreme temperature fluctuations .
FAQs
What safety precautions should I take when building a DIY battery enclosure for an off-grid home?
When you're building a DIY battery enclosure for your off-grid home, safety has to come first. Start by making sure the enclosure is well-ventilated to prevent overheating and the accumulation of flammable gases. Choose non-conductive and sturdy materials, like polypropylene or ABS plastic, to reduce the risk of electrical accidents.
Place the batteries in a cool, dry, and ventilated space, keeping them far from any metal objects that might cause a short circuit. Always stick to the manufacturer’s instructions for handling and storage, and avoid exposing the batteries to extreme heat or cold. On top of that, double-check that all wiring is secure, connections are tight, and the enclosure is built to handle impacts for added safety over time.
Taking these steps will help you build a safe and dependable battery enclosure for your off-grid solar system.
What materials should I use for a battery enclosure based on my local climate?
When selecting materials for your battery enclosure, it's important to factor in your local climate and weather conditions. For outdoor installations, aluminum and stainless steel are solid choices. They offer excellent resistance to corrosion and can handle tough weather conditions.
In hotter regions, materials with strong heat resistance, such as aluminum or sturdy plastics like polycarbonate, are ideal for preventing overheating. If insulation and chemical resistance are key concerns, consider polypropylene or similar plastics. Just make sure they’re rated for outdoor use and can tolerate extreme temperatures. Always aim for materials that offer a balance of durability, weather resistance, and safety tailored to your environment.
How can I expand my battery system to meet growing energy needs?
To grow your battery system and meet higher energy demands, start by assessing both your current energy usage and anticipated future needs. This will help you determine how much extra storage capacity is required. Adding more batteries in parallel can boost capacity, but it’s crucial to confirm that your charge controller, inverter, and other system components can handle the expanded setup.
For a significant jump in energy needs, you might need to upgrade your [solar panels](/blog/how-to-choose-solar-panels-that-match-your-roof) and charge controller to effectively support a larger battery bank. Careful planning and ensuring every component is rated to handle the increased load will help maintain performance and ensure the system operates safely over time.