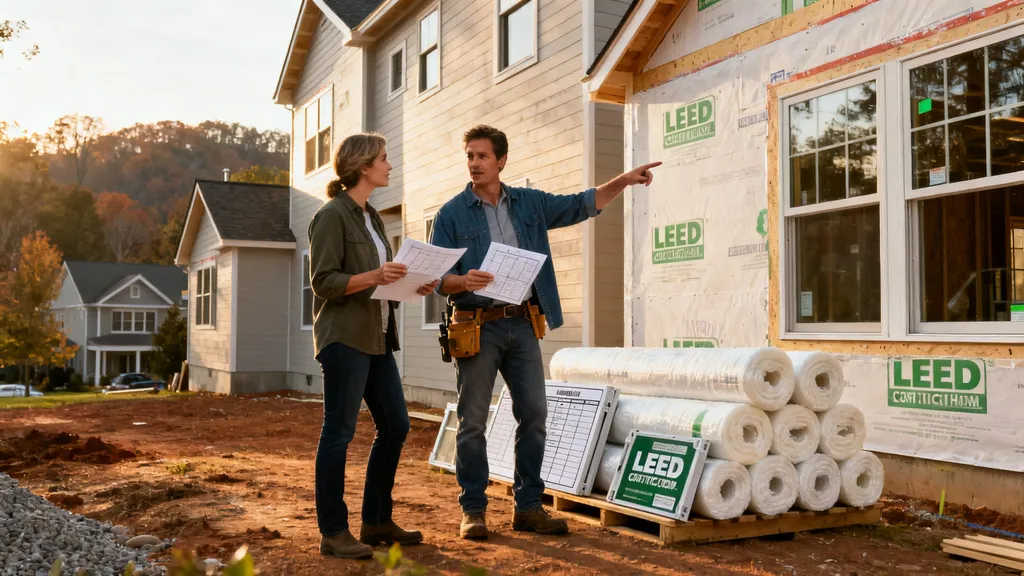
Practical guide to LEED homes: mandatory prerequisites, high-value credits, testing, costs, and DIY-friendly strategies for budget-conscious self-builders.
LEED Certification for Homes: Requirements
LEED homes offer a structured way to design and build greener, more efficient residences that can lower energy bills, improve indoor air quality, and increase resale value. This guide explains what "LEED for Homes" means, the mandatory prerequisites every project must meet, which credits deliver the best return for budget-conscious DIY builders, plus the testing, documentation, and cost trade-offs you should plan for. Readers will learn which credits are realistic to tackle themselves, when to hire specialists, and how to prepare for third‑party verification.
TL;DR:
- LEED homes require a set of baseline prerequisites (envelope, ventilation, water) plus points to reach Certified/Silver/Gold/Platinum; typical energy savings range 10–40% depending on level.
- Prioritize envelope improvements, airtightness, balanced ventilation, and efficient mechanicals for the best points-per-dollar return; blower-door and HERS or modeled energy proofs are often required.
- Expect added admin and testing costs (registering, rater fees, blower-door, HERS/modeling): plan for 0–8% incremental budget, hire a HERS rater or verifier for testing stages.
What LEED Certification for Homes Means
"LEED for Homes" is the residential track of the U.S. Green Building Council's rating systems, administered through the USGBC and third-party verification by GBCI. It uses a points-based checklist: projects earn points for measures across energy, water, indoor environmental quality (IEQ), material choices, location, and innovation. Points add up to four certification levels: Certified, Silver, Gold, and Platinum. LEED is intended to be flexible so the same framework can apply to new construction, major renovations, and multifamily projects.
LEED focuses broadly on sustainable performance and occupant health. That contrasts with standards such as Passive House, which targets measurable airtightness and heating demand using the PHPP energy model, and ENERGY STAR, which emphasizes appliance and system efficiency and typically a HERS-verified target. The Living Building Challenge is a more prescriptive, regenerative standard that often requires net-positive outcomes for energy and water; see our living building challenge overview for a detailed contrast.
Example: a 1,200–1,800 ft² single-family self-build aiming for Certified will emphasize meeting prerequisites (baseline envelope, ventilation, water-use targets) and pick a few low-cost credits. The same house chasing Gold will need higher-performing insulation, tighter airtightness, better windows, and possibly renewable generation—shifting budget and sequencing.
Research and studies indicate LEED-labeled homes can deliver measurable benefits for owners and communities. For a deeper review of LEED’s economic effects on multi-family value, consult the analysis of LEED certification levels and their impacts.
LEED Rating Levels and Certification Pathways for Homes
LEED scores are assigned by category and totaled to determine the certification level. Point thresholds and credit sets change between versions (for example, LEED v4 and v4.1), so always confirm the current checklist with USGBC/GBCI. The table below gives a compact comparison of typical levels and expected impacts; treat the numbers as guidance rather than fixed rules.
| Certification level | Typical point range | Typical energy savings vs. code | Typical focus areas |
|---|---|---|---|
| Certified | 40–49 points | ~10–20% | Basic envelope, water, IAQ, site erosion control |
| Silver | 50–59 points | ~15–25% | Improved insulation, better windows, efficient systems |
| Gold | 60–79 points | ~20–35% | Tight envelope, ventilation, advanced systems, renewables |
| Platinum | 80+ points | ~30–40%+ | Deep efficiency, renewables, rigorous material/health measures |
Pathways vary by project type:
- Single-family new construction has a checklist tailored to detached homes and includes on-site verification by a LEED provider or Green Rater.
- Multifamily projects use a different pathway that can apply to stacked units and often includes common-area credits.
- Major renovation/gut rehabs have separate credit applicability and often require proof of substantial performance improvements.
For practical guidance on how LEED levels relate to net-zero design strategies, see our primer on net-zero design tips and consult the official LEED v4: Homes Design + Construction Guide for registration and rating-system details.
Mandatory Prerequisites: What Every LEED Home Must Meet
Every LEED for Homes project must meet a set of prerequisites before earning additional credits. While the exact list varies by LEED version and pathway, these categories are commonly mandatory:
- Energy performance and envelope: Minimum insulation levels (R-values or continuous insulation), control of thermal bridging, and minimum window U-factor/SHGC specifications.
- Airtightness and ventilation: Fundamental ventilation strategy (often a balanced mechanical ventilation system) and an air-barrier strategy; blower-door testing is a regular requirement for demonstrating performance.
- Water efficiency and site: Indoor water-use baselines (to verify low-flow fixtures), hot-water efficiency checks, and erosion & sedimentation control during construction.
- Indoor environmental quality (IEQ): Low-VOC materials documentation, radon mitigation if required by location, and ventilation commissioning or verification.
Common technical tests you should expect:
- Blower-door airtightness testing (targets commonly range 3–5 ACH50 for credits, though values depend on climate and local threshold).
- HERS rating or energy modeling (some pathways accept modeled performance demonstrating percentage savings relative to code).
- Hot-water distribution checks and fixture flow testing.
- Verification of window performance (U-factor/SHGC from NFRC ratings).
Supporting resources: look at our airtightness guidance for practical sealing methods and testing expectations, choose windows with appropriate ratings via our window U-factor tips, and control slab-edge thermal bridging with the insulated slab edge approach in cold climates.
Studies suggest LEED homes can command a resale premium and real utility savings, which helps justify some of these prerequisites. For historic context on value impacts, review the Benefits of LEED | Buildings & Grounds.
Key LEED Credits That Matter for Budget-conscious DIY Builders
Which credits deliver the best points for the least expense? For many self-builders, the highest return comes from practical measures you can manage or coordinate affordably: improved insulation, airtightness, balanced ventilation, efficient windows and lighting, and water fixtures. Small renewables (solar-ready design or a modest PV array) can also contribute meaningful points when budgets allow.
What to prioritize and why:
- Envelope upgrades (continuous insulation, air barrier, thermal-bridge control): Often yield multiple points and reduce mechanical sizing. Incremental cost is typically lower than complex mechanical upgrades.
- Airtightness and air-sealing: Basic air-sealing materials and labor can deliver multiple points; blower-door testing validates these gains.
- Balanced mechanical ventilation (ERV/HRV): Provides IEQ credit and allows lower heating/cooling loads by controlling fresh-air delivery.
- Efficient windows and daylighting: Select NFRC-rated units with lower U-factor and appropriate SHGC for your climate; pairing with daylighting strategies reduces lighting energy use.
- Water-efficiency fixtures and hot-water distribution: Low-flow fixtures are low-cost and easy points; a well-planned hot-water loop can reduce energy waste.
- Solar-ready site/prep and small PV: Establish roof layout and conduit for later PV to capture points now even if panels are installed later.
Estimated cost ranges and typical point gains (very approximate):
- Air-sealing + moderate insulation upgrade: $1,000–$6,000 incremental, 3–8 points.
- Balanced ventilation (ERV/HRV): $1,500–$6,000 installed, 1–3 points plus IEQ benefits.
- Window upgrade (good-quality replacements): $3,000–$12,000, 1–4 points depending on climate and baseline.
- Low-flow plumbing: <$500–$1,000, 1–2 points.
- Small PV (2–4 kW): $5,000–$12,000 installed, variable points toward energy and renewables.
DIY-friendly tasks that earn credit:
- Air-sealing: sealing rim joists, window perimeters, service penetrations; document methods and materials.
- Insulation installation: cellulose, mineral wool, or dense-packed wall insulation with proper detailing.
- Installing low-flow fixtures and efficient LED lighting.
- Preparing for solar (roof-ready conduit, structural assessment).
- Simple daylighting solutions: properly sized skylights, interior light shelves, and reflective finishes.
Add value with documentation: collect product data sheets, NFRC window labels, material VOC certificates, and contractor invoices. For material choices under a budget, consult our budget green materials overview and compare insulation types with our insulation carbon impact analysis. For ventilation selection and installation tips, see the ventilation guide. Practical examples:
- Retrofit scenario: For an 1,400 ft² existing home, air-sealing and adding attic insulation plus a balanced ventilation unit could move a project from ineligible to Certified or Silver with modest cost.
- New-build scenario: Prioritize continuous insulation and tighter assembly from the start—this reduces required mechanical costs and simplifies compliance.
Video walkthrough: for a visual companion showing real examples of air-sealing, ventilation setup, and credit-focused decisions, watch this homeowner-focused video before planning on-site work:
Top 8 credits by ease and cost-effectiveness for DIYers (ranked):
- Air-sealing and airtightness verification
- Attic and cavity insulation upgrades
- Low-flow plumbing fixtures and hot-water efficiency
- Mechanical ventilation commissioning and documentation
- High-efficiency LED lighting and controls
- Window selection to climate-specific U-factor/SHGC
- Solar-ready design and conduit installation
- Material VOC and low-embodied carbon selections
Research on resale and energy savings supports these priorities: several reports show LEED homes averaging substantially lower energy use (example: a trade association noted homes saved about 40% in some samples), and specific studies have shown resale premiums for certified properties. See this LEED homes value study for regional data.
Documentation, Testing, and the On-site Verification Process
Successful LEED certification is as much administrative as technical. The usual workflow:
- Register project with USGBC/GBCI and select the correct residential rating system or a Green Rater organization.
- Assemble baseline documentation: drawings, specifications, product data sheets, window NFRC labels, and the project work plan.
- Implement construction measures, collect verification evidence, and schedule third‑party testing.
- Submit documentation and test reports to the verifier and GBCI for review and final certification.
Key tests and verification steps:
- Blower-door testing for airtightness (performed by a certified testing contractor).
- Duct leakage testing when applicable.
- HERS rating or energy model submission showing compliance or percent savings relative to reference house.
- Water fixture flow testing and hot-water system checks.
- On-site inspections of the air barrier, insulation, ventilation installation, and product verification.
Common Paperwork Pitfalls and How to Avoid Them:
- Missing product data sheets: collect NFRC labels, manufacturer cut sheets, and VOC statements at purchase time.
- Incomplete test reports: ensure the testing technician provides a signed, stamped report with methodology and equipment calibration notes.
- Unclear drawings: mark the location of air-barrier details, mechanical equipment, and solar-ready conduit on plans to speed verifier review.
Budget for verification tasks: blower-door testing typically costs $300–$700 depending on region; HERS ratings or full energy modeling can range from $500–$2,500; third-party verifier fees vary. For airtight membrane installation techniques that verifiers inspect, see our airtight membrane guide and for step-by-step vapor barrier work, consult the vapor barrier steps. Self-builders will often hire technicians for blower-door tests and HERS/commissioning work even if they perform much of the construction themselves. For project sequencing and an overall planning checklist, use the self-build checklist.
Costs, Timelines, and DIY Vs. Professional Trade-offs
How much extra does LEED add to a typical build? It varies widely. Many projects can achieve baseline LEED certification with small incremental costs by making targeted choices; others aiming for Gold or Platinum will see higher percentage increases. Ballpark guidance:
- Incremental cost range: 0–8% of total build cost depending on ambition, region, and baseline code.
- Testing and documentation fees: estimated $1,000–$5,000 total for verification, testing, and rater fees for small single-family projects.
- Timeline impacts: plan for 4–12 extra weeks of coordination during construction for testing windows, documentation gathering, and inspections.
When to hire specialists:
- Blower-door testing and HERS ratings: hire certified technicians.
- HVAC sizing and commissioning: consult an experienced HVAC contractor or commission agent to avoid over- or undersizing heat pumps.
- Complex renewable or grid-tie electrical work: engage a licensed electrician for PV and inverter tie-ins and documentation.
- Energy modeling for higher ratings: hire a modeler familiar with PHPP or other accepted tools if pursuing aggressive energy targets.
Saving Strategies and Phased Approaches:
- Build to LEED standards but defer formal certification until after construction if upfront cash is tight—this preserves the performance benefits without immediate certification fees.
- Prioritize high ROI items first (envelope, air sealing, ventilation) and phase renewables later.
- Choose products with clear, verifiable documentation at purchase to avoid costly rework.
Examples of assemblies affecting cost and performance: insulated concrete forms (ICF) foundations typically raise upfront cost but improve thermal mass and reduce heating loads—see our ICF foundation approach. Rammed earth has lower embodied-carbon benefits in some climates but different construction timelines and skills required; review our rammed earth cost guide before choosing.
Industry data supports meaningful operational savings: the USGBC notes that LEED-applied multifamily projects can use 30–40% less electricity on average; see the USGBC support article for more context: applying LEED to multifamily projects.
How LEED Compares to Passive House and Living Building Challenge for Homes
Choosing a standard means choosing priorities. The chart below summarizes key differences:
| Standard | Primary focus | Typical metric | Verification approach |
|---|---|---|---|
| LEED | Broad sustainability and occupant health | Points across categories (energy, water, materials) | Third-party review (GBCI) and on-site verifier |
| Passive House | Energy-first performance; minimal heating demand | PHPP, airtightness (ACH50), heating demand kWh/m²·yr | Passive House Institute (PHI/PHIUS) certified verification and blower‑door tests |
| Living Building Challenge | Regenerative, net-positive buildings | Net-zero/positive energy and water, material red-list | Rigorous performance verification over time, project-specific audits |
Which fits your project?
- Budget retrofit seeking measurable savings: LEED or ENERGY STAR are practical choices for progressive improvements and easier documentation.
- Performance-first new build with airtightness priority: Passive House targets low loads and allows very small mechanical systems but requires detailed modeling and strict airtightness targets.
- Demonstration/regenerative project: Living Building Challenge suits those aiming for net-positive outcomes and willing to accept higher complexity and cost.
For a deeper comparison with Passive House certification processes, see our passive house comparison. For regenerative goals and how they contrast with LEED, review our living building challenge overview.
Key Points: LEED Homes Requirements at a Glance
- LEED requires baseline prerequisites (envelope, ventilation, water) plus optional credits to reach Certified/Silver/Gold/Platinum.
- Common tests include blower-door, HERS or energy modeling, duct leakage, and fixture flow verification.
- Highest return for DIYers: air-sealing, insulation, balanced ventilation, efficient windows, and low-flow plumbing.
- Expect documentation and testing fees; total incremental costs commonly fall into a 0–8% range of project cost depending on goals.
- Hire certified technicians for blower-door testing, HERS rating, HVAC commissioning, and PV grid tie-in.
- Confirm your project's checklist with USGBC/GBCI and a local LEED provider early to avoid rework.
The Bottom Line
LEED homes offer a practical pathway to greener, healthier housing that suits many budget-conscious self-builders—but plan for extra documentation and testing. Focus first on envelope performance, airtightness, ventilation, and efficient systems to capture the best points-per-dollar. If full certification is out of reach, build to LEED standards and defer formal registration to preserve the long-term benefits. Always confirm current requirements with USGBC/GBCI and get local rater quotes early.
Video: "LEED Explained: the Beginner’s Guide to Green Building Certification"
For a visual walkthrough of these concepts, check out this helpful video:
Frequently Asked Questions
How long does LEED certification for a single-family home typically take?
Timeline depends on project scope and when you register. Simple projects that register early and prepare documentation can complete verification within 3–6 months from construction completion. More ambitious targets requiring multiple tests, energy modeling, or revisions can take 6–12 months. Plan extra time for scheduling third-party tests like blower-door and HERS ratings.
Can a DIY self-builder complete the requirements and testing alone?
Many DIYers can perform tasks that earn LEED credits—air-sealing, insulation, selecting efficient fixtures, and preparing product documentation. However, third-party tests (blower-door, HERS rating) and electrical work for PV must be done by certified technicians or licensed trades in most areas. Using a Green Rater or LEED consultant for documentation review reduces the risk of failed verification.
How much does LEED certification add to total project cost?
Incremental costs vary widely with project ambition and baseline code level. A practical range for added costs is 0–8% of total build cost: the low end is achievable by prioritizing high-ROI envelope and systems changes, while Gold/Platinum goals push costs higher. Also budget $1,000–$5,000 for testing, rater fees, and documentation in many regions.
Which LEED credits are easiest for small homes?
For small homes, the easiest and most cost-effective credits usually involve air-sealing and insulation, efficient lighting and appliances, low-flow plumbing fixtures, and balanced mechanical ventilation. Preparing the site and planning for solar-ready roof details is also inexpensive and can earn points without immediate major expense.
Is LEED compatible with off-grid systems and tiny houses?
Yes. LEED's flexible credit structure can be applied to off-grid systems and smaller homes, though the pathway and some credits may need close attention—especially for energy and water credits where grid-tied assumptions are common. Tiny homes and off-grid projects should document system sizing, storage, and renewable generation carefully and consult a LEED provider to choose applicable credits and verification methods.