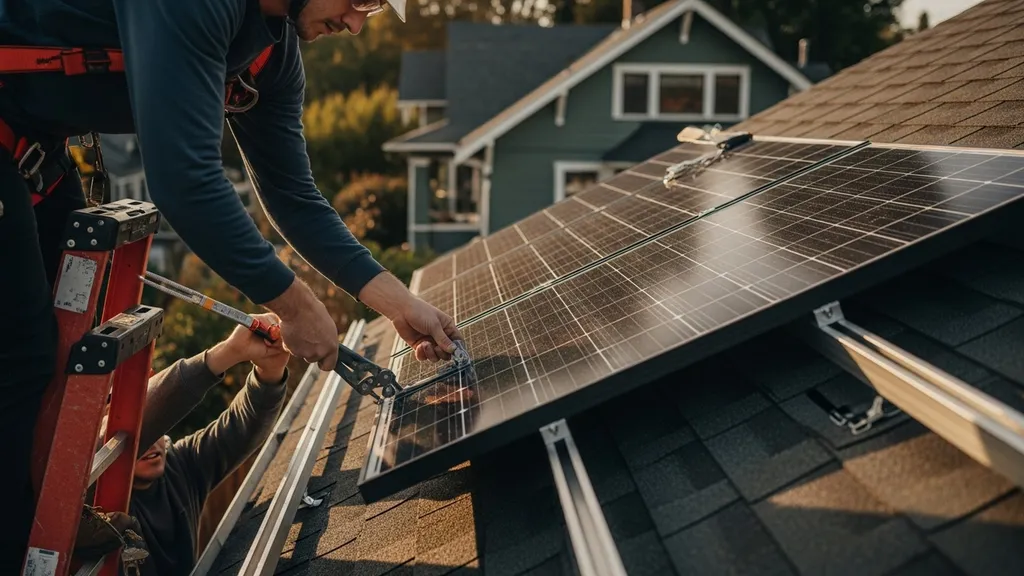
Step-by-step DIY solar installation guide for budget-conscious builders — planning, sizing, components, safety, costs, and commissioning.
Solar Panel Installation DIY: Complete Guide
Installing a DIY solar installation can cut energy bills and add resilience to a home, cabin, or tiny house. This guide explains how DIY solar installation works, how to size a system for your needs, what components to choose, step-by-step mounting and wiring instructions, permit and inspection basics, and long-term maintenance so you can plan a safe, cost-effective project. Read on to learn the timelines, typical component sizes, and where to get tools and calculators to start.
TL;DR:
- Plan for 1–3 days of hands-on mounting/wiring for a small array; typical panel sizes are 250–450W and modern string inverters exceed 95% efficiency.
- Use your monthly kWh to size the array: factor 14% system losses and divide by local sun-hours; use the solar sizing calculator for quick estimates.
- DIY is sensible for roof or ground mounts with basic carpentry and electrical skills, but hire a licensed electrician for final AC tie-in, permits, and inspections.
Key Points to Know Before a DIY Solar Installation
What to expect before beginning a DIY solar installation:
What Skills and Tools You Need
- Basic electrical knowledge: reading breaker panels, identifying breakers, and following wiring color codes.
- Carpentry and roof work skills: measuring, drilling, and installing flashings or mounts safely.
- Hand and power tools: drill/driver, torque wrench, crimpers, multimeter, voltage tester, conduit bender (if needed), and a ladder with a spotter.
- Safety equipment: fall-arrest harness, helmet, gloves, eye protection, and lockout/tagout tags for the service panel.
- Timeframe: a small array (2–6 panels) typically takes 1–3 days for one person to mount and wire (excluding permitting and inspection). Larger arrays scale up accordingly.
Industry guidance: the Department of Energy's homeowner guide gives a clear checklist of suitability and safety considerations; consult it early in planning (Department of Energy's homeowner guide to solar).
When to Call a Licensed Electrician or Inspector
- Final AC connection to the main service must usually be completed by a licensed electrician per local code.
- Hire a pro if your installation requires electrical panel upgrades, meter swaps, or complicated interconnection equipment.
- Inspectors typically require: single-line diagrams, equipment spec sheets, and labeling for disconnects. Expect an electrical permit and a building permit in most jurisdictions.
- National Electric Code (NEC) topics to watch: rapid shutdown requirements, overcurrent protection, and grounding. Local amendments vary—always check with the AHJ (authority having jurisdiction).
Use this section as a quick readiness checklist: roof condition, shading, permit likelihood, required skills, and timeline. If any of those items are uncertain, get a pro opinion before buying equipment.
How DIY Solar Installation Works: Core Components and System Types
A solar array turns sunlight into DC electricity, routes that DC to an inverter, and then supplies AC loads or stores energy in batteries. Key flow: sun → PV modules → DC conductors → inverter → AC loads/grid or batteries.
PV Panels and How They Produce Electricity
- Panels (modules) are made of silicon cells that produce DC current when exposed to sunlight via the photovoltaic effect.
- Typical residential panel wattages are 250–450W. Panel power, tilt, and orientation determine peak output.
- Panel efficiency affects roof area requirements: higher-efficiency monocrystalline cells need less space than polycrystalline or thin-film.
Inverters and Power Conversion Options
- String inverters: One inverter receives DC from series-connected strings. Efficient (95%+), cost-effective for uniform installations.
- Microinverters: One microinverter per panel, converting DC to AC at the module. Best for shaded or complex roofs; offers per-panel monitoring.
- Hybrid inverters: Support grid-tied operation and battery storage; can be AC-coupled or DC-coupled depending on system design.
- Conversion efficiency: modern string inverters commonly exceed 95% peak efficiency. Microinverters and optimizers reduce mismatch losses.
Reference: the Solar Energy Industries Association offers technical resources on system types and grid interactions (Solar energy industries association resources).
Mounting Systems and Roof vs Ground
- Roof mounts: Flush mounts on rafters, or tilted racks for improved angle. Proper flashing and sealant are required for water integrity.
- Ground mounts: Pole mounts, fixed-tilt racks, and tracking systems. Ground mounts allow easier access and cooling, often improving yield.
- Structural check: Roof load-bearing capacity must be verified; older roofs may need reinforcement or replacement before installation.
Battery Systems and Charge Controllers
- Battery chemistries: Flooded lead-acid, AGM, and lithium iron phosphate (LiFePO4). LiFePO4 offers higher usable depth-of-discharge, longer cycle life, and lower maintenance.
- Charge controllers: Used in off-grid and many battery-coupled systems. MPPT controllers are more efficient than PWM, especially when panel voltage exceeds battery voltage.
- Coupling methods: AC coupling uses an inverter on the AC side; DC coupling connects panels to battery via a charge controller. Read the guide to ac and dc coupling in hybrid systems for specifics.
Also see research on storage impacts: a university analysis discusses energy consumption and emissions associated with storage strategies (study on storage impacts).
Planning Your DIY Solar Project: Site Assessment, Permits, and Incentives
Careful planning reduces rework. This section covers site analysis, permitting, and finding incentives.
Assessing Roof Angle, Orientation, and Shading
- Tilt and azimuth: In the Northern Hemisphere, south-facing arrays within ±30° of azimuth give strong year-round output. Tilt roughly equal to latitude is a good starting point.
- Shade analysis: Use smartphone apps or a simple shadow test (track shading through key solar hours) to detect obstructions. Even small shading on one panel can reduce a whole string's output unless microinverters or optimizers are used.
- Roof condition: Inspect shingles, flashing, and framing. If the roof needs replacement within 5–10 years, replace before installing panels.
For retrofit specifics and panel-to-roof matching, see our guide on adding solar to an existing home.
Permits, Inspections, and Local Rules
- Typical required paperwork: electrical permit, building permit, and an interconnection agreement with the utility for grid-tied systems.
- Inspectors often ask for a single-line electrical diagram and equipment spec sheets. Prepare labeling for AC/DC disconnects and rapid shutdown devices.
- Contact your utility early for net metering or export rules; some utilities require specific inverter certifications or anti-islanding measures.
- For a checklist of municipal steps, consult planning resources like Sunhub's installation planning notes (Sunhub's planning checklist) and ENERGY STAR guidance on energy-efficient homes (EPA's energy star guidance).
Finding Incentives and Rebates
- Search federal, state, and local incentives via national databases or programs like DSIRE where available. Many regions offer tax credits, rebates, or performance-based incentives.
- Incentive programs can affect the financial case and sizing decisions. Record all incentive documentation for permit and interconnection submissions.
Plan for permit lead time—some jurisdictions take a week; others take several weeks. Factor inspection scheduling into the project timeline.
Sizing a DIY Solar System: Step-by-step Calculation
Sizing is critical. Use actual consumption data, factor losses, and match components to get reliable performance.
Estimate Your Energy Needs (loads and Daily Kwh)
- Pull your last 12 months of utility bills to find monthly kWh. Convert to daily kWh: divide monthly kWh by 30.
- Example: 900 kWh/month → 30 kWh/day.
Using a Solar Sizing Calculator and Rules-of-thumb
- Apply production losses: assume ~14% total system losses (inverter, wiring, soiling, temperature). That leaves ~86% of theoretical energy.
- Use local average sun-hours (peak sun-hours per day). Example: if your location averages 4.0 sun-hours/day:
- Required array kW = (Daily kWh) / (sun-hours × system efficiency)
- Using the example: Required array kW = 30 kWh / (4.0 × 0.86) ≈ 8.72 kW
- For quick help, use the solar sizing calculator or a panel count calculator.
Matching Panels, Inverter, and Battery Sizing
- Choose panel wattage and count using the required array kW. Using 420W panels:
- Panel count = required array kW × 1000 / panel wattage → 8.72 kW = 8720 W → 8720/420 ≈ 21 panels.
- Inverter sizing: typically equal to or slightly less than array DC rating for grid-tied systems (e.g., 8–10 kW inverter for an 8.72 kW array). Oversizing the inverter can reduce efficiency under low loads.
- Battery sizing (for autonomy): Decide desired days of autonomy and usable capacity:
- Example: 1-day autonomy for a 30 kWh/day load with lithium (80% usable) → battery bank size = 30 kWh / 0.8 = 37.5 kWh.
- Lead-acid with 50% usable would double the required nominal capacity.
For more specific presets, see the small-system guides: 1 kW workshop guide, 3 kW tiny-house guide, 7 kW cabin guide, and 10 kW off-grid guide.
Comparison/specs Table: Common Panel, Inverter, and Battery Specs
| Component | Typical sizes | Usable capacity / notes |
|---|---|---|
| Panel | 300W, 370W, 420W | Higher watt panels reduce roof area; efficiencies vary 17–22% |
| Inverter | 3 kW, 5 kW, 10 kW | String inverters 95%+ efficiency; microinverters per-panel |
| Battery (LiFePO4) | 5 kWh, 10 kWh modules | ~80–90% usable, 3000–5000 cycles |
| Battery (Lead-acid) | 5 kWh, 10 kWh modules | ~50% usable, 500–1200 cycles depending on type |
Use the panel count calculator to convert array kW into a panel count for the specific module you plan to buy.
Choosing Components for a DIY Solar Installation: Panels, Inverters, Batteries, and Racking
Selecting equipment requires balancing budget, performance, certifications, and warranty.
Selecting Solar Panels: Efficiency, Warranties, and Certifications
- Efficiency vs cost: Higher efficiency panels cost more per watt but save roof space. Monocrystalline panels typically offer the best efficiency.
- Warranties: Look for 25-year performance warranties and 10–12 year product warranties as baseline expectations.
- Certifications: Confirm IEC and UL listings for safety and grid interconnection. For more on key marks, see solar panel certifications explained.
- For budget conscious options, consult our curated list of budget panel options.
Inverter Choices: String, Microinverter, and Hybrid Inverters
- Choose microinverters when panels face multiple orientations or shading is present. They simplify performance troubleshooting at the panel level.
- Choose string inverters for uniform arrays; they are cost-effective and efficient for typical residential roofs.
- For systems planning batteries, consider hybrid inverters or pair a battery inverter that supports AC or DC coupling.
Battery Selection and Safety Considerations
- LiFePO4: Higher initial cost, lower lifecycle cost, compact, and no venting required. Good for long-term off-grid use.
- Lead-acid (AGM/flooded): Lower upfront cost, bulkier, require ventilation (flooded), and have shorter cycle life. Use for tight budgets but expect replacement sooner.
- Safety: install batteries in ventilated, temperature-controlled enclosures. For DIY battery housing, see our guide on DIY battery enclosure.
Mounting and Racking Options for Roofs and Ground Mounts
- Flush mounts: Low-profile, commonly used on pitched roofs; require proper flashing and sealant.
- Tilt racks: Improve winter yield by increasing tilt angle; useful when roof slope is far from optimal.
- Pole mounts and ground racks: Easier access for maintenance and better cooling, which can improve performance.
- Flat roofs: Consider ballast mounts or penetrating mounts with curb details.
Small trade-off example: a ground mount may cost more for racking and site prep but often yields 5–10% better annual output due to reduced shading and better cooling.
Step-by-step DIY Solar Installation: Layout, Mounting, Wiring, and Commissioning
A clear sequence reduces mistakes. Below is a procedural outline for a typical roof-mounted grid-tied or hybrid system.
Pre-install Checklist and Safety Setup
- Checklist: Site plan, permit paperwork, equipment specs, roof anchoring points identified, PPE, and fall protection set up.
- Lockout/tagout: De-energize the service panel for any AC work; clearly tag breakers to prevent accidental re-energizing.
- Spotter: Use a helper for ladder work and handing tools; never work alone on the roof.
Mounting Rails and Securing Panels
- Mark rafter locations with a stud finder and measure rail layout for panel spacing.
- Install flashing and roof-penetration hardware at rafters; torque lag bolts per manufacturer specs.
- Mount rails, ensure they are level and properly grounded if the mounting system requires grounding jumpers.
- Fasten modules to rails using manufacturer clamps and torque to specified Nm.
Electrical Wiring: Arrays, Combiner Boxes, and Inverter Hookup
- Route DC conductors in UV-rated conduit or cable; maintain polarity and avoid sharp bends.
- If using multiple strings, bring strings into a combiner box with appropriate fuses or breakers before the inverter DC input.
- Install PV array disconnect within sight of the inverter per NEC requirements.
- Grounding: Bond racking, module frames, and equipment grounding conductors per code.
- Final AC hookup: have a licensed electrician perform the panel tie-in and install the AC disconnect or meter base changes required by the utility.
System Testing, Commissioning, and Inspection
- Pre-commission tests: verify open-circuit voltage, short-circuit current if needed, and continuity of grounding conductors.
- Power up inverter per manufacturer's sequence and verify readings against expected voltage and current.
- Provide the inspector with single-line diagrams and manufacturer spec sheets; correct any punch-list items they identify.
Watch this step-by-step guide on installing solar panels using aluminium interlock (tutorial final part):
.For battery installations, follow enclosure guidance in the DIY battery enclosure and consult our solar troubleshooting tips during commissioning.
Costs, Common Pitfalls, and Troubleshooting for DIY Solar Installation
Budgeting and avoiding mistakes protects your investment.
Typical DIY Cost Breakdown and Budgeting Tips
- Major cost categories: panels, inverter(s), racking, wiring/conduit, disconnects/combiner boxes, batteries (if used), permits, and inspection fees.
- Expect higher per-watt savings on equipment when buying bulk but account for additional fasteners, flashings, and sealants.
- Use our solar cost calculators to detail component and labor estimates for your project.
Common Mistakes and How to Avoid Them
- Undersized inverter: don’t assume inverter sizing is a one-to-one with panels—check manufacturer guidance and local interconnection rules.
- Poor roof penetrations: improper flashing causes leaks; test and seal all penetrations.
- Improper grounding or missing OCPD (overcurrent protection): follow NEC and manufacturer instructions for string configuration and DC fusing.
- Ignoring shading: use optimizers or microinverters where shading exists.
Troubleshooting Checklist for Performance Issues
- Low production: check orientation, tilt, and shading; compare production to expected yields using monitoring portal or a reference nearby array.
- Inverter fault codes: reference manufacturer troubleshooting tables. Common causes include open circuits, overvoltage, or grid abnormalities.
- Battery charging issues: verify charger/MPPT settings, battery temperature compensation, and state-of-charge readouts.
If problems persist, consult our solar troubleshooting tips and be ready with serial numbers and system diagrams when contacting vendor support.
Maintenance and Long-term Performance: Warranties, Monitoring, and Upgrades
Maintaining panels and electronics preserves returns over decades.
Routine Maintenance Tasks and Inspection Schedule
- Clean panels 1–2 times per year in dusty climates; more often if heavy soiling or bird droppings occur.
- Inspect mounts, bolts, and flashing annually for looseness or corrosion.
- Check conduit runs and cable glands for weathering; re-torque connections as specified.
- Record inverter hours and fault history; save all warranty paperwork and installation photos.
Monitoring Options and Performance Tracking
- Manufacturer portals: Many inverters provide cloud monitoring with per-string or per-panel data.
- Third-party monitors: Use energy data loggers or IoT solutions for custom dashboards.
- Monitoring helps detect gradual performance drops (soiling, shading growth) and identify sudden faults quickly.
Upgrading and Scaling an Existing DIY System
- Adding panels: ensure the inverter and roof space can accept extra DC input; you may need a larger inverter or parallel inverters.
- Adding batteries: decide between AC coupling (easier retrofits with a battery inverter) or DC coupling (more efficient in some designs). Consult the AC/DC coupling guide for trade-offs.
- Firmware updates: keep inverter and charge controller firmware current for safety and performance improvements.
The Bottom Line
DIY solar installation is achievable for budget-conscious builders with basic carpentry and electrical skills, careful planning, and the right permits. Use accurate sizing tools, follow code requirements, and involve a licensed electrician for final AC tie-in and inspections. Start with the solar sizing calculator and the step-by-step installation checklist if you’re ready to proceed.
Frequently Asked Questions
How difficult is a DIY solar installation?
The short answer: it varies. A small ground-mounted array or a few rooftop panels is manageable for DIYers with carpentry skills and a solid grasp of basic electrical concepts. Tasks like measuring, mounting rails, and routing conduit are well within reach for many homeowners. However, the final AC connection and any panel upgrade work that affects the main service usually require a licensed electrician. If your project includes battery installation or complex interconnection equipment, expect a steeper technical curve and consider professional help.
Do I need a permit and inspection?
Yes—most jurisdictions require at least an electrical permit and often a building permit for rooftop systems. Inspectors typically want a single-line diagram, equipment spec sheets, and labeled disconnects. Utilities also commonly require an interconnection agreement for grid-tied systems. Contact your local building department and utility early to learn specific requirements and timelines.
Can I connect a DIY system to the grid?
Connecting to the grid is possible but regulated. Utilities usually require an interconnection agreement, a certified inverter, and compliant rapid shutdown and anti-islanding features. Most jurisdictions require a licensed electrician to perform the final AC tie-in. Follow your utility’s procedures to enable net metering or export credits where available.
How much does a DIY solar system cost?
Costs depend on system size and components. Major line items include panels, inverter(s), racking, wiring, batteries (if used), and permits. DIYers save on labor but still pay for hardware and often electrical contractor fees for final hookup. Use our solar cost calculators to get a tailored estimate for equipment and incidental costs.
How long do solar panels and batteries last?
Solar panels commonly carry 25-year performance warranties and often produce useful power for 30 years or more with gradual degradation. Battery life varies by chemistry: LiFePO4 batteries typically offer thousands of cycles and longer calendar life, while lead-acid batteries have shorter cycle life and require more maintenance. Check manufacturer datasheets for expected cycle life, usable capacity, and recommended operating conditions.