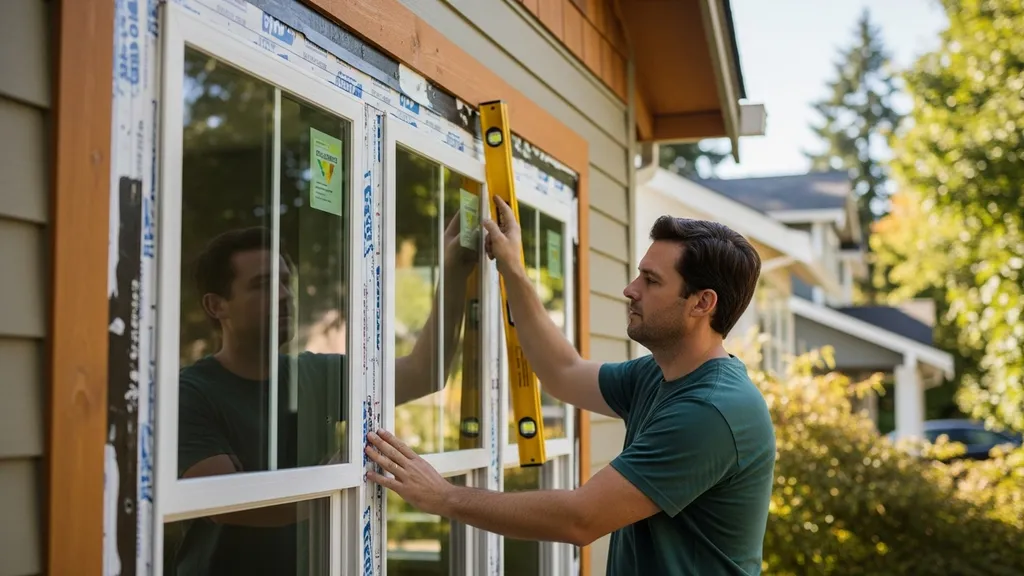
Practical guide to choosing, installing, and sizing energy-efficient window replacements that cut bills and improve comfort.
Window Replacement for Energy Efficiency
Older single-pane windows in a cold climate can make a house feel drafty, hike heating bills, and cause interior condensation. Window replacement for energy efficiency reduces heat loss, improves comfort, and can cut annual heating and cooling costs by roughly 10–30% depending on climate and the scope of upgrades. This guide explains when to replace windows, how to choose glazing and frames, what installation details matter most, and how to estimate costs and payback so budget-conscious DIYers and self-builders can make informed decisions.
TL;DR:
- Replace failing windows to save 10–30% on annual heating/cooling (typical range) and stop cold surfaces that cause drafts and condensation.
- Choose glazing by climate: high-performance double with low‑E + argon is cost-effective in mild climates; triple‑pane is justified for cold climates or passive-house targets.
- Prioritize correct flashing, air sealing, and insulating the rough opening—poor installation wipes out product gains.
Why Window Replacement for Energy Efficiency Matters
Windows can account for about 10–25% of a home's heat loss or gain depending on the building envelope and occupancy patterns. In an older house with single-pane glazing and poor seals, losses cluster near window assemblies: cold surfaces radiate into rooms, drafts at sashes increase heating demand, and condensation between panes signals failed seals. Replacing worn windows with energy efficient windows—properly sized and installed—can reduce heating and cooling energy use by roughly 10–30% in many retrofit scenarios. The exact savings depend on climate, orientation, and replacement scope.
The U.S. Department of Energy and Building America projects offer practical retrofit checklists for removal and replacement that link product selection to installation details; see the Building America Solution Center’s window replacement checklist for a step-by-step reference. After replacement, track performance to confirm savings; homeowners should monitor home energy use to compare pre- and post-upgrade consumption and spot installation issues early.
Beyond energy, new windows improve occupant comfort (fewer cold spots and drafts), reduce condensation-related rot risk, and can increase the effective lifetime of surrounding finishes. For homeowners pursuing deeper retrofits or net-zero goals, windows are one of several priority measures that interact with ventilation, insulation, and HVAC sizing.
How to Decide If Your Home Needs Window Replacement for Energy Efficiency
Signs Your Windows Are Failing
Look for visible and performance-based signs:
- Persistent condensation between panes (failed IGU)
- Rotted or swollen sills and jambs
- Sash that won’t close tightly or rattles
- Noticeable drafts and cold radiating surfaces on winter mornings
- Excessive solar heat gain in summer without adequate shading
If you see failed seals or structural rot, full-frame replacement is usually the right call. Cosmetic issues, broken hardware, or minor drafts can sometimes be fixed without full replacement.
Quick Tests You Can Do (thermal Camera, Candle Test, Draft Detection)
Do low-cost diagnostics before committing:
- Candle test: Move a lit candle along the sash and frame edges on a windy day. Flicker or steady smoke movement shows air leakage.
- Thermal scan: Rent an infrared camera or use a phone app to spot cold spots at the frame, rough opening, and glazing edges.
- Touch test: Run a hand around the sash and head for noticeable cold air. Pay attention to sill corners and the head flashing.
For a whole-house assessment, a blower-door test by a qualified contractor reveals relative leakage and helps prioritize windows versus other air leakage hotspots. See our article on common air leakage hotspots for typical problem areas to inspect.
Repair Vs. Replace Checklist
Use a simple threshold to decide:
- Replace if: condensation between panes, significant frame rot, warped sash, or major operation problems.
- Repair if: worn weatherstripping, broken balances, single-pane but otherwise intact framing (consider storm windows), or minor seal leaks limited to trim.
Simple interim measures like adding storm windows or following our door weatherstripping tips can improve comfort while you plan a replacement project. For large-scale removals that affect structural members, treat the job as a framing project rather than a glazing swap.
Industry trends show growing market activity for replacement work, and recent reports can help you benchmark typical issues and costs during planning; see a recent market trends report on replacement and installation for background.
Choosing Window Types and Glazing for Window Replacement for Energy Efficiency
Selecting the right combination of glass, gas fill, coatings and frames depends on your climate and goals. Here are practical comparisons and guidance.
Single, Double, and Triple-pane Glazing Comparison (table)
| Glazing Type | Typical U‑factor (Btuh·ft²·°F) | Typical SHGC | Typical R‑value equivalent |
|---|---|---|---|
| Single pane (no low‑E) | 1.2–1.4 | 0.6–0.8 | ~0.8 |
| Double pane, clear, air | 0.30–0.50 | 0.4–0.6 | 2.0–3.3 |
| Double pane, low‑E + argon | 0.25–0.35 | 0.25–0.55 | 2.9–4.0 |
| Triple pane, low‑E + argon/krpton | 0.18–0.30 | 0.20–0.50 | 3.3–5.6 |
Notes: Values are typical manufacturer ranges and depend on frame type and spacer design. Look for NFRC label values for a specific unit. Industry sources report wide variation—triple-pane delivers best insulating performance, but cost and weight rise.
Low‑e Coatings and Gas Fills Explained
Low‑emissivity (low‑E) coatings are thin metallic films that reflect long-wave infrared heat while letting visible light through. In cold climates use low‑E coatings that reflect indoor heat back into the room; in hot climates choose coatings with lower SHGC to reduce solar heat gain. Gas fills—argon for most budget upgrades, krypton for tighter gaps in high-performance triple glazing—reduce convective heat transfer between panes.
Frame Materials: Vinyl, Wood, Fiberglass, Aluminum with Thermal Break
- Vinyl: Low cost, low maintenance, fair thermal performance. Limited paintability.
- Wood/Clad: Higher cost, very good thermal performance with insulation, aesthetic finish options. Requires maintenance for exposed wood.
- Fiberglass: Stable, low expansion, good thermal performance, durable in temperature swings.
- Aluminum with thermal break: Strong and slim profiles but can conduct heat; thermal break improves performance.
Frame choice influences overall U‑factor and thermal bridging. For passive-house or cold-climate targets, insulated frames and thermally-broken sills matter more than cosmetic trim.
For deeper context on whether extra cost for triple glazing is worth it, read our analysis of triple‑pane tradeoffs. For passive-house level selection and installation details, see passive house window choices. To compare specific NFRC ratings and cost estimates side-by-side, use the window comparison tool.
Understanding U-factor, SHGC and Labels for Window Replacement for Energy Efficiency
What U‑factor, SHGC and VT Mean for Comfort
- U‑factor: Measures heat transfer; lower values mean better insulation and less heat loss in winter. Target lower U‑factor for cold climates.
- SHGC (solar heat gain coefficient): Fraction of incident solar heat that enters. Lower SHGC reduces cooling loads in hot climates; higher SHGC helps capture passive solar heat in winter.
- VT (visible transmittance): Amount of visible light transmitted. Higher VT improves daylighting but may increase glare.
Pick targets by climate: in heating‑dominated climates, prioritize low U‑factor (e.g., ≤0.30); in cooling climates, prioritize lower SHGC (e.g., ≤0.25). For mixed climates, balance both metrics.
How to Read NFRC and ENERGY STAR Labels
NFRC labels report measured U‑factor, SHGC, VT, and air leakage for a specific unit. ENERGY STAR sets regional criteria; check local ENERGY STAR requirements to see which products qualify in your zone. For benchmarking and industry stats on window performance trends, see the window and door benchmarking statistics which summarize manufacturer data and performance shifts.
When choosing windows, review both the NFRC label and manufacturer installation guidance. Remember trade-offs: a very low SHGC can reduce passive solar gains in winter if windows face south. Use orientation-informed design decisions; see window orientation tips to balance SHGC with solar access.
Installation, Airtightness and Flashing for Window Replacement for Energy Efficiency
Critical Installation Steps That Impact Performance
Product specs matter, but installation has equal or greater influence on final performance. Key steps include:
- Inspect and repair framing: Remove any wet or rotted framing and allow assemblies to dry.
- Install a sill pan: A correctly sized sill pan prevents water intrusion at the base.
- Apply continuous flashing: Flash head and jambs with compatible tape or membrane before setting the unit.
- Seat and shim correctly: Use non‑compressible shims to set level and plumb; avoid distorting the frame.
- Air seal the frame-to-rough-opening gap: Use low‑expansion spray foam or backer rod plus a compatible sealant.
- Install interior trim without breaking the air barrier: Keep the interior air barrier continuous or repair it after trimming.
Poor flashing or gaps at the air barrier can nullify the benefits of low U‑factor units. For deeper airtightness techniques and testing strategies, see our airtightness guide.
Integrating Flashing with Cladding and Air Barrier
Tie the window flashing into the wall’s drainage plane: under the housewrap or WRB at the head and over the sill pan per manufacturer details. Ensure the external cladding overlaps the flashing correctly to shed water away from the opening. If you’re adding exterior continuous insulation, review reveal details and flashing described in our exterior insulation methods.
Thermal Bridging and Insulating the Rough Opening
Frames can create thermal bridges at the perimeter. Address this by:
- Choosing frames with thermal breaks or insulated jambs
- Adding compressible foam or mineral wool in the rough opening
- Using exterior continuous insulation up to the frame edge where possible
For readers new to insulation concepts, our primer on understand R‑value insulation explains how R‑value relates to these strategies.
Good installation reduces air infiltration and moisture risk. For practical tips and a friendly step-by-step walkthrough, see Glass Doctor’s step-by-step window replacement guide.
DIY vs Professional Options for Window Replacement for Energy Efficiency
When DIY Replacement is Appropriate
DIY insert or pocket replacements can be reasonable for a confident DIYer when:
- The existing frame and rough opening are sound and square
- Work is limited to sash removal and reglazing or insert units
- You understand flashing and sealing basics and can follow manufacturer instructions
Simple pocket replacements avoid disturbing exterior cladding and can be completed in a few hours per window by an experienced DIYer.
When to Hire a Pro and What to Ask
Hire a professional when:
- There is frame rot, water damage, or structural repair required
- You’re replacing multiple windows in one wall and need consistent flashing details
- You want blower-door testing or airtightness verification after installation
Ask potential contractors for proof of insurance, references for similar jobs, familiarity with NFRC ratings, a written warranty, and a one-window mock-up before a full install. Request they explain how they will integrate the window with the air barrier and whether they use sill pans and compatible flashing systems.
This video provides a helpful walkthrough of the key concepts:
Also consult a contractor’s process description such as a step-by-step guide to the window replacement process to set expectations on time and staging. If your project requires structural opening changes, review our step-by-step framing details before starting.
Costs, Savings and ROI of Window Replacement for Energy Efficiency
Typical Cost Ranges for Common Upgrades
Installed costs vary by region, unit size, frame material, and installation complexity. Ballpark ranges:
- Vinyl double‑pane retrofit insert: $300–$900 per window
- Wood‑clad double‑pane full‑frame: $800–$1,800 per window
- Fiberglass or high‑end wood triple‑pane full‑frame: $1,200–$3,000+ per window
These are averages; recent industry data and ROI summaries indicate replacement cost per window in the U.S. often averages near $650 for a single unit, but premium units and complex installs raise costs significantly. See industry statistics for more context: window replacement industry statistics.
Estimating Energy Bill Savings and Simple Payback
Estimate savings conservatively:
- Replace single-pane to high‑performance double (low‑E + argon): expect 10–15% reduction in heating/cooling energy in many climates.
- Replace poor double to triple‑pane: expect incremental savings of 5–10% depending on U‑factor change and orientation.
Example simple calculation: A home spending $2,400/year on HVAC might save 12% ($288/year) from window upgrades; if upgrade cost is $6,000, simple payback ~21 years (not accounting for rebates or home-value increase). Windows rarely have the shortest payback among retrofit measures—adding insulation or sealing may return more energy savings per dollar—so consider windows as part of a whole-house plan. For planning a package approach, see the deep retrofit checklist.
Incentives, Rebates and Financing Options
Many utilities and national programs offer rebates for ENERGY STAR certified windows or specific efficiency upgrades—check the ENERGY STAR incentives page and local utility programs. Also consider tax credits or homeowner financing programs where available. After installation, track home energy use to validate savings claims and qualify for performance‑based incentives. For owners pursuing net‑zero, new windows are one of several prioritized upgrades; review the 10 net zero features to see how windows fit into a broader strategy.
Materials, Sizing Checklist and Key Points Before a Window Replacement for Energy Efficiency
Pre-purchase Checklist (measurements, Rough Opening, Flange Types)
- Measure both visible jamb-to-jamb and rough opening dimensions.
- Confirm whether you’ll use an insert (pocket) or full‑frame replacement.
- Identify flange type (nailing fin vs. block‑frame) to match installation details.
- Request NFRC label and installation instructions for the specific unit.
- Decide on interior and exterior trim details and whether exterior insulation will alter reveal depth.
Ordering Tips and Lead Times
Order windows after confirming final dimensions and any wall insulation or cladding changes. Many custom units have lead times of 4–8 weeks; high‑performance units or specialty frames can be longer. Ask the supplier for shipping protection and staging advice for delivery.
On-site Inspection Checklist for Delivery and Install
- Inspect each unit for glass damage and correct sizes upon delivery.
- Stage units in a dry, protected area to avoid warping or finish damage.
- Verify manufacturer’s hardware and installation accessory kit are complete.
Key Points List: 10 Must-check Items
- Confirm NFRC label: Verify U‑factor, SHGC, and VT for each window ordered.
- Measure twice: Check both visible and rough opening dimensions before ordering.
- Decide scope: Choose insert for sound frames, full‑frame for rot or large upgrades.
- Inspect framing: Replace any wet or rotted framing before installation.
- Use a sill pan: Ensure positive drainage at the sill for every exterior opening.
- Tie in WRB: Integrate flashing with the wall’s weather‑resistive barrier.
- Air seal properly: Use low‑expansion foam or backer rod + sealant at perimeter.
- Avoid over‑tightening: Fasteners should hold but not twist the frame.
- Protect finishes: Stage and protect units on delivery; install interior trim without perforating air barriers.
- Verify performance: Run a thermal scan or blower‑door test after installation to confirm airtightness.
For help selecting sustainable materials for trim and frames, consult the sustainable materials guide. If adding cavity insulation around openings, review R‑value comparisons in our insulation R‑value comparison.
The Bottom Line: Window Replacement for Energy Efficiency
Window replacement can produce meaningful comfort improvements and energy savings—often 10–30% in heating/cooling loads—when you pick the right glazing and frames for your climate and, crucially, install them with proper flashing and air sealing. For a budget‑conscious approach, prioritize replacing units with failed seals or rot, use high‑value double‑pane low‑E options in moderate climates, and choose triple‑pane units where cold‑climate performance or passive‑house targets demand it. Run diagnostics, use the window comparison tool, get 2–3 quotes, and monitor post-install energy use to verify results.
Frequently Asked Questions
How much will replacing windows save on energy bills?
It varies, but studies and retrofit case studies typically show 10–30% reductions in heating and cooling energy when windows are upgraded from single‑pane or very poor seals to high‑performance units and when installation is done correctly. The exact saving depends on climate, window area, orientation and whether other envelope improvements are made.
To get a realistic estimate, track baseline energy use, run a thermal or blower‑door test before work, and then monitor home energy use after installation to validate results.
Are triple‑pane windows worth it?
Triple‑pane glazing offers the lowest U‑factors and best comfort for cold climates or passive‑house targets, but cost and weight are higher. For many moderate climates, a well‑specified double‑pane with low‑E and argon provides the best cost-to-performance ratio. See our deeper look at triple‑pane tradeoffs to compare lifecycle costs and performance.
Can I replace windows myself?
Yes for inserts and pocket replacements when the existing frame is sound and you can follow manufacturer instructions for flashing and sealing. Full‑frame replacements, structural repairs, and jobs where the air barrier or siding is affected are best handled by an experienced installer. Watch a step‑by‑step demo and assess your comfort level before committing:
Does window replacement need a permit?
Permit requirements vary by jurisdiction. Many places waive permits for sash replacements or insert work but require them for full‑frame replacements that change structural openings or alter waterproofing details. Check local building department rules before ordering windows and keep documents from your installer on file.
How do I ensure the install keeps air barriers intact?
Require the installer to show how flashing ties into the wall WRB, to use a sill pan, and to seal the frame‑to‑rough‑opening gap with the appropriate materials (low‑expansion foam, backer rod + sealant). Ask for a post‑install thermal scan or blower‑door test and refer them to our airtightness guide for continuous air barrier strategies.