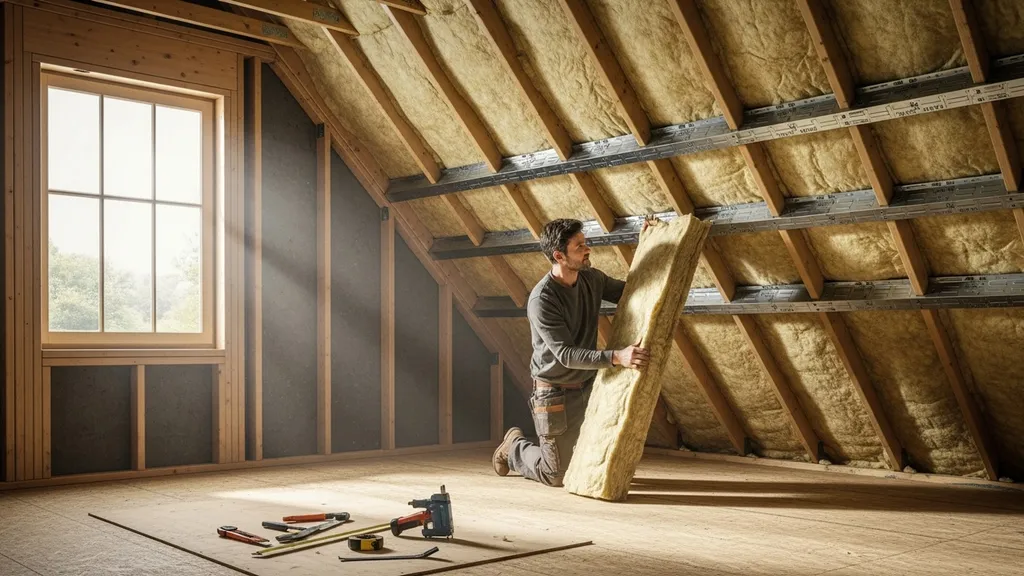
How to insulate and ventilate an attic conversion for comfort, moisture control, and energy efficiency—practical options, ventilation rules, and DIY steps.
Attic Conversion: Insulation and Ventilation
Converting an attic into a livable room adds square footage and can increase home value, but getting the insulation and ventilation right is essential to comfort, energy use, and avoiding moisture damage. An attic conversion without the right thermal and moisture strategy commonly leads to condensation, mold, or ice dams—roofs account for roughly 20–30% of a home's heat loss when poorly insulated. This guide explains how to choose insulation, size vents or design a sealed assembly, and follow a DIY-friendly sequence so an attic conversion performs for decades.
TL;DR:
- Aim for target attic R-values by climate: R-38 in moderate climates, R-49–R-60 in cold zones, or match local code/IECC guidance.
- Prioritize air sealing as much as added R-value; for a conditioned attic, insulate at the roofline and add mechanical ventilation (ERV/HRV).
- Use baffles and soffit-to-ridge flow for vented attics; for sealed attics, plan controlled mechanical ventilation and a clear vapor/drying strategy.
Why Insulation and Ventilation Matter in an Attic Conversion
Converting an attic into a bedroom or office changes the building envelope. An occupied attic becomes part of the conditioned space and must control heat flow and moisture like any other interior room. Research and building-science guidance show roofs can be responsible for 20–30% of a home's heat loss when ceiling and attic insulation are inadequate. That translates to higher heating bills and uneven temperatures in a converted space.
Performance, Comfort and Energy Impacts
- Thermal comfort: Insulating the right assembly keeps the new room at the same temperature as the rest of the house. For many U.S. climates, the International Energy Conservation Code (IECC) and local codes recommend attic R-values in the R-38 to R-60 range depending on climate zone. Use those as a baseline and measure your cavity depth to estimate what you can install without changing framing.
- Energy: Upgrading an attic to conditioned space often means extending HVAC or adding a supplemental heat source. Insulation reduces load; choosing continuous insulation at the roofline will cut thermal bridging and lower peak loads for heat pumps or furnaces.
- Acoustics: Insulation also improves sound control between floors, which matters for bedrooms.
Moisture, Mold and Structural Risk
- Condensation risk: If warm, humid air from living spaces reaches cold roof sheathing, it can condense and cause rot or mold. This risk grows when adding insulation but neglecting air sealing or ventilation.
- Ice dams: In cold climates, heat leaking into the attic melts snow on the roof; meltwater refreezes at eaves, causing ice dams that damage shingles and decks. Proper insulation and effective soffit-to-ridge ventilation reduce that risk.
- For practical guidance on building durable attics and avoiding moisture intrusion, see the U.S. Department of Energy's guide to durable attics.
Before choosing an assembly, evaluate thermal comfort goals and moisture risk. Passive House moisture principles and local code requirements provide useful constraints: get a building inspector or energy rater involved early if you plan a sealed, conditioned attic.
Planning the Conversion: Inspection, Codes, and Conditioned vs Unconditioned Attic
A solid plan prevents surprises. A quick inspection and a check of code requirements will determine whether the attic can become a habitable room or needs structural or fire upgrades first.
Structural and Access Checklist
- Joist and rafter depth: Measure joist depth and rafter spacing to calculate maximum in-cavity R-value and whether sistering or re-rafters are needed.
- Roof deck condition: Look for rot, active leaks, or nail pops that indicate a roof repair before interior work.
- Ventilation paths: Identify soffits, ridge vents, or blocked ventilation channels; also look for baffles or insulation blocking airflow.
- Penetrations: Locate chimneys, plumbing vents, ductwork, and electrical runs that cross the ceiling plane.
- Access and egress: Confirm there’s space for a compliant stair or safe egress window if adding a bedroom.
Code Basics: Egress, Insulation, and Fire Separation
- Egress: Most codes require an egress window or a stair that meets dimensions for a sleeping room. Confirm local requirements early; some jurisdictions require two exits.
- Insulation and fire separation: Ceiling/roof insulation and fire-blocking around chases are governed by the IRC/IECC and local amendments. A fire-rated drywall ceiling and smoke alarms may be mandatory.
- For more on attic ventilation basics that affect your plan, see ENERGY STAR’s about attic ventilation.
Choose Conditioned or Unconditioned Attic
- Unconditioned (cold) attic: Insulate at the ceiling plane and leave attic ventilated. Pros: lower intervention, often cheaper. Cons: ducts and HVAC left in unconditioned space need insulation and may lose efficiency; moisture risk around ceiling penetrations is managed by sealing and insulation above.
- Conditioned (warm) attic: Insulate and air-seal at the roofline (rafter bays), making the attic part of the thermal envelope. Pros: easier mechanical integration, fewer thermal bridges, better comfort for finished spaces. Cons: requires tight air sealing, proper vapor strategy, and sometimes thicker insulation or exterior continuous insulation.
- Deciding which approach fits your project depends on existing roof framing, budget, and whether you plan to extend HVAC ducts into the new attic room. Measure cavity depths and calculate achievable R-values before committing.
Insulation Options for Attic Conversions (comparison and Specs Table)
Selecting insulation depends on assembly type, cavity depth, moisture tolerance, and DIY skill. Below are common options and where they fit.
Batt Insulation (fiberglass, Mineral Wool)
- Fiberglass batts are affordable, widely available, and DIY-friendly. They meet many code requirements when fit tightly.
- Mineral wool (rockwool) resists water, offers better fire performance, and performs well where tight fitting around pipes or wiring is needed. See our mineral wool guide for details.
- Both can be used in vented attics or rafter bays if a proper air barrier is installed.
Blown-in Cellulose and Loose-fill Fiberglass
- Blown cellulose fills irregular cavities and provides good thermal performance and sound control. It's available as recycled content, which lowers cost for eco-minded builders.
- Loose-fill fiberglass is lighter and resists settling better than old formulations.
- For shallow rafters or tight cavities, consult the tiny house insulation guide.
Spray Polyurethane Foam (open and Closed Cell)
- Spray foam provides strong air sealing and high R-value per inch (closed-cell ~6.5 per inch, open-cell ~3.6 per inch). Closed-cell can act as a vapor retarder.
- It’s often used for sealed attic assemblies where air tightness is a priority. Compare trade-offs in our spray foam vs cellulose article.
Natural Fiber Options and Eco-friendly Choices
- Sheep’s wool, hemp, and recycled cotton are breathable and have low embodied carbon. They work well where moisture buffering and non-toxic materials are priorities. See the natural fiber options piece for performance details.
| Insulation | R-value per inch | Typical installed cost* | Air-seal effect | Moisture behavior | Fire performance | DIY difficulty |
|---|---|---|---|---|---|---|
| Fiberglass batts | 2.9–3.8 | Low | Low | Tolerant, but traps moisture if air flows | Moderate | Low |
| Mineral wool | 3.0–3.3 | Low–moderate | Low | Water-resistant, dries | High | Low |
| Blown cellulose | 3.2–3.8 | Low–moderate | Moderate | Absorbs moisture, can dry | Moderate | Moderate |
| Loose-fill fiberglass | 2.2–3.4 | Low | Low | Resists moisture, resists settling | Moderate | Moderate |
| Open-cell spray foam | ~3.6 | Moderate–high | High | Vapor-open; can trap moisture if not detailed | Low–Moderate | High (contractor) |
| Closed-cell spray foam | ~6.0–6.5 | High | Very high | Acts as a vapor retarder | Higher | High (contractor) |
| Natural fibers (wool/hemp) | 2.5–3.5 | Moderate | Low | Buffers moisture, dries | Moderate | Moderate |
*Cost ranges vary by region and project size; these are typical installed brackets, not quotes.
Which materials for which assembly and climate
- For a vented attic with deep joists, fiberglass or cellulose at the ceiling works well. If you have limited depth, consider high-R closed-cell foam or exterior continuous insulation.
- For a sealed, conditioned attic, spray foam simplifies the air barrier but raises cost; mineral wool plus an interior air barrier and exterior continuous insulation is an alternative. For shallow cavities, read the r23 vs r30 guide and r-15 vs r-38 comparison to weigh how much thickness you need.
- If you prefer natural options, match their hygrothermal behavior to your climate; see the natural fiber options article.
For more on retrofitting vented attics and technical details, review the Insulation Institute’s Retrofitting vented attics: solutions that work.
Cold Roof vs Warm Roof: Installation Strategies for Attic Conversions
Two main assemblies are used when finishing an attic: a vented (cold) attic with insulation at the ceiling, and a sealed (warm) attic with insulation at the roofline. Both have valid uses.
Vented (cold) Attic Approach: When It Works
- Description: Insulation stays at the ceiling plane; the attic above remains ventilated with soffit-to-ridge airflow.
- When to choose: If framing depth allows code-level attic R-values and roof sheathing is sound; lower up-front cost and simpler DIY.
- Requirements: Continuous soffit-to-ridge ventilation channel, baffles to preserve air paths at eaves, and robust sealing of ceiling penetrations.
- Pros/cons: Good for existing roofs without re-roofing. On the flip side, HVAC ducts in the attic will need upgraded insulation and may still lose heat.
Sealed (warm) Attic Approach: Insulating at the Roofline
- Description: Insulate and air-seal the roofline so the attic is inside the conditioned envelope.
- When to choose: Finishing an attic as living space, moving ducts inside conditioned space, or pursuing higher-performance standards.
- Requirements: Air barrier at the roof plane, careful vapor control selection (closed-cell foam or interior membranes), and often thicker insulation or continuous exterior insulation to reduce thermal bridging. For guidance on insulated roofline practices and passive-house performance, see exterior roof insulation performance.
- Pros/cons: Better thermal continuity and fewer conditioned/unconditioned transitions. Cons are higher material and labor costs and the need for mechanical ventilation sizing.
Hybrid Assemblies and Continuous Insulation Options
- Hybrid options use a mix: partial spray foam at the interior and exterior continuous insulation such as polyiso or mineral wool on the roof deck to get higher overall R and reduce bridging. Exterior insulation also helps with moisture control by keeping sheathing warmer during winter months; read our cool roof principles to see how reflective or ventilated roofing can supplement roofline strategies.
- Market research indicates loft conversions with dedicated bedrooms can raise home value substantially, which is a factor when weighing the extra upfront cost of a warm roof (see an example study on value increases from Nationwide: Xxx).
Ventilation Essentials for Attic Conversions
Ventilation strategy depends on whether the attic is vented or sealed.
Basic vent types and how they work (soffit, ridge, gable, powered)
- Soffit vents intake outside air at the eaves; ridge vents exhaust at the peak. Together they create soffit-to-ridge flow.
- Gable vents move air across the attic but can short-circuit soffit-to-ridge flow and are less effective in roof valleys.
- Powered vents (attic fans, turbines) can supplement airflow but may cause negative pressure and backdraft combustion appliances if not designed correctly. Use powered ventilation only where passive options are inadequate and follow manufacturer guidance.
Sizing Ventilation: Net Free Area Rules
- A common rule-of-thumb is 1:150 (one square foot of net free vent area per 150 square feet of attic floor) for attics without vapor barriers, or 1:300 for assemblies with a vapor retarder or balanced ventilation. This ratio helps prevent condensation and ice dams by keeping sheathing closer to outdoor temperatures.
- Always calculate net free area using manufacturer vent specs and the attic floor area. If in doubt, consult local code or an energy rater.
Ventilation for Sealed Attics and Mechanical Ventilation Needs
- Sealed, conditioned attics must have controlled mechanical ventilation to provide indoor air quality for occupants. Typical solutions include an ERV or HRV sized for the new room(s) and whole-house ventilation rates.
- Kitchen and bathroom exhausts affect overall house pressure and ventilation balance; review the kitchen and bath exhaust sizing guidance to ensure you don’t depressurize the attic or pull attic air into living spaces.
- For a visual walkthrough of installing baffles, soffit-to-ridge ventilation, and examples of vented vs sealed assemblies, watch this practical how-to video: Watch this step-by-step guide on beefing up attic insulation:
For additional planning steps and code considerations when converting an attic, Bob Vila’s planning guide provides accessible code and design reminders: Attic conversion.
Air Sealing and Moisture Control: Critical Steps for Long-term Success
Air sealing and controlling moisture paths is as important as adding R-value. A leaky barrier undermines even thick insulation and invites condensation issues.
Common Air Leakage Paths and How to Fix Them
- Top plates and framing penetrations: Seal with caulk, fire-rated foam, or gaskets around plates and chase openings.
- Recessed lights and fixtures: Replace non-IC rated cans or box them out with sealed enclosures; consider using sealed LED fixtures or external housings.
- Plumbing stacks and chimneys: Use mineral wool and high-temperature sealants for chimneys; use fire-blocking and layered sealing for plumbing vents.
- Duct seams: Seal with mastic or UL-approved tapes and insulate ducts to reduce loss.
Vapor Control Layers vs Drying Strategy
- The correct placement of vapor retarders depends on climate. In cold climates, limit moisture from the living space by placing a vapor retarder on the warm side. In mixed or warm climates, allow assemblies to dry to the exterior and avoid interior vapor barriers that trap moisture.
- Spray foam can act as an air barrier and, if closed-cell, a vapor retarder. Compare spray foam and cellulose behavior in our spray foam vs cellulose article to decide which aligns with your moisture strategy.
Detailing Around Penetrations, Chimneys and Recessed Lights
- Chimneys: Maintain clearances and use non-combustible chase materials; seal gaps at the roof deck with high-temperature approved materials.
- Recessed lights: Install insulated boxes or use certified airtight fixtures to prevent convective airflow into the attic.
- Skylights and dormers: Flash properly and detail the interface between roofline insulation and window frames; see the window sealing guide in how to seal windows.
Air sealing materials and methods include gaskets for top plates, layered taping at sheathing seams, closed- or open-cell spray foam for irregular gaps, and mastic for ductwork.
DIY Step-by-step Checklist and Cost-saving Tips
A clear sequence reduces rework and expense. Below is a suggested order for a safe retrofit plus tools and savings ideas.
Tools and Materials Checklist
- Insulation (batts, blown cellulose, or supply for foam contractor)
- Baffles/rafter vents, soffit vent materials
- Caulk, low-expansion foam, sheathing tape
- Respirator (NIOSH-rated for fiberglass/cellulose work), gloves, goggles
- Insulation supports, utility knives, staple gun
- Blower for blown-in installs (rent if needed)
- Ladder, scaffolding or safety gear for roof access
Suggested Work Sequence for a Safe Retrofit
- Inspect roof and framing: Repair leaks and rotten sheathing; replace damaged rafters or joists.
- Check code/egress: Confirm window/stair requirements and get permits where required.
- Air-seal the ceiling plane: Seal top plates, chases, and penetrations before insulation.
- Install baffles and ensure ventilation channels if keeping a vented attic.
- Install insulation (blown-in or batts) or install roofline insulation for a sealed attic.
- Add vapor control or interior air barrier as per your climate strategy.
- Finish interior surfaces and arrange mechanical ventilation if converting to conditioned space.
- Test and verify: Use a smoke pencil to find leaks, and consider a blower door test for significant remodels.
Budget Hacks and Where to Spend Extra for Durability
- Buy recycled cellulose to save on material cost for blown-in insulation.
- Rent a blower and crew for a day rather than renting long-term—short bursts lower rental fees.
- Prioritize air sealing and continuous insulation over extra inches of R in low-budget scenarios—air sealing often yields better comfort per dollar.
- Combine scaffolding and roofer visits with other planned exterior work to split rental costs.
- Hire specialists for structural reinforcement, complex roofline spray foam, or mechanical ventilation sizing.
When to hire a pro
- Structural reinforcement, spray-foam application, and complex ventilation design should be handled by licensed contractors. If ducts will be moved or you’ll change the HVAC distribution, consult an HVAC designer.
Key points
- Choose conditioned versus unconditioned early; it changes thermal, moisture, and ventilation work.
- Air sealing often yields more comfort than nominal R-value increases.
- Use baffles and continuous air pathways for a ventilated attic; plan ERV/HRV for sealed attics.
- Match insulation type to moisture strategy and cavity depth to avoid condensation.
- Hire contractors for spray foam, structural, or complex ventilation tasks.
For off-grid or partial off-grid projects that include ventilation fans or heat-pump systems, see our off-grid posts such as off-grid insulation advice and the off-grid solar sizing guide.
The Bottom Line
An attic conversion succeeds when you decide early whether the space will be conditioned or unconditioned, prioritize air sealing as much as added R-value, and follow the correct ventilation rules for your chosen assembly. An informed choice of insulation—matched to moisture strategy and cavity depth—prevents long-term problems and keeps operating costs down.
Frequently Asked Questions
What R-value do I need for an attic conversion?
Required R-value depends on your climate zone and whether the attic will be vented or sealed. As a starting point, many moderate climates target R-38 at the ceiling, while cold climates target R-49 to R-60; sealed roofline assemblies often rely on higher continuous insulation values to reduce thermal bridging. Always check local IECC or municipal code for minimums and consult the r-15 vs r-38 comparison for trade-offs when cavity depth is limited.
Is spray foam worth it for an attic conversion?
Spray foam delivers excellent air sealing and high R-value per inch, making it attractive for sealed, conditioned attics or shallow rafters. However, it is costly and typically requires professional installation; consider hybrid approaches like exterior continuous insulation plus mineral wool if you want lower-carbon or more reversible options. Our spray foam vs cellulose guide compares the performance and trade-offs.
How do I prevent condensation and mold after insulating the attic?
Prevent condensation by controlling air movement (air sealing), choosing the correct vapor control strategy for your climate, and ensuring either continuous ventilation in a vented attic or balanced mechanical ventilation in a sealed attic. Seal top plates, penetrations, and duct connections, and keep roof sheathing warm enough with adequate R and continuous insulation to lower dew-point risk.
Do vents still matter if I make the attic sealed?
Not for thermal ventilation—sealed attics avoid soffit-to-ridge venting because the goal is to keep the space inside the conditioned envelope. But sealed attics do require controlled mechanical ventilation (an ERV/HRV or properly sized supply/exhaust) to maintain indoor air quality for occupants. If you keep the attic unconditioned, vents remain important for preventing condensation and ice dams; see the ENERGY STAR guide linked earlier for details.
What is the typical cost range for an insulation-only attic retrofit?
Costs vary by insulation type, access, and region. A basic blown-in cellulose retrofit for a typical attic might be low–to–moderate cost, while closed-cell spray foam or adding exterior continuous insulation can be high-cost. Rather than provide a single number, get local estimates and factor in hidden costs like roof repairs, air sealing labor, and required ventilation upgrades.