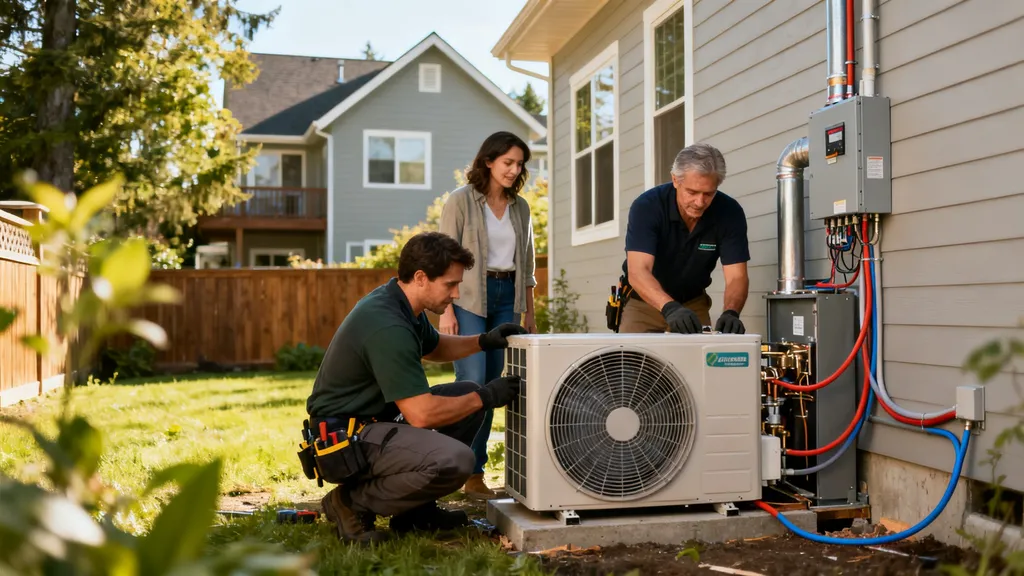
Step-by-step guide to replacing a furnace with a heat pump—sizing, costs, incentives, DIY vs pro tasks, and what to expect from a retrofit.
Heat Pump Retrofit: Replacing Furnace
Replacing a furnace with a heat pump can cut home heating emissions and often reduce fuel bills—but whether a heat pump retrofit makes sense depends on climate, the home's envelope, and the right system choice. This guide on heat pump retrofit covers which homes are good candidates, retrofit system types (ducted, ductless, geothermal), sizing and efficiency basics, a step‑by‑step installation workflow, realistic costs and incentives, and clear DIY vs contractor boundaries so budget-conscious self-builders can plan the job.
TL;DR:
- Heat pump retrofit can replace a furnace in most mixed and mild climates with expected COPs 2.5–4.5 and paybacks of 5–15 years depending on fuel and electricity costs.
- Use a Manual J load calculation or the heat pump sizing tool before picking system type; match cold‑climate ratings if winters are severe.
- For budget projects, consider ductless mini‑split retrofit for room-by-room replacement; for whole‑house comfort, preserve or upgrade ducts and choose a multi‑zone ducted air‑source system.
Heat Pump Retrofit: is Replacing Your Furnace Right for Your Home?
Homeowners in mixed and coastal climates typically get the fastest operating-cost wins from a heat pump retrofit, but modern cold‑climate air‑source heat pumps perform much better than older models in colder regions. Research and government guidance, such as the Building America Solution Center, outline options to consider when retrofitting an HVAC system and show that heat pumps can reduce annual CO2 emissions when deployed correctly (see the Building America checklist for retrofit options: Heat pump replacement).
Which Climates Favor Heat Pump Retrofits
- Mild/mixed climates: Expect high seasonal performance with COPs commonly between 3.0 and 4.5 for modern units.
- Cold climates: Choose units rated for low‑temperature operation (look for performance metrics at 0°F/-18°C or the manufacturer's "cold‑climate" models). Some studies show data‑driven retrofits reduce annual carbon emissions even in colder regions; see a recent analysis for performance trends and emissions impacts.
- Humid climates: Heat pumps provide both heating and dehumidification in summer; however, proper sizing and ventilation are essential to control indoor humidity.
How Building Envelope and Insulation Affect the Decision
- Heat pumps operate most efficiently in homes with reduced heating loads. Upgrading wall and attic insulation from R23 to R30 or higher can shrink the required system size and improve comfort. For guidance on whether to upgrade insulation during a retrofit, consult our insulation comparison guide.
- Window upgrades improve heat retention; review the window U-factor guide to understand potential load reductions.
- Adding or repairing an air barrier reduces cycles and improves dehumidification. For airtightness upgrades, see airtight membrane installation.
Ducted vs Ductless: Impact on Retrofit Feasibility
- Ducted systems can often reuse existing furnace ducts if they’re in good condition and sized correctly. That may reduce installation cost and preserve centralized distribution.
- Ductless mini‑splits avoid duct losses and are ideal when ducts are missing, severely undersized, or when you want room‑by‑room control (this is the common mini‑split retrofit scenario). Interior head placement and aesthetics are practical constraints for some homeowners.
- Consider thermal bridging and slab edges in load calculations; see insulated slab edge advice for details that matter to total heat loss and heat pump sizing.
If you’re pursuing a very low‑load approach or passive design, comparing certification pathways can clarify targets—see our note on passive house certification differences for context.
Heat Pump Retrofit: Types of Retrofits When Replacing a Furnace
There are three primary retrofit approaches: ducted air‑source, ductless mini‑splits, and ground‑source (geothermal). Each fits different budgets, building types, and comfort goals. For a high‑level overview of heat pump basics, see our heat pump basics.
Ducted Air‑source Heat Pumps (single‑ and Multi‑zone)
- Best when existing ductwork is usable and the homeowner wants centralized thermostatic control.
- Multi‑zone ducted systems (variable‑speed compressors, multiple zones) offer consistent airflow and integrate well with hydronic or forced‑air setups.
- Typical pros: even distribution, simpler indoor aesthetics. Cons: duct losses if ducts are leaky or uninsulated.
Ductless Mini‑splits and Multi‑head Systems
- Install wall or ceiling indoor heads matched to zones. They’re common in retrofit projects without usable ducts.
- Pros: targeted heating, high seasonal efficiency at room level, lower cost for selective room upgrades. Cons: multiple indoor units can be visually intrusive and have higher per‑ton installation cost for whole‑house coverage—this is the standard mini‑split retrofit route.
Ground‑source (geothermal) Retrofits — When They Make Sense
- Geothermal systems deliver excellent efficiency and steady COPs year‑round but have high up‑front cost and site constraints. They’re best for larger projects, ground access for loops, or off‑grid/net‑zero goals where long payback is acceptable.
Comparison/specs table
| System Type | Typical Efficiency Metrics | Installation Complexity | Typical Lifespan | Rough Cost Band |
|---|---|---|---|---|
| Ducted air‑source | SEER 16–22, HSPF 8–11, COP 2.5–4 | Moderate, may reuse ducts | 15–20 years | $6,000–$18,000 |
| Ductless mini‑split | SEER 18–30, HSPF 9–12, COP 2.8–4.5 | Low to moderate, multiple wall heads | 12–20 years | $4,000–$12,000 |
| Ground‑source (geothermal) | COP 3.0–5.0 (year‑round) | High, excavation or borefields | 20–30+ years | $15,000+ |
Safety and refrigerant notes
- Check refrigerant type (R‑410A, R‑32, or newer blends) and adherence to EPA refrigerant handling rules. For contractors, industry best‑practice retrofit guides outline refrigerant safety and charge verification—see RDH’s contractor guidance for retrofit planning and procedures.
- For all system types, confirm manufacturer cold‑temperature performance if winters are a factor.
Heat Pump Retrofit: Sizing, Performance & Efficiency When Replacing a Furnace
How to Size a Heat Pump for Heating and Cooling Loads
- A proper Manual J load calculation (or equivalent) is the foundation of a successful retrofit. Oversizing causes short cycling and humidity problems; undersizing fails to meet comfort targets.
- Use the site's heat pump sizing tool for a first estimate, then confirm with a certified HVAC contractor or engineer.
- Example: A moderately insulated 1,800–2,200 ft² house in a mixed climate often falls in the 2–3 ton (24–36,000 Btu/h) range, depending on envelope performance and ceiling heights. That range is illustrative—run a load calc for the actual home.
Understanding ratings: HSPF, SEER, COP, and cold‑climate metrics
- SEER (cooling seasonal efficiency) and HSPF (heating seasonal performance factor) are standard North American metrics; higher numbers mean better seasonal efficiency.
- COP (coefficient of performance) describes instantaneous efficiency (heat output divided by electrical input). Expect COPs of roughly 2.5–4.5 under typical conditions; COP falls as outdoor temperature drops.
- Cold‑climate performance is reported as rated heating capacity at specific low temperatures (for example, capacity at 5°F/-15°C). Confirm manufacturer data for low‑temperature operation.
- For more on decoding these labels, read efficiency ratings explained.
Common Sizing Mistakes to Avoid
- Using rule‑of‑thumb tonnage without accounting for insulation, orientation, and infiltration.
- Not checking duct condition when replacing a furnace with a ducted heat pump—leaky ducts can erase efficiency gains.
- Ignoring ventilation needs after tightening the envelope; pairing a heat pump with adequate mechanical ventilation will control indoor air quality and humidity. See the ventilation guide for balancing ventilation after retrofit.
- Overlooking electric service capacity—higher efficiency compressors and pumps may need a service upgrade.
Industry guidance and best practices
- RDH’s retrofit best‑practices document and Building America resources stress accurate load calculations and staged commissioning. See RDH’s guide for contractor-level procedures and quality checks: Heat pump retrofit best practices guide for contractors version 2.
Heat Pump Retrofit: Step‑by‑step Process for Replacing a Furnace
Pre‑retrofit Inspection, Permits, and Site Prep
- Permit checklist: mechanical permit for HVAC changeout, electrical permit for added loads or panel changes, gas permit to abandon or cap lines if decommissioning a gas furnace. Local rules vary—check with your AHJ.
- Pre‑checks: electrical panel capacity and available breaker space, condition of existing ductwork (insulation, leakage), attic/crawlspace access for line routing, and refrigerant routing paths.
- Document baseline energy use (utility bills) to compare savings after the retrofit.
Typical Installation Stages
- Decommissioning: Safely cap gas lines (if present) and remove the old furnace per local code.
- Outdoor unit siting: Place on a level pad with clearance for airflow, service access, and sound considerations.
- Indoor installation: For ducted swaps, install an air handler to match duct connections; for mini‑splits, mount indoor heads and run line sets. Plan condensate routing, drain pans, and condensate pumps where needed.
- Electrical connections: Add a dedicated circuit, disconnect, and necessary breakers. Panel upgrades require a licensed electrician.
- Refrigerant work: Certified technicians should handle brazing and charging to meet EPA requirements.
- Controls and ventilation: Install thermostats or controls and ensure ventilation pathways are intact; consult the ventilation guide.
Timeline and common durations
- Straightforward ducted replacement: 1–3 days.
- Multi‑head mini‑split installation: 1–2 days plus electrical work.
- Larger retrofits with envelope upgrades, panel changes, or geothermal: weeks to months for planning and excavation.
Commissioning, System Balancing, and Performance Checks
- Commissioning checklist: verify refrigerant charge, measure supply and return air temps, confirm airflow targets (CFM), validate defrost cycles in cold weather, and set staging or variable‑speed controls.
- Use a log: record pre and post temperatures, run times, and energy use for later payback calculations.
- For a practical install walk‑through, watch a step‑by‑step retrofit video to visualize the stages and common site constraints: Watch this step-by-step guide on replacing a mobile home furnace. -step by step-:
Include reputable retrofit checklists (e.g., Building America) in planning and set expectations for the contractor to document commissioning steps: Heat pump replacement. For broader project planning and market context, see recent retrofit market forecasts: Heat pump retrofitting toolkits market.
Heat Pump Retrofit: Costs, Incentives, and Payback When Replacing a Furnace
Typical Cost Ranges for Common Retrofit Scenarios
- Ducted air‑source retrofit: $6,000–$18,000 (system size, duct repairs, and electrical work affect price).
- Ductless multi‑head: $4,000–$12,000 (depends on number of indoor heads and line set complexity).
- Geothermal: $15,000+ (site dependent; loop field costs drive price).
These are ballpark ranges; local labor rates and permit costs shift totals.
Available Rebates, Tax Credits, and Financing
- Federal and state rebates, plus tax credits, can significantly lower upfront cost. The IRS and energy programs periodically update eligible credits; consult federal guidance and local utility programs for current offers.
- Training and rebate programs also exist for contractors—see regional training pilots for best practices and rebate program eligibility at NSCC’s retrofit training page which describes skills promoted in many incentive programs.
- Pairing a heat pump with rooftop solar can reduce operating costs further. For DIY solar pairing and how PV affects payback, see the solar panel DIY guide and for ongoing troubleshooting, the solar troubleshooting tips.
Operating Cost Comparison: Gas/oil Furnace vs Heat Pump
- Example payback math: If replacing a gas furnace costing $1,600/year to operate with a heat pump that uses $900/year of electricity after installation, annual savings are $700. If retrofit incremental cost is $7,000 after rebates, simple payback ≈ 10 years.
- Actual payback depends on local fuel prices, usage hours, and incentives. Many projects report 5–15 year paybacks, shorter when fuel prices are high or incentives are strong—this is the typical range for heat pump payback comparisons.
Lifecycle and warranty
- Expect annual maintenance similar to furnaces (filter changes, annual seasonal service). Warranties commonly run 5–12 years for parts and compressors; some manufacturers offer extended warranties for registered installations.
Heat Pump Retrofit: Practical DIY and Contractor Considerations for Budget‑conscious Self‑builders
Tasks Suitable for a Confident Diyer vs Jobs That Need Certified HVAC Pros
- DIY‑friendly tasks:
- Removing the old furnace and prepping the space.
- Installing condensate routing and drainage (if within code limits).
- Simple electrical prep: pulling conduit, mounting disconnects (licensed electrician may be required to make final connections).
- Envelope work like weatherstripping doors—see door weatherstripping tips.
- Contractor/Certified work:
- Refrigerant handling, brazing, and charging (EPA Section 608 certified techs are required).
- Final electrical connections to the service panel when a permit requires a licensed electrician.
- Commissioning airflow and refrigerant charge checks.
Checklist of Tools, Parts, and Materials to Source
- Indoor components: air handler or indoor heads, mounting hardware.
- Outdoor components: condensing unit, pad, mounting bolts.
- Refrigerant supplies: line sets, insulation, flare fittings (installers should supply).
- Electrical: disconnect, breakers, sized conductor, subpanel if needed.
- Plumbing: condensate trap, pump (if gravity drain not available).
- Common tools: multimeter, vacuum pump, manifold gauges (for certified techs), refrigerant recovery equipment (pro only).
- See vapor barrier how-to for moisture control when modifying wall cavities or routing line sets.
How to Vet Contractors and What to Ask
- Ask for load calculation documentation (Manual J) and commission reports.
- Confirm refrigerant type and inverter compressor technology; request brand/model specs and cold‑temperature data.
- Request references and ask about previous retrofit projects similar in scope.
- Red flags: no load calculation, vague answers about refrigerant handling, or unwillingness to provide written commissioning checks.
- Industry resources recommend verifying contractor training and membership in trade organizations. [Resource [Innovations outlines [best practices for workforce expertise and installation quality]]](https://resource-innovations.com/resource/best-practices-for-the-retrofit-installation-of-heat-pump-water-heaters).
Budget tips for self-builders
- Stage the retrofit: start with envelope and duct repairs, then install a smaller heat pump system; reduced loads often mean smaller equipment and lower system costs.
- Consider doing prep work (demolition, access, minor electrical runs) yourself and hiring a certified tech for refrigerant and final commissioning to save on labor.
Heat Pump Retrofit: Key Points Checklist and Equipment Comparison
Quick Decision Checklist Before Signing a Contract
- Confirm a completed Manual J load calculation and sizing report.
- Verify electrical panel capacity and plan for upgrades if needed.
- Confirm rebate and tax credit eligibility and documentation procedures.
- Get at least two detailed quotes that list equipment models, efficiency ratings, and commissioning steps.
- Request a written commissioning checklist and warranty terms.
Heat Pump vs Furnace Comparison Table
| Factor | Heat Pump | Gas/Oil Furnace |
|---|---|---|
| Typical upfront cost | Moderate to high (varies) | Lower to moderate |
| Seasonal efficiency | SEER 16+, HSPF 8+ or COP 2.5–4.5 | AFUE 80–98% |
| Emissions | Low/no onsite combustion | Onsite combustion, higher CO2 |
| Running cost | Lower if electricity is cheap/efficient | Depends on fuel price; can be higher |
| Maintenance | Annual tune, filter changes | Annual tune, combustion checks |
| Comfort characteristics | Good humidity control, even temps | Rapid heat-up, possible dry heat |
Maintenance & Monitoring Checklist After Retrofit
- Change or clean filters every 1–3 months depending on use.
- Keep 2–3 ft clearance around outdoor unit and clear debris seasonally.
- Schedule annual service to check refrigerant charge, fan motors, and controls.
- Record monthly energy use and compare to pre‑retrofit baseline; this helps verify payback and catch issues early.
Final quick tips
- Save all commissioning paperwork and serial numbers for warranty claims.
- If planning future PV, size the electrical service with headroom for both heat pump loads and solar inverters—see our solar panel DIY guide.
The Bottom Line: Replacing Furnace with a Heat Pump — Final Recommendations
A heat pump retrofit is often a smart move for mixed and mild climates and can work in cold regions when cold‑climate units are specified. Prioritize a Manual J load calculation, envelope improvements (insulation, windows, airtightness), and a contractor who provides commissioning documentation. For budget‑conscious self‑builders, do preparatory work yourself but leave refrigerant and final electrical hookups to licensed professionals. For a consolidated starting checklist and to compare options, download the retrofit decision checklist or explore related DIY guides on insulation, ventilation, and solar pairing.
Frequently Asked Questions
Can a heat pump fully replace a furnace in cold winters?
Yes, in many cases. Modern cold‑climate heat pumps are rated to provide a high percentage of heat at low outdoor temperatures, and manufacturers publish performance at specific low points (for example, capacity at 5°F or -15°C). However, replacement success depends on the home's heating load, insulation level, and whether the system is sized and commissioned correctly. In very cold regions some owners use a hybrid approach (heat pump plus small backup unit) for the coldest days.
Will a heat pump work with my existing ducts?
Often yes, provided ducts are sized correctly, sealed, and insulated. If ducts have high leakage or poor R‑value, their losses can eliminate heat pump efficiency gains. Have a contractor inspect and, if necessary, repair or upgrade ducts before committing to a ducted air‑source retrofit. If ductwork is unusable, a mini‑split retrofit is a common alternative.
How long does installation take?
Simple ducted replacements typically take 1–3 days. Mini‑split multi‑head systems usually take 1–2 days for the install plus any additional electrical work. Complex retrofits that include envelope upgrades, panel changes, or geothermal loops require additional time for planning and construction—sometimes weeks to months depending on scope.
What rebates are available for heat pump retrofits?
Rebates vary by federal program, state incentive, and local utility. Federal tax credits and state rebate programs can cover a portion of costs; contractor incentives and utility rebates may also apply. Check federal resources and local utility programs, and consider training or pilot programs described by regional training centers that link to rebate eligibility (for example, the NSCC retrofit training overview).
How do I size a heat pump for my home?
Start with a Manual J load calculation or an accurate sizing tool—our heat pump sizing tool gives a first estimate. The calculation considers insulation levels, window U‑factors, air infiltration, orientation, and occupancy. Avoid rule‑of‑thumb sizing; oversizing leads to short cycles and poor humidity control, while undersizing causes comfort gaps.