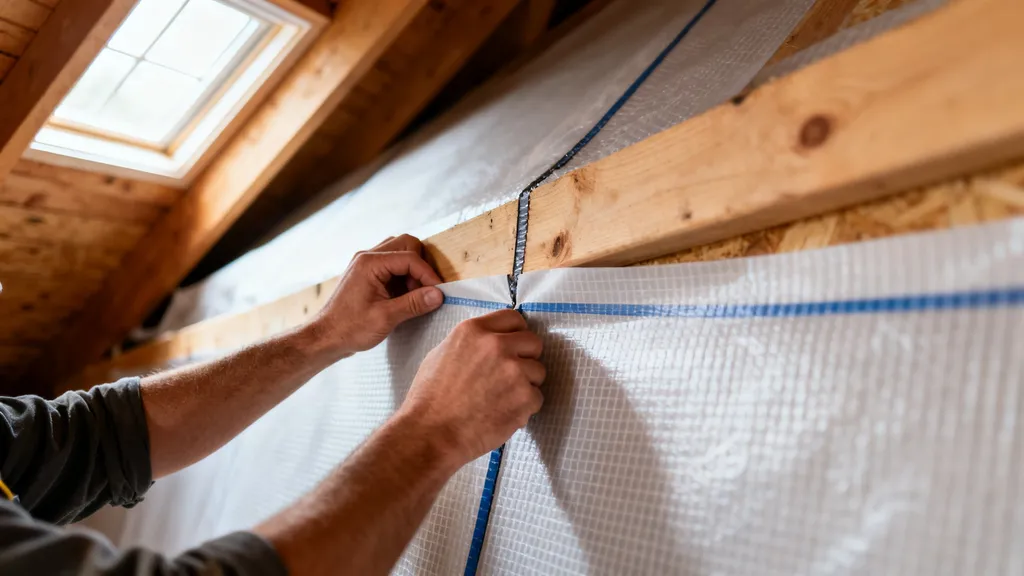
How smart (variable-perm) vapor retarders work, where they help most, and practical guidance for DIY builders choosing vapor control.
Smart Vapor Retarders: When to Use Variable Perm
Smart vapor retarder selection affects how a wall, roof, or basement handles moisture over decades. A smart vapor retarder (variable-perm membrane) reduces vapor diffusion when indoor air is dry and becomes more permeable when relative humidity rises, letting assemblies dry. This guide explains how they work, where they help most by climate and assembly, and step-by-step installation and product-selection guidance for budget-conscious DIY homebuilders.
TL;DR:
- Use a smart vapor retarder when you need a warm-side vapor control that allows drying both directions — especially in mixed climates and assemblies with exterior insulation.
- Expect perm values <1 perm when dry and >6–10 perms when wet; check the TDS perm vs RH curve before buying.
- Prioritize air-barrier continuity, proper flashing, and compatibility with tapes/adhesives — test with a blower door after installation.
What is a Smart Vapor Retarder (variable-perm)?
A smart vapor retarder is a membrane whose permeability (measured in perms) changes with relative humidity (RH). When indoor air is dry, the membrane behaves like a Class II or Class I retarder (low perm), slowing vapor diffusion from the warm interior into the wall. When RH rises — for example from a wetting event inside the assembly — the membrane becomes much more permeable, allowing moisture to diffuse out so the assembly can dry.
Perm, vapor retarder, vapor barrier:
- Perm: A unit measuring water vapor transmission through a material. Lower numbers mean less vapor passes through.
- Vapor barrier: Often used for very low-perm materials (Class I, <0.1 perm). Common example: 6-mil polyethylene.
- Vapor retarder: A broader term for materials that slow vapor but may not be fully impermeable (Classes II and III).
Typical classification thresholds:
- Class I: <0.1 perm (polyethylene film)
- Class II: 0.1–1.0 perm (coated kraft, some smart membranes when dry)
- Class III: 1.0–10+ perms (vapor-open membranes; many smart membranes when wet)
Smart membranes sit on the boundary: a product may read <1 perm at 50% RH and jump above 10 perms at 90% RH. For a homeowner, think "like a sponge that breathes when wet, but acts like plastic when dry" — except the material changes permeability without soaking up water.
For more background on variable behavior and typical ranges, see this expert guide on smart vapor barriers and vapor-open membranes: The definitive guide to smart vapor barriers and vapor open membranes for homeowners and professionals.
How Smart Vapor Retarders Work — the Basics of Humidity-driven Permeability
Material Science in Plain Language: Polymer Coatings and Pores That Change with RH
Smart membranes use polymers that absorb a tiny amount of water vapor at higher RH, which increases free volume in the polymer or opens microscopic pathways. That change raises vapor permeability. When RH drops, the polymer structure tightens and perm falls. The change is reversible and measured on perm-vs-RH curves in technical data sheets.
Laboratory tests (for example manufacturer reports and independent research on products like MemBrain) show a steep perm increase near 60–80% RH for many polymer-based smart membranes. One long-form technical note on MemBrain provides measured perm curves across RH levels and how that behavior affects assembly performance: Swts content files.
Moisture Transport Mechanisms: Vapor Diffusion vs Capillary Moisture
There are two separate moisture threats in assemblies:
- Vapor diffusion is slow movement of water vapor driven by vapor pressure differences. It’s what vapor retarders address.
- Capillary moisture or bulk water is liquid transport via leaks, rain intrusion, or wicking in building materials. Smart retarders do not stop bulk water — flashing, WRBs, and drainage are what you need for that.
Design decisions should separate vapor diffusion control from strategies for liquid management and moisture storage. Hygrothermal behavior — the interaction of heat and moisture — determines whether a variable-perm product helps or harms a specific assembly. For deeper technical reading on moisture transport, see ASHRAE fundamentals and building science resources.
Quick Reference: Key Decision Points for Using Variable-perm Retarders
Two-minute Checklist for Diyers
- If you need a warm-side retarder that will allow drying after wetting, consider a smart membrane.
- If you are building in a true cold climate (Climate Zones 7–8) and have little or no exterior insulation, prefer a Class I or II retarder per code unless a hygrothermal analysis says otherwise.
- If exterior continuous insulation covers sheathing to typical thresholds (see next section), a smart retarder helps interior drying.
- If the wall assembly includes hygroscopic materials (e.g., cellulose or wood sheathing) and there’s a realistic wetting risk, choose a retarder that increases permeability above ~7–10 perms at high RH.
The Insulation Institute summarizes code paths and when interior retarders are required: Vapor retarders.
Top Three Assembly Flags That Point to Using a Smart Retarder
- Exterior continuous insulation is present and equals a significant fraction of wall R-value. Example: in a Climate Zone 6 wall, if exterior rigid insulation provides enough thermal resistance to keep inward moisture from freezing in the sheathing, a variable-perm retarder reduces the risk of trapped moisture. See our exterior insulation guide for recommended depths and thresholds.
- Retrofit projects where you can’t easily control both sides of the wall. Smart retarders help assemblies that occasionally get wet to dry to the interior during low-RH periods; this is common in retrofit Passive House retrofits where adding exterior CI is limited — see our passive house retrofit.
- Mixed climates with seasonal direction changes in vapor drive. In places that swing between heating-dominated and cooling-dominated seasons, a membrane that adapts to humidity reduces interstitial condensation risk.
When to Choose a Smart Vapor Retarder: Climate and Assembly Rules
Cold Climates (zones 5–8): Pros and Caveats
In cold climates, codes commonly require a Class I or II retarder on the interior warm side of frame walls. Smart membranes can meet Class II performance when dry and comply with code in many cases, but caution is needed. If the sheathing will remain cold for extended periods (thin exterior insulation or none), a high-perm path during winter could allow interior moisture to reach and condense on cold sheathing.
For Climate Zone 6, a common recommendation is: if you add enough exterior continuous insulation to keep the sheathing temperature above freezing in winter (a ratio that depends on total R-value), the assembly can accept a variable-perm retarder. For Climate Zone 6 design specifics, consult our climate zone 6 guide.
Mixed and Transitional Climates: Where Smart Retarders Shine
Mixed climates (e.g., Climate Zones 3–5) often benefit most from smart membranes. Seasonal shifts in vapor drive mean assemblies must dry both inward and outward. A membrane that behaves like a retarder when the interior is dry, but opens when wet, reduces trapped moisture risk and is typically recommended by building-science practitioners in these regions. Green Building Advisor provides practical climate-specific commentary on where smart vapor retarders are permitted: Smart vapor retarders 2.
Hot-humid Climates: Typical Guidance and Alternatives
In hot-humid climates, vapor drive is usually from outside to inside during cooling seasons. Interior-side vapor retarders can trap moisture. Many codes and experts advise against using interior vapor retarders in hot-humid areas unless you have an assembly explicitly designed to handle inward drive and provide drying to the exterior. Instead, focus on airtightness, robust WRBs, and continuous exterior insulation or wall systems designed for inward drying. Passive House projects also emphasize airtightness and correct hygrothermal modeling; see our passive house principles for integrated guidance.
Common Wall and Roof Assemblies That Benefit From Variable-perm Membranes
Smart membranes are not a universal fix. But several common assemblies benefit because they need a warm-side retarder that also allows drying after wetting events.
- Wood-framed walls with exterior continuous insulation: When exterior CI is thick enough to keep sheathing warm, a smart retarder lets moisture diffuse inward for drying when needed. See our exterior insulation guide and sheathing options in plywood vs OSB.
- Insulated cathedral ceilings / roof assemblies: Cathedral roofs with spray foam often have limited drying potential. Where you use fibrous insulation and provide some venting or vapor-open exterior layers, a variable-perm interior membrane reduces risk by allowing drying after wetting events. Refer to attic strategies in attic insulation options.
- Retrofits with added exterior layers: When older sheathing is preserved and exterior insulation is added, the smart membrane gives a safer warm-side control that won’t lock moisture into the original sheathing — useful in DIY retrofits described in our passive house retrofit.
- Basements and crawlspaces (select cases): Variable-perm membranes can help if the assembly is designed to dry to the interior and moisture sources are controlled. For mass walls (concrete, ICF, hempcrete), smart retarders are often unnecessary; see hempcrete vs ICF for when breathable walls need different strategies. Foundation type influences approach — consult our foundation comparison.
A useful comparison table follows to map assembly types to recommended vapor control approaches.
| Assembly type | Recommended vapor control approach |
|---|---|
| Wood frame + exterior CI (sufficient CI) | Smart vapor retarder on interior; continuous exterior WRB and FLASHING |
| Wood frame without exterior CI | Class I/II interior retarder (poly) or sealed gypsum with airtight membrane |
| Cathedral ceiling with vapor-open exterior | Smart retarder if interior insulation is fibrous; ensure venting or exterior drying |
| Mass walls (concrete, hempcrete) | No interior smart retarder; use exterior WRB and allow inward/outward drying |
| Basement perimeter with interior insulation | Use capillary breaks, vapor-permeable insulation, and consider smart membrane only with design review |
Building Enclosure Online discusses using continuous air barriers with smart retarders and performance considerations: 87126 continuous air barrier smart vapor retarder.
Installation Best Practices and Common Mistakes
Proper installation matters more than small spec differences. A smart membrane must act as both a vapor-control layer and, often, part of the air barrier. Here are hands-on steps and common pitfalls.
Placement, Continuity, and Sealing Details
- Install the smart vapor retarder on the warm side of the primary insulation unless design calls otherwise.
- Overlap seams per the product TDS — typically 2–4 inches — and seal with manufacturer-recommended tape. Avoid mixing tapes of different chemistries that may not bond.
- Tie the membrane into the air-barrier system: windows, doors, top plates, and floors must be sealed to maintain continuity. For airtight membrane techniques and sealing details, see our airtight membrane guide.
Flashing, Transitions, and Penetrations
- Integrate the smart retarder with window and door flashing planes; the retarder can’t be the only line of defense against bulk water.
- At electrical and plumbing penetrations, use gaskets or compatible sealants and patch with manufacturer-approved tape. A common mistake is relying on caulk alone; tape plus gasket plus mechanical fastening yields a more durable seal.
- Avoid installing the retarder over wet sheathing. Let the structure dry before finishing.
What to Check with a Blower Door and Moisture Inspections
- Perform a blower door test after the retarder and air-sealing are complete but before drywall. Typical airtightness targets vary by standard; Passive House targets are very tight, while code minimums are looser. Learn more about testing steps in our blower door testing.
- Use a moisture meter to check sheathing moisture content if the assembly has had wetting events. Recheck after a season if possible.
- Common mistake: assuming a smart retarder replaces a WRB or flashing. It does not.
For a visual demonstration, check out this video on dishwashers. why does everyone install them wrong?:
.Also consult this construction resource on field-tested smart vapor retarder air-barrier performance: Construction materials smart vapor retarders.
Product Selection: Reading Specs and Comparing Smart Vapor Retarders
Key Specs to Check: Perm vs RH Curve, Tear Strength, UV Exposure Limits
- Perm vs RH curve: The most important spec. Look for data showing perm at 50% RH and at 90% RH (or a curve across values). A useful rule: <1 perm at 50% RH and >6–10 perms at 90% RH indicates a membrane that will restrict diffusion when dry and permit drying when wet.
- Tear and tensile strength: Determines handling durability during install and long-term performance if the membrane is exposed in an attic or cathedral ceiling. Choose medium-to-high tear strength for DIY handling.
- UV exposure limits: Most membranes are not UV-stable for long; if the product will be exposed for more than a few weeks, install a protective layer or choose a UV-stable option.
How to Read Technical Data Sheets (TDS) for DIY Decisions
- Look for measured perm at specific RH levels rather than a single number. If the TDS shows a curve, prefer products with clear lab data (ASTM E96 or similar).
- Check approved tapes and sealants; manufacturer warranties may require those products for seal integrity.
- Beware of marketing language that uses "vapor permeable" without numbers — always demand perm figures.
Comparison table (typical ranges for common categories):
| Material type | Perm @50% RH | Perm @90% RH | Tear strength | Common uses |
|---|---|---|---|---|
| Variable-perm membrane | 0.2–1.0 perms | 6–>10 perms | Medium–High | Interior warm-side retarder that allows drying |
| Coated kraft paper | 0.5–1.5 perms | 1–5 perms | Low–Medium | Interior retarder in dry climates |
| Polyethylene sheet (6-mil) | 0.03–0.06 perms | 0.03–0.06 perms | High | Class I vapor barrier; cold climates or specific code paths |
| Vapor-open WRB / breathable membrane | >10 perms | >10 perms | Medium | Exterior weather-resistive barrier; not for interior warm-side control |
For roof and attic interactions, read our attic insulation options and consider how insulation R-values (see R-20 vs R-30) change sheathing temperatures and drying potential.
Cost, Durability, and Long-term Performance Considerations for DIY Projects
Material Costs vs Labor — What Diyers Can Expect
Variable-perm membranes typically cost more than plain polyethylene but less than specialty high-performance membranes. For a small DIY project, the incremental material cost is often modest; labor and attention to sealing details drive overall value. If your project is tight on budget, weigh the cost of a higher-spec membrane against the potential cost of a future moisture remediation.
Our guide on budget green materials covers low-cost alternatives and when spending more is justified.
Durability, Inspection, and When to Replace
Smart membranes are durable if protected from UV and physical damage. Inspect seams, penetrations, and taped corners after construction and during the first year. Replace or repair if you find gaps, degraded tape bonds, or mechanical damage. In attic or crawlspace spaces where the membrane may be exposed, plan for a protective layer or faster inspection cycles.
Long-term Benefits: Mold Risk Reduction and Energy Performance
Proper vapor control reduces the chance of interstitial condensation and mold growth, protecting structural materials and indoor air quality. Research indicates assemblies that dry effectively have longer service life and lower maintenance costs. Monitoring energy performance — for example using basic net-zero monitoring — can show indirect benefits from moisture-controlled, tight envelopes.
If you’re investing in envelope upgrades while adding renewables, coordinate priorities; our solar installation guide explains sequencing whole-house upgrades.
The Bottom Line
Smart vapor retarders are a practical choice when assemblies need a warm-side vapor control that can open up to dry after wetting events — especially in mixed climates and when exterior continuous insulation is present. They are not a universal replacement for proper flashing, WRBs, or airtight detailing, and they require correct placement and compatible tapes. The single best rule of thumb for DIYers: pick a product with clear perm-vs-RH data and make the air-barrier connections continuous and testable.
Frequently Asked Questions
Can I use a smart vapor retarder in a hot-humid climate?
In general, using an interior-side vapor retarder in hot-humid climates requires caution. In cooling seasons the vapor drive is typically from outside to inside, so interior retarders can trap moisture and raise the risk of condensation inside walls. Many builders in hot-humid zones avoid interior retarders entirely or use designs that allow drying to the exterior. Check local code and consider a hygrothermal analysis or a design that emphasizes continuous exterior WRB and controlled ventilation.
Do smart vapor retarders replace housewrap or air barriers?
No. Smart vapor retarders control vapor diffusion and may contribute to airtightness, but they do not replace a dedicated weather-resistive barrier (WRB) or proper flashing. For a durable enclosure, maintain a continuous WRB on the exterior for rain management and ensure the interior air barrier is continuous and tested. For step-by-step airtight membrane installation techniques, see our airtight membrane guide.
Can I install a variable-perm membrane on the exterior of walls?
Variable-perm membranes are designed primarily for warm-side installation where humidity-driven permeability helps interior drying. On the exterior, the membrane's benefits depend on the overall assembly. In some cases, vapor-open exterior membranes are appropriate, but these are typically different products specified as WRBs. Always follow manufacturer guidance and system tolerances before using an interior-rated smart retarder on the exterior.
How much do perm ratings change with humidity in practice?
Many smart membranes show low perms (<1 perm) at moderate RH (around 50%) and increase to >6–10 perms at high RH (>80–90%). Exact values vary by product; so consult the technical data sheet for perm-versus-RH curves. Research reports, such as product white papers and independent lab tests, provide the best evidence for real-world behavior. The MemBrain technical report is a good example: [Swts content files](https://sweets.construction.com/swts_content_files/151920/591675.pdf).
Are smart vapor retarders appropriate for crawlspaces or basements?
Use caution. Basements and crawlspaces involve ground moisture and capillary transport that vapor retarders cannot control. For conditioned basements, a design that includes a capillary break, appropriate insulation type, and controlled ventilation often works better. Smart membranes may be appropriate in some interior insulated basement walls, but consult local code and consider a professional hygrothermal assessment for complex cases.