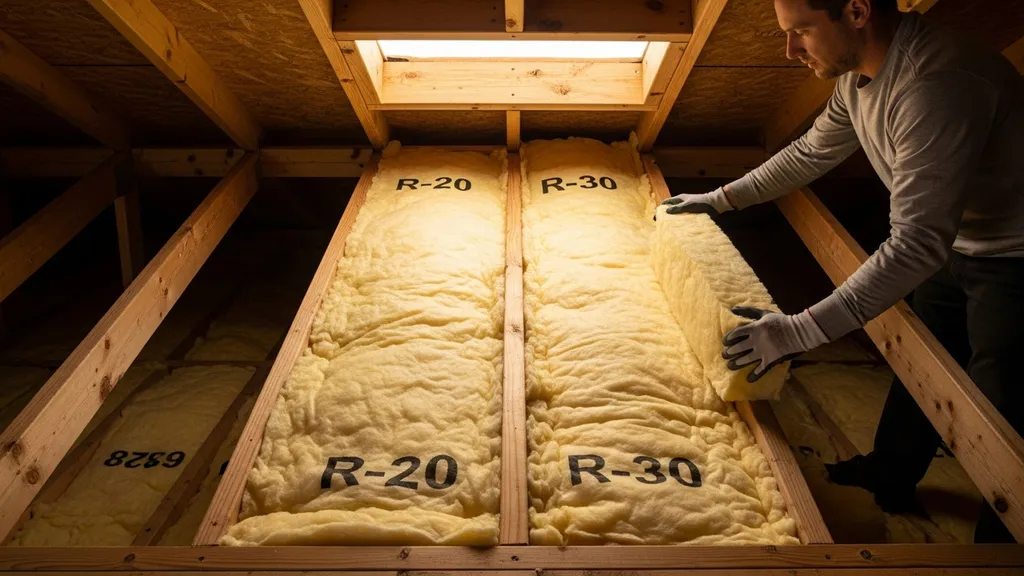
Compare R-20 and R-30 insulation — thickness, materials, climate guidance, costs and retrofit tips to help budget-conscious DIY builders choose.
R-20 vs R-30 Insulation: Which Do You Need?
Choosing between R-20 vs R-30 insulation comes down to climate, cavity depth, heating fuel and whether you’re renovating or building new. This article compares the two R-values, shows typical material thicknesses, and gives clear retrofit and new-build guidance so budget-conscious DIY builders can pick the right target and avoid common mistakes. Expect practical thickness examples, assembly trade-offs, and step-by-step retrofit tips you can use on a tiny house, attic or conventional framed wall.
TL;DR:
- R-20 provides a reasonable thermal barrier in mild climates or shallow cavities; it’s about 33% less R than R-30 and often fits a 2x6 wall or modest attic depth.
- R-30 gives roughly 50% more R-value than R-20 (30 vs 20) and is a common minimum for attic floors and cold-climate upgrades — choose it if you have enough depth or can add continuous exterior foam.
- If you’re retrofit-limited on depth, use dense-pack cellulose, layer with rigid foam, and prioritize air sealing first; run numbers with the insulation savings calculator before deciding.
R-20 vs R-30 Insulation: Quick TL;DR and Comparison Table
Short Answer — Who Each is For
R-20 is a practical target when cavity depth is limited (2x6 walls, thin cathedral ceilings) or for mild climates and small outbuildings. R-30 is a better baseline for attic floors and for mixed-to-cold climates where heating energy dominates. The right choice depends on cavity depth, whether you can add continuous exterior insulation, and the heating fuel.
Side-by-side Comparison Table (materials, Thickness, R/inch, Typical Uses)
| Material | Typical R/inch | Thickness to reach R-20 | Thickness to reach R-30 | Typical uses / assembly notes |
|---|---|---|---|---|
| Fiberglass batts | 3.1–3.4 | 6–7 in (R-20≈2x6 partial fill) | 9–10 in (often needs 2x10 or stacked) | Standard cavity fill; prone to gaps if not installed carefully |
| Blown cellulose | 3.2–3.7 | 5.5–6.5 in | 8–9 in | Good for dense-pack retrofits; better air infiltration resistance than batts |
| Mineral wool | 3.0–3.3 | 6–7 in | 9–10 in | Fire-resistant and hydrophobic options; heavier than fiberglass |
| Open-cell spray foam | ~3.6 | 5.5 in | 8.5 in | Adds air barrier; can trap moisture in some assemblies |
| Closed-cell spray foam | ~6.0–6.5 | 3.25–3.5 in | 4.5–5 in | High R/inch, vapor retarder at higher density; costlier |
| Polyiso board | ~5.5 at 1" (varies with temp) | 3.5–4 in (stacked) | 5.5–6 in (stacked) | Good for continuous exterior CI to avoid thermal bridging |
Table notes: R/inch ranges vary by product and temperature. For a primer on R-value basics see the Energy Star guide to recommended home insulation R-values. Cost and savings vary heavily by climate and fuel — run the insulation savings calculator to test local payback.
How R-20 and R-30 Differ: R-value, Thickness and Materials
R-value Basics and R/inch by Common Materials
R-value: A measure of resistance to heat flow — higher means less heat transfer. Note that R-values add in series (e.g., cavity fill plus continuous foam) and are reduced by thermal bridging through studs or rafters. The exact R/inch depends on material and temperature. The Insulation Institute’s technical guidance shows typical batt thicknesses and R-values for fiberglass products and is useful for specifying batt options (see the institute’s product guide: https://insulationinstitute.org/wp-content/uploads/2016/01/BI473.pdf). For general material types and installation notes consult the Department of Energy’s overview of insulation types at https://www.energy.gov/energysaver/types-insulation.
Common approximate R/inch:
- Fiberglass batts: 3.1–3.4 R/in
- Blown cellulose: 3.2–3.7 R/in
- Mineral wool: 3.0–3.3 R/in
- Open-cell spray foam: ~3.6 R/in
- Closed-cell spray foam: ~6.0 R/in
- Polyiso foam board: ~5.0–6.0 R/in (declines with temperature for some products)
Practical Thickness Examples for Walls, Attic Floors, and Cathedral Ceilings
- 2x4 stud cavity (3.5" deep): Max practical batt R ≈ R-13 to R-15; reach R-20 only with added exterior foam or spray foam.
- 2x6 stud cavity (5.5" deep): Typical batt R-20 fits; closed-cell spray foam or dense-pack cellulose can also achieve R-20 here.
- Attic joists (8–10" usable depth): R-30 typically needs 8–9 inches of blown cellulose or fiberglass; R-38 or higher may be chosen in cold climates.
- Cathedral ceilings: Often shallow; reaching R-30 may require high-R foam boards on the exterior or a combination of cavity fill plus rigid exterior insulation.
For attic-specific depth guidance, see our attic insulation guide.
Thermal Bridging and Assembly-level Performance
Studs, rafters and joists conduct heat; a wall with nominal R-20 cavity fill may only deliver R-12–R-15 overall if studs and connections are not addressed. Continuous insulation (CI) on the exterior reduces thermal bridging and raises assembly R-value more cost-effectively than simply increasing cavity R. When comparing R-20 vs R-30, always consider whether the value refers to cavity-only or assembly R (cavity + CI). For a direct comparison between cavity-installed spray foam and dense-pack cellulose, see our spray foam vs cellulose article.
R-20 Insulation: Overview, Strengths, Weaknesses, Best For
Overview: Where R-20 Commonly Appears
R-20 is commonly used in 2x6 wall cavities, some attic upgrades in temperate zones, and in small buildings where depth and budget are constrained. In retrofit situations with limited depth — older walls or certain tiny houses — targeting R-20 may be the most realistic way to improve performance without major framing work.
Strengths
- Fits within standard 2x6 cavities without additional framing.
- Lower material volume and faster DIY installs with batts or blown options.
- Dense-pack cellulose can achieve R-20 while improving air infiltration resistance.
- Can be paired with thin continuous foam for improved assembly performance.
Weaknesses
- May not meet minimums in cold climate building codes or passive-house targets by itself.
- Thermal bridging through studs reduces whole-wall effectiveness.
- Limited margin against peak heating loads in electric-heated or off-grid homes.
When evaluating thin-depth options for an R-20 target, consider alternative eco-friendly panels such as cork or polymer-based rigid foam. For product choices and attic trade-offs, see our attic material options and the how to use cork for DIY home insulation guide.
Best For: Climate and Building Type Examples
- Mild climates (IECC zones 1–3): R-20 plus good air sealing is often adequate for walls and small cabin envelopes.
- Tiny homes and sheds: Where depth is limited, R-20 with excellent sealing and a high-quality door/window package gives good comfort.
- Retrofits with limited cavity depth: Achievable without adding exterior foam or re-framing.
Decisions should reference local code minimums and heating fuel. The DOE provides material tables and installation notes that help match materials to desired R-values: https://www.energy.gov/energysaver/types-insulation.
R-30 Insulation: Overview, Strengths, Weaknesses, Best For
Overview: Where R-30 Commonly Appears
R-30 is a common target for attic floors across many climate zones and for deeper cathedral ceilings or walls with continuous exterior insulation. It’s often the baseline for remodels that target measurable energy savings without moving to high-performance passive-house R-levels.
Strengths
- Reduces heat loss more than R-20; a 50% higher R-value for the same surface area.
- Better at reducing peak heating loads in mixed and cold climates.
- When combined with CI, it substantially improves whole-envelope performance by reducing thermal bridging.
Weaknesses
- Requires more depth or additional layers (rigid foam), which can complicate retrofit work.
- Diminishing returns: each extra R provides less incremental savings; in very mild climates R-30 may not pay back quickly.
- Thicker assemblies may require changes to roof overhangs, eaves, or window jamb details.
For strategies that let you reach R-30 in narrow cavities, compare rigid foam options and stacking approaches in our foam board comparison and read about continuous exterior approaches in exterior roof insulation.
Best For: Climate and Building Type Examples
- Cold climates (IECC zones 5–8): R-30 for attic floors is commonly recommended; R-30 or higher in walls when paired with CI is preferable.
- Mixed climates with electric heating: Higher R reduces operating costs and peak demand.
- New builds aiming for high comfort: R-30 or higher simplifies meeting tighter whole-envelope targets without exotic materials.
R-30 makes sense when you can provide the depth or are prepared to add exterior insulation to deliver assembly-level gains.
Cost, Energy Savings, and Payback: R-20 vs R-30
How Marginal R-value Saves Energy (rules of Thumb)
Energy savings from increasing R depend on climate, area of the insulated surface and heating/cooling system. The incremental effect of moving from R-20 to R-30 is found by calculating the delta-U (difference in overall conductance) and multiplying by the area and degree-day demand. A practical rule: the percentage reduction in conductive heat loss equals the percentage change in U-value, not R-value. For example, raising R from 20 to 30 reduces cavity conduction by 33% in idealized series-only conditions, but whole-assembly savings are lower when thermal bridging exists.
When the Extra R Pays Back — Climate and Usage Scenarios
R-30 is more likely to pay back when:
- The building is in a cold climate with high heating degree days.
- Heating is electric resistance or high-cost fuel.
- The insulated area is large (e.g., a whole attic) so savings compound.
R-20 may be the better choice when:
- The climate is mild and heating load is small.
- Budget limits mean you’d defer other high-impact upgrades (air sealing, appliances).
- You have limited cavity depth and would need expensive framing changes to reach R-30.
For code-specific minimums and prescriptive tables, see the California Energy Commission’s insulation guidance (2019 field guide): https://www.energy.ca.gov/sites/default/files/2020-09/2019%20Insulation%20and%20QII%20Requirements_v3_ADA.pdf.
Using Calculators and Simple Payback Checks
Don’t guess payback. Estimate:
- Heat loss area in ft².
- Delta R (30–20 = 10), compute delta U = 1/R20 – 1/R30.
- Multiply delta U by area and heating degree days, then by local energy cost to estimate annual savings.
Use the insulation savings calculator to plug local fuel prices and degree days and test scenarios. If retrofit costs are high because of scaffolding, ventilation modifications or added exterior insulation, the payback may be long; in many cases, combining air sealing and targeted window upgrades shortens payback more than simply increasing cavity R.
Installation and Retrofit Considerations for R-20 vs R-30
Air Sealing First, Then Insulation
Air leaks negate insulation value. Follow proven steps: seal attic bypasses, rim-joist penetrations, and recessed lighting gaps before adding insulation. Our step‑by‑step air sealing steps guide shows common techniques and prioritization. Also consult the common air leakage points checklist to target major loss areas.
Layering Strategies (cavity Fill + Continuous Exterior)
A common retrofit path when depth is limited:
- Dense-pack cellulose or open-cell foam in the cavity for air infiltration control.
- Add 1–2 inches of rigid polyiso or mineral wool on the exterior sheathing to raise assembly R and reduce thermal bridging.
Dense-pack works well for retrofit walls without removing siding; rigid foam applied under new cladding avoids re-framing. For attic bays, consider raised-heel trusses or installing insulation above the roof deck (continuous exterior) to maintain ventilation and allow deeper insulation without compressing cavity materials.
Moisture and Ventilation Checks
Moisture control varies by climate and assembly. Closed-cell spray foam can act as a vapor retarder; other systems need a deliberate vapor-control layer. Building codes and university extension guides provide climate-specific vapor strategies — for complex cases consult those references and a local building official. Also ensure attic ventilation paths are preserved when adding insulation to attic floors, unless using unvented, conditioned roof assemblies.
Retrofit Tips for Attics, Walls and Cathedral Ceilings
- Use dense-pack cellulose to avoid over-bulking and improve air sealing in wall retrofits.
- For attics, install baffles at eaves before adding insulation to keep soffit ventilation clear.
- When adding exterior foam, flash and detail windows, sills and eaves to avoid water entry and to maintain cladding ties.
- For cathedral ceilings, adding rigid foam to the exterior or building a new insulated roof assembly can be less risky than trying to cram thicker cavity fill.
Check out these helpful tips and techniques:
Coordinate insulation work with other upgrades — for example, sealing around solar tube penetrations and then insulating reduces future redos; see our solar tube installation walkthrough. If you’re changing cladding while adding exterior insulation, consult our eco-friendly exterior coatings guide for compatible finishes.
External guidance on code changes and practical field adjustments can help avoid pitfalls — refer to the Southface field guide for examples of where ceiling R-values have changed by climate zone: https://www.southface.org/wp-content/uploads/2019/09/GA-2020-Residential-Field-Guide.pdf.
Which Should You Choose? Scenario-based Recommendations for R-20 vs R-30 Insulation
Short Checklist: Choose R-20 When...
- You have a 2x6 cavity and no budget for exterior framing work.
- The building is in a mild climate (low heating degree days).
- You’re insulating a shed, tiny house, or small cabin where depth and weight matter.
- You pair R-20 with thorough air sealing and higher-performance windows.
If you’re weighing small outbuildings, see our shed insulation choices and test options using the shed insulation calculator.
Short Checklist: Choose R-30 When...
- You have attic space or can add depth without major structural work.
- The building is in a mixed or cold climate and heating costs are significant.
- You can add continuous exterior insulation to reduce thermal bridging and achieve assembly-level targets.
- Your goal includes lower peak loads or you plan electric heating/off-grid systems.
Special Cases: Tiny Homes, Sheds, Small Cabins, Passive-house Goals
- Tiny homes and sheds: R-20 plus meticulous air sealing often offers the best cost-to-comfort trade-off. Use high-performance doors and windows to reduce overall load.
- Small cabins and off-grid builds: If space and budget allow, aim for R-30 in the attic/roof to cut fuel use; for walls, combine cavity R-20 with 1–2" polyiso outside for a hybrid approach.
- Passive-house aspirants: R-30 alone is rarely sufficient; passive-house targets require whole-envelope strategies including CI, very low infiltration and high-performance windows. Read the passive-house exterior roof strategies in exterior roof insulation before deciding.
If you’re unsure, run a simple checklist:
- Is the building in a cold climate? → lean R-30.
- Do you have only 2x4 cavities? → consider R-20 + exterior foam.
- Is budget tight and heating load low? → R-20 with air sealing.
- Do you want passive-house level comfort? → R-30+CI or higher.
Also consider pairing window upgrades with insulation — see our analysis of triple-pane windows for when windows reduce heating loads more than marginal insulation increases.
The Bottom Line
R-20 is a sensible, lower-depth target for mild climates, small buildings and many retrofit scenarios when combined with thorough air sealing. R-30 is a stronger choice for attics, cold climates and new builds where depth or continuous exterior insulation is available. Use the insulation savings calculator, prioritize air sealing, and choose the assembly (cavity + CI) that delivers the real-world thermal performance you need.
Frequently Asked Questions
How much thicker is r-30 than r-20 in my wall?
Thickness varies by material. For common fiberglass batts (≈3.2 R/in), R-20 typically needs about 6–7 inches while R-30 needs about 9–10 inches. Closed-cell spray foam (≈6 R/in) requires roughly 3.5 inches for R-20 and about 5 inches for R-30. Check specific product datasheets for exact R/inch values and consult university extension or manufacturer tables for accurate thicknesses under your local temperature conditions; see the Insulation Institute product guide for typical batt dimensions: https://insulationinstitute.org/wp-content/uploads/2016/01/BI473.pdf.
Can I layer insulation to reach r-30?
Yes. A common approach is cavity fill (e.g., R-20) plus 1–2 inches of rigid foam on the exterior to achieve assembly R near or above R-30 while reducing thermal bridging. Alternatively, use high-R closed-cell spray foam in the cavity. When layering, detail vapor control and flashing carefully so you don’t create moisture traps; the [Department of Energy](https://www.energy.ca.gov/sites/default/files/2020-09/2019%20Insulation%20and%20QII%20Requirements_v3_ADA.pdf)’s insulation overview provides installation notes: https://www.energy.gov/energysaver/types-insulation.
Is r-30 worth it in mild climates?
Not always. In mild climates the incremental heating savings from R-30 over R-20 are smaller, and payback may be long. Often the budget is better spent on air sealing, improving windows, or adding targeted continuous insulation in thermal-bridge hotspots. Use a local energy-savings tool such as the insulation savings calculator to compare costs and payback for your location.
What are common retrofit mistakes to avoid?
Common errors include insulating before sealing major air leaks, compressing batts (which lowers R-value), failing to maintain soffit ventilation, and creating unaddressed thermal bridges. Also avoid mixing vapor-permeable and impermeable layers without considering climate-specific moisture control. Review our air sealing steps and the common air leakage points list before insulating.
Is r-30 alone enough for passive-house goals?
No, R-30 alone is seldom sufficient. Passive-house targets rely on very low infiltration, minimized thermal bridges, high-performance windows and often higher overall insulation levels or strategic continuous insulation. Use R-30 as part of a whole-envelope plan that includes air-tightness testing and window upgrades; our exterior roof and CI guides explain how to meet stricter performance targets.