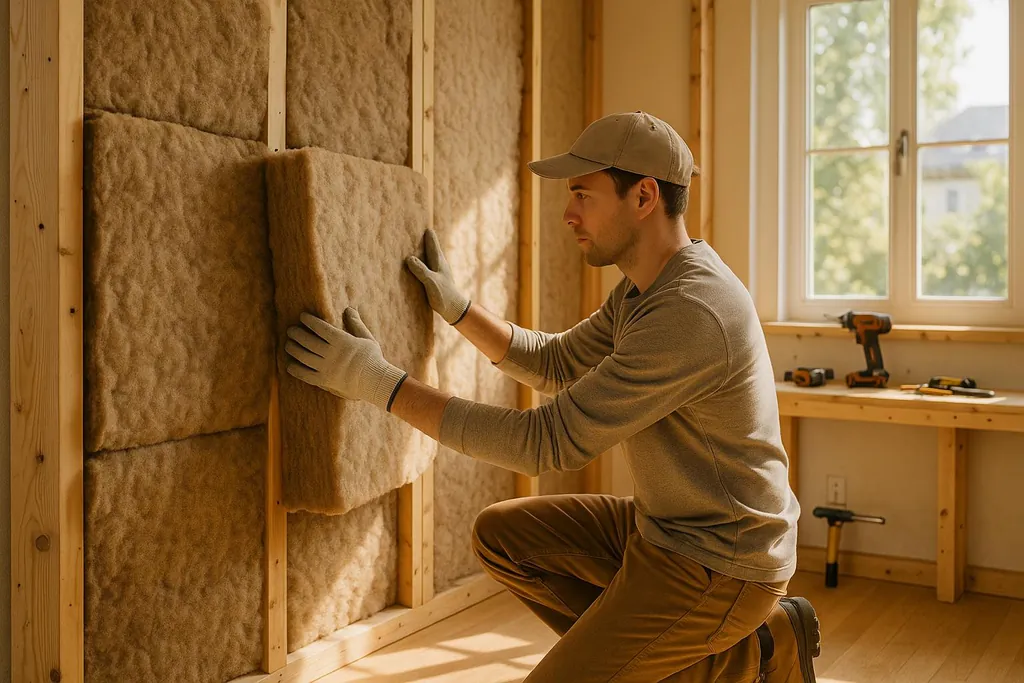
Transform your home into an energy-efficient Passive House with DIY retrofits that lower bills, improve comfort, and reduce your carbon footprint.
DIY Passive House Retrofit
Use the Passive House Feasibility Quiz to score your retrofit's seven Passive House criteria and get a per-criterion gap list before committing to any single upgrade.
If you're tired of high energy bills and uncomfortable indoor conditions, retrofitting your home to meet Passive House standards can be a game-changer. This process focuses on improving insulation, airtightness, windows, and ventilation to reduce energy use, enhance comfort, and even increase your property's value. While some projects may require professional help, many upgrades can be tackled as DIY tasks.
Key benefits of Passive House retrofits:
- Lower heating and cooling costs
- Consistent indoor temperatures and improved air quality
- Reduced noise and drafts
- Smaller carbon footprint
How to get started:
- Conduct a home energy assessment to pinpoint energy loss.
- Prioritize upgrades like air sealing, insulation, and efficient windows.
- Tackle projects step-by-step: improve the building envelope, ensure airtightness, and install proper ventilation.
INSIDE a DIY Deep Energy Retrofit (a Passive House EnerPHit)
Understanding Passive House and EnerPHit Standards
When it comes to creating ultra-efficient homes, the Passive House and EnerPHit standards provide a clear path. These guidelines focus on cutting energy use while ensuring a comfortable indoor environment. For existing buildings, the EnerPHit standard offers a more adaptable framework, addressing the unique challenges of retrofitting older structures. Let’s break down what these standards involve and how they can shape your next project.
What Are Passive House Standards?
Originating in Europe, Passive House standards set the bar for energy efficiency by significantly reducing reliance on traditional heating and cooling systems. The foundation of this approach lies in a few key principles:
- High-quality insulation to minimize heat loss through walls, roofs, and foundations.
- Energy-efficient windows designed to improve overall performance.
- Airtight construction to prevent unwanted air leakage, verified through rigorous testing.
- Elimination of thermal bridges, which are weak spots where heat can escape.
- Mechanical ventilation with heat recovery, ensuring a steady supply of fresh, filtered air without wasting energy.
These principles establish clear performance benchmarks, making it easier to plan and execute energy-efficient upgrades.
EnerPHit: The Retrofit Standard
For retrofitting older buildings, EnerPHit builds on Passive House principles but adjusts for the realities of existing structures. Older homes often have design or structural constraints that make achieving ideal conditions challenging. EnerPHit addresses this by setting more lenient energy targets for heating and cooling, allowing for substantial energy savings while working within these limitations.
EnerPHit also offers a flexible compliance approach. Instead of adhering to a single strict energy target, you can meet overall performance goals through a component-based method. This means you can make improvements in areas like insulation, windows, and airtightness, balancing upgrades to overcome constraints in other aspects of the home. This flexibility makes EnerPHit an achievable goal, even for DIY retrofit projects in typical American homes.
Benefits of Passive House Retrofits
Upgrading to Passive House or EnerPHit standards delivers multiple benefits. These retrofits can significantly lower energy bills, improve indoor air quality, and enhance overall comfort. The improvements are designed to last, ensuring that the advantages extend well into the future.
From an environmental standpoint, bringing your home up to these standards also cuts its carbon footprint. This makes your retrofit not only a smart financial decision but also a meaningful contribution to efforts aimed at tackling climate change.
How to Assess Your Home Before Starting
Start with a detailed energy assessment to pinpoint where your home is losing energy. This process helps you identify the most effective improvements to make. By combining visual inspections, utility bill analysis, and diagnostic tools, you can create a complete picture of your home's energy use. This overview will guide you in prioritizing upgrades and making informed decisions.
Whole-Home Energy Assessment
Begin by gathering your utility bills from the past 12 months. These records reveal your energy consumption trends and can highlight seasonal spikes in heating or cooling costs. Such patterns may indicate issues like poor insulation or air leaks.
Next, conduct a room-by-room inspection. Look for drafts, uneven temperatures, or discomfort. For example, condensation on windows during winter often signals poor insulation. Pay close attention to areas around windows, doors, and where the siding meets the foundation, noting any gaps or problem areas.
Document the current state of your home's systems and materials. Record the age and condition of your heating and cooling equipment, the type and amount of insulation in key areas (like the attic), and the quality of your windows and doors. Additionally, consider your household's daily habits. Ask yourself: How often is the house occupied during the day? What temperature do you usually set on the thermostat? Which rooms are used the most? These details can uncover opportunities for behavioral adjustments to complement physical upgrades.
Tools and Methods for Diagnosis
While professionals rely on advanced equipment, there are several DIY methods you can try. A thermal imaging camera or a smartphone attachment designed for thermal imaging can help you spot heat loss through walls, windows, and the roofline.
For a basic blower door test, use a box fan in an open doorway blowing outward. A smoke pencil or even incense sticks can help you detect leaks by showing where air is escaping.
You can also use online tools to estimate the potential impact of upgrades. While experts often turn to software like EnergyPlus, simpler online calculators are available to help homeowners evaluate the benefits of different improvements. These tools can help you focus on upgrades that deliver the best results for your investment.
How to Prioritize Upgrades
To get the most out of your efforts, prioritize upgrades that offer the best return on investment. Begin with air sealing, which is one of the simplest and most cost-effective ways to cut energy loss. Seal gaps around windows, doors, electrical outlets, and other areas where air can escape before moving on to larger projects.
Next, address insulation, particularly in the attic. Many homes, especially older ones, are under-insulated, and improving this can significantly reduce heat loss and energy costs.
If your windows and doors are outdated, consider replacing them. While this can be a bigger expense, upgrading inefficient single-pane windows or poorly performing doors can greatly enhance both comfort and energy efficiency. Focus on the worst offenders first and assess how new installations might affect solar heat gain.
Plan your upgrades in phases, considering both your budget and seasonal needs. For example, complete air sealing and attic insulation before winter to keep your home warmer. Larger projects, like window replacements, can be scheduled during milder weather.
Lastly, think about how your home's systems work together. Installing a high-efficiency heating system won’t make a big difference if your home still has poor insulation and air leaks. Tackle the building envelope first to prevent energy loss, then optimize your heating and cooling systems to match your home's improved efficiency.
Step-by-Step Guide to DIY Passive House Retrofit
Now that you've evaluated your home and set priorities for upgrades, it's time to dive into the retrofit process. Turning your home into a passive house takes careful planning and attention to detail, but the payoff is a dramatically more energy-efficient and comfortable living space. The key is creating a building envelope that works seamlessly to minimize energy loss.
Improving the Building Envelope
Start by upgrading your building envelope to significantly reduce energy waste. For exterior walls, aim for 4 to 8 inches of continuous insulation, such as polyisocyanurate or mineral wool panels, to reach R-values between R-30 and R-50. In the attic, target R-60 to R-80 with materials like blown-in cellulose, fiberglass, or spray foam, especially for cathedral ceilings. Foundation walls should have 2 to 4 inches of rigid foam insulation running from the footer to about 2 feet above ground. For crawl spaces, use snugly fitted batts between floor joists, secured with wire mesh.
To tackle thermal bridges - areas where heat bypasses insulation - apply continuous insulation across the entire exterior before adding siding. Pay close attention to structural elements like studs and joists, which are common culprits for heat loss.
Once the envelope is insulated, the next step is upgrading your windows and doors.
Upgrading Windows and Doors
Windows and doors play a critical role in limiting heat loss. Install triple-pane windows with low-E coatings, aiming for U-values of 0.15 Btu/hr·ft²·°F or lower. Depending on your climate, choose a Solar Heat Gain Coefficient (SHGC) between 0.25 and 0.50.
When replacing windows, remove the old ones completely, clean the opening, and create a continuous air barrier using self-adhering tape. Secure the new window with screws through the frame, seal gaps with low-expansion spray foam, and use weatherproof tape over exterior flanges. Finish by tightly sealing the interior trim.
For doors, opt for insulated steel or fiberglass options with U-values of 0.17 Btu/hr·ft²·°F or lower. Add door sweeps and weatherstripping around the entire frame, focusing on the threshold for a tight seal.
If replacing windows or doors isn’t feasible, consider secondary glazing options like interior storm windows or magnetic acrylic panels. These can improve energy performance by 30 to 50 percent without the cost of full replacements.
After addressing the envelope, focus on airtightness to maximize energy savings.
How to Achieve Airtightness
Airtightness is essential for preventing air leaks and achieving passive house standards, which require 0.6 air changes per hour at 50 pascals of pressure. Create a continuous air barrier using self-adhering membrane tapes and liquid sealants across the entire building envelope.
Seal penetrations thoroughly: use foam gaskets behind electrical outlets, expanding foam or caulk around plumbing and wiring, and weatherstripping for attic hatches. Add rigid foam insulation to attic access points and replace standard recessed lights with airtight fixtures - or switch to surface-mounted LEDs.
Common air leakage spots include electrical outlets, recessed lights, plumbing penetrations, and the junction where walls meet the foundation. Achieving airtightness often requires multiple rounds of testing and sealing.
Once your home is sealed, the next step is installing a ventilation system to maintain air quality.
Installing Ventilation Systems
After achieving airtightness, a mechanical ventilation system is necessary to ensure fresh air circulation. Install a Heat Recovery Ventilator (HRV) or Energy Recovery Ventilator (ERV) with an efficiency rating of 85 percent or higher. These systems transfer heat from outgoing stale air to incoming fresh air, maintaining comfort while reducing energy use.
For a typical 2,000-square-foot home, you'll need a unit with a capacity of 60 to 100 cubic feet per minute (CFM). Place the main unit centrally for easy maintenance, and connect it to power and a condensate drain.
Design your ductwork to be insulated, short, and straight for maximum efficiency. Position exterior wall caps at least 6 feet apart, keeping fresh air intakes away from potential contamination sources like exhaust vents or prevailing winds.
To optimize performance, connect your ventilation system to a programmable controller with humidity sensors. These sensors can adjust ventilation rates automatically based on occupancy and moisture levels.
With ventilation handled, it’s time to refine your heating and cooling setup.
Efficient Heating and Cooling Solutions
A passive house retrofit significantly reduces heating and cooling demands - by as much as 80 to 90 percent. This means you can install smaller, more efficient systems. Air-source heat pumps are a great option, providing both heating and cooling even in temperatures as low as -15°F.
For zoned heating and cooling, consider mini-split heat pumps. These require no extensive ductwork and allow you to control temperatures in specific areas, such as living rooms and bedrooms. Outdoor units should be positioned for easy maintenance.
In colder climates, ground-source heat pumps offer consistent performance with seasonal efficiency ratings exceeding 400 percent. While the upfront costs are higher, they deliver excellent long-term savings.
For homes with extremely low heating loads, electric resistance heating can be a viable option. Baseboard heaters or heated floors can provide supplemental warmth during the coldest days.
If possible, integrate your heating system with your ventilation setup. Some HRV systems include electric heating coils that can warm incoming fresh air, further reducing the load on your primary heating system.
Tools, Materials, and Cost-Saving Tips
The success of a passive house retrofit hinges on using the right tools and materials - especially when airtightness and superior insulation are non-negotiable.
Essential Tools and Materials
Having the right tools on hand is key to achieving effective air sealing and insulation. For instance, a blower door test kit is indispensable for identifying leaks in the building envelope. To ensure consistent and high-quality sealing around windows, doors, and other penetrations, invest in a durable caulking tool that applies sealants efficiently.
Don’t overlook the importance of sealing your HVAC system’s ductwork. Proper duct sealing helps minimize air leaks and reduces energy waste, making your system more efficient. Additionally, choose high-performance insulation for walls, attics, and pipes to maintain a tight thermal envelope that keeps your home comfortable year-round.
With these tools and materials in place, you can focus on strategies to cut costs without compromising quality.
Cost-Saving Strategies
Start with upgrades that deliver immediate energy savings. For example, duct sealing and insulation improvements are high-impact changes that can quickly reduce energy consumption. Tackling similar tasks - like completing all air sealing work in one go - can also save on labor and equipment costs by streamlining the process.
Don’t forget to explore state and local incentives or utility rebates, which can help offset some of your retrofit expenses. Many programs are designed to encourage energy-efficient upgrades, so it’s worth checking what’s available in your area.
How to Avoid Common Mistakes and Ensure Success
Once you've planned and started your upgrades, it's crucial to steer clear of common pitfalls to ensure everything runs smoothly. Retrofitting to meet passive house standards is no small feat - it’s a detailed process where timing and order matter. Getting the sequence right can save you from unnecessary expenses and headaches.
Sequencing Upgrades Correctly
Think of your retrofit as a puzzle where every piece needs to fit perfectly with the next. Begin with the basics, like foundational repairs, before moving on to the building envelope. From there, tackle windows, doors, and ventilation systems. Each improvement should build on the last, creating a cohesive system that works together seamlessly. Skipping this step-by-step approach or treating upgrades as standalone projects can lead to inefficiencies or even undo previous work. Be sure to check along the way that everything integrates as intended.
Post-Retrofit Testing and Verification
Once your upgrades are complete, it’s time to see if they deliver the results you aimed for. Use tools like blower door tests or thermal imaging to assess performance. These tests can pinpoint any weak spots or areas that need fine-tuning, ensuring your retrofit is as effective as possible. This not only confirms success but also gives you peace of mind.
When to Consult Professionals
While many retrofit tasks can be tackled by a dedicated DIYer, it’s important to recognize when to bring in the pros. Certain jobs - especially those involving structural changes, electrical systems, or complex ventilation setups - may require expertise to ensure everything is done safely and meets performance standards. Don’t hesitate to call in a professional when the task is beyond your skillset; it’s an investment in getting the job done right.
Conclusion: Key Takeaways for DIY Passive House Retrofits
Transforming your home to meet passive house standards is no small feat, but it’s entirely doable - and the rewards are worth it. You’ll enjoy lower energy bills and a cozier, more sustainable living space. The secret? Start with the basics. Understand what passive house and EnerPHit standards demand, and conduct a detailed energy assessment before diving in. A solid foundation makes all the difference.
The process works best when tackled step by step. Begin with the building envelope to seal up your home, move on to upgrading windows, doors, and ventilation, and wrap things up with efficient heating and cooling systems. This logical sequence ensures everything works together seamlessly, boosting the overall efficiency of your home.
Cost management is another essential piece of the puzzle. By choosing materials wisely, timing your purchases, and breaking the work into phases, you can spread out expenses and avoid feeling overwhelmed. Keep in mind that some tasks - like structural changes, electrical work, or installing complex ventilation systems - might require professional help. Budgeting for these services upfront is just smart planning.
One of the most important lessons? Work in the right order. Start with foundational fixes and tackle each upgrade systematically. This approach helps you avoid expensive missteps and ensures every improvement builds on the last.
For more detailed guidance and support, check out the resources at [DIY Eco Homes](/). Whether you’re looking for step-by-step tutorials or want to connect with others on the same journey, you’ll find everything you need to make your energy-efficient home a reality.
FAQs
What are the most affordable upgrades to start with for a Passive House retrofit?
The most cost-effective steps to kick off your Passive House retrofit include focusing on better insulation, sealing air leaks, and installing energy-efficient windows. These upgrades work wonders for improving your home's airtightness and thermal efficiency, which helps cut down on energy waste and makes your living space more comfortable.
If you're looking to save even more on energy costs, think about adding a high-efficiency HVAC system and energy recovery ventilation. These systems are designed to optimize heating, cooling, and indoor air quality, creating a cozy environment while trimming utility expenses. Starting with these upgrades offers great value for your money and helps you meet Passive House standards.
How can I ensure my DIY retrofit meets EnerPHit standards, especially for an older home with structural challenges?
To achieve EnerPHit standards when retrofitting an older home, focus on key upgrades like boosting airtightness, installing high-performance insulation, and upgrading to energy-efficient windows. These improvements can dramatically improve energy efficiency while respecting the unique challenges of older structures.
EnerPHit standards are designed to be flexible, allowing for significant energy savings without requiring extensive structural changes. Concentrate on exterior upgrades - such as insulating walls and roofs, sealing air leaks, and replacing outdated windows - since these are often the most impactful and least disruptive steps.
Before diving in, conduct a thorough assessment of your home’s structure. This will help you pinpoint potential limitations and plan upgrades that enhance energy efficiency without compromising the building's integrity. With careful preparation and the right materials, you can create a more comfortable, energy-efficient living space.
What tools and materials do I need to ensure airtightness during a DIY Passive House retrofit?
To ensure your [DIY Passive House retrofit](/blog) achieves proper airtightness, you'll need a few key tools and materials. Start with a high-quality caulking gun, closed-cell spray foam, and airtight tapes like butyl or foil tape. For materials, consider vapor barriers, airtight membranes (such as [Pro Clima Intello](https://proclima.com/products/internal-sealing/intello)), and durable sealants specifically designed for energy-efficient construction.
These tools and materials work together to seal gaps, block air leaks, and help maintain steady indoor temperatures - essential for meeting Passive House standards. Choosing reliable products upfront not only saves time but also ensures your home stays energy-efficient for years to come.