Step-by-step guide to blower door testing for reaching Passive House airtightness — tools, metrics (ACH50/n50), air-sealing fixes, DIY vs pro advice.
Blower Door Testing: How to Achieve Passive House Airtightness
A blower door test is the standard way to measure airborne leakage in a house and verify whether a build meets Passive House airtightness targets. This guide explains what a blower door test measures, the tools and steps used on test day, how ACH50/n50 relate to one another, and practical air-sealing strategies to turn a failed test into a pass. Readers will learn what to prepare before testing, how to read a test report, when to rent or hire equipment, and which materials and fixes usually yield the biggest airtightness gains.
TL;DR:
- Passive House target: n50 ≤ 0.6 ACH50; test with a calibrated blower door and report ACH50/CFM50 values.
- Run iterative tests during construction, prioritize large-area leaks (rim joist, window laps, attic hatch), and use tapes/membranes/gaskets for effective fixes.
- Rent a blower door for QA runs, but hire a certified technician for final certification or permitting reports.
Why Blower Door Testing Matters for Passive House Airtightness
A blower door test quantifies air leakage so teams know whether an enclosure meets the Passive House airtightness target: n50 ≤ 0.6 ACH50 (sometimes written as ACH50 ≤ 0.6). That metric expresses the number of times the building's air volume exchanges per hour at a 50 Pascal pressure difference. The blower door test forces this pressure difference and measures flow rates to calculate ACH50 and CFM50.
Achieving low airtightness reduces heating and cooling loads, improves thermal comfort, and limits moisture-driven problems in assemblies by reducing uncontrolled infiltration. The Passive House Institute (PHI) and PHIUS provide certification thresholds and protocols; industry testing methods reference standards such as ASTM E779 and ISO 9972 for consistent procedures and reporting. For an in-depth primer on airtightness fundamentals and Passive House targets, see the site's complete airtightness guide.
Research and trade guidance also show that proactive testing early in construction reduces rework and cost. For builders on a budget, the blower door acts as a diagnostic tool—revealing the biggest offenders so teams can focus sealing effort where it returns the most benefit.
Key Points at a Glance
- Metric to watch: n50 (same as ACH50) — Passive House: ≤ 0.6 ACH50.
- Primary diagnostic values: CFM50 or m3/h at 50 Pa, converted to ACH50 based on building volume.
- Typical workflow: pre-test prep → depressurize/pressurize → smoke/infrared diagnostics → remediation → re-test.
- Standards referenced: ASTM E779 / ISO 9972 for test method and reporting.
How Airtightness Affects Energy, Comfort, and Durability
Air exchange through gaps causes drafts, uneven temperatures, and higher delivered heating/cooling loads. Tightening an enclosure reduces those uncontrolled flows; mechanical ventilation (ERV/HRV) then supplies controlled, filtered fresh air. Tight homes also control moisture better because warm, humid indoor air has fewer unplanned leakage paths into cold assemblies where condensation can occur. That said, tightening requires proper ventilation design and commissioning—ventilation systems must be sized and balanced for the reduced infiltration rate.
External source for contractor-focused blower door context: see a practical contractor guide at Blower door testing guide for contractors.
How a Blower Door Test Works: Tools, Steps, and Metrics
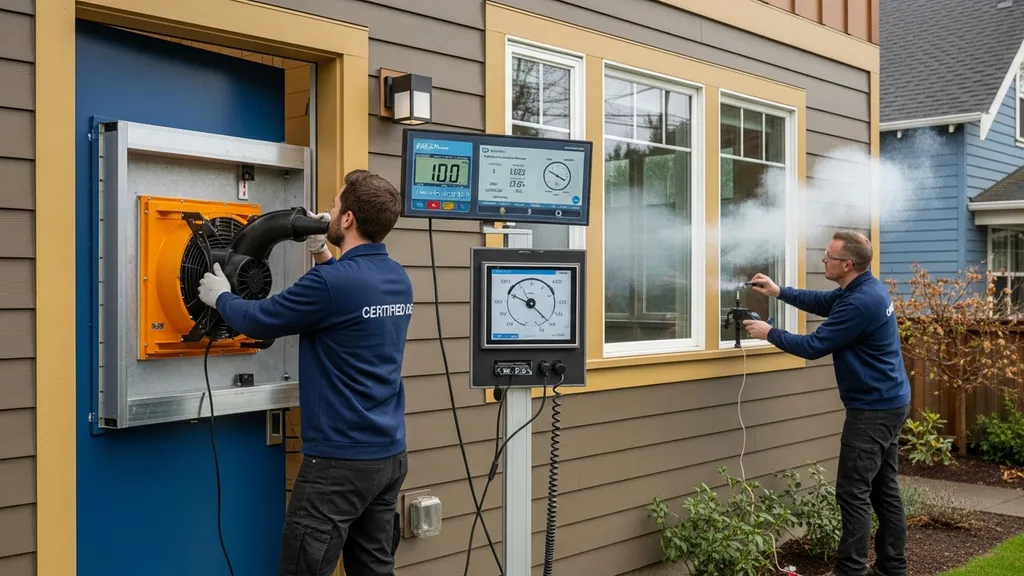
A blower door test uses a calibrated fan mounted in an exterior door, a differential pressure gauge (manometer), and flow measurement to quantify leakage. Technicians often combine smoke pens or infrared cameras to locate leaks visually once the fan creates a pressure difference.
Common equipment: blower door, fan, manometer, smoke pens
- Blower door frame and fan: Adjustable metal frame that seals in a doorway, with a variable-speed fan that forces air out or in.
- Manometer (pressure gauge): Measures the pressure difference between indoors and outdoors and the flow through the fan.
- Smoke pens or theatrical smoke: Visualize air movement at junctions and penetrations.
- Infrared camera (optional): Helps identify thermal anomalies related to leakage when temperature differences exist.
- Sealing plugs and temporary covers: Used to close intentional openings for controlled testing.
For a primer on workshop tools and the kind of gear you should own for building tasks, see essential builder tools.
Step-by-step Test Procedure (pre-test Checks to Depressurization)
- Pre-test site prep: Close exterior windows and doors, open interior doors, disable HVAC fans and appliances that would affect pressure, and isolate combustion appliances per code. Label intentional penetrations that should remain open for diagnostics.
- Install the blower door: Fit the frame into a main exterior door and mount the fan and manometer.
- Exterior baseline: Note outdoor temperature and wind conditions—strong wind can affect readings.
- Run a pressure series: The operator runs the fan to create pressure steps (commonly from 10 Pa to 70 Pa) while the manometer records flow; the 50 Pa reading is the standard for ACH50.
- Diagnostics: Use smoke pens or infrared to identify leak locations while the house is depressurized (or pressurized for some tests).
- Report generation: The tester produces a report showing CFM50, ACH50, leakage curves, and graphs.
Key Metrics: ACH50, CFM50, Specific Leakage Area and Relevant Standards
- CFM50 (cubic feet per minute at 50 Pa): Instant flow through the fan at the 50 Pa setpoint.
- ACH50 (air changes per hour at 50 Pa): Calculated from CFM50 and building volume: ACH50 = (CFM50 × 60) / building volume (ft3).
- Specific leakage area (SLA) / L/m2 at 50 Pa: A normalized measurement used in European practice to compare envelope tightness relative to surface area.
Standards such as ASTM E779 and ISO 9972 describe how to perform the flow/pressure series and report results. For practical pre-test tips targeted at installers and builders, see the Insulation Institute's checklist: 4 tips to ace your blower door test.
Watch this review for practical insights:
Viewers will see a short set-up, smoke testing to find leaks, and how to read a basic test trace.
Preparing Your Build for Blower Door Testing Success
A phased checklist reduces surprises on test day. Air-sealing during rough-in handles large, repeatable penetrations; sealing at enclosure completion refines continuity; final sealing addresses trim-level gaps and thresholds.
Air-sealing Checklist by Construction Phase
- Rough-in: Install continuous service chase grommets at electrical, plumbing, and HVAC penetrations; gasket subfloors and rim joists; pre-seal chases around chimneys and flues.
- Enclosure completion: Tape membrane laps, seal window and door flanges, and apply continuous airtight membranes at wall–roof–foundation junctions.
- Final finishes: Gasket attic hatches, seal thresholds and interior partition penetrations, and install backer and sealant at transitions that get covered by trim.
What to Finish — and What to Leave Temporary — Before the First Test
- Finish: Air barrier continuity at typical leak planes (rim joist, window/flange, service entries).
- Leave temporary: Covers for permanently installed finishes that might impede diagnostics (temporary taping of sprinkler heads, or removable covers at planned penetrations) so you can locate leaks with a clear path. Temporary sealing of major openings is acceptable to run a diagnostic pre-drywall test.
Common Trouble Spots to Pre-check
- Window and door flanges and rough openings.
- Rim joists and sill plates (unsealed subfloor-to-foundation junctions).
- Electrical and plumbing penetrations, oversized or misaligned penetrations.
- Attic hatches and recessed lighting (IC-rated can/retrofits).
- Garage-to-house interfaces and basement bulkhead doors.
For retrofit projects, follow more targeted strategies in the site's retrofit airtightness tips. For contractor-oriented procedural guidance similar to PathlightPro's approach to test readiness, consult this learning guide to code compliance testing.
Interpreting Blower Door Results for Passive House Compliance
Understanding a blower door report is about more than the single ACH50 number. A typical report includes a leakage curve, multiple pressure points, and sometimes a visual map of leak locations—use that information to prioritize fixes.
Understanding ACH50, N50, and Pass/fail Criteria
- ACH50 and n50 are often used interchangeably; both refer to air changes per hour at 50 Pa. Passive House certification requires n50 ≤ 0.6 ACH50 for new builds under the classic PHI standard (confirm current thresholds with PHI or PHIUS depending on your certification path).
- Pass/fail depends on the project standard: code compliance targets (for permits) are usually less strict than Passive House targets. Always compare the reported ACH50 to the applicable threshold.
Converting and Comparing Metrics for Permit vs Passive House
- Use the building volume to convert CFM50 to ACH50: ACH50 = (CFM50 × 60) / volume(ft3).
- For reference, many conventional new homes have ACH50 values multiple times higher than Passive House targets; use the test to benchmark progress rather than to assign blame.
Remediation Roadmap: Prioritizing Leaks by Impact
- Large-area leaks first: Fix continuous gaps like unsealed rim joists, missing membrane laps, or major window flange failures—these deliver the biggest ACH50 drops per hour of work.
- Systematic sealing second: Address distributed smaller penetrations with grommets, conduit boxes, and sealant.
- Detail and finish: Gasketing, thresholds, and trim-level sealants move the final decimal points.
Diagnostic reports often include the leakage curve and a pressure vs. flow graph—document pre- and post-test values and attach photos of remediated areas. For guidance that ties airtightness results back to broader Passive House decisions, see applying passive house principles. For ventilation implications as you tighten, read the ERV vs HRV overview at ERV vs HRV overview.
Industry write-ups on remediation tactics and common fail points can help interpret ambiguous results; see a practical take on passing tests at Passing a blower-door test.
DIY vs Professional Blower Door Testing: Costs, Certification, and When to Hire
DIY testing and rental blower doors are excellent for iterative quality assurance, but final certification and many permitting processes require a calibrated, documented test from a certified professional.
Pros and Cons of DIY Testing and Rental Equipment
- Pros: Lower cost per run, quick iterative feedback, useful for contractors and owner-builders to find and fix leaks during construction.
- Cons: Rental units may lack calibration or diagnostic experience; DIY reports may not be accepted for formal certification without a certified technician’s signed report.
When a Certified Professional Matters (passivhaus Certification, Permits)
- Hire a certified blower door technician when you need a formal, calibrated test for Passive House certification or local code compliance that requires a professional signature. Certified technicians bring diagnostic skills—smoke testing, infrared interpretation, and experience prioritizing fixes under tight schedules.
How to Work with a Blower Door Technician Effectively
- Share job plans and highlight known service penetrations or temporary openings.
- Request a pre-test walkthrough and ask the tester to perform a smoke diagnostic during the pressure series.
- Ask for a clear report including CFM50, ACH50, leakage curve, labeled photos of leaks, and recommended fixes.
For DIY ventilation integration and planning ahead of tightness gains, consult the site's article on DIY ventilation options. For planning service penetrations related to battery enclosure and off-grid systems, see service planning for penetrations.
Practical cost guidance: rental fees and technician rates vary widely by region. Expect rental blower doors to be economical for multiple QA runs; professional rates include testing, diagnostics, and a signed report—check local pricing and get itemized quotes.
External information on homeowner-facing guidance is useful: see Andersen Windows' overview of blower door testing for practical homeowner advice at What is a blower door test? | Andersen Windows.
Air-sealing Materials and Techniques Proven for Passive House Airtightness
Choosing the right materials and detailing them correctly is essential. Below are material categories and installation guidance for durable airtightness.
Top materials: tapes, membranes, gaskets, liquid-applied membranes, sealants
- Tapes: Specialized butyl or acrylic tapes for membrane laps and window flanges.
- Membranes: Peel-and-stick or vapor-permeable membranes for continuous air barriers.
- Gaskets: Pre-formed gaskets for sill plates, framing interfaces, and window installation.
- Liquid-applied membranes: Brush-on or spray-applied films that form a monolithic barrier in complex details.
- Sealants: Polyurethane or compatible silicone for point sealing; use low-modulus products where movement is expected.
Comparison/specs Table for Common Air-sealing Products
| Product type | Best use | Advantages | Limitations | Vapor considerations |
|---|---|---|---|---|
| Butyl/acrylic tape | Membrane laps, window flanges | Fast, long-lasting adhesion | Surface prep critical | Generally vapor-permeable options exist |
| Peel-and-stick membrane | Continuous air barrier on sheathing | Durable, clear lap detail | Edge treatment needed | Choose permeability per climate |
| Pre-formed gaskets | Sill plates, window perimeters | Quick install, consistent size | Limited shapes | Vapor neutral |
| Liquid-applied membrane | Complex details, penetrations | Conforms to shapes, continuous seal | Requires cure time and coverage control | Select based on vapor permeability |
| High-quality sealant | Point seals, trim gaps | Flexible, durable joints | Slower than tape for long runs | Use compatible products to avoid trapping moisture |
Installation Tips for Critical Assemblies (walls, Roofs, Foundations)
- Wall assemblies: Create an uninterrupted air barrier layer—whether sheathing-plus-tape or a separate membrane. In assemblies like a Larsen truss or with continuous exterior insulation, detail transitions so the air barrier follows a single plane; see the Larsen truss vs exterior insulation article for assembly implications.
- Window interfaces: Flash and tape to produce a weatherproof and airtight flange-to-membrane connection. Review the site's triple-pane window tradeoffs for discussion of window choice and detailing.
- Foundations: Seal sill plates to foundations with gaskets and apply a continuous sill membrane where slab-edge assemblies exist. For retrofit basement projects, see basement airtightness tips.
Material choice differs for new builds versus retrofits—retrofits may favor spray-applied or liquid membranes where access is limited, whereas new builds often use taped sheathing and continuous insulation. For broader guidance on air-sealing materials and beginner-friendly techniques, consult the site's air-sealing materials guide and industry writing such as Green Building Advisor's practical coverage at Passing a blower-door test.
Using Blower Door Tests During Construction: Sequence, Re-tests, and Common Fixes
A sequence of tests during construction heads off final-stage surprises and keeps the project on budget.
Quality-control Testing Schedule: Milestone Tests and Final Certification Test
- Rough-in check: Run a basic diagnostic after rough-in to find large penetrations and service chase leaks; this is quick and inexpensive.
- Pre-drywall test (if feasible): Identifies membrane continuity issues before finishes hide details—high leverage for sealing work.
- Post-envelope test: After windows and roofing are installed, retest to confirm enclosure performance.
- Final verification test: Certified test for Passive House or permit sign-off.
Typical Fixes After a Failed Test (detailed Examples)
- Rim-joist sealing: Install a continuous gasket and apply a taped membrane across the rim-sill interface. This often reduces a large portion of leakage quickly.
- Window flange failure: Remove rotted or misaligned sill filler, reseat flashing, and re-tape flanges with a proven air-sealing tape.
- Service penetrations: Replace loose or oversized penetrations with properly sized grommets or install a sheet-metal collar with liquid-applied membrane at the joint.
- Attic hatch: Fit a compression gasket, install a lid with overlapping stops, and seal perimeter with a flexible sealant.
- Basement junctions: Apply a continuous sill gasket and seal the slab-wall junction with an appropriate product.
Documenting Improvements and Test Reports
- Keep a ledger of test dates, CFM50/ACH50 values, photos of leaks, and the repairs performed. Attach each test report to the project file and label the remediation steps taken after each test. This documentation is crucial for certification and for solving recurring problems in similar future projects.
Practical iterative workflow
- Run rough-in diagnostic to find big holes.
- Fix major gaps and re-test.
- Perform pre-drywall test to verify membrane continuity.
- Seal details exposed during finishing and perform final test (hire pro if needed).
For sealing roof-to-wall junctions and attic details, read the site's guidance on roof insulation methods. For basement and foundation junctions often revealed by tests, review basement airtightness tips. For window placement and how it affects installation detailing, consult window orientation basics.
The Bottom Line
A blower door test is the measurement backbone for reaching Passive House airtightness: use it early and often as a diagnostic tool, aim for n50 ≤ 0.6 ACH50 for Passive House targets, and prioritize sealing large-area leaks first. Rent equipment for iterative QA runs, but bring in a certified technician for the final certification test and formal reports. Document every test and remediation step so results are reproducible and defensible for certification or permit inspections.
Frequently Asked Questions
What is a good ach50 for Passive House?
The Passive House target for airtightness is n50 ≤ 0.6 ACH50 for classic certification paths. That means the building's full air volume exchanges fewer than 0.6 times per hour at a 50 Pa test pressure. Code or local permit thresholds are usually more permissive—check the specific standard you aim to meet (PHI, PHIUS, or local code).
Can I rent a blower door and do my own test?
Yes. Renting a blower door is a cost-effective way to run iterative QA tests during construction. Rentals let owner-builders and contractors find and fix leaks. Keep in mind that final certification or some permitting processes require a calibrated test and signed report from a certified technician.
For guidance on tools and readiness, see the site's essential builder tools.
How long does a blower door test take?
A basic blower door test and diagnostic sequence typically takes 1–3 hours on site. Time varies with the size of the building, extent of diagnostics (smoke testing, infrared scans), and prep time to isolate HVAC or combustion appliances. Allow additional time for walkthroughs, photography, and report generation by a professional.
Will tightening the house cause indoor air quality problems?
Tightening without providing controlled ventilation can reduce indoor air quality. When you reduce infiltration, mechanical ventilation (ERV or HRV) becomes the primary method to exchange stale indoor air for fresh filtered air. Design and commission the ventilation system to match the reduced natural infiltration and the home's occupancy patterns; see the site's ERV vs HRV overview at ERV vs HRV overview for more on system selection.
How many times should I test during construction?
Plan for multiple tests: an early rough-in diagnostic, a pre-drywall test (if practical), a post-envelope test, and a final verification test. Each test targets different leak types and reduces the chance of costly rework late in the schedule. Use rental tests during construction and hire a professional for the final certification or acceptance test.