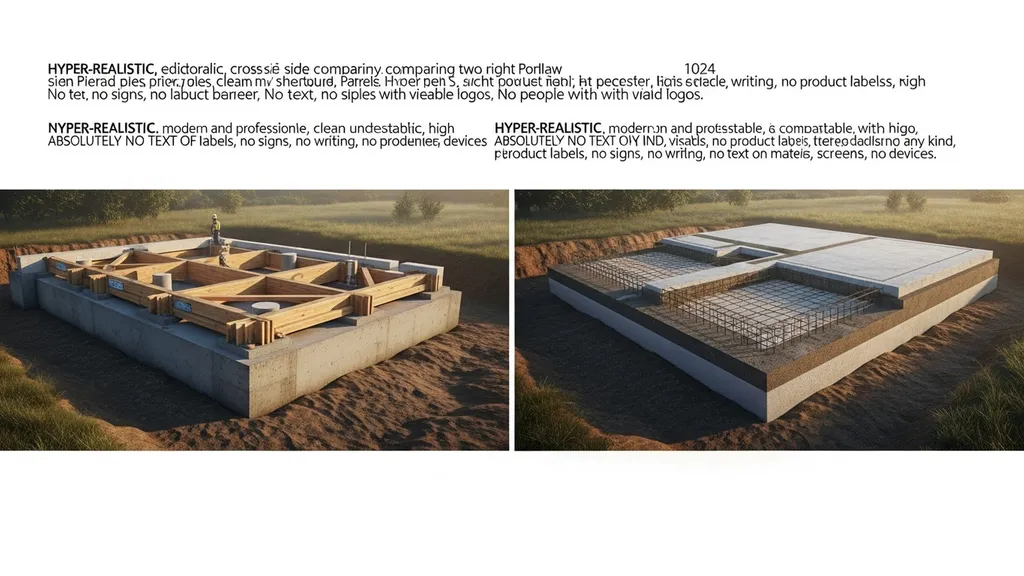
Clear, practical comparison of pier-and-beam vs slab foundations for DIY, costs, energy, moisture, and site suitability.
Pier and Beam vs Slab: Foundation Comparison
Choosing between a pier and beam vs slab foundation shapes a DIY build from day one: it affects cost, energy performance, moisture risk, and how easy it is to run plumbing and HVAC. This article compares the two systems with practical numbers, site-driven rules of thumb, and clear DIY guidance so a budget-conscious self-builder can decide which foundation fits their lot, climate, and skill set.
TL;DR:
- Pier-and-beam often costs slightly more upfront ($7–$15/sq ft), but offers easier mechanical access and better flood resilience; good for sloped or wet sites.
- Slab-on-grade is usually cheaper to build ($4–$10/sq ft), provides superior thermal mass when insulated correctly, and needs less routine maintenance.
- Choose based on site (frost depth, floodplain, expansive clay), energy goals (passive-house/net-zero), and access for plumbing—do a soil report and plan a 10–20% contingency.
For current reference points, review Portland Cement Association resources and Insulating Concrete Forms Manufacturers Association.
Related guides: Design slab on grade foundation cold climates, Build update 3 slab form prep pouring concrete, Zapier Test - Published Article for Trigger, and Icf foundations insulated concrete forms.
Pier and Beam vs Slab: Quick TL;DR and Comparison Table
One-paragraph summary (who should consider which)
Pier and beam foundations raise the house off the ground on concrete piers or posts, creating a crawl space that simplifies repairs and helps in flood-prone or sloped sites. Slab-on-grade pours the structural slab directly on compacted fill and is usually lower-cost, low-maintenance, and better for tight, compact builds targeting passive-house or net-zero goals—provided the slab is insulated correctly for the climate.
| Metric | Pier & Beam | Slab-on-Grade |
|---|---|---|
| Typical cost range (per sq ft) | $7–$15 (depends on piers, access) | $4–$10 (depends on reinforcement, insulation) |
| Typical build time | 2–5 weeks (site prep + framing) | 1–3 weeks (site prep + pour, longer cure) |
| Thermal performance / insulation | Requires underfloor or skirt insulation; risk of thermal bridging | Good thermal mass; best with perimeter and under-slab insulation |
| Crawl space | Yes (usually 18–36" high) | No |
| Flood / freeze suitability | Better for flood zones; good on steep lots | Better for well-drained, frost-free sites; frost protection required in cold climates |
| Common maintenance | Crawl-space moisture control, skirting repair, pest checks | Slab cracks, plumbing access issues; fewer routine tasks |
Data are approximate and depend on soil, local labor, and code. Check local frost-depth rules, flood maps, and soils before deciding—see Oregon's foundation guidance for manufactured dwelling anchors for an example of code-level site expectations (PDF).(https://www.oregon.gov/bcd/licensing/Documents/md-study-guides/mdisc-studyguide-chapter3.pdf) See deeper breakdowns below.
Pier and Beam: Overview, Strengths, Weaknesses, and Best For
What a pier-and-beam foundation is
A pier-and-beam foundation uses discrete concrete piers (cast-in-place pads, drilled shafts, or precast piers) spaced under load-bearing beams. On top of the piers sit pressure-treated sill plates and beams that support floor joists and subfloor. Typical crawl-space heights range from 18 inches to 36 inches; pier spacing commonly falls between 6 and 12 feet depending on load and beam size. Materials include cast concrete, pressure-treated timber or engineered beams, joist hangers, and blocking. Common details: concrete piers below frost depth, anchor bolts to hold sills, a continuous skirt to close the crawl space.
Key strengths
- Access: Mechanical, plumbing, and electrical runs are visible and serviceable under the house—this reduces renovation costs and simplifies repairs.
- Flood protection: Elevating the structure is an effective flood-mitigation strategy in coastal or riverine zones.
- Site flexibility: Works well on sloped lots where cutting and retaining for slabs would be expensive.
- Faster dry-in for the main structure: With a raised floor you can frame and enclose the house without waiting for long slab cures.
Key weaknesses
- Thermal bridging: Floor joists and sills create heat loss paths. Uninsulated crawl spaces often cause higher heating loads.
- Moisture and pests: If not detailed properly, crawl spaces collect humidity, mold, and invite rodents and insects.
- Maintenance: Skirting, vents, vapor barriers, and occasional joist repairs add lifecycle tasks.
- Air sealing: Achieving passive-house-level airtightness requires sealing the floor perimeter and often creating a sealed, conditioned crawl space.
Best practice: Install a continuous vapor barrier on the crawl floor, consider making the crawl space conditioned (sealed and insulated at the perimeter), and insulate the underside of the floor with closed-cell spray foam or rigid insulation. For practical crawl-space moisture fixes see our guide to crawl space repairs. For designing air and moisture control systems, consult our guide to ventilation design.
Best-for scenarios
- Wet or flood-prone lots where raising the structure reduces risk.
- Steep or rocky sites where extensive excavation for a slab is costly.
- Retrofit projects where raising floor level allows running new plumbing/electrical under the house.
- Owners who expect to make frequent mechanical changes or want easy access for future upgrades.
DIY considerations and basic build steps
- Site prep and survey: Confirm elevations, utility locations, and frost depth.
- Footings/piers: Excavate and form footings or drill piers. Many codes require footings below frost depth.
- Sill and beam installation: Set sill plates, install pressure-treated beams, secure with anchor bolts.
- Joists and decking: Hang joists, install subfloor.
- Crawl-space treatment: Lay a 6-mil (or thicker) vapor barrier with taped seams, install vents or plan for a sealed crawl space, add insulation under the floor or at the skirt.
Quick cost breakdown for a small DIY home (1,000 sq ft, owner-builder labor): materials for piers and beams $5,000–$12,000; treated lumber and joists $4,000–$8,000; crawl-space moisture control $500–$2,000. Common pitfalls: underestimating excavation and compaction needs, skipping a vapor barrier, and non-structural undersizing of beams. Local building departments enforce foundation plans and inspections—get a plan stamped where required.
Slab-on-Grade (Slab): Overview, Strengths, Weaknesses, and Best For
What a slab-on-grade foundation is
A slab-on-grade is a structural concrete slab poured on compacted fill with a capillary break and vapor barrier beneath. Variants include monolithic slabs (integral footing and slab cast together), insulated slab (rigid insulation under and/or around edges), and perimeter-footing slab where the slab sits on grade with separate reinforced footings. Typical slab thickness is 4–6 inches for residential floors; thicker at load-bearing strips or footings. Reinforcement usually includes welded wire mesh or rebar, and control joints are cut to manage shrinkage cracking.
Key strengths
- Simplicity: Slabs require less formwork and fewer materials than piers and beams and are often quicker to build.
- Thermal mass: When insulated correctly, a slab stores heat and helps stabilize indoor temperatures—valuable for passive-house or net-zero design.
- Low maintenance: No crawl-space access, fewer pests, and fewer periodic tasks.
- Cost: Typically lower initial cost on flat, stable sites with easy access for concrete trucks.
Key weaknesses
- Access to services: Plumbing or conduit embedded in the slab is harder and costlier to repair or reroute.
- Frost and heave risk: In cold climates, slabs require frost-protected shallow foundations or deep footings.
- Slab repair difficulty: Large cracks, slab settlement, or plumbing failures under slab can be expensive to fix.
- Insulation requirement: Poorly insulated slabs are cold and have higher heating loads.
Insulation approaches for slabs include continuous perimeter insulation, under-slab rigid foam (XPS, EPS, or polyiso), and insulated slab footings. For detailed methods on insulating slab footings for energy performance see insulating slab footings. Alternative materials like cork can be used in perimeter or under-slab insulation; see options for cork insulation.
Best-for scenarios
- Flat, well-drained sites in moderate climates or low frost areas.
- Small footprints and compact designs where the cost and thermal performance of slab are advantageous.
- Passive-house or net-zero projects where thermal mass and tight envelope strategy are prioritized.
Installation highlights and DIY constraints
- Prepare compacted base: Proper compaction and a graded base are non-negotiable.
- Vapor barrier: Install a continuous 6-mil (or thicker) polyethylene with taped seams.
- Reinforcement and control joints: Place mesh or rebar and plan control joint layout before pouring.
- Curing: Slabs can take 7 days to be walkable; 28 days for near-full strength. Plan schedules accordingly.
For passive-house projects, slab detailing interacts with whole-building energy modeling and mechanical sizing; consult Passive House design resources such as PHIUS (Passive House Institute US) and the relevant building energy code (IECC) for guidance.
Pier and Beam vs Slab: Cost, Thermal Performance, Moisture Risk, and Site Suitability
Cost comparison (materials, labor, long-term maintenance)
- Upfront material and labor: Slab-on-grade generally runs lower: about $4–$10/sq ft for typical residential slabs (flat site, standard reinforcement). Pier-and-beam usually sits at $7–$15/sq ft because of extra lumber, piers, and labor to set beams.
- Long-term maintenance: Expect higher lifecycle maintenance for pier-and-beam—crawl-space moisture mitigation, skirting replacement, and occasional joist repairs. Slabs may need patching or plumbing work if services fail.
- Hidden costs: On steep sites, a slab may require retaining walls and more excavation, pushing the cost above a pier-and-beam solution.
For a true foundation cost comparison, include excavation, compaction testing, concrete, reinforcement, lumber, fasteners, and moisture control. Allow a contingency of 10–20% for unforeseen soil issues or permit-mandated changes.
Thermal & energy performance
- Heat loss pathways differ: Pier-and-beam floors lose heat through joists and the perimeter; slabs lose heat into the ground at the perimeter and through under-insulated areas.
- R-values and strategies: A conditioned slab with perimeter insulation (R-10 to R-20 continuous at the edge in cold climates) and under-slab insulation (R-10 to R-15) can achieve low U-factors and support passive-house targets. Pier-and-beam requires either insulating underfloor joists (R-19–R-30 typical) and sealing or conditioning the crawl space with perimeter insulation and continuous air barrier.
- Modeling and net-zero: Foundation choice affects HVAC sizing and building energy modeling—see our steps for net-zero building steps when evaluating payback from extra insulation.
External standards: Consult IECC and Energy Star guidance for minimum assembly R-values and air-sealing criteria. For slab insulation strategies, DOE resources explain under-slab insulation and moisture control (see the Department of Energy's slab and basement insulation guidance).
Moisture, flood risk, and pest vulnerability
- Pier-and-beam: Superior in flood zones because the living floor sits above flood elevations. However, crawl spaces trap moisture unless vented or sealed and can foster mold and pests.
- Slab-on-grade: Less vulnerable to pests and typically drier if sub-slab drainage and vapor barriers are installed. In high water table areas, slabs require drainage and possible interior or exterior waterproofing.
- Flood maps and soil data: Use FEMA flood maps to check floodplain status and USDA/NRCS or local soil surveys for bearing capacity and expansive clay presence. FEMA's flood map tool and USDA's Web Soil Survey are authoritative starting points. (FEMA Flood Map Service Center: https://msc.fema.gov/portal/home) (USDA Web Soil Survey: https://websoilsurvey.sc.egov.usda.gov/App/HomePage.htm)
Soil, slope, and frost considerations
- Expansive clays: Regions with high shrink-swell clay often favor suspended foundations or deep footings to bypass unstable near-surface soils.
- Frost depth: Where frost penetrates deep, consider frost-protected shallow foundations or ensure footings/piers extend below frost depth; check local code for minimum footing depth.
- Sloped sites: Pier-and-beam reduces cut-and-fill costs and can avoid large retaining walls.
If soil tests show poor bearing capacity or expansive soils, structural recommendations may include deeper piers, geogrid-reinforced pads, or engineered fill—consult a geotechnical report.
Pier and Beam vs Slab: DIY Buildability, Timeline, and Permits
Typical DIY timeline for pier-and-beam
- Site prep and stakes: 1–3 days
- Footing and pier excavation/installation: 3–7 days (depends on number of piers and concrete cure)
- Rough framing (sills/beams/joists): 3–10 days
- Crawl-space moisture treatment and skirting: 1–3 days
Total owner-builder timeline: 2–5 weeks, not counting weather delays and inspections.
Typical DIY timeline for slab-on-grade
- Site prep, compaction, and formwork: 2–5 days
- Vapor barrier, reinforcement, and pour: 1–2 days
- Initial cure and saw cuts: 3–7 days
- Full cure for heavy loads: up to 28 days (you can often build over after 7–10 days with proper sequencing)
Total owner-builder timeline: 1–3 weeks for the slab work; schedule around concrete availability and curing windows.
Permits, inspections, and common code checkpoints
- Foundation plan review: required in most jurisdictions.
- Footing inspection: before concrete pour for footings and piers.
- Rebar/reinforcement inspection: for slabs and perimeter footings.
- Backfill inspection: to confirm compaction and materials.
- Final foundation inspection: before framing.
Safety and regulatory resources: OSHA excavation and trenching rules apply during site work—follow their guidance for shoring and slope protection to keep crews safe (see OSHA excavation guidance: https://www.osha.gov/excavations). Local building departments enforce footing depths and anchor requirements; the Oregon manufactured dwelling installation guide is an example of how agencies specify anchoring and foundation details.
Tools, skills, and common mistakes DIYers make
- Essential tools: transit/laser level, compaction equipment (plate compactor), concrete tools, rebar bender/cutter, joist hangers, and fasteners.
- Specialist tasks: soil compaction testing (proctor tests), concrete finishing for slabs, and structural steel or engineered pier installation often require contractors.
- Common mistakes: skipping compaction, underestimating frost depth, failing to tape vapor-barrier seams, and not planning service access through slab.
For budgeting whether to DIY or hire trades, see our DIY vs hiring labor comparison.
Which Should You Choose? Scenario-Based Recommendations
Below are short, scenario-driven recommendations to match typical DIY priorities.
Budget-first scenario (tight budget, quick build)
Choose slab-on-grade for flat, well-drained sites where excavation is minimal. Slabs usually cost less per square foot and reduce framing materials and labor. If in a cold region, budget for perimeter or under-slab insulation to avoid higher heating bills.
Climate-first scenario (cold climate / passive-house priority)
Slab with continuous perimeter insulation and under-slab foam can work well for passive-house goals because of thermal mass and airtightness. Alternatively, a sealed, conditioned crawl space with high-perimeter insulation can work if design constraints prevent a slab. Model both options in your energy model and compare HVAC sizing and payback for added insulation. See our net-zero building steps for modeling guidance.
Site-first scenario (flood-prone or steep lot)
Pick pier-and-beam for floodplain lots or steep terrain—elevating the floor is usually simpler and cheaper than extensive earthworks. Confirm required freeboard levels and anchoring per local code; the Oregon installation guidance shows how agencies require anchoring against wind and flood forces (PDF).(https://www.oregon.gov/bcd/licensing/Documents/md-study-guides/mdisc-studyguide-chapter3.pdf)
DIY-skill-first scenario (limited contractor access)
If concrete finishing and accurate soil compaction are outside your comfort zone, a pier-and-beam with simple concrete pier pads or adjustable screw jacks might be easier for an owner-builder. If you can schedule a reliable concrete crew for one day, a slab can be efficient.
Decision checklist — five quick questions:
- Is the lot flat and out of floodplain?
- Is frost depth minimal or managed with frost-protected shallow foundation?
- Do you need easy access to mechanicals or expect frequent plumbing changes?
- Is thermal performance a top priority (passive-house/net-zero)?
- What does the soil report recommend for bearing and movement?
Watch a practical comparison video that walks through pros/cons and real-site examples: it helps visualize trade-offs and supports these scenarios.
For a visual demonstration, check out this video on pros and cons of pier and beam foundation:
The Bottom Line
For most level, well-drained lots aiming for low initial cost and strong thermal mass, a properly insulated slab-on-grade is the efficient choice. For flood-prone, steep, or retrofit sites where access and elevation matter, choose a pier-and-beam. The final decision on pier and beam vs slab should follow a soil report, flood check, and simple lifecycle cost estimate that includes energy and maintenance.
Frequently Asked Questions
Can I build a pier-and-beam or slab myself as a first-time DIYer?
Yes, many owner-builders handle either system, but the tasks differ. A pier-and-beam often breaks into smaller, repeatable tasks (digging, setting piers, framing joists) that suit phased DIY work. Slab work requires one-day concrete pours and good compaction, which means coordinating crews and equipment. If you lack experience with compaction testing or large concrete pours, plan to subcontract those steps.
Tip: Budget for one geotechnical or structural consultation and schedule required inspections to avoid costly rework.
Which foundation is better for passive-house performance?
Both can meet passive-house targets when detailed correctly. Slabs provide thermal mass and airtightness advantages if you install continuous perimeter and under-slab insulation. Pier-and-beam requires either a well-sealed conditioned crawl space or high-performance under-floor insulation and continuous air barrier to avoid thermal bridging. Modeling both options in your energy simulation will reveal which yields lower loads for your climate.
How do I handle plumbing and electrical with each foundation?
With pier-and-beam, run plumbing and electrical under the floor where they remain accessible for repairs. Slabs need sleeves, recessed chase areas, or plumbing runs cast in-place—repairs to in-slab plumbing are more invasive and costly. Plan all sanitary and supply lines and consider installing service access panels where possible.
What are the maintenance needs and expected lifespans?
Concrete slabs can last many decades with minimal maintenance aside from occasional crack repairs. Pier-and-beam lifespans depend on materials and moisture control; pressure-treated sill plates and regular crawl-space checks extend life. Expect periodic checks for moisture, pests, and structural fasteners on pier-and-beam systems.
How do site conditions (soil, flood, frost) change the recommendation?
Site conditions are often decisive. High water table or floodplain favors pier-and-beam. Deep frost or expansive clay may require deeper footings or suspended floors. Poor-bearing soils may push you toward deeper piers or engineered slab systems. Always order a geotechnical soil report and check FEMA flood maps and local frost-depth tables before finalizing the foundation type.