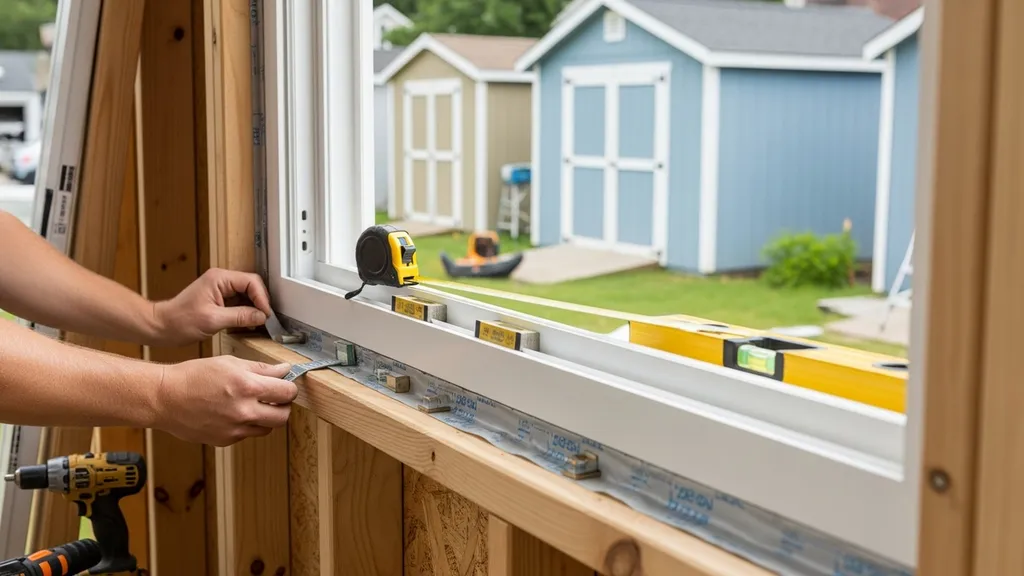
Step-by-step guide to choosing, flashing, and installing windows in sheds — energy, moisture control, and off-grid tips for DIY builders.
Shed Window Installation Guide
Installing windows correctly makes a shed brighter, more usable, and less prone to leaks and energy loss. This shed window installation guide explains how to plan placement and sizing, choose the right window types and glazing for your climate, flash and seal openings, insulate around frames, and test for leaks — all with practical steps and material recommendations for budget-conscious DIY builders. Read on to learn what tools you need, how to build a proper sill pan, where permits may be required, and how window choices influence off-grid lighting and heating loads.
TL;DR:
- Measure and plan first: order a window with rough opening = window size + 1/2" each side for shims, and check with your local building department before cutting openings.
- Flash and seal well: use a sill pan, self-adhering flashing tape, and continuous WRB ties to prevent most leaks — test with a hose after install.
- Choose glazing by climate: double-glazed low-E with argon is a good mid-range pick for cold and mild climates; size glazing for daylight but limit heat loss to protect off-grid loads.
Shed Window Installation — Planning: Placement, Sizing, and Permits
Window placement affects daylight, cross-ventilation, passive solar gain, security, and interior layout. For a small 100–200 sq ft shed, a single south or southeast window sized for a 10–20% glazed area provides useful daylight without large heating penalties in many climates. Place operable windows where they support natural ventilation: opposite vents or doors for cross-flow, and at higher and lower heights to encourage stack effect.
Sizing and rough openings: when you order a window, measure the framed rough opening rather than the finished trim. Typical rule: rough opening (RO) = window unit width + 1/2" on each side and height + 1/2" total for shims and leveling. Example math: for a 24" x 36" window, order RO ~25" x 36.5" (check manufacturer specs). Leave 1/8"–1/4" perimeter clearance for compressible shims per many manufacturers. For egress windows the minimum clear opening varies by code — roughly 20" x 24" is a ballpark in some jurisdictions, but confirm locally.
Permits and codes: many jurisdictions exempt very small storage sheds, but permit rules differ. If your shed is considered habitable, affects structural framing, or requires egress, you will likely need a permit. Check with your local building department or code official before cutting openings. For procedural guidance, see the building permits guide. Also review your shed plans (for example, lean-to shed plans) early so window positions can be framed during wall construction rather than retrofitted.
Before you buy: pre-purchase checklist — measure twice, note wall thickness (for jamb depth and interior reveals), choose operable vs fixed based on ventilation needs, confirm sizing and head/jamb details with the supplier, and plan delivery and on-site protection from weather.
Shed Window Installation — Choosing the Right Window Type
Choosing windows balances cost, thermal performance, maintenance, and function. Fixed windows are cheaper per glazed area and provide good airtightness; operable windows add ventilation and egress capability. Frame materials and glazing drive durability and thermal performance.
Fixed vs Operable: Pros and Cons for Sheds
- Fixed: lower cost, better airtightness, simpler flashing; not suitable where ventilation or egress is required.
- Single-hung/double-hung: common for sheds used as workshops; provides ventilation but needs periodic maintenance.
- Casement: excellent for airtight performance and catch breezes when open; more expensive hardware.
- Awning: good for ventilation during light rain because of the top hinge.
Frame Materials and Glazing Choices
Frames: vinyl is low-cost and low-maintenance; wood offers repairability and trim options but needs finish protection; aluminum-clad wood combines strength with low maintenance but runs higher in price. Glazing: single-pane is only suitable for very mild climates or unheated storage. Double-glazed with low-E coating and argon fill is the practical broad recommendation for cold-to-mild climates for balance of cost and performance.
Performance Ratings to Prioritize for Sheds
Look at U-factor and Solar Heat Gain Coefficient (SHGC). For cold climates, prioritize lower U-factor (better insulating): aim for roughly 0.25–0.35 W/m²K (verify product labels and regional metrics) or ENERGY STAR rated units. In hot climates, prioritize lower SHGC to reduce heat gain. Industry standards such as the IECC and ENERGY STAR provide useful benchmarks.
Comparison/specs table:
| Window type | Typical cost range | R-value / U-factor range | Best use case | Pros / Cons |
|---|---|---|---|---|
| Fixed | $50–$200 | U 0.35–0.50 | Daylighting, low-cost sheds | Lower cost, best airtightness; no ventilation |
| Single/Double-hung | $120–$450 | U 0.30–0.45 | Workshops, general sheds | Easy venting; moderate cost |
| Casement | $200–$600 | U 0.25–0.40 | Ventilation, airtight performance | Good seal, higher price |
| Vinyl frame, double-glaze low-E | $100–$400 | U 0.25–0.35 | Budget energy-efficient option | Low upkeep, good performance |
| Wood or aluminum-clad | $250–$800 | U 0.22–0.35 | High-end finish, passive-solar projects | Higher cost, durable if finished
For examples of high-performance options in colder climates, consult the site's energy-efficient window list. To balance cost and sustainability choices, see how to choose budget friendly green materials.
Also mention common brands as reference points: manufacturers such as Andersen (400 Series), Pella (Lifestyle), and Milgard (Tuscany) offer varied lines across price and performance tiers. Compare product labels for U-factor, SHGC, and air infiltration rates when shopping.
Shed Window Installation — Tools, Materials, and Safety
A predictable kit of tools and materials speeds the job and reduces mistakes. Match flashing and fasteners to your wall assembly type (simple siding vs sheathing + rain screen).
Essential Tools and Consumables:
- Tape measure, carpenter’s level (48"), and square
- Framing hammer or nail gun, drill/driver, impact driver
- Shims (plastic or cedar), low-expansion spray foam (low-pressure), backer rod
- Exterior-grade sealant (compatible with flashing tape), nails or screws per manufacturer
- Flashing tape (self-adhering butyl or SBS-backed), sill pan or pan-flashing materials
- Pry bar, utility knife, caulk gun, and hose for water testing
Recommended Flashing and Sealant Products:
- Use a pre-formed sill pan where possible, or field-build one from rigid flashing membrane plus a continuous slope to drain.
- Choose self-adhering flashing tape compatible with your WRB and sealant manufacturer instructions.
- Use an exterior-grade, polyurethane or advanced silicone sealant for long-lasting joints; avoid incompatible adhesives over certain tapes.
Safety and Handling Tips:
- Use gloves and eye protection when cutting openings or handling glass.
- Ladder safety: maintain three points of contact; use a scaffold for extended work on higher walls.
- Store windows flat, off the ground, and covered; protect glass from direct sun glare if vinyl units are in storage for long periods.
- When fastening, follow manufacturer fastener pattern; over-tightening distorts frames and under-fastening allows movement.
For how sheathing choices affect fastening and flashing, see wall sheathing choices. Local permit guidance for storage sheds and size thresholds can affect what you need to keep on site; review your local rules before ordering units. For example, some jurisdictions exempt small sheds under 100–120 sq ft but require zoning review or permits above that threshold — check your local building office.
Shed Window Installation — Step-by-step Installation (with Youtube Embed)
This step-by-step assumes a framed wall with a prepared rough opening and a WRB (housewrap or membrane) installed. It covers a typical retrofit or new-construction installation.
Step 1: Prepare the Framed Opening
- Confirm the rough opening size matches the window supplier's specification. Re-measure diagonals for squareness; difference should be <1/8".
- Check sill framing slope: the sill should slope toward the exterior slightly (1/8"–1/4" over the sill) or use a sloped sill pan to drain water.
- Cut WRB neatly, leaving flaps you can tie into the flashing. Protect the bottom of the WRB to avoid damage.
Step 2: Install Sill Flashing and Test-fit the Window
- Install a sill pan: either pre-formed or constructed from self-adhering membrane. Extend the pan onto the face of the sheathing slightly and create a drip edge.
- Apply self-adhering flashing tape up the jambs a few inches above the head. Lap flashing in shingle-fashion (lower layers overlap upper layers) to shed water.
- Test-fit the window and mark fastener locations; remove and set the window aside.
Step 3: Fasten, Shim, and Plumb the Window
- Place a continuous bead of sealant on the sill pan where the window will seat (follow manufacturer guidance).
- Set the window into the opening; center it and seat it fully.
- Insert shims at the bottom of the jambs near each fastener location and at mid-height. Leave 1/8"–1/4" clearance around the perimeter as recommended.
- Level and plumb the unit, then fasten following the manufacturer's pattern. Do not over-tighten; the frame should not bow.
Step 4: Insulate, Air-seal, and Install Exterior Flashing
- From the interior, fill the gap around the frame with compressible insulation: fiberglass batt or mineral wool trimmed to fit, or a thin bead of low-expansion spray foam used sparingly to avoid frame distortion.
- On the exterior, tape the jambs into the WRB: press the flashing tape onto the window flange and then onto the WRB to create a continuous drainage plane.
- Install head flashing above the window, lapping over the top jamb flashing. Tie the WRB into the flashing per manufacturer lap direction.
Step 5: Interior Trim and Final Checks
- Finish interior trim and install backer rod and sealant at the interior trim-to-frame joint for airtightness.
- Operate the window to check smooth action.
- Perform a hose test: apply water to the head and both jambs for several minutes and check the interior for leaks. Repair as needed.
Watch this step-by-step guide on installing a shed window (step-by-step DIY guide):
Before installing vapor barriers in relation to windows, consult the site's vapor barrier timing and the detailed vapor barrier steps. Common installer mistakes include over-tightening screws (which warps frames), failing to provide sill drainage, and failing to maintain WRB continuity.
Shed Window Installation — Flashing, Waterproofing, and Air-sealing
Waterproofing is the single biggest determinant of a leak-free window over time. Correct lap direction and an uninterrupted drainage path are essential.
Sill Pans, Flashing Tapes, and Drip Details
- Use a sill pan that provides a positive slope and a lip at the exterior to shed water.
- When using flashing tape, start with the sill, then apply jamb tape, and finish with head flashing. The lap sequence should be from lower to upper so water sheds down and out.
- Pre-formed sill pans are quicker and reduce errors; field-built pans can work if built with continuous membrane and a defined drain outlet.
Tying flashing into siding or rain screen
- If you have a rain-screen assembly, leave the rainscreen gap and integrate the flashing so water drains into the rainscreen cavity rather than trapping behind siding. See rain screen installation for full details.
- On housewrap systems: cut the WRB with a horizontal flap above the opening so you can install the head flashing over the WRB flap for a shingle lap.
Common Leak Points and How to Avoid Them
- Sill corners: seal corners and use mechanical fasteners outside of the drainage plane when possible.
- Jamb-to-sill transitions: avoid folds or wrinkles in tape; ensure the tape fully adheres.
- Penetrations: fasteners through the flange should be sealed; use compatible sealants.
- Protect the WRB when cutting the opening — make clean cuts and re-tape edges.
Comparison table of flashing options:
| Flashing option | Drainage reliability | Ease of installation | Best when |
|---|---|---|---|
| Pre-formed sill pan | High | Moderate | You want predictable drainage with minimal field work |
| Self-adhering flashing tape (WRB-integrated) | High | Easy | Compatible WRB and simple jamb/head sealing |
| Liquid-applied flashing | Moderate | Slower | Complex shapes or repairs where tape won't conform |
For sequencing WRB and window flashing, check the guidance in the vapor barrier installation guide. After installation, a simple DIY water test with a hose helps verify integrity before siding trim is permanently attached.
Shed Window Installation — Insulation, Condensation Control, and Ventilation
Insulating around windows reduces thermal bridging and improves comfort, but incorrect methods trap moisture. Balance insulation and vapor control.
How to Insulate Around Windows Without Trapping Moisture
- Use compressible insulation around the frame cavity: mineral wool or fiberglass batts trimmed to fit leave a small gap for a thermal break and allow drying.
- Low-expansion spray foam can be used in thin beads to air-seal, but do not overfill cavity depth — overfilling can warp the frame and block drainage or drying.
- Interior gaps between frame and trim: use backer rod and a high-quality sealant to allow movement and maintain air barrier continuity.
Preventing Condensation and Frost on Window Glass
- Condensation occurs when interior humidity and cold exterior combine with low surface temperatures. Aim to keep indoor relative humidity below about 50% in cold months; mechanical ventilation or dehumidification can help.
- Better glazing (double-pane low-E with argon) raises the interior glass surface temperature and reduces condensation risk.
- Thermal breaks in frame materials and adequate insulation around the jamb reduce cold spots.
Ventilation Approaches for Small Sheds
- Simple passive ventilation: operable windows placed for cross-ventilation combined with screened vents near the eaves or gable.
- Mechanical ventilation: a small exhaust fan activated by humidity (useful for workshop sheds) prevents moisture build-up from activities like painting or occasional washing.
- For workshop sheds with power needs tied to off-grid systems, combine daylighting strategies with efficient LED lighting to keep electrical loads low.
For more about insulating walls and choosing R-values for shed projects, see insulation options and for ventilation strategies consult shed ventilation strategies.
Shed Window Installation — Energy and Off-grid Considerations
Window choices affect daylighting, heating and cooling loads, and therefore the sizing of off-grid PV and battery systems.
Orienting and Sizing Windows for Passive Solar Gain
- South-facing windows in cold climates can provide winter solar gain; however, in small sheds avoid glazing that exceeds roughly 10–20% of floor area unless you incorporate thermal mass or shading.
- In summer, use overhangs or exterior shading to prevent overheating. For a 150 sq ft shed, a 2 ft x 3 ft south window provides useful light and modest passive gain without large heat loss.
Selecting Glazing for Cold Climates and Solar Heat Control
- Double-glazed low-E with argon fill provides a reasonable balance: lower U-factor than single pane and moderate SHGC. In cold climates target U-values near the lower end of the 0.25–0.35 W/m²K range.
- In hot climates prioritize low SHGC and consider spectrally selective low-E coatings that block infrared while admitting visible light.
Windows and Off-grid Systems: Lighting, PV, and Load Impacts
- Daylighting reduces daytime lighting hours and can reduce PV needs. For example, increasing glazing to provide an extra 200 lux of daylight for a 150 sq ft shed could reduce lighting consumption by 30–50% during daytime usage.
- If your off-grid system is in the 1kW–2kW range (see workshop solar sizing and solar sizing for sheds), prioritize glazing that limits heat loss overnight so heating loads don't spike battery draw.
- Use efficient LED fixtures, daylight sensors, and task lighting to reduce the need for large glazing increases solely to reduce electrical loads.
Numbers to consider (example): swapping a single-pane 24" x 36" window for a double-glazed low-E unit reduces conductive heat loss substantially — local climate and orientation affect exact savings. Consult IECC recommendations for regional U-factor targets.
Shed Window Installation — Common Mistakes, Fixes, and When to Call a Pro
Even small errors lead to recurring leaks or drafts. Here are the most common problems and practical fixes.
Seven Most Common Installation Mistakes
- Insufficient or missing sill pan — Fix: retrofit a pan or re-flash sill; consider a pre-formed pan for durability.
- Wrong rough opening size — Fix: add framing or furring for a snug installation, or return the unit if off by more than manufacturer tolerance.
- Over-compressed insulation or overuse of high-expansion foam — Fix: remove excess foam or cut back and replace with low-expansion foam or mineral wool.
- Improper sill slope or blocked drainage — Fix: re-establish slope or add drainage holes in the pan lip to allow weep drainage.
- Failing to integrate WRB — Fix: lift siding or trim, re-tape WRB to flashing, and secure a continuous lap.
- Over-tightened fasteners distorting the frame — Fix: remove fasteners and re-seat with correct torque and shims.
- Improper head flashing installation — Fix: re-install head flashing with correct shingle lap over jamb flashing.
How to Diagnose and Fix Leaks and Drafts
- Visual inspection first: look for stains, rot, or soft sheathing.
- Hose test: apply water to the head for 5–10 minutes; have an assistant watch interior for leaks.
- Thermal camera: useful to find air infiltration and wet spots if available.
- Small leaks: often fixed by re-taping flashing and sealing interior trim joints. Recurring or structural leaks likely need professional assessment.
When to Hire a Contractor
- If the opening location affects the structural header, call a pro.
- Persistent leaks after re-flashing or when rot is present require professional remediation.
- If the project involves code-related egress, complex flashing over cladding systems, or complicated roof-wall intersections, hiring a contractor experienced with window flashing is reasonable.
For detailed sequences on sheathing and weather barrier fixes, review the site's wall sheathing and build-update articles.
Key Points: Quick Checklist for Shed Window Installation
- Measure: Confirm rough opening equals window size + 1/2" each side (verify with manufacturer).
- Check permits: Consult your local building department before cutting openings; see the building permits guide.
- Order right unit: Note frame depth for jambs and interior trim.
- Prepare sill pan: Use pre-formed or field-built pan with slope to exterior.
- Maintain WRB continuity: Flash sill, jambs, and head in shingle lap order.
- Shim and fasten: Level and plumb; leave 1/8"–1/4" clearance as recommended.
- Insulate and air-seal: Use mineral wool or thin low-expansion foam; backer rod and sealant at trim.
- Test: Operate windows and perform a hose test.
- Time estimate: 1–3 hours for an experienced DIYer per small window (more for complex claddings).
- Material cost estimate: Flashing tape, sealant, shims, and sill pan materials typically $30–$150; window price varies by type and performance.
If your shed is very small and exempt from permits, still follow good flashing and WRB integration — it prevents long-term maintenance.
The Bottom Line
Shed window installation succeeds when planning, flashing, and air-barrier continuity come first. Prioritize correct rough openings and sill pan installation, choose glazing matched to climate and off-grid goals, and test the completed assembly for water tightness. Use the checklist above and linked resources to reduce common failures and extend the life of the window installation.
Frequently Asked Questions
Do I need a permit to install a window in my shed?
It depends on your local rules and the shed size or use. Many jurisdictions exempt very small storage sheds under a threshold (often 100–120 sq ft), but permits are commonly required when the shed becomes habitable, affects structural framing, or needs egress windows. Check with your local building department or code official before you cut openings; a practical resource is the building permits guide.
How do I flash a window sill correctly?
Install a sill pan with a positive slope to the exterior, then apply self-adhering flashing tape across the sill and up the jambs. Seat the window on a bead of compatible sealant, then tie the jamb and head flashing into the WRB with shingle-lap sequencing so water drains outward. For rain-screen walls, integrate the flashing to drain into the rainscreen cavity — see rain screen installation.
What is the best window type for cold climates?
Double-glazed units with a low-E coating and argon fill are a practical mid-range choice; they offer significantly better insulating performance than single-pane glass. Look for lower U-factor ratings and ENERGY STAR certification in your climate zone. For very cold sites, consider wood or aluminum-clad frames with better thermal breaks and higher-performance glazing options listed in the site's energy-efficient window list.
Can I install a window in an existing shed wall?
Yes, but prepare for additional tasks: remove siding, cut the opening in the sheathing, install a header if necessary, and replace or repair the WRB and flashing. Retrofitting requires careful attention to flashing and sill drainage to avoid leaks. If the wall contains rot or structural issues, hire a contractor for repairs before installing a unit.
How can I stop condensation on shed windows?
Reduce indoor humidity (aim below 50% in cold months), increase glass surface temperature with better glazing (low-E, argon), and ensure good airflow or ventilation. Insulating and sealing around the frame to avoid cold spots also helps. If condensation persists, consider upgrading to higher-performance glazing or adding ventilation fans for workshops.