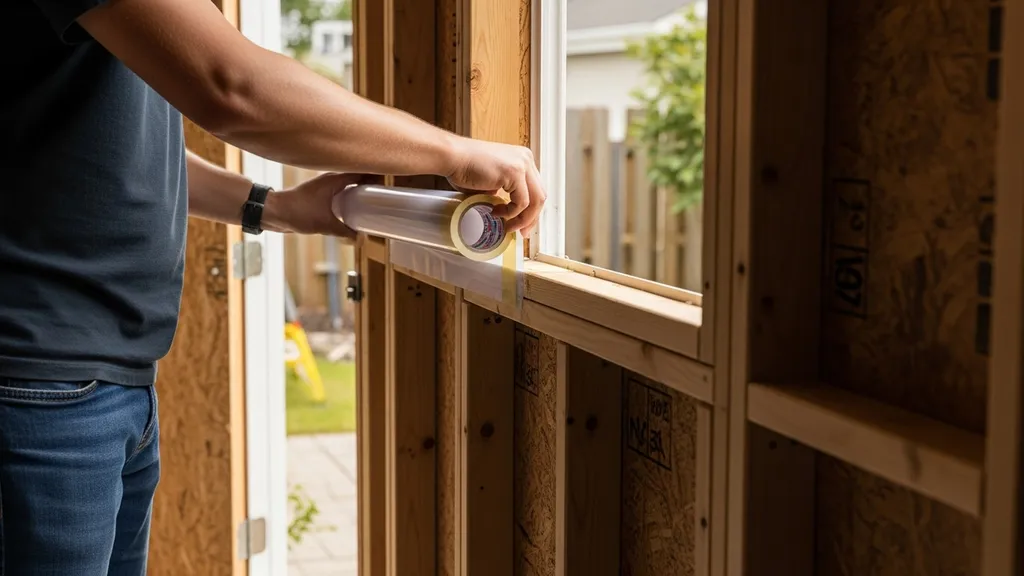
Learn when and where to install a shed vapor barrier — walls, floors, or roof — plus material choices, climate rules, and step-by-step tips to avoid moisture problems.
Shed Vapor Barrier: When and Where to Install
A shed vapor barrier controls moisture movement through the shed envelope and prevents condensation inside walls, ceilings, and floors. For a budget-conscious DIY builder, choosing whether to add a vapor barrier, and where to put it, changes the difference between a dry, long-lasting structure and one that develops rot, mold, or ruined insulation. This article explains when to use a shed vapor barrier, where to place it in walls, floors, and roofs, which materials work best, and step-by-step installation tips to avoid common moisture mistakes.
TL;DR:
- In heating-dominated climates put a vapor control layer on the warm side of insulation (interior); in hot-humid climates avoid impermeable interior barriers and favor drying to the exterior.
- Use a Class I barrier (≤0.1 perm) like 6‑mil polyethylene on warm-side framed walls in cold climates; choose a smart vapor retarder or permeable assembly in mixed climates.
- Focus first on continuous air sealing, flashing at openings, and a drying path; tape all seams, seal penetrations, and provide ventilation before adding insulation or finishes.
For current reference points, review the Department of Energy guide on vapor retarders and Building Science Education's primer on vapor barriers.
Shed Vapor Barrier Basics: How They Work and Common Misconceptions
A vapor barrier limits moisture movement by diffusion through building materials. But there are two different things often confused: water vapor diffusion and air movement. Vapor diffusion is the slow flow of moisture through materials driven by a vapor pressure gradient. Air movement carries far more moisture and heat and is controlled by an air barrier, not a vapor barrier. Industry tests for vapor permeance follow ASTM E96; results are reported in perms (grains/hr-ft²-in-Hg). Typical classes:
- Class I (vapor barrier): ≤0.1 perm (very low moisture flow)
- Class II (vapor retarder): 0.1–1.0 perm (moderate control)
- Class III (vapor retarder): 1–10 perms (light control)
Example: a 6‑mil polyethylene sheet is roughly 0.06 perm (Class I). Kraft-faced insulation sheets are around 1 perm (Class II). Ordinary latex paint rates vary but typically exceed 10 perms and act as vapor-open finishes.
Dew point basics: condensation occurs where warm moist air meets a cold surface below the dew point. In a cold climate, the dew point often falls inside the exterior sheathing if there’s no warm-side control. That’s why planners often place the vapor control layer on the warm (interior) side in heating-dominated regions.
Common misconception: putting impermeable layers on both sides of an assembly is safer. The opposite is true — two impermeable layers can trap moisture inside the cavity with no way to dry. Air barriers and vapor barriers serve different roles; a continuous air barrier (e.g., taped sheathing or properly sealed interior gypsum) reduces convective moisture transport and should be coordinated with vapor control. For background on airtightness principles and how they relate, see our guide to passive house airtightness.
When to Install a Shed Vapor Barrier: Climate, Use, and Timing
Deciding when to add a vapor barrier depends on climate zone, how you will use the shed, and whether this is a new build or a retrofit.
Cold and Temperate Climates: Warm-side Placement Guidance
- In cold (heating-dominated) climates place vapor control on the warm interior side of the insulation for framed walls and roofs. This reduces the risk of interior moisture migrating into cold cavities and condensing on sheathing. A Class I film or a well-sealed vapor retarder is common for heated sheds or those that will be finished as living or workshop space. For detailed cold-climate principles, see our cold-climate design resource.
Warm-humid Climates: Why Interior Vapor Barriers Can Be Harmful
- In hot-humid climates exterior air is often more humid than interior conditioned air. Installing an impermeable interior barrier (like polyethylene) can trap moisture that needs to dry to the exterior and may lead to mold. In these regions favor assemblies that dry outward or use variable‑permeance smart retarders.
Use-case Timing: Storage, Workshop, or Conditioned Living Space
- Unheated storage shed: You usually do not need an interior Class I vapor barrier unless the floor sits over damp soil. Focus instead on ventilation and ground moisture control.
- Heated workshop or tiny studio: Treat like a small house — install a warm-side vapor control layer, seal air leaks, and ensure ventilation to manage indoor humidity.
- Hybrid workshop with intermittent heating: Consider a Class II retarder or a smart membrane to allow drying when the building is unheated.
New Construction vs Retrofit Considerations
- New build: Install vapor control during framing after rough-ins are complete but before insulation and interior finishes. This gives access to seal seams and flash openings.
- Retrofit: Inspect existing insulation, sheathing, and ventilation first. Adding interior polyethylene over damp or poorly ventilated assemblies can trap moisture. Often retrofits favor adding exterior insulation or improving ventilation instead of interior barriers. See general sequencing in our building a shed article.
Where to Install a Shed Vapor Barrier: Walls, Floors, and Roofs
Placement rules differ by assembly. Below are practical recommendations and a compact comparison table.
Walls: Placement in Common Wall Assemblies
- Framed stud wall (heated shed, cold climate): Place vapor barrier on the interior warm side of insulation, sealed continuously at top plates, around windows, and at service penetrations.
- Framed stud wall with exterior continuous insulation: A vapor barrier may be unnecessary on the interior if exterior insulation keeps the sheathing warm enough to avoid condensation. See our exterior wall insulation guidance.
- SIPs (structural insulated panels): SIPs often include factory facings that act as both air and vapor control; follow manufacturer instructions and avoid adding redundant interior films.
Floors and Slabs: When Floor Vapor Control Matters
- Slab-on-grade: Install a continuous vapor barrier under the slab (Class I polyethylene) to limit ground moisture from migrating into the slab and interior floor finishes.
- Raised floor over crawlspace: If the crawlspace is ventilated and dry, interior floor vapor control is less critical. For unvented or damp crawlspaces, install a ground vapor retarder and consider sealing the crawlspace as a conditioned space.
- Earth or compacted earthen floors: Consult our earthen floor guidance. Many earthen floors benefit from a breathable finish rather than a full impermeable barrier.
Roofs and Ceilings: Vaulted Roofs, Attic Spaces, and Condensation Risks
- Vaulted insulated roofs in cold climates: Use an interior vapor control layer on the warm side and ensure ventilation if a vented assembly is used. If installing exterior foam or unvented insulated roof assemblies, follow the exterior foam roof recommendations so the sheathing stays warm.
- Attic with vented roof space: Place vapor control at the ceiling plane; keep insulation from blocking vents.
- Flat or low-slope roofs: Provide careful detailing; impermeable barriers on both sides can trap moisture in the deck.
Comparison/specs table
| Assembly type | Recommended barrier location | Recommended permeance | Common materials |
|---|---|---|---|
| Stud wall (heated, cold climate) | Interior warm-side | ≤0.1 perm (Class I) | 6‑mil PE, taped smart retarder |
| Stud wall with exterior CI | None interior if CI adequate | Variable; allow drying | Exterior foam + taped sheathing |
| SIP panels | As per manufacturer | N/A (factory-faced) | Integrated facings |
| Slab-on-grade | Under slab | ≤0.1 perm | 6‑mil or 15‑mil PE under slab |
| Raised floor over damp soil | Ground vapor retarder in crawlspace | ≤0.1 perm | Ground sheet, sealed seams |
| Vaulted roof (insulated) | Interior warm-side for vented; exterior CI for unvented | ≤0.1 or variable | Membrane, foil-faced board |
Special cases: high groundwater, flood-prone sites, and earthen floors require site-specific strategies. When you use exterior continuous insulation or exterior foam on roof decks, the need for an interior vapor barrier changes; see our exterior foam guide and exterior foam roof articles for detailed sequences.
Choosing Shed Vapor Barrier Materials: Types and Permeance
Selecting a material comes down to permeance, durability, installation ease, and cost.
Plastic Vapor Barrier Sheets (polyethylene) — Pros and Cons
- Typical perm: 6‑mil ≈ 0.06 perm (Class I); 10–15‑mil are even lower.
- Pros: Low cost, easy to install, effective warm-side control in cold climates.
- Cons: Can be punctured, may trap moisture if assembly cannot dry, poor UV resistance (store indoors), and must be continuous and well-sealed to work.
Foil-faced Sheathing and Foil-backed Insulation
- Typical perm: foil facings act as Class I barriers.
- Pros: Combine thermal and vapor control, often used in commercial builds.
- Cons: Reflective surfaces require careful sealing; foil faces can complicate exterior drying if used on both sides.
Smart Vapor Retarders and Vapor-retarder Paints
- Typical perm: variable; some products change from ~0.5 perm when dry to >10 perms when humid (allowing drying).
- Pros: Useful in mixed climates where seasonal drying direction reverses. They reduce the risk of trapped moisture in retrofit work.
- Cons: Higher cost than basic polyethylene; surface must be installed without damage.
How to Read Permeance and Pick the Right Class
- If you need a warm-side vapor barrier in a cold climate: choose a Class I or a low-perm Class II (≤0.1–1.0 perm).
- If the assembly must dry outward or you’re in a mixed climate: consider a smart vapor retarder or a Class II/III product.
- For floors under slabs: use a continuous Class I barrier with taped seams to withstand footing loads and construction traffic.
Material comparison table
| Material | Typical perm | Best use | DIY friendliness | Caution |
|---|---|---|---|---|
| 6‑mil polyethylene | ~0.06 | Warm-side vapor barrier, under slabs | High | Puncture risk; must be sealed |
| 10–15‑mil polyethylene | <0.01 | Under slabs, high-risk areas | Moderate | Heavier to handle; cost ↑ |
| Kraft-faced batt paper | ~1 | Insulation facers in cold climates | High | Paper can tear; needs taped seams |
| Foil-faced insulation | ≤0.1 | Roof decks, metal buildings | Moderate | Needs careful transitions |
| Smart vapor retarder (e.g., MemBrain) | Variable | Mixed climates, retrofits | Moderate | Cost higher; follow manufacturer |
For how insulation choice affects vapor control, review our best insulation for sheds article.
Step-by-step Shed Vapor Barrier Installation Tips
Key points — must-dos before you start:
- Ensure continuity of the barrier: tape seams and seal to framing, windows, and doors.
- Seal all penetrations: electrical, plumbing, and vents must be airtight.
- Maintain a drying path: avoid creating an impermeable sandwich with no way to dry.
- Coordinate with flashing and drainage planes at windows and doors.
Preparing Framing and Substrates Before Installation
- Complete rough electrical, plumbing, and HVAC runs. Keep wires and pipes tight to framing to reduce hole size.
- Sheath and weather-resist the exterior so you have a drainage plane before interior work continues.
- Install any blocking and nailers for trim; these help create clean seal lines for the vapor barrier.
Sealing Seams, Penetrations, and Overlaps
- Overlap sheets by 6 inches where possible, then tape with a compatible seam tape (butyl or acrylic construction tape). Manufacturer instructions may specify different overlap widths—follow them.
- Use low-expansion spray foam or gaskets at larger penetrations. For conduit and plumbing, install grommets or collars and seal with sealant.
- At the top plate, seal to the rim joist or ceiling plane to maintain continuity.
Detailing Around Windows, Doors, and Service Penetrations
- Flash window rough openings per manufacturer details. On the interior, bring the vapor barrier to the rough opening and seal with compatible tape; do not leave a bypass path at the jamb.
- For exterior-mounted service penetrations (outlets, lights), use sealed boxes and foam gaskets. For interior-mounted devices (switches), minimize added holes and seal around boxes.
Installation order for new builds (recommended)
- Rough-ins complete.
- Exterior sheathing and WRB complete.
- Air barrier (if interior gypsum will be the air barrier, plan seal lines).
- Install and seal the vapor barrier before insulation or install insulation first only if specified by product.
- Install insulation without compressing or trapping moisture.
- Install interior finish.
Tools and materials for DIY installers
- Utility knife, tape measure, chalk line
- Staple gun and 1/2" staples for poly sheets
- Butyl or acrylic vapor-barrier tape (3" wide recommended)
- Low-expansion foam (for gaps) and latex sealant
- Caulk gun and compatible sealants
- Breathable seal collars for pipes and wiring boxes
- Personal protective equipment (gloves, eye protection)
Watch this step-by-step guide on installing insulation:
Inspection checklist after installation
- All seams and penetrations taped or foamed
- Continuous seal at top plates, corners, and edges
- No visible tears or open edges
- Windows and doors flashed and interior seal tied into the vapor barrier
- Ventilation paths confirmed (vents open, whirlybirds installed, or mechanical system commissioned)
For more detailed wall procedures and photos, see our step-by-step guide to vapor barrier for walls. For door and threshold sealing techniques that maintain vapor/air barrier continuity, read about door weatherstripping. For recommended tapes, foams, and gaskets see our air sealing materials guide. If your shed uses daylighting tubes, follow care when sealing around roof-mounted tubes per our solar tubes installation instructions.
Common Shed Vapor Barrier Mistakes That Trap Moisture
Layering Impermeable Materials on Both Sides
- Scenario: homeowner adds interior polyethylene over a wall assembly already sheathed with foil-faced insulation. Result: moisture that enters the cavity cannot dry inward or outward, so it accumulates, leading to insulation wetting and eventual rot.
- Fix: remove one impermeable layer, replace with a vapor-retarding but breathable option, or add exterior continuous insulation so the sheathing stays warm.
Ignoring Ventilation and Drying Paths
- Mistake: sealing every crack but failing to provide a way for transient moisture (from condensation, spills, or leaks) to escape. This commonly causes musty smells and blistering paint.
- Fix: add passive vents, ridge vents, or a simple exhaust fan for a workshop; ensure attic vents are unobstructed.
Poorly Sealed Penetrations and Accidental Air Leaks
- Problem: even small gaps around recessed lights, wires, or the base plate let moist air into cavities; warm air carries far more moisture than diffusion and will condense where it cools.
- Fix: use foam sealants, gaskets, and proper box seals as part of the vapor barrier detailing.
Signs of trouble to watch for
- Musty or moldy odors, paint blistering, warped trim, or staining on sheathing are red flags. Act quickly: locate the moisture source, dry the cavity, and correct the barrier/ventilation arrangement.
Shed Vapor Barrier Alternatives and Complementary Strategies (ventilation, Air Barriers)
Using Air Barriers and Exterior Sheathing Instead of Interior Vapor Barriers
- A continuous, well-sealed exterior air barrier (such as taped ZIP sheathing) can limit convective moisture transport and reduce reliance on interior polyethylene. This approach often moves the control point outward and pairs well with exterior insulation. See our zip sheathing air barrier guide for details.
Exterior Insulation Strategies That Change Vapor Control Needs
- Adding continuous exterior insulation warms the sheathing, reducing condensation risk within cavities. If you add enough exterior R-value, you may be able to omit an interior vapor barrier and allow assemblies to dry inward. Our exterior wall insulation and exterior foam guide explain trade-offs and installation steps.
Ventilation: Passive Vents, Ridge Vents, and Balanced Systems
- For unconditioned sheds, passive ridge and soffit vents or solar attic vents clear moisture and heat. For conditioned spaces, a simple exhaust fan or a balanced ventilation system with heat recovery helps control indoor humidity. For designs that need mechanical ventilation, consult our balanced ventilation resource.
- Ventilation reduces dependence on vapor barriers by controlling indoor humidity at the source.
How insulation type changes vapor strategies
- Closed-cell spray foam has low permeance and acts as both insulation and vapor control; it can simplify detailing but is more expensive. Fiberglass or cellulose require separate vapor/air control layers and careful detailing to avoid wetting and settling.
- Smart vapor retarders paired with a controlled ventilation strategy often offer the best balance in mixed climates: they limit vapor during heating seasons and allow drying during humid periods.
The Bottom Line
Choose a shed vapor barrier based on climate, intended use, and how the assembly will dry: warm-side Class I barriers for heated sheds in cold climates; vapor-open or smart retarder strategies for hot-humid or mixed climates. Prioritize continuous air sealing, proper flashing at openings, and providing drying paths. Use the checklist below on your next shed project.
Actionable checklist:
- Identify climate and shed use (storage, workshop, conditioned).
- Decide barrier location: interior warm-side for cold climates; avoid interior Class I in hot-humid.
- Select material by permeance and durability (6‑mil PE for cold climates; smart retarder for mixed).
- Seal seams, penetrations, and transitions with appropriate tape and foam.
- Verify ventilation and drying options before closing walls.
Frequently Asked Questions
Can I use 6-mil polyethylene in my shed?
Yes, 6‑mil polyethylene is a common Class I vapor barrier and works well as an interior warm-side barrier in heating-dominated climates and for under-slab use. Make sure the sheet is continuous, seams are taped, penetrations are sealed, and the assembly still has a way to dry if moisture gets in.
Do I need a vapor barrier on the floor of a raised shed?
Not always. If the floor sits above a ventilated, dry crawlspace you may not need an interior floor vapor barrier. If the shed is over damp soil or an unvented crawlspace, install a ground vapor retarder and consider sealing the crawlspace to control moisture under the building.
Will a vapor barrier prevent mold in my shed?
A properly installed vapor barrier reduces the risk of condensation-related mold by limiting vapor diffusion, but it won’t stop mold from leaks, high indoor humidity, or poor ventilation. Combine vapor control with air sealing, good flashing, and ventilation to manage mold risk.
Can I add a vapor barrier during a retrofit?
Sometimes, but proceed carefully. Adding interior polyethylene to an existing assembly can trap moisture if the exterior cannot dry. Inspect insulation, sheathing, and ventilation first—retrofitting often favors smart retarders or exterior insulation instead of interior films.
How does ventilation interact with a vapor barrier?
Ventilation controls indoor humidity and reduces the vapor load on assemblies, so it complements vapor barriers rather than replaces them. For conditioned sheds, balanced or exhaust ventilation plus a properly located vapor control layer provides the best protection against condensation.