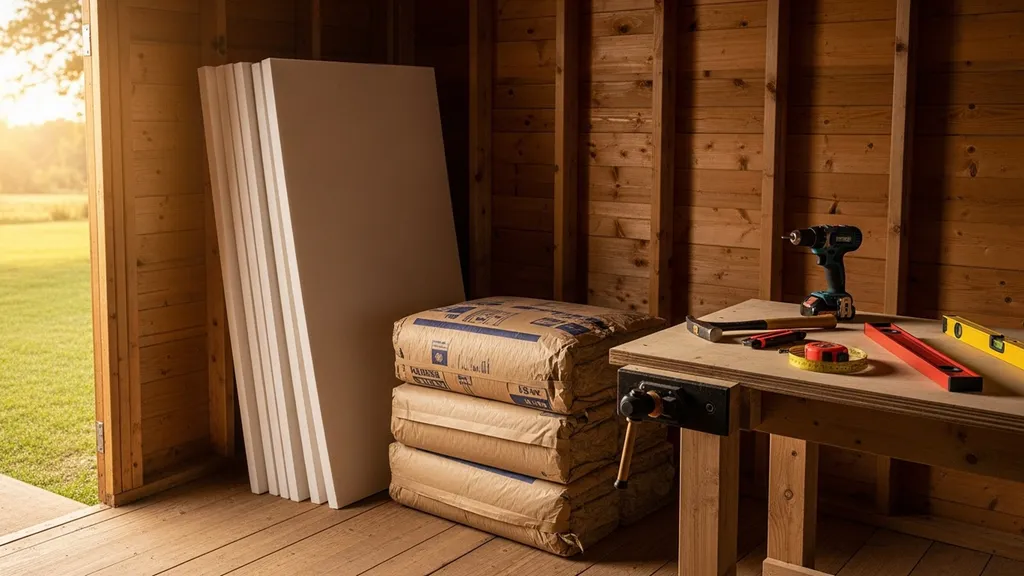
Compare the best insulation for shed use — materials, R-values, costs, and DIY installation tips to keep a workshop, storage shed or garden room comfortable.
Best Insulation for Shed: Materials and R-Values
Choosing the best insulation for a shed determines how comfortable, dry, and energy-efficient the space will be. Whether converting a storage box into a weekend workshop, protecting garden tools, or finishing a small garden room, the right insulation and R-values cut heat loss, control condensation, and reduce running costs. This article explains R-values, compares common materials, gives climate-based R recommendations, and walks through a weekend DIY install plan so readers can pick the best approach for their shed.
TL;DR:
- Choose insulation by use: unheated storage → R-7 to R-13 walls; heated workshop or living space → walls R-13–R-21 and roof R-30–R-49.
- For high performance in limited cavity depth, use polyiso or closed-cell spray foam (R~6/in); for moisture-prone sheds, choose mineral wool or exterior rigid foam.
- Prioritize air-sealing and ventilation first; combine continuous exterior foam + cavity insulation or a foam-batt hybrid for the best cost–performance balance.
Related guides: Best insulation for attic materials and r values, Safer alternatives spray foam insulation performance, Ultimate guide to natural fiber insulation, Fix damp crawl space insulation sealing drainage tips, R 15 vs r 21 insulation which do you need, and R 15 vs r 20 insulation which do you need.
Why Choosing the Best Insulation for a Shed Matters
Insulating a shed does more than keep it warm. The best insulation for shed projects reduces heat transfer, controls condensation, protects stored items from moisture, and extends the usable season for workshops and garden rooms. For small outbuildings, heat-loss patterns differ from houses: typical ranges are roof 25–35%, walls 20–30%, and floor 10–20%. Those proportions mean the roof and walls usually deserve the most insulation attention.
Who Uses Insulated Sheds and Why IT Changes Requirements
- Storage-only: Prioritize moisture control and pest resistance; moderate R-values are fine.
- Heated workshop: Focus on air-sealing and higher R-values to maintain a stable working temperature.
- Garden room / potting shed: Balance thermal performance with vapor control and ventilation to protect plants.
- Tiny-house or mobile sheds: Consider weight, thickness, and code for habitable spaces; maximize R per inch.
Top Heat-loss Paths in Small Buildings
- Roof: Largest fraction of heat loss in many sheds; adding insulation here gives big returns.
- Walls: Thermal bridging from studs reduces effective R—continuous exterior insulation helps.
- Floor: Elevated sheds lose heat through the floor; insulating rim-joists and adding underside insulation matters.
- Air leaks: Gaps around doors, windows, and seams are often the biggest performance hit; air-sealing saves more than extra inches of insulation.
For an overview of available insulation types and where they're typically installed, see the Department of Energy's guide to insulation types and installation methods: Types of Insulation | Department of Energy.
Understanding R-values and Recommended R-values for Sheds
R-value measures thermal resistance: higher R means slower heat flow. It scales with thickness, so R-per-inch is useful when space is limited.
What R-value Means and R-value Per Inch for Common Materials
- Fiberglass batt: ~3.2 per inch
- Mineral wool (rock wool): ~3.0–3.3 per inch
- Cellulose (dense-packed): ~3.5 per inch
- Polyisocyanurate (polyiso): ~6.0–6.5 per inch (note: performance drops at low temperatures)
- EPS (expanded polystyrene): ~3.6–4.0 per inch
- XPS (extruded polystyrene): ~5.0 per inch
- Closed-cell spray polyurethane foam (ccSPF): ~6–7 per inch
- Open-cell spray foam (ocSPF): ~3.6–3.8 per inch
For a wider technical breakdown of insulation types and R-values, the Insulation Institute provides comparison tables and installation notes: Insulation types | fiberglass, mineral wool, spray foam.
Recommended R-values by Climate Zone (simple Guide)
- Mild climates (IECC Zones 1–3):
- Walls: R-7 to R-13
- Roof/ceiling: R-19 to R-30
- Floor: R-10 to R-13
- Mixed climates (IECC Zones 4–5):
- Walls: R-13 to R-18
- Roof/ceiling: R-30 to R-38
- Floor: R-13 to R-19
- Cold climates (IECC Zones 6–8):
- Walls: R-13 to R-21 (consider continuous insulation)
- Roof/ceiling: R-30 to R-49
- Floor: R-19 to R-30 for unheated ground-contact floors
These are general targets; local code or accessory building rules may differ. Check IECC climate zone guidance at the Department of Energy's energy codes site: IECC climate zones and code guidance.
Use higher R-values for heated workshops or living spaces in sheds. Remember that thermal bridging through studs reduces effective assembly R-value; adding continuous exterior foam or using structural insulated panels (SIPs) helps.
Best Insulation Materials for Sheds: Comparison of Performance, Cost, and Suitability
Choosing between materials depends on desired R, moisture risk, budget, and DIY skill. Below is a compact comparison table, followed by detailed notes.
| Material | R-per-inch | Best uses | Typical installed thickness for R-target | Estimated material cost (installed varies) |
|---|---|---|---|---|
| Polyiso foam board | 6.0–6.5 | Continuous exterior insulation, roof sheathing | 1"–2" for R-6–R-12 | $1.20–$2.00/ft² per inch |
| XPS rigid foam | 5.0 | Below-grade or high compressive load areas | 1"–2" for R-5–R-10 | $0.90–$1.75/ft² per inch |
| EPS rigid foam | 3.6–4.0 | Budget exterior foam, SIP cores | 2"–3" for R-8–R-12 | $0.40–$1.00/ft² per inch |
| Fiberglass batts | 3.2 | Framed walls and attic cavities | 3.5"–9" for R-13–R-30 | $0.30–$0.80/ft² |
| Mineral wool | 3.0–3.3 | Moisture-prone walls, fire-resistance | 3.5"–9" for R-13–R-30 | $0.60–$1.20/ft² |
| Cellulose | 3.5 | Retrofit cavities, attic loose-fill | 3.5"–12" for R-13–R-42 | $0.40–$1.00/ft² |
| Closed-cell spray foam | 6.0–7.0 | Rim-joist, tight small spaces, high R/in | 1"–3" for moderate R | $1.25–$3.00/ft² per inch |
| Open-cell spray foam | 3.6–3.8 | Sound control, interior cavities | 3"–6" typical | $0.80–$1.80/ft² per inch |
| Reflective foil | N/A (works with air gap) | Hot climates, radiant heat reduction | N/A — used with airspace | $0.20–$0.70/ft² |
Rigid Foam Boards (polyiso, EPS, XPS) — When to Pick
- Use polyiso as exterior continuous insulation for roofs or walls where you want high R per inch and a simple thermal break. See our deeper comparison of polyiso vs EPS vs XPS for performance and temperature sensitivity: polyiso vs EPS overview.
- EPS is budget-friendly but lower compressive strength and slightly lower R.
- XPS performs well under load and resists moisture, but has higher embodied carbon and cost.
Fiberglass Batts and Mineral Wool — Pros and Caveats
- Fiberglass batts are inexpensive and DIY-friendly for standard stud cavities. Avoid compressing batts; leave a small gap at the top of cavities for ventilation if used in roof assemblies.
- Mineral wool resists moisture better than fiberglass, is non-combustible, and deters rodents. It is slightly more expensive but often worth it in damp sheds or near soil contact.
Cellulose — an Eco Option for Retrofit Walls and Attics
- Dense-packed cellulose performs well in attics or where cavity retrofits are needed. It provides good sound damping and has a favorable embodied carbon profile. Be mindful of settling over time and ensure proper air-sealing before installation.
Spray Polyurethane Foam (open- and Closed-cell) — Trade-offs
- Closed-cell spray foam (ccSPF) gives high R per inch and acts as both insulation and an air/moisture retarder. This is useful for rim-joists, tiny sheds with shallow cavities, or when a high performance envelope is required.
- Open-cell foam is cheaper and good for sound control but absorbs water and is not a vapor barrier. Spray foam requires professional application for consistent quality and has higher upfront cost; compare lifecycle costs and carbon using the spray foam vs cellulose analysis: spray foam vs cellulose.
Reflective/foil and Insulated Panels — Niche Uses
- Reflective foil works best in hot, low-humidity climates where radiant heat is a dominant load. Structural insulated panels (SIPs) provide quick assembly and high R per inch but are less flexible for custom interior layouts.
Environmental and embodied carbon considerations
- Natural and recycled materials (cellulose, mineral wool with recycled content) typically have lower embodied carbon than petrochemical foams. For a deeper comparison, see our natural vs synthetic insulation cost and efficiency comparison: natural vs synthetic options.
For general insulation rating standards and to verify R-value claims, consult Energy Star's insulation fact sheet: Insulation fact sheet - energy star.
Choosing the Best Insulation for Your Shed Type and Purpose
Matching the insulation type to the shed's use prevents wasted cost and performance problems.
Unheated Storage Sheds: Moisture Control and Rodent Resistance
- Recommendation: Use mineral wool batts or exterior rigid foam with a ventilated cavity. Mineral wool resists moisture and pests better than fiberglass. If you only need freeze protection, R-7 to R-13 walls and R-19 roof are adequate.
- Tip: Vent the roof and provide a rainscreen behind exterior cladding to keep sheathing dry.
Heated Workshops and Hobby Sheds: Thermal Mass and Air Sealing
- Recommendation: Prioritize air-sealing then insulation. A hybrid assembly—exterior polyiso (1"–2") for continuous insulation plus R-13 fiberglass or mineral wool in the studs—reduces bridging and meets higher R targets without thick cavities.
- For very tight assemblies or shallow walls, closed-cell spray foam provides both air control and high R/inch.
- Seal doors and windows using the window sealing techniques in our guide: window sealing tips.
Garden Rooms, Potting Sheds, and Plant Spaces: Vapor and Ventilation
- Recommendation: Use breathable assemblies where plants or soil moisture are present—mineral wool or exterior foam with controlled ventilation is a safe approach. Add mechanical ventilation (small extractor fan) for humidity control if plants generate moisture.
Tiny Houses, Mobile Sheds and Code Considerations
- Recommendation: For habitable tiny houses check local building codes for insulation minimums and fire safety. Use lightweight, high R-per-inch solutions (polyiso, ccSPF) to reduce wall thickness and weight. Consider service access to utilities and ensure vapor and fire barriers meet code.
Example calculation (8x10 shed, 8-ft walls)
- Wall area: (8+8+10+10) ft × 8 ft = 288 ft² (minus doors/windows)
- To reach R-13 using fiberglass batts (~3.2/in): need ~4" thickness (one nominal 2x4 cavity typically holds R-13).
- Roof area (flat/low slope): ~100 ft²; to reach R-30 with polyiso (6 R/in), need ~5" of polyiso (or 6" cavity with fiberglass).
- Practical hybrid: 1" polyiso exterior (R~6) + R-13 batt in 2x4 → combined effective R roughly R-18 after accounting for some thermal bridging.
For framing details and cavity depths before insulating, consult the shed framing guide: shed framing guide.
How to Install Insulation in a Shed: Methods, Step-by-Step Checklist and Common Mistakes
A methodical install gives the best long-term performance. Start with the shell—fix gaps and ensure sheathing is solid—then insulate.
Preparing Framing, Sheathing and Air-sealing First
- Measure cavities: Confirm stud spacing and cavity depth to pick correct insulation sizes.
- Repair sheathing: Replace any wet or rotted sheathing before insulating.
- Air-seal: Caulk or foam around windows, doors, and top/bottom plates. Use canned spray foam for rim-joist gaps.
- Install flashing: Proper flashing around openings prevents leakage that can saturate insulation.
Wall, Roof and Floor Installation Options (framed vs SIP vs Exterior Foam)
- Cavity batt/blanket: Install batts snug without compression. Staple vapor-retarder face to studs if required.
- Exterior continuous foam: Attach polyiso/EPS to sheathing, seal joints with tape or compatible sealant, then add furring strips for cladding attachment.
- Spray foam: Apply per manufacturer’s instructions; ensure ventilation and PPE. For rim-joists, spray 2" closed-cell for both structure and insulation.
- SIPs or insulated panels: Fast assembly but plan openings and wiring ahead.
Vapor Barriers, Ventilation, and Condensation Control
- Cold climates: Place vapor control toward the warm interior side (e.g., a smart vapor retarder or foil-backed gypsum) to prevent condensation in cavities.
- Warm-humid climates: Avoid interior vapor barriers; instead use exterior vapor-impermeable layers and ensure good ventilation.
- Attic ventilation: Vent roofs where required; continuous insulation can reduce the need for soffit-to-ridge vents in some assemblies.
- For practical vapor barrier guidance, see this installation-focused vapor guide: Install a basement vapor barrier the right way and Building Science discussion on moisture control: Building Science resources on vapor control.
Step-by-step checklist for insulating a framed shed
- Inspect shell: Replace damaged sheathing; seal nail holes and seams.
- Air-seal gaps: Caulk and foam around penetrations, windows, and doors.
- Install continuous exterior foam (optional): Tape seams, seal edges, add furring strips.
- Fit cavity insulation: Place batts or dense-pack cellulose without compressing.
- Seal joints and edges: Use foam or tape at top plates and rim joists.
- Install vapor control (if needed): Position smart vapor retarder or polyethylene based on climate.
- Finish interior: Hang interior lining (plywood, drywall) and seal perimeter.
Tools & materials list
- Tape measure, utility knife, staples, caulk gun, low-expansion spray foam, safety goggles, N95 or respirator for dusty materials, gloves, straightedge, furring strips (if exterior foam), insulation supports for floor joists.
Safety notes
- Wear respiratory protection when cutting fiberglass or using spray foam.
- Follow manufacturer VOC and curing safety guidance for spray polyurethane foam.
Watch this step-by-step guide on insulating a shed - thrift diving:
Common mistakes (and how to avoid them)
- Compressing batt insulation reduces R; cut batts to fit, don’t stuff.
- Skipping an air barrier: small leaks negate large amounts of insulation.
- Improper vapor barrier placement causes condensation; match barrier location to climate.
- Leaving rim-joists uninsulated—these are major thermal and moisture weak spots.
For practical vapor-barrier techniques in floors and walls, consult the basement vapor barrier guide: vapor barrier guide.
Material Specs and a Quick Pick Table: Best Insulation for Sheds by Budget and Use
Here are clear picks for common scenarios with recommended R-targets and typical thicknesses.
| Scenario | Recommended material | Target R | Typical installed thickness | Typical material cost |
|---|---|---|---|---|
| Budget storage | Fiberglass batts | Walls R-13, Roof R-19 | Wall cavity (3.5") / Roof (6") | $0.30–$0.80/ft² |
| Moisture-prone shed | Mineral wool + exterior foam | Walls R-13–R-18 | 1" exterior foam + R-13 batt | $0.80–$1.50/ft² |
| Highest R per inch | Polyiso or ccSPF | Roof R-30+ in limited depth | 2" polyiso + 2x4 cavity or 3" ccSPF | $1.50–$3.00/ft² |
| Eco-friendly pick | Dense-packed cellulose | R-13–R-30 | 4"–10" dense-packed | $0.40–$1.00/ft² |
Best Budget Pick
- Fiberglass batts in 2x4 walls (R-13) and attic rolls in the roof (R-19–R-30) offer the lowest upfront cost and are DIY-friendly.
Best for Moisture-prone Sheds
- Mineral wool resists moisture and pests. Combine with a thin continuous exterior foam to reduce thermal bridging and keep sheathing warm.
Best for Highest R-value Per Inch
- Polyiso exterior sheathing or closed-cell spray foam are top choices when cavity depth is limited.
Best Eco-friendly Pick
- Cellulose uses recycled newsprint and performs well in attics and dense-packed walls; pair with good air-sealing.
See our guide on exterior continuous insulation for practical methods when using exterior foam: exterior foam guide.
Cost, Carbon and Maintenance: Long-Term Considerations for Choosing the Best Insulation for Shed Use
Comparing upfront cost to lifetime savings
- Rough example: A small heated shed (100 ft² floor area) upgrading roof R from 10 to 30 might save ~500–1,200 kWh/year depending on climate and usage pattern. At $0.15/kWh, that’s $75–$180 saved annually. Payback depends on material and labor costs; thicker foam or spray foam shortens payback where heating is frequent.
Embodied Carbon and Recyclability
- Cellulose and mineral wool generally have lower embodied carbon than petrochemical foams. EPS and XPS are less recyclable and have higher lifetime emissions. For a detailed comparison of natural vs synthetic materials, see: natural vs synthetic options.
Maintenance, Pests, and Moisture Monitoring
- Inspect annually for damp spots, compressed batts, or animal nesting. Replace or dry out wet insulation promptly. Rigid foam panels last decades but check joints and sealant annually.
Disposal and end-of-life
- Fiberglass and cellulose are relatively straightforward to dispose of; rigid foams require special handling at some recycling centers. Closed-cell spray foam is difficult to remove and recycle.
DIY Plan: Insulating a Typical 8x10 Framed Shed (Materials List and Timeline)
Materials List and Quantities for an 8x10 Shed (8-ft Walls)
- Fiberglass batts R-13 (2x4 walls): 6–8 batts
- Roof insulation: R-19 attic rolls or polyiso boards (1"–2") for continuous exterior
- Rim-joist spray foam or cut foam board: 16 linear feet
- Low-expansion canned spray foam: 1–2 cans
- Caulk and tape: 1 tube caulk + 1 roll foil/foam board tape
- Vapor retarder (if needed): 1 roll smart vapor retarder
- Fasteners and insulation supports: as needed
Step-by-step Timeline (weekend-friendly Schedule)
Day 1 morning
- Inspect and repair sheathing; measure cavities; cut and fit foam if using exterior boards.
Day 1 afternoon
- Air-seal top and bottom plates, fill rim-joist gaps with spray foam, install exterior foam and tape seams (if used).
Day 2 morning
- Install cavity insulation (batts or dense-pack). Fit around wiring and plumbing without compressing.
Day 2 afternoon
- Install vapor retarder if required, hang interior lining, seal edges and penetrations, and clean up.
Quick Troubleshooting Tips
- If insulation feels cold in spot tests, look for missing air-seal or compressed areas.
- If condensation appears on sheathing, check vapor barrier placement and ventilation.
For a plug-and-play framing checklist before insulating, reference the shed framing guide: shed framing guide.
The Bottom Line: choosing the best insulation for your shed
Pick insulation based on use, climate, budget, and moisture risk. For basic storage, fiberglass batts in 2x4 walls and R-19 roof are the lowest-cost route; for heated workshops choose a hybrid of exterior polyiso + cavity batt or closed-cell spray foam for the best performance in limited depth; for moist or unheated sheds prefer mineral wool or exterior foam to protect the structure. First measure, choose target R-values for your climate, and prioritize air-sealing and ventilation.
Frequently Asked Questions
How much does it cost to insulate a small shed?
Material-only costs for a basic 8x10 shed typically range from $100–$400 for fiberglass batts and minimal supplies. Upgrading to exterior polyiso or closed-cell spray foam pushes material costs to $300–$900, and professional spray foam installation can raise total cost to $1,000–$2,500 depending on thickness. Labor, local prices, and whether you add continuous exterior foam change the final price.
Do I need a vapor barrier in a shed?
It depends on climate and use. In cold climates, placing a vapor retarder toward the warm interior reduces the chance of interior moisture condensing in the wall cavity. In warm, humid climates, interior vapor barriers can trap moisture; instead, use vapor-permeable materials and manage moisture with ventilation. Always match vapor barrier strategy to your IECC climate zone and consider a smart vapor retarder that changes permeability with humidity.
Should I insulate the floor and the door?
Yes. Floors account for 10–20% of heat loss in small buildings, so insulating the underside of the floor or adding rigid foam under a slab-like floor helps. Doors are common weak spots—install insulated doors if heating the shed, or add weatherstripping and a threshold to reduce drafts. For workshops, an insulated, well-sealed door significantly improves comfort.
What thickness of insulation do I need to reach a given R-value?
Use the material's R-per-inch to calculate thickness. Example: to reach R-13 with fiberglass (≈3.2/in) you need about 4" (R-12.8). For R-30 with polyiso (≈6/in), you need roughly 5" of continuous polyiso. Hybrid assemblies (1" polyiso + R-13 cavity) can reach R~18 with less total thickness. Always allow for thermal bridging which reduces effective assembly R.
Can I do shed insulation myself or should I hire a pro?
DIY is practical for fiberglass batts, rigid foam board, and dense-pack cellulose with rental equipment. Spray foam often requires professionals to ensure correct application, safety, and warranty. If the project involves structural changes, electrical work, or straddles habitable building code requirements (tiny house), hiring a licensed contractor is advisable.