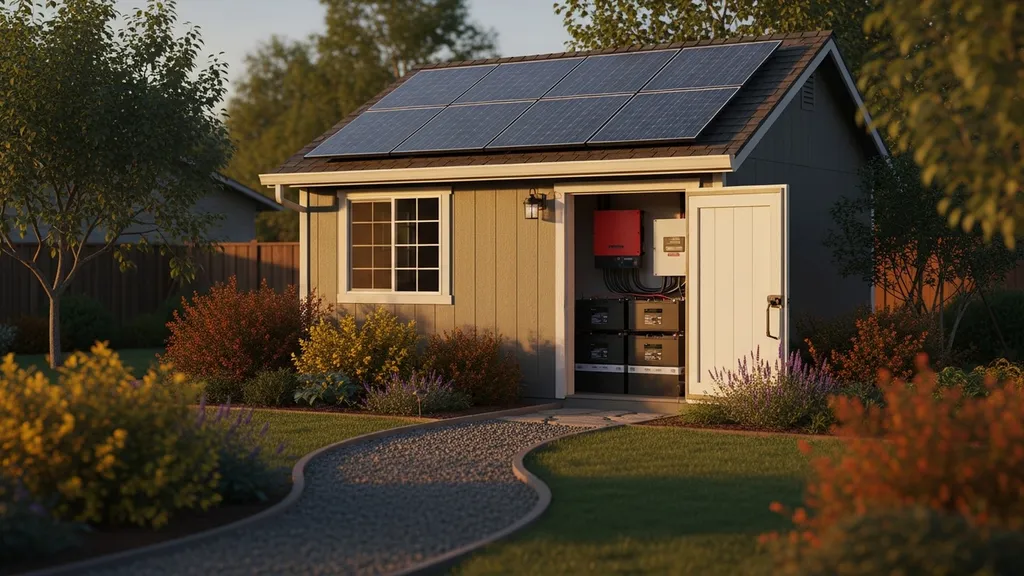
Step-by-step sizing guide to plan a 2kW solar system for a shed — loads, panels, batteries, inverter sizing, costs, and installation checklist.
2KW Solar System for Shed: Complete Sizing Guide
A 2kw solar system for shed is a practical, budget-friendly option for powering lights, a fridge, power tools, and basic off-grid needs. This guide shows exactly how to estimate loads, size panels, charge controllers, inverters, and batteries, and what to expect in daily kWh based on sun hours. Read on to learn the step-by-step math, component choices, wiring basics, and a clear checklist for installing and commissioning a 2 kW shed system.
TL;DR:
- A 2kW array typically yields about 4.2–8.0 kWh/day after 20–30% system losses, depending on peak sun hours; with 4 PSH expect ~6.4 kWh/day.
- For ~6 kWh usable/day, plan a battery bank of ~8 kWh usable (LiFePO4) or ~16 kWh lead-acid (at 50% DoD); choose inverter continuous rating ≥ expected continuous load and surge ≥ motor start.
- Typical DIY installed cost range: $2,500 (basic grid-tied-ish) to $10,000+ (off-grid with LiFePO4); phase purchases to lower upfront cost and prioritize efficient loads first.
Related guides: 1kw solar system for tiny house complete sizing guide, 1kw solar system for cabin complete sizing guide, Designing off grid solar system guide, and The Complete Guide to Water-Efficient Plumbing and Moisture Control: Design, Off-Grid and Smart Water Systems, Composting Toilets, and Crawl Space Solutions.
How much power does a shed need? Estimating typical loads
Start by listing every device you'll run and the hours per day. The basic equation is simple: hours per day × device wattage = watt-hours per day (Wh/day). Sum those to get the daily energy need, then convert to kWh (divide Wh by 1,000). Separate that from peak or surge demand, which is the instantaneous wattage that determines inverter sizing.
Common shed device wattages (typical ranges):
- LED light: 10 W
- Phone/laptop charging: 5–50 W
- Chest fridge (small): 100–200 W running, 600–800 W startup
- Bench grinder / circular saw: 800–1,500 W (intermittent)
- Water pump (12–24 V DC or AC): 200–800 W depending on type
- Small space heater: 1,000–1,500 W (high energy; use sparingly)
Example scenario A — tool-storage workshop (intermittent tools + lighting):
- 2 × LED lights, 10 W each × 6 hours = 120 Wh
- Laptop charging, 50 W × 4 hours = 200 Wh
- Occasional circular saw use, 1,200 W × 0.25 hour = 300 Wh
- Radio/charger loads = 50 Wh
Total = 670 Wh/day ≈ 0.67 kWh/day. Peak power ≈ 1,200 W (saw).
Example scenario B — tiny off-grid cabin (fridge, lights, laptop, occasional heater):
- Fridge average duty = 150 W × 24% duty cycle = 36 W average × 24 h = 864 Wh
- 3 × LED lights, 10 W × 4 hours = 120 Wh
- Laptop and phone = 60 W × 4 hours = 240 Wh
- Small DC water pump, intermittent = 200 W × 0.5 hour = 100 Wh
Total = 1,324 Wh/day ≈ 1.32 kWh/day. Peak might be 200–300 W continuous, startup fridge surge ~700–800 W.
How to measure real values:
- Use a plug-in power meter (Kill A Watt or similar) for AC devices.
- For DC loads, use a DC clamp meter or an inline shunt with logging.
- Industry guidance on sizing factors and operations is summarized in the system sizing guide from IEA SHC, which stresses that load profile and operation time are as important as the raw load size.
Practical tip: do a 7-day sample audit where you log device runtimes; this smooths out one-off events and gives a realistic average daily kWh.
2kW Solar System for Shed: What It Can Realistically Power
A 2kW PV array's daily production depends on local peak sun hours (PSH). Raw array energy = 2,000 W × PSH. After panels, wiring, charge controller, inverter, and battery losses (typically 20–30%), you get usable kWh/day.
PSH scenarios and expected usable energy (including estimated 25% losses):
| Peak sun hours (PSH) | Raw kWh/day (2 kW × PSH) | Estimated usable kWh/day (after 20–30% losses) |
|---|---|---|
| 3 PSH | 6.0 kWh | 4.2–4.8 kWh |
| 4 PSH | 8.0 kWh | 5.6–6.4 kWh |
| 5 PSH | 10.0 kWh | 7.0–8.0 kWh |
According to production guidance from the NAHB solar sizing overview, orientation and module type shift these numbers; south-facing, unshaded arrays at optimum tilt perform best.
Real-life Examples:
- Workshop with moderate tool use (Scenario A above, ~0.7 kWh/day): a 2kW system at 3–4 PSH covers this easily and supports several tool starts per day with battery buffer.
- Tiny cabin with fridge and modest loads (~1.3 kWh/day): a 2kW array at 4 PSH supplies daily needs and charges a small battery bank for evening use.
- If you plan to run a 1.5 kW heater for even one hour daily (1.5 kWh), that single load uses a large share of daily energy—expect ~25–35% of production in many climates.
Key sizing takeaways (cheat-sheet):
- Expected kWh/day by PSH: 3 PSH ≈ 4.2–4.8 kWh; 4 PSH ≈ 5.6–6.4 kWh; 5 PSH ≈ 7.0–8.0 kWh.
- Recommended battery reserve: 1–2 days autonomy for small setups (more if winter/cloudy seasons matter).
- Inverter sizing tip: ensure continuous rating ≥ continuous loads, and surge rating covers motor/tool startups—pick an inverter with surge 2–3× continuous rating for motor-heavy loads.
If your expected daily need is under ~6 kWh and peak loads stay under ~3 kW, a 2kW system is often appropriate. For larger or continuous heavy loads, plan a bigger array or hybrid generation. See wind-solar hybrid options if you want redundancy or higher yield in low-sun seasons.
Sizing components: panels, charge controller, inverter, and batteries for a 2kW shed
Panel count and wattage:
- Typical modern modules are 330–370 W. Six modules at 330 W = 1,980 W; six at 370 W = 2,220 W. That gives a 2 kW-class array using 6 panels.
- Allow roof area ~100 sq ft/kW as a rough guide per Ohioline's sizing guide. So 2 kW needs roughly 200 sq ft of usable roof or ground space, but exact footprint varies with module dimensions.
Orientation and tilt:
- South-facing (northern hemisphere) with tilt near latitude gives best year-round yield; shallow fixed tilt improves summer. Avoid shading from trees and chimneys—one shaded cell string can cut output dramatically.
MPPT charge controller sizing:
- For battery-based off-grid 24 V or 48 V systems, choose an MPPT that accepts array voltage and current. Array current (Isc at max power) ≈ Parray / Vmp. Example: 2,000 W array on a 24 V battery system: maximum array current ≈ 2,000 W / 24 V = 83 A (this is a simplification; you must use Vmp and consider Voc and controller voltage limits).
- A safer approach: size MPPT rated current ≥ calculated array current × 1.25 (25% safety margin) and ensure controller maximum input voltage > array Voc at coldest temperature.
- For a 48 V battery system, array currents halve; this reduces wire size and losses.
Inverter and Battery Bank Sizing:
- Inverter sizing: pick continuous rating at or above expected continuous load — for a workshop with frequent tool starts, a 3,000 W inverter with 6,000 W surge is common. For small cabins with only lights and electronics, a 1,500–2,000 W inverter may suffice.
- Battery sizing step-by-step:
- Determine usable daily energy need (e.g., 6 kWh/day).
- Decide autonomy days (e.g., 2 days) → required usable energy = 6 kWh × 2 = 12 kWh.
- Choose battery chemistry and DoD:
- Lead-acid (recommended DoD ~50%): battery bank capacity = 12 kWh / 0.5 = 24 kWh nominal.
- LiFePO4 (usable DoD ~80–90%): bank = 12 kWh / 0.9 ≈ 13.3 kWh nominal.
- Convert Wh to Ah at system voltage (example at 48 V): Ah = Wh / V. For 13.3 kWh at 48 V: 13,300 Wh / 48 V ≈ 277 Ah.
- Higher battery voltage (24 V or 48 V) reduces current and cable size. For systems above ~1.5 kW continuous, 48 V is more efficient and common.
Chemistry trade-offs:
- Lead-acid: lower upfront cost, heavier, limited cycles, larger capacity needed due to lower DoD.
- LiFePO4: higher upfront cost, lighter, long cycle life (>3,000 cycles typical), higher usable DoD and efficiency (~95% round-trip).
Industry studies and installer guides such as NABCEP's PV installation guide cover these trade-offs in detail; see the NABCEP pv installation professional resource guide for standards and installation practices.
Practical examples:
- Example 1 (modest off-grid): 6 × 330 W = 1.98 kW array, MPPT 60 A at 24 V (or 30–40 A at 48 V), inverter 3,000 W with 6,000 W surge, LiFePO4 battery 10 kWh usable (≈208 Ah @ 48 V).
- Example 2 (tool-focused): same array, inverter 3,500–5,000 W if frequent heavy tool startups, larger surge headroom.
For a visual demonstration, check out this video on complete hybrid solar inverter wiring installation:
For more detail on matching array voltage to battery voltage and MPPT requirements, see our guide on panel-to-battery matching.
System layout and wiring basics for a shed (mounts, grounding, combiner, and conduit)
Choose mounts based on roof type and structure. Rail-based systems work well on standard framed roofs. For metal roofs, specialized clamps or through-bolting with sealed fasteners are typical—see our walk-through on metal roof mounting. If your shed is ground-mountable, a pole or small ground frame can avoid roof penetrations entirely.
Inspect roof structure:
- Confirm rafter spacing, decking type, and load path to supports. Strengthen rafters or add blocking if needed.
- See the shed construction guidance in building the shed for framing and roof substrate details.
Combiner boxes and DC safety:
- For a 6-panel array wired as two strings of three, a small combiner with string fuses simplifies overcurrent protection before the MPPT.
- Install a DC isolator near the MPPT and a DC fuse sized to the controller and array current. Follow manufacturer wiring diagrams.
Cable sizing and voltage drop:
- Use short runs where possible. For 24 V systems, currents are higher—use heavier cable. Target voltage drop <3% for DC runs to the battery/inverter. Example: For a 48 V system carrying 100 A over 5 m, you’ll need cable sized to keep drop under 3% (consult a cable table or voltage-drop calculator).
- For longer runs, consider upsizing to 48 V or stepping up to use inverter-charger with remote AC generator input.
Grounding and surge protection:
- Bond module frames and metal racks to a common earth ground.
- Install surge protection devices (SPDs) on AC and DC sides per local code and to protect against lightning-induced transients.
For detailed installation and code overview, see the WSU guide on solar electric system design and installation.
Caveat: this section provides practical guidance but does not replace a licensed electrician’s role. Local codes (NEC in the U.S., local amendments elsewhere) dictate final equipment selection and interconnection practices.
Cost estimate and budgeting: realistic price ranges and cost-saving tips
Costs vary widely with battery chemistry, inverter quality, and whether labor is DIY or contracted. Below is a line-item comparison for three sample builds.
| Item | Basic (DIY grid-tied-ish) | Off-grid lead-acid | Off-grid LiFePO4 (mid) |
|---|---|---|---|
| Panels (2 kW) | $900–$1,500 | $900–$1,500 | $900–$1,500 |
| Inverter / charger | $300–$700 | $700–$1,200 | $1,000–$2,000 |
| Batteries | $300–$800 (small starter) | $1,000–$2,500 | $4,000–$8,000 |
| Racking & mounts | $150–$500 | $300–$800 | $300–$800 |
| Wiring & breaker/combiner | $150–$400 | $200–$600 | $200–$600 |
| Misc (fuses, SPD, disconnects) | $100–$300 | $200–$500 | $200–$500 |
| Total est. (installed DIY parts) | $1,800–$4,200 | $3,300–$7,100 | $6,600–$13,400 |
Notes:
- Labor and permitting add to installed costs. Hiring a certified installer or electrician typically increases the budget by 20–50%, but may be required by code.
- For budget planning tools, use the budget planning worksheet to phase purchases and track cashflow.
Ways to reduce upfront cost:
- Phase the build: buy panels first and add batteries later.
- Buy panels in bulk or during sales; open-box or lightly used modules can be viable if inspected.
- Prioritize efficiency: upgrade LED lighting and insulation (see shed insulation guide) to shrink battery and panel requirements.
- Consider repurposed EV batteries cautiously—these require careful testing, BMS integration, and are often more complex than new modules.
Permits and incentives:
- Permitting, inspection, and grid-interconnection rules vary by jurisdiction. Some areas require a licensed electrician to sign off. Use national guidance like the NABCEP PV installer resources for best practices and certification info.
- Check local rebates, state incentives, and federal tax credits that may lower net cost.
Installation checklist and step-by-step commissioning for a shed solar system
Pre-install Checks:
- Verify permits and interconnection rules with local authority having jurisdiction.
- Confirm roof structure and rafter load capacity; reinforce if necessary.
- Mock up panel layout on the roof and mark conduit runs.
Step-by-step Install Sequence (typical for Off-grid Battery-backed System):
- Mount racking and secure panels to racks; torque module clamps per manufacturer spec.
- Wire PV strings and route conduits to combiner box.
- Install combiner box, fuses, and DC isolator.
- Connect PV combiner to MPPT/charge controller input.
- Run battery DC cabling and install battery disconnects and fusing.
- Connect MPPT to battery bank, verifying correct polarity and voltage.
- Install inverter, connect battery and AC loads, and add AC disconnects.
- Commission BMS (for LiFePO4) and ensure correct charge profile settings.
Commissioning tests and monitoring setup:
- Open-circuit voltage (Voc) check on each string to confirm no wiring errors before connection.
- Observe MPPT input under sun to confirm power harvest and correct charging behavior.
- Perform a staged load test: add known resistive loads to validate inverter continuous rating and battery response. Example: place a 1,500 W heater (if relevant) for a 10-minute test while monitoring battery voltage and inverter temperature.
- Set up a monitoring solution (inverter portal, charge controller logging) to track daily kWh, battery SoC, and PV string voltage.
LiFePO4 users: follow manufacturer charge parameters when configuring CC/CV setpoints and initial conditioning.
Safety notes:
- Wire DC circuits with insulated tools and appropriate PPE. DC arcs can be dangerous at high current.
- Many jurisdictions require a final inspection or electrician sign-off—plan for that into timeline and cost.
Maintenance, monitoring, and troubleshooting common issues
Monitoring Metrics to Track:
- Daily kWh produced and consumed.
- PV string voltages and MPPT power.
- Battery state of charge (SoC) and temperatures.
- Inverter status and error codes.
Routine Maintenance Schedule:
- Visual system check quarterly: look for loose clamps, cable chafing, and corrosion.
- Clean panels seasonally or as needed—dirt and pollen can cut output by 5–15%.
- For lead-acid batteries: check electrolyte and terminal tightness monthly; equalize per manufacturer.
- For LiFePO4: monitor BMS logs monthly and ensure ventilation around battery enclosure.
Common faults and basic troubleshooting:
- Reduced output: check for shading, dirt, or a string with lower current. Use a simple PV combiner current check or the inverter/MPPT monitoring.
- Loose connections: thermal cycling can loosen lugs—retorque to spec and secure with threadlocker if recommended.
- MPPT not tracking: confirm array Voc and Vmp are within controller input range, and that the controller firmware is updated.
- Battery voltage sag: heavy loads or low SoC cause voltage drops; reduce loads and check battery health (capacity test).
Cooling and humidity:
- In hot climates, keep panels slightly ventilated and consider spacing or passive cooling to improve efficiency—see panel cooling tips.
- Keep batteries in a ventilated, temperature-stable enclosure; use simple desiccants or small dehumidifiers where moisture is a concern.
The Bottom Line: Is a 2kW solar system right for your shed?
A 2kW solar system for shed makes sense if your daily energy need is typically under ~6 kWh and your peak loads stay under ~3 kW. It’s a good starting point for lighting, refrigeration, electronics, and intermittent power-tool use. If you need continuous heavy loads (space heating, long run-time power tools), plan a larger array, bigger inverter, or hybrid generation. The system scales: start with the panels and inverter, then add battery capacity later to spread cost.
Can a 2kW system run a space heater in a shed?
The short answer: not for long. A typical 1,500 W electric space heater consumes 1.5 kWh for every hour of operation. A 2kW array at 4 peak sun hours yields roughly 6–6.4 kWh usable per day, so running a 1,500 W heater for three hours would use nearly all daily production. For heating, use efficient options instead: insulation, a small propane heater, or a wood stove. If electric heat is required, consider a larger array and battery bank or a hybrid system with a generator.
How many batteries do I need for 24-hour power?
It depends on daily kWh needs and battery chemistry. Example: If you need 6 kWh/day and want 2 days autonomy, you need 12 kWh usable. With LiFePO4 at 90% DoD, that's ≈13.3 kWh nominal (about 277 Ah at 48 V). With lead-acid at 50% DoD, you'd need ≈24 kWh nominal. Translate nominal kWh to the number of battery modules based on the Ah and voltage rating of the batteries you choose.
Do I need a permit to install solar on a shed?
Permit requirements vary by local authority. Many jurisdictions require electrical permits and inspections for any PV system with permanent wiring or grid interconnection. If the shed is in a homeowner association area, additional approvals may be needed. Confirm requirements before buying equipment and consult local building/electrical departments. When in doubt, hire a licensed electrician for final hookup and sign-off.
What inverter size do I need for power tools?
Choose an inverter with continuous output at or above your expected continuous tool load, and with surge capacity to handle motor starts. For occasional circular saw or grinder use (1,200–1,500 W), a 3,000 W inverter with a 6,000 W surge rating is common. If using multiple heavy tools simultaneously, add their continuous ratings plus a safety margin of 20–30%.
Can I expand a 2kW system later?
Yes. Design initial layout and charge controller/inverter choices with expansion in mind. Choose an inverter and charge controller that accept extra input or use additional controllers. For battery expansion, match voltage and battery chemistry to existing bank and follow manufacturer guidance for parallel/series additions. Plan physical space and conduit runs for adding panels and batteries to reduce later retrofit costs.