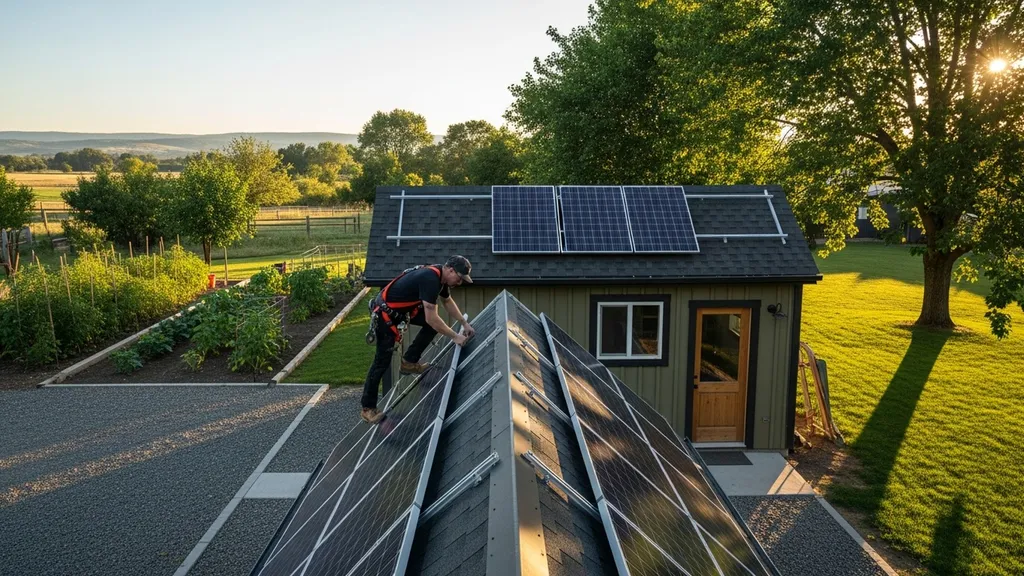
Step-by-step guide to sizing, components, costs, and installation tips for a 1kW solar system for workshop — practical for DIY builders.
1KW Solar System for Workshop: Complete Sizing Guide
A 1kw solar system for workshop is a compact, affordable way to run lights, chargers, and light-duty tools while cutting utility bills or providing backup power. This guide explains how much energy a 1 kW solar system can realistically produce, how to size panels, inverter and batteries, wiring and safety basics, likely costs and payback examples, plus common DIY mistakes and maintenance. Read on to learn practical, tool-level examples and simple worksheets you can use to decide if a 1 kW array fits your workshop needs.
TL;DR:
- A 1 kW solar system typically produces about 3–6 kWh/day depending on location; expect 10–25% system losses so net usable energy is ~2.5–5 kWh/day.
- Do an itemized energy audit (device watts × hours/day → daily kWh), allow 20–30% headroom, then pick panels (≈4×260 W or 3×340 W), an inverter sized 1–1.5× continuous load, and battery capacity sized by usable kWh needs.
- A DIY 1 kW setup focused on lighting and chargers can cost $1,200–$4,000; add batteries for off-grid use ($800–$4,000+), and consider upsizing to 2 kW if you plan to run heaters, large compressors, or welders.
How Much Energy Does a 1KW Solar System Generate for a Workshop?
A nominal 1 kW (1000 W) PV array produces energy based on the site’s peak sun-hours. Peak sun-hours is the equivalent number of hours per day when solar irradiance equals 1000 W/m². A useful rule of thumb: 3–6 peak sun-hours per day yields roughly 3–6 kWh/day at the module nameplate before losses.
- Typical daily kWh output (sun-hours examples)
- Low-sun location (3 PSH): ~3 kWh/day (STC), net ~2.4–2.7 kWh/day after 10–25% losses.
- Average location (4.5 PSH): ~4.5 kWh/day, net ~3.5–4.0 kWh/day.
- High-sun location (6 PSH): ~6 kWh/day, net ~4.5–5.4 kWh/day.
Energy production calculators like the Department of Energy’s guide to sizing a solar system provide localized estimates and are useful to translate nameplate kW into expected kWh/year for your postcode. Research shows system losses from temperature, inverter efficiency, wiring, and soiling commonly range 10–25%, so budget conservatively.
- How location and season change production
- Seasonal variation: production can be 30–60% higher in summer months versus winter in temperate climates. Peak sun-hours drop in winter due to lower sun angle and shorter days.
- Shading: a single shaded panel on a string can reduce whole-string output dramatically unless microinverters or optimizers are used. Orientation and tilt matter: south-facing (northern hemisphere) at tilt roughly equal to latitude gives near-annual optimum.
Practical loads a 1 kW array can support (net usable energy examples):
- LED shop lighting (8 fixtures × 20 W × 8 hours) ≈ 1.3 kWh/day.
- Cordless tool charging (four drill batteries, 1.2 Ah–3 Ah each) ≈ 0.2–0.6 kWh/day.
- Bench drill press (0.5 kW running for 0.5 hours) ≈ 0.25 kWh.
- Small chest fridge (energy-efficient) ≈ 1–2 kWh/day — may be borderline depending on climate and duty cycle.
To reduce electrical lighting demand and extend system usefulness, consider passive daylighting like solar tubes; see our guide on how to install solar tubes step-by-step guide for practical measures that cut lighting load.
How to Size a 1KW Solar System for Your Workshop: Step-by-step
This section gives a simple worksheet method plus worked examples so you can see whether a 1 kW array meets your needs.
- Performing a simple workshop energy audit
- List devices: write down each device, rated watts, and expected hours per day.
- Multiply watts × hours → device daily Wh. Sum and convert to kWh (Wh ÷ 1000).
- Add 20–30% contingency for inefficiencies and future small loads.
Example worksheet row:
- 2 × LED shop lights: 2 × 40 W × 6 h = 480 Wh → 0.48 kWh/day
- Battery charger: 60 W × 2 h = 120 Wh → 0.12 kWh/day
- Converting watts to daily kWh and matching it to a 1kW array
- Formula: daily kWh needed ÷ expected net kWh/day from 1 kW array = fraction of day you’ll be covered.
- Worked example A — Basic woodworking bench:
- LED lights 1.2 kWh, dust extractor (0.75 kW × 0.5 h) = 0.375 kWh, charger & small tools = 0.3 kWh → Total ≈ 1.875 kWh/day.
- If your 1 kW array nets ~4 kWh/day (average sun), it covers these loads with room for growth.
- Worked example B — Electrician’s workshop with compressor/heater:
- Small compressor (1.5 kW) running 1 h/day = 1.5 kWh, space heater (1.5 kW) used even briefly quickly overwhelms a 1 kW system. Heaters and high-duty compressors are generally infeasible on a sole 1 kW array.
- Accounting for inefficiencies, duty cycles and future loads
- Duty cycle: a tool with high surge but low run time (e.g., circular saw) still draws significant energy in short bursts; sizing the inverter and battery must consider surge capability.
- Round up: if audit gives 1.8 kWh/day, plan for 2.2–2.5 kWh/day to allow for cloudy days and inefficiencies.
- For detailed lighting calculations, use the off-grid lighting calculator approach to refine lamp counts and run-times.
Helpful related reads: the cabin sizing reference and our small cabin planning guide how to build a small cabin complete guide have worked audits for compact buildings with similar load mixes.
Component Selection for a 1KW Solar System for Workshop
Choose parts that match your energy needs, site, and budget. Below are concrete recommendations for panels, inverters, and mounting.
- Choosing panels: wattage, count, and layout
- Panel count examples to reach ~1 kW:
- 4 × 260 W panels = 1,040 W nominal
- 3 × 340 W panels = 1,020 W nominal
- Panel type: monocrystalline panels offer slightly higher efficiency and smaller footprint. Polycrystalline panels are often cheaper per watt.
- Check specs: review STC wattage, temperature coefficient, and mechanical load rating. For low budgets, see our list of budget panel options.
- Orientation/tilt: flush roof mounts on a workshop roof should match roof pitch where possible; for optimal annual yield, tilt close to your latitude. For roof vs ground mount decisions, factor access, shading, and theft risk. For help matching panel form factor to common roofs, see how to choose solar panels that match your roof.
- Certifications: prefer IEC 61215 / IEC 61730 certified modules; our explainer on solar panel certifications explained covers warranty and durability implications.
- Inverter and charge controller options
- Inverter sizing: pick an inverter rated at 1–1.5× your maximum continuous AC load. For a pure 1 kW system, a 1500 W pure-sine inverter provides headroom for small surges. If you expect to run a 1.2 kW tool, choose a 2 kW inverter to avoid tripping.
- Off-grid systems: use an inverter with built-in charger if you need AC charging from a generator or grid. For grid-tied small systems, microinverters or a small string inverter are common.
- Charge controllers: for battery-based systems, MPPT charge controllers are usually worth the extra cost over PWM for higher efficiency and better voltage matching. On small rooftop arrays, MPPT improves energy harvest under partial shading and varied panel temps.
- For best practices in off-grid installation and commissioning, see NREL’s installation, operations, and maintenance of off-grid solar systems.
- Racking, roof vs ground mount and site considerations
- Racking: choose an aluminum rail system for roof mounts; ensure flashing and roof penetrations are done per manufacturer instructions.
- Shading: avoid even small, transient shade on panels. Use string layouts or microinverters/optimizers if shading can’t be avoided.
- Security and theft: panels and rails should be secured with tamper-resistant hardware if theft is a local concern.
Battery Storage and Off-grid Options for a 1KW Solar System for Workshop
Decide whether batteries are needed and size them for autonomy and depth-of-discharge.
- Sizing a battery bank (kWh and Ah) for workshop use
- Basic math: Required battery kWh = desired usable kWh ÷ allowable depth of discharge (DoD).
- Example: If you want ~3 kWh usable for overnight workshop use and choose LiFePO4 with 90% usable DoD, battery bank ≈ 3.3 kWh (round up to 4 kWh for buffer). For lead-acid (usable DoD ~50%), a 6 kWh nominal bank would be required.
- Convert to Ah: Ah = (kWh × 1000) ÷ battery nominal voltage. Example: 4 kWh at 48 V → (4000 ÷ 48) ≈ 83 Ah.
- Battery chemistry choices: lead-acid, AGM, LiFePO4
- Lead-acid (flooded or AGM): lower upfront cost but shorter cycle life, deeper maintenance needs, and lower usable DoD. Lead-acid banks require ventilation for flooded types.
- LiFePO4: higher upfront cost but longer cycle life, higher usable DoD, better efficiency, lighter weight, and simpler maintenance. For DIYers who prefer lower maintenance and longer lifespan, LiFePO4 often provides better lifecycle cost despite higher price.
- Consider C-rate: ensure battery chemistry supports charging/discharging rates required by inverter and loads.
- Grid-tied vs off-grid vs hybrid setup choices
- Grid-tied without batteries: good for daytime-only workshop loads and export credit scenarios; no backup during outages.
- Off-grid with batteries: necessary if you want to run loads at night or be independent from grid; requires correct battery sizing and inverter selection.
- Hybrid: combines grid connection with battery backup for resilience—helps manage larger initial costs while allowing battery-backed runs during outages. For a cost breakdown of adding grid-interactivity or backup generation, see hybrid energy systems cost breakdown.
- For technical guidance on matching PV string voltage to battery and controller requirements, consult how to match solar panel voltage and battery voltage to avoid common design errors.
Include a battery management system (BMS), appropriate enclosures, fire-resistant placement, and local-code-compliant ventilation where required.
Installation, Wiring, and Safety for a 1KW Workshop Solar System
A safe, code-compliant installation protects equipment and people. This section gives a clear wiring path and safety checklist.
- A simple wiring diagram for a 1kW off-grid workshop system
- Single-line flow: PV array → PV combiner / MC4 circuit (if multiple strings) → DC disconnect → MPPT charge controller → Battery bank (with fuses) → AC inverter (with DC disconnect) → AC distribution panel → Workshop loads.
- Include: PV-side DC breaker/disconnect, battery fusing sized to cable ampacity, inverter AC breaker, grounding electrode system, and clear labeling at service entry.
- Consider surge ratings and inverter surge capability for motor start-up.
- Electrical safety: breakers, disconnects, grounding and labeling
- Cable sizing: choose conductor sizes based on current, acceptable voltage drop (<3% for DC runs is a good target for small systems), and ambient temperature; use insulated, UV-rated PV cable outdoors.
- Breakers and fuses: install DC-rated breakers/inline fuses on positive conductors between panels and controller and between battery and inverter per manufacturer guidance.
- Grounding: bond module frames and racks per local code and manufacturer instructions. Use a grounding electrode conductor for the DC system ground if required.
- Labeling: label PV circuits, battery disconnects, and inverter AC circuits per electrical code so first responders can safely isolate systems.
- Permits, inspections and common code points
- Many jurisdictions require electrical permits for PV and battery systems, and building permits for roof penetrations. Plan for inspections and submit equipment datasheets if requested.
- Permitting triggers often include rooftop arrays, battery installations, and grid interconnection. Consult your AHJ (authority having jurisdiction) and a licensed electrician where required.
- For visual learners, watch a practical installation wiring walkthrough. This video demonstrates a compact off-grid 1kW wiring layout, placement, and safety practices: For a visual demonstration, check out this video on 1.2kw off-grid solar system installation:
Costs, ROI, and When a 1KW Solar System for Workshop Makes Sense
Estimate hard costs, run example paybacks, and decide when to stay at 1 kW or upgrade.
- Typical component and installation cost ranges (DIY vs pro)
- Panels: $150–$350 per 260–340 W panel (budget vs premium).
- Inverter: $200–$700 for a quality 1500–2000 W pure-sine inverter.
- Charge controller (MPPT): $150–$400 depending on voltage/current rating.
- Batteries: Lead-acid 4–6 kWh bank $600–$1,200; LiFePO4 4 kWh bank $1,500–$4,000+.
- Mounting, wiring, combiner, breakers: $200–$800.
- Permits and inspection: $100–$500 depending on locality.
- DIY total (panels + inverter + basic mounting, no batteries): around $1,200–$3,000. Adding batteries raises cost by $800–$4,000 depending on chemistry.
- Contractor install: add labor and markup: $1,000–$3,000 extra depending on complexity and region.
- Simple payback examples using local electricity prices
- Example: If a 1 kW array nets 4 kWh/day → ~1,460 kWh/year. At $0.15/kWh, annual savings ≈ $219. If the system cost (DIY, no battery) is $1,800, simple payback ≈ 8–9 years (ignoring incentives).
- Adding batteries improves resilience but increases payback period; factor in incentives, time-of-use rates, and avoided generator fuel costs.
- When to choose 1kW vs upgrade to 2kW or a hybrid system
- Choose 1 kW when primary goals are lighting, phone/drill charging, small tools, and reduced grid draw.
- Upgrade to 2 kW when you expect regular use of 1–2 kW tools, refrigeration, or multiple users simultaneously. For sizing/cost differences and a larger example, see the 2kW shed sizing guide.
- Heavy loads like full-size electric heaters, large air compressors, and welders usually require 2 kW+ arrays or hybrid solutions. For refrigeration alternatives when solar is marginal, see off-grid refrigeration propane vs solar options.
Decision checklist:
- If your audit shows <4 kWh/day and loads are lighting + chargers, 1 kW is cost-effective.
- If you plan continuous 1 kW+ loads or overnight heavy use, plan for a 2 kW array or hybrid design.
Common Mistakes, Troubleshooting and Maintenance for a 1KW Workshop System
Avoid predictable errors and follow a short troubleshooting flow to keep production reliable.
- Top installation and design mistakes DIYers make
- Undersizing for real duty cycles: calculators using nameplate watts only are misleading without hours/day.
- Ignoring shading and orientation: even partial shade reduces output disproportionately.
- Insufficient wire gauge and incorrect fusing: leads to voltage drop and safety hazards.
- Mismatched voltages between panels and the charge controller/battery bank: check datasheets.
- Troubleshooting checklist for poor performance
- Check for shade or dirt on panels; clean if so and remeasure.
- Measure PV open-circuit voltage at midday; compare to expected value from panel datasheets.
- Check charge controller LEDs and error codes, then inverter fault codes. For common inverter fault diagnosis and fixes, consult 5 common solar inverter issues and fixes.
- Test battery voltage and state of charge; aging batteries often reduce available energy unexpectedly.
- Simple maintenance schedule and seasonal checks
- Quarterly: inspect mounts and wiring, remove debris, and clean panels if dusty.
- Annually: test battery capacity and electrolyte levels if flooded lead-acid; inspect BMS logs for LiFePO4.
- Before winter/summer: confirm tilt/angle and check roof penetrations and flashing.
- For low-power additions like security lighting, consider DIY projects such as DIY solar motion sensor light setup that pair well with small systems.
Quick Sizing Checklist, Comparison Table, and Decision Cheatsheet
Use these actionable steps and a compact comparison to finalize your decision.
- Key points checklist (actionable steps)
- Do an itemized energy audit: list device, watts, hours/day, calculate kWh.
- Estimate local peak sun-hours using a solar calculator or energy.gov.au guidance.
- Convert required daily kWh to array size, adding 20–30% headroom.
- Choose panels to reach ~1,000 W nominal (e.g., 3×340 W or 4×260 W).
- Select an inverter sized 1–1.5× peak continuous load and an MPPT controller for battery systems.
- If off-grid, size battery kWh by desired autonomy ÷ usable DoD.
- Pull permits and schedule inspections; label all disconnects.
- Test system under load and monitor performance for 30–90 days.
- Comparison/specs table: typical 1kW component list vs 2kW
| Component | Typical spec for 1kW | Typical spec for 2kW | When to choose |
|---|---|---|---|
| PV modules | 3×340 W or 4×260 W (~1.0–1.04 kW) | 6×340 W or 8×260 W (~2.04–2.08 kW) | 1kW for lights & chargers; 2kW for multiple power tools |
| Inverter | 1500–2000 W pure sine | 3000–4000 W pure sine | Choose larger for motor starts or shared circuits |
| Battery bank (usable) | 2–4 kWh (LiFePO4 3–4 kWh) | 4–8 kWh | More battery for overnight heavy use or multi-day autonomy |
| Charge controller | 20–40 A MPPT | 40–80 A MPPT | Larger arrays need higher-current controllers |
| Expected net kWh/day | 3–5 kWh (varies by sun) | 6–10 kWh | Select based on location and load profile |
- Quick decision flow: Is 1kW enough for your workshop?
- If daily needs ≤ ~4 kWh and loads are lighting, chargers, and occasional small tools → 1 kW is a good, budget-friendly choice.
- If daily needs > ~4–5 kWh, or you plan to run compressors/heaters/welders frequently → consider 2 kW or hybrid systems. See the 2kW shed sizing guide for upsizing details.
- Reduce demand with passive daylighting and efficient LEDs — for passive daylighting ideas, check our guide on ultimate guide to light shelves for passive homes.
The Bottom Line
A 1 kW solar system for workshop is a practical, low-cost entry point for lighting, chargers, and occasional small tools — especially when paired with efficient lighting and modest battery storage. Run a clear load audit, account for system losses, and size inverter and batteries to match duty cycles; upgrade to 2 kW or a hybrid approach when you need sustained high-power loads or overnight heavy use.
Frequently Asked Questions
Can a 1kW solar system run power tools in my workshop?
Yes, but with limits: a 1kW solar system can support light-duty power tools for short periods and charging batteries, especially during sunny days. High-power or continuously used tools (heaters, large compressors, welders) usually require a larger array or hybrid setup; see the "Costs, ROI" and decision cheatsheet sections above.
How many solar panels make up a 1kW system?
Typically 3×340 W panels or 4×260 W panels reach about 1,000 W nominal. Panel count depends on wattage per panel, so check datasheets and your roof space; our "Component selection" section includes layout guidance and links to budget panel options.
Do I need batteries with a 1kW workshop solar system?
Not always: if you only need daytime power and are grid-connected, you can run without batteries. For night use, blackout resilience, or off-grid operation, size a battery bank by dividing desired usable kWh by allowable depth of discharge as described in the battery sizing section.
What is the approximate cost to DIY a 1kW system?
A DIY 1kW system without batteries typically ranges $1,200–$3,000 depending on panel quality and inverter choice; adding batteries increases cost (lead-acid cheaper, LiFePO4 pricier). See the "Costs, ROI" section for component ranges and two payback examples.
How do I protect my 1kW system from weather and theft?
Use certified, weather-rated racking and PV hardware; ensure roof penetrations are flashed correctly and panels are secured with tamper-resistant fasteners. For theft mitigation, mount panels out of easy reach, use lockable junction boxes, and consider monitoring with alarms or remote telemetry.