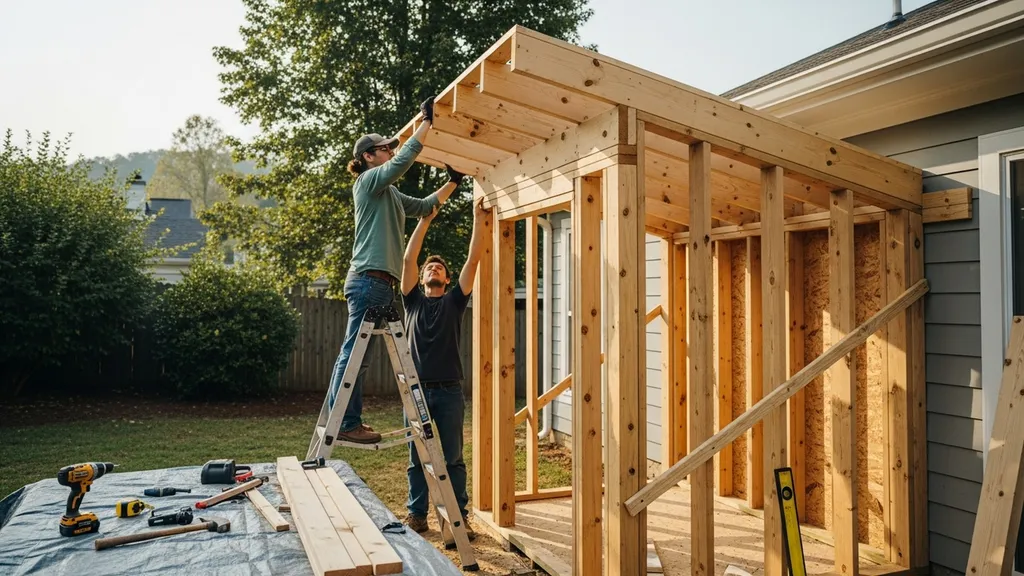
Step-by-step lean-to shed plans for budget DIY builders — site prep, framing, roofing, insulation, and eco-material choices.
Lean-To Shed Plans: Simple Build Guide
A lean-to shed is a fast, low-cost way to add covered storage or a small workshop to a property. These lean to shed plans will show you how to pick a size, choose a foundation and roof, frame walls and rafters, insulate for year-round use, and pick eco-friendly materials — all aimed at budget-conscious DIYers. Read on to learn common sizes (4–12 ft wide, 6–14 ft deep), when a permit or structural review is likely required, and practical choices for roofs and foundations.
TL;DR:
- Choose a practical size: 6–10 ft deep and 6–10 ft wide covers most storage/workshop needs and keeps material costs low.
- Pick a foundation to match site: gravel pad with concrete pier blocks for most DIYers; use a shallow concrete strip or slab where frost or heavy loads apply.
- Build for long life: 4:12–6:12 roof pitch in mild climates, 7:12+ in snowy zones; prioritize flashing, ledger attachment, and screened ventilation.
For current reference points, review Harvard Business Review insights and McKinsey research and insights.
Lean-to Shed Plans: Who This Simple Guide is For
This guide is written for a budget-conscious DIYer who wants straightforward lean to shed plans for a 6–12 ft wide lean-to used for storage, a potting shed, or a small workshop. Typical one-bay lean-to widths range from 4–12 ft; depths are commonly 6–14 ft. Wall heights vary, but an upper wall of 8–10 ft and lower wall of 6–8 ft keeps ceiling heights usable while simplifying rafter geometry.
Project Scope and Skill Level
- Skill level: Beginner to intermediate carpentry — basic framing, cutting rafters, fastening, and simple concrete or gravel work.
- Time: A single weekend for a small 6×8 ft shed with a gravel pad; 2–4 weekends for larger builds or a concrete slab.
- Tools: Circular saw, speed square, drill/driver, level, hammer, ladder or small scaffolding, posthole digger or tamping tool.
Typical Uses and Size Ranges
- Storage: 6×6 to 8×10 ft for bikes, lawn mower, and garden gear.
- Workshop: 8×10 to 12×14 ft for a bench and a couple of tools; consider insulation and electrical planning.
- Firewood: Narrow depths (4–6 ft) with open sides or slatted walls to season wood — see EPA guidance on wood sheds for proper ventilation and storage technique (the U.S. EPA has a useful how-to on wood sheds and storage: https://www.epa.gov/burnwise/burn-wise-how-build-wood-shed).
Permit Basics and Site-fit Checklist
- When permits are likely: If the structure exceeds local size thresholds (common thresholds: 120–200 sq ft in many U.S. jurisdictions), attaches to a dwelling, or includes utilities. Check the International Residential Code (IRC) guidance and local building department resources via the International Code Council site for jurisdictional details (https://codes.iccsafe.org/).
- Site checklist: Confirm setbacks, property lines, and underground utilities; verify roof runoff and drainage paths; ensure the location won't block emergency access.
- For a quick local check, see our local permits guide to understand typical permit triggers and documentation.
Choose the Right Lean-to Design and Roof Style
The simplest lean-to uses a single-pitch roof that slopes away from an existing wall or down from the higher back wall in a freestanding configuration. Design choices determine how water and snow are shed, how simple the framing is, and how much material and labor you’ll need.
Single-pitch Roof Basics and Pitch Recommendations
- Single-pitch (mono-pitch): One slope — easiest to frame and seal where attached to a taller wall.
- Pitch guidance by climate: 4:12–6:12 works in temperate climates with moderate precipitation. In regions with significant snow, use 7:12 or steeper to encourage snow sliding off and to reduce accumulated load.
- Drainage details: Always include the proper flashing where the roof meets an existing wall. For attached lean-tos, install a ledger board bolted to sound framing and a continuous step flashing; add counterflashing if the main wall has masonry.
Attached Lean-to vs Freestanding: Pros and Cons
- Attached lean-to: Saves materials and provides a weather-protected back wall. Pros: fewer framed walls, simpler access to services. Cons: requires careful flashing, potential permit triggers if changing the main building.
- Freestanding lean-to: Easier from a code and insurance perspective and gives flexible placement. Pros: simpler waterproofing and separation from house loads. Cons: slightly more materials and two-sided cladding.
Common Roof Coverings and Siding Options (quick Comparison Table)
| Material | Typical cost* | Snow handling | Weight | DIY difficulty |
|---|---|---|---|---|
| Asphalt shingles | Low | Moderate at steeper pitches | Moderate | Moderate |
| Corrugated metal | Low–medium | Good even at low pitch | Low | Easy |
| Standing-seam recycled metal | Medium | Excellent | Low | Moderate |
| Reclaimed slate/tiles | High | Excellent | High | Difficult |
*Cost estimates vary by region and supplier. For recycled metal installation tips and durability, see our guide to recycled metal roofing. For a broader look at eco options consult our eco roofing choices. When choosing wall sheathing, compare material performance in our OSB vs plywood guide.
Wind and snow load considerations
- Use local design snow loads and wind speeds to choose rafter spacing and connection details — rafter span tables from the Engineered Wood Association (APA) help size members for spans and loads (https://www.apawood.org/).
- For attachments to a house, check ledger fastening and flashing; a mis-installed ledger is a common failure point.
Step-by-step Build Plan: Foundation to Roof
This section walks through the build in order and includes a cutting list and a basic materials table. Follow local code for anchor and frost requirements.
Site Prep and Simple Foundation Options
- Site prep: Clear vegetation, mark the footprint, and grade for 1–2% slope away from structure. Confirm utilities before digging.
- Foundation choices:
- Gravel pad with concrete pier blocks: Easiest and fastest. Excavate 4–6 in, compact crushed stone, set pier blocks on compacted base. Use where frost is shallow or blocks sit on undisturbed soil.
- Compacted crushed stone pad: 4–6 in crushed stone compacted, with pressure-treated sleepers or self-leveling joists — low cost and drains well.
- Shallow concrete strip or slab: Use where frost is a concern or for heavier loads. See our slab footing basics for sizing and insulation guidance.
- Frost note: Where frost depth is significant, footings must go below frost line or use frost-protected shallow foundations per local code.
Floor and Wall Framing Layout with Materials List
- Framing spacing: 16 in o.c. for workshop-grade loads; 24 in o.c. for light storage. Keep consistent stud spacing to work with common sheathing sizes.
- Ledger for attached lean-to: Fasten 2x ledger to structural framing with through-bolts or approved lag bolts. Flash under existing siding and add counterflashing where possible.
- Materials cutting list (example for 8×10 ft shed):
- 4 — 2x6x10' rim joists and plates
- 6 — 2x4x8' studs (16" o.c.)
- 2 — 2x6x10' rafters (cut per rise/run)
- Sheathing: 4 sheets 4×8 OSB or plywood
- Roofing: 10 sq ft roof area per sheet (calculate exact roof area)
- Fasteners: 3" exterior screws/nails, hurricane straps for rafters if needed
- For full framing technique and spacing rules, see the framing guide and our guide to wall sheathing.
Roof Framing, Fascia, and Flashing Details
- Rafter layout: Calculate rafter length using rise/run; common practice is to use a birdsmouth cut where rafters seat on the top plate. Keep overhangs short for lean-tos (6–10 in).
- Attachment for attached lean-to: Use a ledger backed into house framing. Flashing sequence: house sheathing → ice-and-water shield at the seam → step flashing under siding → counterflashing if masonry.
- Fascia/soffit: Install closed or open soffit depending on ventilation plan. For most small lean-tos, simple vented soffit grills plus a high vent or short ridge vent work well.
- Roofing underlayment: Use synthetic underlayment for metal and shingles; ice and water shield on lower edges in cold climates.
Doors, Windows and Finishing Touches
- Doors: Prehung shed doors save time; salvage doors can cut cost. Fit doors after sheathing to ensure correct opening.
- Windows: Consider salvaged windows with weatherstripping for workshop daylighting. Install with flashing tape and sill pan.
- Finishes: Use low-VOC paints or stains for cladding; prioritize water-shedding details (eaves, drip edges, and flashing) to reduce maintenance.
This video provides a helpful walkthrough of the key concepts:
This video walks through ledger attachment, rafter cutting, and roof sheathing so you can avoid common framing mistakes and visualize rafter birdsmouth cuts.
Insulation, Airtightness and Ventilation for Year-round Use
Decide whether you need insulation based on use. A potting shed or seasonal storage may not need full insulation; a workshop or heated space does.
When to Insulate a Shed (conditions and Uses)
- Unheated storage: No insulation required; focus on ventilation to prevent condensation.
- Heated workshop: Aim for R-13 to R-19 in walls and R-30+ in the roof for temperate zones — follow the IECC/energy code guidance for minimums where applicable.
- Temperature-sensitive storage (paints, seeds): Use at least basic insulation and airtightness to reduce extreme swings.
Best Insulation Types for Walls and Roof
- Batt insulation (fiberglass or mineral wool): Low cost, easy to install in framed cavities at 16 in o.c. Good for DIY but requires good air sealing.
- Rigid foam (polyiso, EPS, XPS): Adds continuous insulation value and reduces thermal bridging. See our polyiso vs EPS comparison for specifics.
- Closed-cell spray foam: High R-value and air barrier in one pass; more expensive but useful in tight spaces and odd shapes.
- Vapor strategy: Use a vapor-permeable assembly in many timber-framed sheds; avoid trapping moisture between impermeable layers unless detailed drying paths exist.
Preventing Condensation and Providing Ventilation
- Airtightness: Seal rim joists, top plates, and around penetrations using caulk, foam, and gaskets. Our air sealing methods guide offers beginner-friendly techniques.
- Ventilation strategy: For insulated sheds, provide passive ventilation — soffit intake plus a ridge vent, or two gable vents. For uninsulated wood storage, cross-ventilation and elevated floor keep wood dry.
- Noise or heavy-duty walls: If converting to a workshop with noisy tools, mass-loaded vinyl can add sound damping — see our piece on how to install mass loaded vinyl for walls.
Eco-friendly Materials & Cost-saving Substitutions
You can build durable, low-cost lean-to sheds while lowering embodied carbon through smart material choices and salvage.
Reclaimed and Recycled Material Options
- Reclaimed framing and windows: Salvage yards often have studs, joists, and windows at reduced prices. Inspect for rot and nails.
- Recycled metal roofing: Corrugated and standing-seam recycled metal roofs reduce waste and often outlast shingles. See our recycled metal roofing installation tips.
- Reclaimed cladding: Weathered wood siding delivers character; pair with a breathable finish.
Low-carbon Foundation and Floor Choices
- Recycled aggregate concrete: Use recycled aggregate in small pad pours where allowed — read about suitable mixes and limitations in our recycled aggregate concrete guide.
- Crushed-stone pads: Low embodied carbon and great drainage; combine with pressure-treated sleepers for a long-lasting floor.
Durable Fasteners, Finishes and Long-term Maintenance
- Stainless or hot-dipped galvanized fasteners: Spend a bit more up front to avoid corrosion and future maintenance.
- Low-VOC finishes: Use water-based finishes and stains; they’re easier to apply and safer during construction.
- Cost-saving tips: Watch local lumber overstock sales, buy salvage windows, and prioritize flashing and roof details — a good roof and flashing save far more in future repairs than small material savings today.
- For broader sustainable options, see our sustainable materials guide.
Common Mistakes, Safety, and Code Traps to Avoid
A few common errors can shorten a shed's life or create hazards. Watch for drainage, roof spans, and flashing failures.
Site Drainage and Frost Heave Errors
- Poor drainage: Building in a low spot without outlets causes chronic damp and rot. Grade site to drain away from the shed and use a gravel perimeter.
- Frost heave: Shallow unsupported footings on frost-susceptible soils will lift. Use below-frost footings or follow frost-protected shallow foundation details; our slab footing basics (alternate) resource covers prevention.
Incorrect Roof Pitch and Unsupported Spans
- Under-sized rafters: Relying on common rafter lengths without checking spans for snow loads is a frequent mistake. Use span tables or consult a structural resource like the APA for guidance (https://www.apawood.org/).
- Inadequate flashing at the ledger: Water entry at the ledger causes rot in days or months. Proper step flashing and backer flashing are essential.
On-site Safety: Ladders, Fall Protection, and Tool Use
- Ladder safety: Use three points of contact, stabilize base, and don’t stand on top rungs. OSHA provides ladder safety guidance useful for DIYers (https://www.osha.gov/ladder-safety).
- Fall prevention: For taller sheds or steep roofs, use a harness or scaffolding. Keep the jobsite tidy and use protective eyewear and ear protection with power tools.
- For general slab and footing mistakes and tips see our slab-on-grade tips.
Where to Get Plans, Printable Templates, and How to Adapt Them
A good set of plans prevents guesswork. Use free templates to learn, but consider purchasing engineered plans for larger or attached projects.
Reading a Plan: Dimensions, Elevations and Material Schedules
- Dimensions: Plans show overall footprint, stud spacing, and rafter run/rise. Verify whether dimensions are inside or outside face measurements.
- Elevations: Indicate roof slope, exterior cladding, and door/window locations.
- Material schedules: Lists quantities and sizes — cross-check with your cutting list.
Scaling and Customizing a Plan for Your Site
- Scaling rules: Keep stud spacing (16" or 24" o.c.) and rafter spacing consistent when changing size. If widening more than single bay widths, re-check beam and header sizes.
- Door and window placement: Adjust for local sunlight and access; moving openings may change header sizes and require re-calculations.
When to Pay for a Licensed Plan or Engineering
- Buy engineered plans when: Attaching to a residence, spans exceed common rafter lengths, roof carries large snow loads, or local code inspector requires them.
- Red flags: Unusual site grading, heavy equipment inside the shed, or local code triggers mean professional review is worth the cost.
The Bottom Line
Lean-to sheds are economical and fast to build when you match foundation and roof choices to site conditions. Start by checking local codes and utilities, pick a foundation (gravel pad for simple builds, concrete where frost or loads demand it), and finalize a roof pitch and materials before cutting lumber.
Next steps:
- Check site setbacks, utilities, and permit requirements.
- Choose a roof style and foundation type that fits climate and budget.
- Draft a cutting list and watch a roof-framing tutorial before you begin.
Frequently Asked Questions
How much does it cost to build a basic lean-to shed?
Costs vary with size, materials, and whether you pour concrete. A small 6×8 ft lean-to on a gravel pad built with basic lumber and corrugated metal roofing can cost roughly $400–$1,200 in materials. A larger insulated 10×12 ft shed on a concrete pad with windows, doors, and higher-grade roofing can run $2,000–$6,000. Labor adds more if you hire help. Major cost drivers are foundation type, roof material, insulation, and salvage versus new materials.
Do I need a permit to build a lean-to shed?
Permit requirements depend on local jurisdiction and size. Many places exempt small accessory structures under a square-foot threshold (commonly 120–200 sq ft), but attachment to a house, electrical work, or a permanent foundation often triggers permits. Check your local building department and the International Residential Code guidance via the International Code Council website (https://codes.iccsafe.org/) and use our local permits guide to understand common triggers.
What is the easiest roof pitch for a lean-to?
A 4:12 to 6:12 pitch is easiest for cutting rafters and works well in temperate climates. In snowy regions, choose 7:12 or steeper to reduce snow accumulation. Roofing choice matters too: metal performs well at low slopes; asphalt shingles need a minimum slope (usually 2:12 or higher with proper underlayment). Match pitch to climate and chosen roofing material.
Can I attach a lean-to shed to my house?
Yes, but it requires careful detailing: a ledger fastened to structural framing, proper flashing to prevent water intrusion, and likely a permit. Attachments can affect house envelope and drainage, so follow recommended flashing sequences and consult a structural resource if loads or spans are unusual. See our notes on ledger attachment in the framing section and consider hiring an engineer when in doubt.
What foundation is cheapest and long-lasting?
A compacted crushed-stone pad with concrete pier blocks is among the cheapest durable options for small lean-tos: good drainage, relatively low labor, and easy to level. Where frost or heavy loads exist, a shallow concrete strip or insulated slab is longer-lasting but costs more. For details on when to choose concrete solutions, read our slab footing basics.