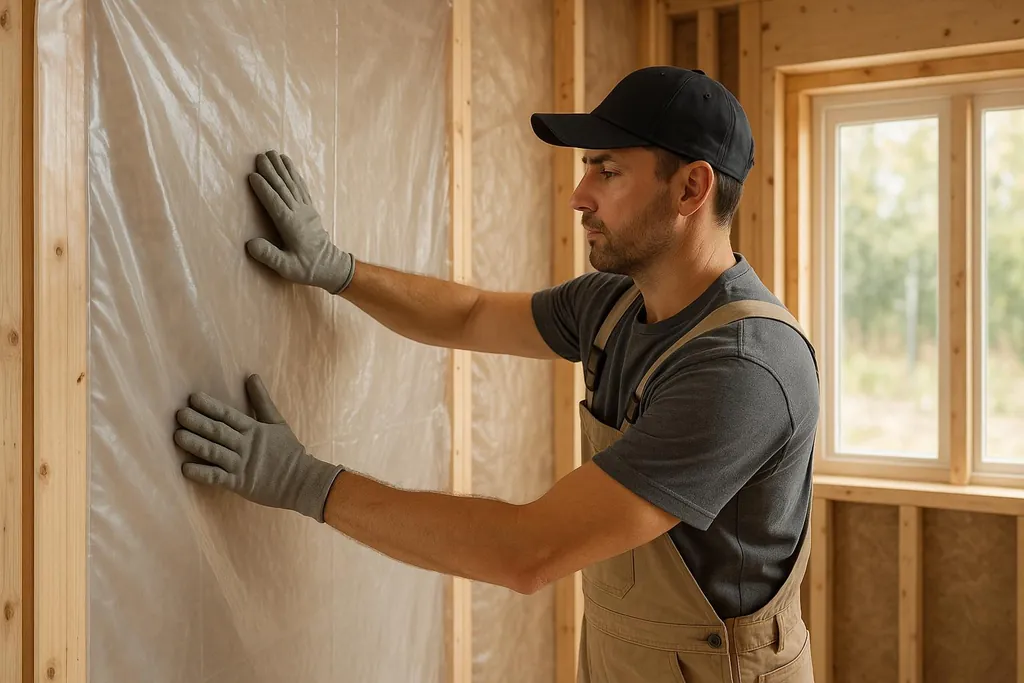
Vapor barriers vs vapor retarders: learn the differences, choose by climate zone, and follow step-by-step wall installation instructions.
Vapor Barrier Installation for Walls: Step-by-Step Guide
Moisture control is essential for protecting your home. A vapor barrier prevents water vapor from seeping through walls, reducing the risks of mold, wood rot, and insulation damage. Here's what you need to know:
Use the Building Climate Zone Lookup before choosing a vapor-control strategy, then test wall-layer assumptions in the Wall Assembly Builder.
- What it does: Vapor barriers block water vapor, improving energy efficiency and indoor air quality.
- Why it matters: Moisture can cause structural damage, increase energy bills, and harm air quality.
- How to install: Proper installation involves choosing the right material, prepping the walls, sealing edges, and ensuring compliance with climate-specific building codes.
Quick Overview
- Materials Needed: Polyethylene sheeting, sealing tape, caulk, and safety gear.
- Key Steps: Clean and prep walls, measure and cut the barrier, seal edges and openings, and secure the barrier tightly.
- Climate Considerations: Placement varies by climate zone - interior for cold climates, exterior (if needed) for hot, humid areas.
By following these steps, you can protect your home from moisture-related problems while improving energy efficiency and comfort.
What Vapor Barriers Do and Why You Need Them
What Are Vapor Barriers?
A vapor barrier is designed to slow down the movement of water vapor through a material, helping to manage moisture while maintaining the performance of walls and other structures [\[2\]](https://www.energy.gov/energysaver/vapor-barriers-or-vapor-retarders).
> "The function of a vapor barrier is to retard the migration of water vapor." - Joseph Lstiburek [\[5\]](https://buildingscience.com/documents/digests/bsd-106-understanding-vapor-barriers)
It's important to note that vapor barriers and air barriers serve different purposes. Vapor barriers control the diffusion of water vapor, while air barriers regulate airflow [\[7\]](https://metalcon.com/blog/air-barrier-vs-vapor-barrier-how-do-they-differ). Together, they create a moisture management system, but they are not interchangeable.
The effectiveness of vapor barriers is measured in "perms", which indicate permeability. The International Residential Code (IRC) categorizes vapor retarders into three classes based on their permeability:
| Class | Permeability (perms) | Examples |
|---|---|---|
| Class I | 0.1 or less | Glass, sheet metal, polyethylene sheet, rubber membrane [\[2\]](https://www.energy.gov/energysaver/vapor-barriers-or-vapor-retarders) |
| Class II | Greater than 0.1 and up to 1.0 | Unfaced expanded or extruded polystyrene, 30-pound asphalt-coated paper, plywood, bitumen-coated kraft paper [\[2\]](https://www.energy.gov/energysaver/vapor-barriers-or-vapor-retarders) |
| Class III | Greater than 1.0 and up to 10 | Gypsum board, unfaced fiberglass insulation, cellulose insulation, board lumber, concrete block, brick, 15-pound asphalt-coated paper, house wrap [\[2\]](https://www.energy.gov/energysaver/vapor-barriers-or-vapor-retarders) |
These classifications not only describe the materials but also highlight their specific uses and benefits.
Vapor Barriers vs. Vapor Retarders: Key Differences
The terms "vapor barrier" and "vapor retarder" are often used interchangeably, but they describe fundamentally different approaches to moisture control. Understanding the distinction is critical to choosing the right product for your project.
A vapor barrier acts like a sealed plastic bag -- it forms a nearly impermeable layer that blocks virtually all vapor diffusion (Class I, 0.1 perms or less). A vapor retarder, on the other hand, slows down vapor movement while still allowing some moisture to escape over time. This controlled drying process helps prevent mold and rot that can develop when moisture gets trapped inside walls.
> "Managing moisture movement is one of the most important considerations when designing the system and selecting products. How the walls move water can make a difference in its longevity, performance, and efficiency, as well as the health of the occupants within." - Benjamin Obdyke
Why the distinction matters: Moisture can find its way into a wall assembly through construction humidity, air leaks, or seasonal changes. A vapor retarder provides an escape route, reducing condensation risks. Vapor barriers, however, can trap moisture if the wall assembly is not perfectly sealed, leading to long-term problems. Research shows that air movement accounts for over 98% of water vapor transport in building cavities, making airtight sealing just as important as the vapor control layer itself.
As building expert Richard Keleher warns:
> "When these systems are not designed and installed properly, they can actually prevent assemblies from drying, which can lead to unwanted moisture intrusion."
Here is a practical comparison of when to use each:
- Use vapor barriers (Class I) in high-moisture areas with direct ground contact: under concrete slabs, in crawl spaces, and in foundation walls. For below-slab applications, high-performance vapor barriers with permeance ratings below 0.01 perms are recommended, complying with ASTM E1745 Class A standards (minimum tensile strength of 45 lbs/in and impact puncture resistance of 2,200 grams).
- Use vapor retarders (Class II or III) for above-grade walls, roofs, and ceilings, where a balance between moisture control and drying ability is essential.
- Avoid pairing Class I vapor barriers with low-permeability cladding materials like brick or concrete, as this combination can prevent walls from drying properly. In southern U.S. zones (Zones 1-3), faced insulation is often unnecessary since moisture tends to migrate inward and the facing can trap vapor.
For mobile and manufactured homes, vapor barriers installed in the underbelly provide protection for insulation, ducts, plumbing, and electrical wiring against moisture, pests, and temperature changes.
Do You Really Need a Vapor Barrier?
Whether you need a vapor barrier -- or a vapor retarder -- depends on your climate, building materials, and wall assembly design. Using the wrong type or placing it incorrectly can actually create moisture problems rather than solve them.
Factors that determine your need:
- Climate zone: Cold climates (Zones 5-8) typically require vapor retarders on the interior side of walls to stop moisture from condensing during winter. In hot, humid areas (Zones 1-2), interior vapor retarders are often avoided to prevent trapping moisture.
- Building assembly type: Framed walls in colder climates typically need a Class I or II vapor retarder on the interior side. However, if the wall includes vented cladding or rigid foam sheathing, the IRC allows for a less restrictive Class III vapor retarder, such as latex paint.
- Material choices: Some materials inherently act as vapor retarders. Foil-faced insulation sheathing functions as a Class I vapor retarder. Kraft-faced insulation serves as a Class II retarder. Even multiple coats of latex paint can achieve a Class III rating, often meeting building code requirements.
Smart vapor retarders are an excellent option for mixed climates with both cold winters and hot, humid summers. Made from polyamide, these materials adjust their permeability based on humidity levels -- when relative humidity exceeds 60%, they allow more moisture to pass through, helping prevent buildup inside walls. This adaptability makes them suitable across all climate zones, though they are especially valuable in colder zones (5-8) where controlling moisture is crucial.
For below-slab installations, the 2021 IRC requires vapor retarders that meet ASTM E1745 Class A standards, ensuring adequate permeance, tensile strength, and resistance to punctures.
Retrofit solutions for older homes: In older homes where installing sheet plastic is not practical, vapor-retarding paints provide a good alternative. Look for products labeled as vapor diffusion retarders, or choose glossy acrylic paints with a high solids content. Apply multiple coats for best results.
Benefits of Vapor Barriers
Vapor barriers do more than just block moisture - they play a key role in protecting your home. Properly installed, they help manage moisture, improve energy efficiency, enhance indoor air quality, and extend the life of your home [\[8\]](https://polyguard.com/blog/vapor-barrier-code-requirements)[\[3\]](https://budgetdry.com/2023/09/28/the-crucial-role-of-vapor-barriers-in-your-home)[\[10\]](https://www.dannysdrywall.services/news/how-a-vapor-barrier-improves-energy-efficiency).
The primary benefit is moisture control. Vapor barriers prevent condensation inside walls, floors, roofs, and foundations, reducing the risk of structural damage and mold growth [\[8\]](https://polyguard.com/blog/vapor-barrier-code-requirements). Without this protection, moisture can lead to wood rot, metal corrosion, and other costly repairs.
By keeping insulation dry, vapor barriers also improve energy efficiency. Wet insulation loses its ability to resist heat flow, forcing your HVAC system to work harder and increasing your energy bills. A dry, well-insulated home is not only more comfortable but also less expensive to heat and cool [\[3\]](https://budgetdry.com/2023/09/28/the-crucial-role-of-vapor-barriers-in-your-home)[\[8\]](https://polyguard.com/blog/vapor-barrier-code-requirements)[\[10\]](https://www.dannysdrywall.services/news/how-a-vapor-barrier-improves-energy-efficiency).
> "Properly installing vapor barriers (retarders) according to vapor barrier code requirements will minimize or stop water vapor infiltration and exfiltration into a building envelope, provide damp proofing, and enhance the building's comfort, energy efficiency, and long-term integrity." - Polyguard [\[8\]](https://polyguard.com/blog/vapor-barrier-code-requirements)
Another major benefit is better indoor air quality. By preventing moisture buildup, vapor barriers stop mold and mildew before they start, creating a healthier living environment. This is especially important for families with members who have allergies or respiratory issues.
Finally, vapor barriers contribute to the durability of your home. They help prevent moisture-related damage, such as wood decay and metal corrosion, which can lead to expensive repairs. Additionally, they help maintain consistent indoor temperatures, reducing wear and tear on your heating and cooling systems [\[3\]](https://budgetdry.com/2023/09/28/the-crucial-role-of-vapor-barriers-in-your-home)[\[10\]](https://www.dannysdrywall.services/news/how-a-vapor-barrier-improves-energy-efficiency).
Building Code and Climate Zone Requirements
The 2021 IRC and International Building Code (IBC) outline specific vapor barrier requirements based on climate zones [\[8\]](https://polyguard.com/blog/vapor-barrier-code-requirements).
In cold climates (Zones 5, 6, 7, 8, and Marine 4), Class I or II vapor retarders are required inside framed walls [\[8\]](https://polyguard.com/blog/vapor-barrier-code-requirements). These barriers are typically installed on the warm side of the insulation (the interior side of the wall). This placement prevents indoor moisture from reaching cold surfaces inside the wall during the heating season, where it could condense and cause damage [\[7\]](https://metalcon.com/blog/air-barrier-vs-vapor-barrier-how-do-they-differ).
In contrast, warmer climates (Zones 1, 2, and 3) generally don't require vapor barriers [\[8\]](https://polyguard.com/blog/vapor-barrier-code-requirements). In hot, humid areas, using a vapor barrier can sometimes trap moisture, leading to problems. When used, they are typically placed on the exterior side to block outdoor humidity from entering the building [\[7\]](https://metalcon.com/blog/air-barrier-vs-vapor-barrier-how-do-they-differ).
Here's a breakdown of vapor retarder requirements by climate zone:
| Climate Zones | Class I | Class II | Class III |
|---|---|---|---|
| 1, 2 | Not permitted | Not permitted | Permitted |
| 3, 4 (except Marine 4) | Not permitted | Permitted | Permitted |
| Marine 4, 5, 6, 7, 8 | Permitted | Permitted | See Table R702.7 [\[8\]](https://polyguard.com/blog/vapor-barrier-code-requirements) |
Incorrect placement of vapor barriers can trap moisture, causing damage to wall assemblies [\[5\]](https://buildingscience.com/documents/digests/bsd-106-understanding-vapor-barriers)[\[8\]](https://polyguard.com/blog/vapor-barrier-code-requirements). For this reason, it's crucial to consult your local building inspection office to ensure compliance with area-specific requirements. Even within the same region, climate conditions can vary, and local codes may have additional rules based on environmental factors.
Vapor barriers are most effective in areas with large seasonal differences in temperature and humidity [\[7\]](https://metalcon.com/blog/air-barrier-vs-vapor-barrier-how-do-they-differ). If you live in a region with mild, stable weather, you might not need a vapor barrier at all. In such cases, a more breathable Class III vapor retarder could be a better option than a Class I barrier.
Understanding these climate-specific requirements is essential for ensuring a proper and effective installation. This knowledge will help you avoid common pitfalls and set you up for success as you move forward.
Choosing the Right Vapor Retarder by Climate Zone
How to Find Your Climate Zone
To determine your specific climate zone, start by consulting the DOE's IECC/ASHRAE Climate Zone Map. This map is organized by county and divides the U.S. into eight numbered zones based on temperature, with subcategories for moisture conditions: A (moist), B (dry), and C (marine). You can search for your climate zone online using your ZIP code or county. Alternatively, reach out to local building officials for confirmation, as local codes may include additional vapor retarder requirements beyond the baseline IRC standards.
Climate Zone Characteristics
| Climate Zone | Temperature Range | Moisture Pattern | Primary Concern |
|---|---|---|---|
| 1-2 | Hot year-round (avg. >70 degrees F) | High humidity, inward vapor drive | Outdoor moisture entering walls |
| 3-4 (Mixed) | Moderate (avg. 50-70 degrees F) | Variable humidity, seasonal changes | Both inward and outward moisture movement |
| Marine 4 | Mild, wet winters (avg. 45-60 degrees F) | High humidity, outward winter vapor drive | Condensation in wall cavities during heating season |
| 5-8 | Cold to very cold (avg. less than 50 degrees F) | Low humidity, strong outward vapor drive | Interior moisture condensing on cold surfaces |
Zones 1-2: Hot and Humid Regions
In regions like southern Florida, coastal Texas, and Hawaii, vapor retarders are generally unnecessary. Moisture tends to move from the warm, humid outdoors into cooler, air-conditioned interiors. Using the wrong vapor retarder here can trap moisture inside walls, potentially causing condensation, mold, and structural damage.
If a vapor retarder is needed in these zones, opt for Class III materials such as latex or enamel paint on gypsum board, or Class II options like kraft-faced insulation batts. Avoid Class I vapor retarders (polyethylene film, aluminum foil) on the interior side of above-grade walls. As the Insulation Institute explains:
> "In the warmer climate zones, installing vapor retarder with a very low perm rating on the interior of a wall assembly can lead to moisture problems."
Zones 3-4: Mixed and Marine Climates
In mixed and marine climates, moisture movement changes with the seasons. The IRC does not mandate vapor retarders for mixed climates, but if one is used, stick with Class II or Class III materials and avoid Class I vapor retarders on the interior side.
Marine Zone 4, including cities like Seattle and Portland, has specific requirements. The IRC calls for a Class I or Class II vapor retarder on the interior side of frame walls. Alternatively, a Class III retarder may be used if certain construction measures are in place, including vented cladding over wood structural panels or continuous insulation with an R-value of at least R-2.5 for 2x4 walls or R-3.75 for 2x6 walls.
Zones 5-8: Cold Climates
In colder areas spanning the northern Midwest to Alaska, warm indoor air moves toward the freezing exterior, which can lead to condensation on cold sheathing. The IRC requires Class I or Class II vapor retarders on the interior side of frame walls in these zones.
For robust moisture protection, use Class I vapor retarders like 6-mil polyethylene sheets or foil-faced insulation. When using exterior insulation, there is some flexibility: with sufficient exterior insulation (R-2.5 to R-12.5, depending on the zone), a Class III retarder such as latex paint may be sufficient, as the insulation helps keep wall cavities warm and reduces the risk of condensation. If you are using foam plastic insulated sheathing with a Class I or II retarder, consider choosing a "smart" vapor retarder that adjusts its permeability based on humidity levels. Note that vapor retarders are not required for basement or below-ground walls.
Vapor Retarder Materials: Quick Reference by Class
| Class | Perm Rating | Examples | Best Climate Zones |
|---|---|---|---|
| Class I | 0.1 perms or less | 6-mil polyethylene sheets, aluminum foil, sheet metal, foil-faced insulation | Zones 5-8 (cold climates), interior placement |
| Class II | 0.1 to 1.0 perms | Kraft-faced insulation, asphalt-coated paper, vapor-variable membranes | Zones 3-4 (mixed), Marine 4 |
| Class III | 1.0 to 10 perms | Latex or enamel paint, unfaced fiberglass insulation, housewraps | Zones 1-2 (hot/humid), also permitted in all zones |
Do You REALLY Need a Vapor Barrier? What You NEED To Know Before Insulating Your Home
Do you need a Vapor Barrier or Vapor Retarder?
Tools, Materials, and Getting Ready
Tools and Materials You'll Need
Having the right tools and materials on hand makes installing a vapor barrier much smoother. A little preparation goes a long way in ensuring the process goes off without a hitch[\[1\]](https://home.howstuffworks.com/home-improvement/repair/best-way-to-apply-vapor-barrier-in-an-inside-wall-on-a-house-with-cement-brick-exterior-walls.htm).
For tools, gather a utility knife to cut the vapor barrier material and a staple gun to attach it securely to the wall framing. A tape measure is essential for precise measurements, and chalk or a line marker will help you mark cutting lines. Keep a pair of scissors or shears nearby as a backup cutting tool. A caulking gun will also be useful for applying sealants around edges or penetrations.
On the materials side, you'll need the vapor barrier itself. Options include polyethylene plastic sheeting (the most common choice), foil-backed paper, or metalized film[\[1\]](https://home.howstuffworks.com/home-improvement/repair/best-way-to-apply-vapor-barrier-in-an-inside-wall-on-a-house-with-cement-brick-exterior-walls.htm). For most residential projects, 6-mil polyethylene sheeting is a popular option, balancing durability and cost. You'll also need sealing tape made for vapor barriers and either acoustic sealant or caulk to seal any gaps or penetrations[\[1\]](https://home.howstuffworks.com/home-improvement/repair/best-way-to-apply-vapor-barrier-in-an-inside-wall-on-a-house-with-cement-brick-exterior-walls.htm).
Don't forget safety gear. Grab safety glasses, work gloves, a dust mask, and knee pads to protect yourself during installation. It's also wise to have a little extra material on hand to ensure proper seam overlap.
Once you've gathered everything, it's time to prep the wall surface for a strong and effective installation.
Preparing the Wall Surface
A clean, smooth wall is critical for the vapor barrier to function effectively. Start by removing any dust, dirt, or debris from the surface. Use a stiff brush or a vacuum to clear out corners and crevices, where debris often hides[\[1\]](https://home.howstuffworks.com/home-improvement/repair/best-way-to-apply-vapor-barrier-in-an-inside-wall-on-a-house-with-cement-brick-exterior-walls.htm)[\[11\]](https://www.pureecoinc.com/how-to-install-a-vapor-barrier-full-guide).
Inspect the wall for imperfections. Fill small holes with spackling compound, and use wood filler or caulk for larger gaps. Sand down any rough spots or nail protrusions that could puncture the barrier during installation[\[1\]](https://home.howstuffworks.com/home-improvement/repair/best-way-to-apply-vapor-barrier-in-an-inside-wall-on-a-house-with-cement-brick-exterior-walls.htm)[\[12\]](https://todayshomeowner.com/foundation/guides/how-to-apply-vapor-barriers-when-framing-basement-walls).
Make sure the wall and floor surfaces are completely clean, dry, and free of moisture[\[11\]](https://www.pureecoinc.com/how-to-install-a-vapor-barrier-full-guide). Trapped moisture behind the barrier can lead to mold or structural issues. If you're working in a damp space, like a basement, consider using fans or a dehumidifier to dry the area thoroughly.
Before installing the vapor barrier, check that your insulation is properly in place. Insulation should fit snugly between the studs without sagging or being overly compressed, as air pockets can reduce the effectiveness of your moisture control system.
For extra protection in high-moisture areas, such as basements or bathrooms, applying a coat of waterproof paint or sealant to the walls can add an additional layer of defense. While not always necessary, it's a step that can provide added peace of mind[\[12\]](https://todayshomeowner.com/foundation/guides/how-to-apply-vapor-barriers-when-framing-basement-walls).
Once the surface is prepped, it's time to consider where the vapor barrier should go based on your climate zone.
Choosing the Right Vapor Barrier Placement
The placement of your vapor barrier depends on factors like your climate, insulation type, and local building codes. Getting this right is essential for effective moisture control[\[13\]](https://www.impactcrawlspace.com/vapor-barrier-installation).
In cold climates, the vapor barrier should go between the insulation and the interior drywall. This placement prevents indoor moisture from condensing on cold surfaces within the wall[\[14\]](https://insulationinstitute.org/im-a-building-or-facility-professional/commercial/installation-guidance/managing-moisture-in-commercial-construction/vapor-retarders)[\[9\]](https://insulationinstitute.org/im-a-building-or-facility-professional/residential/installation-guidance-2/moisture-management/vapor-retarders).
In humid climates, if a vapor retarder is necessary, it should be installed on the exterior side of the wall. However, in southern zones (Zones 1-3), vapor barriers are generally not required, according to the 2021 International Residential Code[\[8\]](https://polyguard.com/blog/vapor-barrier-code-requirements)[\[14\]](https://insulationinstitute.org/im-a-building-or-facility-professional/commercial/installation-guidance/managing-moisture-in-commercial-construction/vapor-retarders).
For colder regions, such as Zones 5-8 and Marine Zone 4, the code recommends using Class I or II vapor retarders inside framed walls[\[8\]](https://polyguard.com/blog/vapor-barrier-code-requirements). The table below summarizes these recommendations:
| Climate Zone | Vapor Barrier Recommendations |
|---|---|
| Zones 1‑3 (Hot and Humid) | Vapor barriers are generally NOT recommended on the interior side of walls[\[13\]](https://www.impactcrawlspace.com/vapor-barrier-installation) |
| Zones 4‑8 (Mixed and Cold) | A Class I or II vapor barrier is often recommended on the interior side of walls[\[13\]](https://www.impactcrawlspace.com/vapor-barrier-installation) |
| Marine 4 Zone (Coastal areas with high humidity) | Class I or II vapor barriers are also advised on the interior side of walls in this zone[\[13\]](https://www.impactcrawlspace.com/vapor-barrier-installation) |
Remember to install the vapor barrier on only one side of the wall. Installing barriers on both sides can trap moisture, leading to long-term issues like mold or structural damage[\[5\]](https://buildingscience.com/documents/digests/bsd-106-understanding-vapor-barriers).
Since building codes and conditions can vary, it's a good idea to consult your local building department to ensure your installation meets all requirements and avoids costly mistakes.
Step-by-Step Vapor Barrier Installation
Measuring and Cutting the Vapor Barrier
Start by measuring the wall at multiple points to ensure accuracy. Use chalk to mark the vapor barrier and cut it slightly larger than the measured area. This gives you enough material for proper overlap. A straightedge can help keep your markings clean and precise, and planning your cuts ahead of time reduces waste.
When cutting, use a sharp utility knife on a large, flat surface. Support the material on both sides of the cut line to avoid tears or jagged edges.
Sealing the Edges and Openings
Once the barrier is cut to size, focus on sealing its edges. Use vapor barrier tape or caulk to secure all perimeters and overlaps, ensuring a minimum 6-inch overlap at seams. For areas where two pieces meet, overlap by at least 6 inches and seal with tape or adhesive for a tight bond [\[15\]](https://www.stegoindustries.com/blog/how-to-successfully-install-an-under-slab-vapor-barrier).
Special attention is needed for penetrations like electrical outlets, pipes, or windows. Use tapes or sealants designed specifically for these areas [\[6\]](https://www.thisoldhouse.com/walls/87464/vapor-moisture-barriers). For pipes, seal each one individually with appropriate tape or a mastic sealant, especially if the pipes are close together [\[15\]](https://www.stegoindustries.com/blog/how-to-successfully-install-an-under-slab-vapor-barrier). According to ASTM E1643 standards, all terminated edges must be sealed to the building foundation [\[15\]](https://www.stegoindustries.com/blog/how-to-successfully-install-an-under-slab-vapor-barrier). Options for sealing these edges include claw tape, double-sided tape, or mastic sealant.
Installing and Securing the Vapor Barrier
With the edges sealed, you're ready to attach the barrier to the wall. Start at the bottom and unroll upward. Staple the barrier every 6 to 8 inches, and add extra reinforcement at penetrations using butyl tape or compatible sealants [\[11\]](https://www.pureecoinc.com/how-to-install-a-vapor-barrier-full-guide)[\[16\]](https://michiganbasements.com/resources/blog/how-to-install-a-vapor-barrier).
For areas requiring additional support, like wall supports or piers, double-sided butyl tape can provide a strong, moisture-resistant bond [\[17\]](https://basementwaterproofingscientists.com/crawlspace-vapor-barrier-installation). Make sure the barrier covers the entire area without leaving gaps and stays tight and wrinkle-free. Once installed, do a quick inspection and reapply staples or sealant where needed. Also, verify that the installation meets the climate zone and code requirements you determined earlier.
Final Check and Repairs
Carefully inspect all seams, edges, and penetrations for any gaps or loose areas. Reinforce these spots with additional staples or adhesive as needed [\[17\]](https://basementwaterproofingscientists.com/crawlspace-vapor-barrier-installation). Confirm that all seams have the required 6-inch overlap and are fully sealed with tape or adhesive [\[16\]](https://michiganbasements.com/resources/blog/how-to-install-a-vapor-barrier). Double-check penetrations around pipes and outlets to ensure there are no gaps, leaving your vapor barrier installation secure and effective.
EASY INSULATION AND VAPOUR BARRIER DIY
Common Problems and How to Fix Them
After finishing the installation process, it's important to tackle a few common issues to ensure your vapor barrier works as intended.
Preventing Wrinkles and Gaps
Wrinkles and gaps can significantly reduce the effectiveness of your vapor barrier by allowing moisture to seep through. Even minor imperfections can create weak spots that compromise the barrier's performance [\[13\]](https://www.impactcrawlspace.com/vapor-barrier-installation).
To avoid this, maintain a temperature of at least 60°F for both the vapor barrier material and the primer. This helps prevent stiffness and ensures proper adhesion [\[18\]](https://www.versico.com/Resources/Media/Blog/2023/11/10/Top-AVB-Installation-Errors)[\[19\]](https://www.carlislesyntec.com/en/Resources/Media/Blog-Landing-Page/TecTopics/2024/01/24/AVB-Installation-Errors). If temperatures are lower, use approved warming equipment to keep the materials flexible. Cold materials are more prone to tearing and may not adhere properly.
When applying the barrier, use the correct rolling tools. A 100- to 150-lb roller works well for horizontal surfaces, while a hand roller is better suited for vertical walls. For seams, a seam roller is essential to create a tight, moisture-resistant bond [\[18\]](https://www.versico.com/Resources/Media/Blog/2023/11/10/Top-AVB-Installation-Errors)[\[19\]](https://www.carlislesyntec.com/en/Resources/Media/Blog-Landing-Page/TecTopics/2024/01/24/AVB-Installation-Errors).
Proper surface preparation is just as critical. Always prime vertical and non-metal surfaces before installing the vapor barrier membrane. Concrete surfaces should be allowed to dry naturally - avoid methods like "torch drying" or "force drying", as these can create uneven surfaces and weaken adhesion [\[18\]](https://www.versico.com/Resources/Media/Blog/2023/11/10/Top-AVB-Installation-Errors)[\[19\]](https://www.carlislesyntec.com/en/Resources/Media/Blog-Landing-Page/TecTopics/2024/01/24/AVB-Installation-Errors).
Once you've addressed these basics, focus on sealing particularly tricky areas.
Sealing Tricky Areas
Corners, electrical outlets, and plumbing penetrations often need extra care to ensure a proper seal. For electrical outlets and switches, remove the cover plates, seal gaps between the box and drywall with caulk, and reinstall the plates using gasket seals for added airtightness [\[21\]](https://basc.pnnl.gov/resource-guides/air-sealing-electrical-wiring).
Ceiling-mounted electrical boxes can be especially problematic, as leaks here bypass insulation entirely. Use fire-retardant caulk to seal around the base and any openings in the box [\[20\]](https://gesealants.com/projects-howtos/12-tips-for-air-sealing-electrical-boxes-outlets-and-wiring).
When dealing with wiring or small holes in exterior walls, use caulk or canned spray foam to fill gaps. Painter's tape can help you achieve clean lines, and foam should be applied evenly. For larger holes, apply the foam in layers, letting each layer partially cure before adding more. This ensures full coverage without leaving gaps [\[20\]](https://gesealants.com/projects-howtos/12-tips-for-air-sealing-electrical-boxes-outlets-and-wiring)[\[21\]](https://basc.pnnl.gov/resource-guides/air-sealing-electrical-wiring).
It's also important to avoid installing double vapor barriers. According to a July 2024 report by Impact Crawlspace, overlapping polyethylene sheeting on kraft-faced insulation can trap moisture, increasing the risk of mold. By avoiding this, callbacks related to moisture issues were reduced by 40% [\[13\]](https://www.impactcrawlspace.com/vapor-barrier-installation).
Comparing Different Sealing Methods
In addition to standard seams, several sealing methods can enhance protection in challenging areas. Butyl tape provides strong adhesion on clean surfaces, while vapor barrier tape is ideal for seaming. For larger openings, low-expanding foam is a reliable choice. When working with irregular shapes or small gaps, caulk or vapor barrier tape can complement these methods effectively. Be sure to trim any excess foam after it has fully cured.
For gaps around electrical boxes, high-quality insulating foam works best. For larger gaps, stick with low-expanding spray foam to avoid overfilling, which can lead to damage [\[20\]](https://gesealants.com/projects-howtos/12-tips-for-air-sealing-electrical-boxes-outlets-and-wiring). Always allow adequate curing time before exposing the seal to environmental conditions.
Eco-Friendly and Energy-Saving Options
Sustainable vapor barriers play a key role in boosting energy efficiency while reducing environmental impact. Considering that buildings contribute to 30% of global raw material use and 40% of greenhouse gas emissions[\[22\]](https://www.wconline.com/articles/97143-sustainable-solutions-eco-friendly-vapor-barriers-in-construction), opting for smarter material choices is essential.
Green Material Options
There are several eco-conscious alternatives to traditional petroleum-based vapor barriers that deliver comparable performance with a reduced environmental footprint. For instance, recycled polyethylene offers the same durability and moisture resistance as standard polyethylene but cuts down on the need for virgin plastics[\[25\]](https://asiccal.com/eco-friendly-crawl-space-materials).
Another option is biodegradable vapor barriers, which break down more easily at the end of their lifecycle, unlike conventional polyethylene that lingers in landfills for decades[\[25\]](https://asiccal.com/eco-friendly-crawl-space-materials). Additionally, linseed oil wax presents a natural, breathable solution, though its long-term reliability still requires further testing[\[23\]](https://www.greenbuildingadvisor.com/question/petroleum-free-vapor-barrier).
When choosing eco-friendly materials, it's also important to look for products with low VOC emissions to ensure healthier indoor air. According to WHO's 2022 data, indoor air pollution is responsible for nearly 3 million premature deaths annually[\[22\]](https://www.wconline.com/articles/97143-sustainable-solutions-eco-friendly-vapor-barriers-in-construction).
Stego Industries offers several sustainable vapor barrier solutions, including StegoHome®, StegoCrawl® Wrap, Pango® Wrap, Stego® Wrap, and Drago® Wrap. These products are NGBS Green Certified, reflecting their commitment to resource efficiency and indoor environmental quality.
> "In the journey towards sustainable construction, looking for product manufacturers that prioritize sustainability can also be an important consideration." > - Tom Marks, Business Development Project Manager, Stego Industries[\[24\]](https://www.stegoindustries.com/blog/6-ways-foudnation-vapor-barriers-contribute-to-residential-green-building-certification)
By using these materials, you not only reduce the environmental toll but also improve your home's overall energy efficiency.
Working with Energy Efficiency Plans
Properly integrating vapor barriers into energy-efficient designs can make a significant difference. In passive house designs, where airtight construction and superior insulation are priorities, vapor barriers are essential for meeting rigorous energy performance standards. For example, Passive House certification limits heating and cooling energy to just 15 kWh/m² annually - roughly one-tenth of what's used in conventional homes[\[28\]](https://www.ecohome.net/en/guides/1120/off-grid-living-blog-a-firsthand-account-of-building-and-living-in-a-remote-area). These homes also demand an air change rate (ACH) of 0.6 or less, compared to older homes that often exceed 10 ACH[\[28\]](https://www.ecohome.net/en/guides/1120/off-grid-living-blog-a-firsthand-account-of-building-and-living-in-a-remote-area). At those airtightness levels you need balanced mechanical ventilation — an HRV or ERV — to bring in fresh air, since natural infiltration is no longer doing the job. The line items add up; our Passive House cost breakdown details where the air-and-vapor system sits in the overall budget.
For off-grid homes, where energy resources are limited, vapor barriers are even more critical. Effective moisture control reduces strain on renewable energy systems, ensuring better overall efficiency.
When selecting a vapor barrier, aim for one rated at 0.01 perms or less to achieve optimal moisture control. A barrier with this rating can cut yearly water vapor transmission by about 90% in a 1,300 sq ft home compared to standard 6-mil polyethylene sheeting[\[27\]](https://www.stegoindustries.com/blog/how-a-below-slab-vapor-barrier-contributes-to-a-high-performance-home).
Installation practices also vary by climate. In colder regions, Class-I or Class-II vapor barriers should be placed on the interior side of walls to combat moisture intrusion. In hot, humid climates, however, interior vapor barriers should be avoided to prevent moisture from becoming trapped[\[26\]](https://thegreencocoon.com/understanding-vapor-barriers).
Long-Term Benefits of Proper Installation
Correctly installing vapor barriers can lower heating and cooling costs by around 15% while also improving indoor air quality by reducing mold and allergen growth[\[22\]](https://www.wconline.com/articles/97143-sustainable-solutions-eco-friendly-vapor-barriers-in-construction). These savings are tied directly to proper installation techniques, as highlighted earlier.
Investing in high-quality vapor barriers aligns with broader environmental goals by creating homes that are healthier, more durable, and energy-efficient. According to the US Department of Energy, effective moisture control also requires sealing air gaps in addition to using vapor retarders[\[2\]](https://www.energy.gov/energysaver/vapor-barriers-or-vapor-retarders).
For homes with concrete slabs, below-slab vapor barriers provide added advantages, such as resistance to radon gas, further enhancing energy efficiency and occupant health[\[27\]](https://www.stegoindustries.com/blog/how-a-below-slab-vapor-barrier-contributes-to-a-high-performance-home).
Conclusion
Installing vapor barriers the right way safeguards your home from moisture-related issues while also improving energy efficiency. When done correctly, it helps prevent problems like mold, wood rot, and structural damage, ensuring your home stays in good condition over the long term[\[29\]](https://koalainsulation.com/richmond/blog/why-is-vapor-barrier-important-with-insulation)[\[4\]](https://www.primetime-energy.com/blog/understanding-vapor-barriers-protecting-your-home-from-moisture).
Success hinges on careful preparation and precision. This includes everything from measuring and cutting the barrier accurately to sealing seams and penetrations without missing a spot. As Wells Concrete puts it:
> "That's why every detail matters in creating an impenetrable barrier. Our technicians adhere to manufacturers' recommendations for installation and detailing, paying special attention to common areas for air leaks, like corners, windows and other building envelope breaks."[\[30\]](https://www.wellsconcrete.com/expertise/sealants-and-restoration/air-barriers)
This attention to detail not only ensures reliable moisture control but also enhances energy efficiency. A well-installed vapor barrier minimizes heat loss and moisture transfer, which can lead to noticeable savings on energy bills[\[29\]](https://koalainsulation.com/richmond/blog/why-is-vapor-barrier-important-with-insulation). To achieve these benefits, it's crucial to seal seams carefully, position the barrier on the correct side of the insulation, and ensure full coverage. Even minor gaps or tears can undermine the system's effectiveness.
Maintaining and inspecting vapor barriers regularly is just as important as proper installation. Routine checks for damage, timely repairs, and maintaining good ventilation can extend the barrier's lifespan and keep it functioning effectively. By controlling moisture, vapor barriers contribute significantly to creating a comfortable, healthy, and energy-efficient environment[\[29\]](https://koalainsulation.com/richmond/blog/why-is-vapor-barrier-important-with-insulation)[\[1\]](https://home.howstuffworks.com/home-improvement/repair/best-way-to-apply-vapor-barrier-in-an-inside-wall-on-a-house-with-cement-brick-exterior-walls.htm).
FAQs
How can I choose the right vapor barrier for my home's climate zone?
Choosing the right vapor barrier for your home starts with understanding your climate zone, as defined by the International Residential Code (IRC), which categorizes the U.S. into eight zones. Here's a quick guide:
- In hot and humid zones (1-3), vapor barriers are generally avoided on the interior side of walls. This helps prevent moisture from getting trapped, which could lead to mold or other issues.
- In mixed and cold zones (4-8), a Class I or Class II vapor barrier is typically recommended for the interior side of walls to manage moisture effectively.
Here's how the two classes differ:
- Class I barriers: These have a permeability rating of 0.1 perms or less and include materials like polyethylene sheets.
- Class II barriers: These range from greater than 0.1 perms to 1.0 perms and include materials such as unfaced polystyrene and asphalt-coated paper.
Make sure to consider your local climate and follow regional building practices to ensure effective moisture control in your home.
What mistakes should I avoid when installing a vapor barrier on walls?
When installing a vapor barrier, there are a few common pitfalls you'll want to steer clear of to ensure it does its job properly. Here's what to watch out for:
- Improper temperature conditions: Keep the temperature in mind. Both the vapor barrier and primer need to be stored and installed in environments above 60°F. Anything colder, and you risk poor adhesion.
- Skipping seam rolling: Don't overlook the importance of a seam roller. Pressing seams firmly together ensures a tight, secure seal.
- Installing over wet surfaces: Walls must be completely dry before installation. Any moisture left behind can weaken adhesion and compromise the barrier's effectiveness.
- Creating a double barrier: Resist the urge to double up. Installing two vapor barriers can trap moisture between layers, potentially causing serious damage.
- Using the wrong material: Not all vapor barriers are created equal. Make sure you're using one that's designed for your specific climate and project needs.
- Poor sealing: Pay extra attention to edges, corners, and any penetrations. A poorly sealed barrier can lead to leaks and moisture problems.
- Ignoring local climate guidelines: The placement of your vapor barrier should be tailored to your region's climate. Misplacement can lead to ineffective moisture control.
Taking care to avoid these mistakes will go a long way in ensuring a proper installation and keeping your walls safe from moisture issues.
How do I make sure my vapor barrier installation meets local building codes?
To ensure your vapor barrier installation meets local building codes, begin by consulting your local building department. Requirements can differ based on your location and climate zone, so this step is crucial. Additionally, reviewing the 2021 International Residential Code (IRC) and International [Building Code](/blog/building-code-checklist-for-toilet-ventilation) (IBC) can provide clarity on vapor barrier standards for your specific area.
Use materials that comply with ASTM standards to guarantee durability and performance. For instance, colder climates often require Class I or II vapor retarders. During installation, follow essential practices like using a vapor barrier with a minimum thickness of 10-mil and overlapping seams by at least 6 inches to ensure a proper seal. Sticking to these steps will help keep your project compliant and effectively control moisture.
What is the difference between a vapor barrier and a vapor retarder?
A vapor barrier (Class I, permeance of 0.1 perms or less) blocks nearly all moisture, making it ideal for high-moisture areas like under concrete slabs, crawl spaces, and foundation walls. A vapor retarder (Class II or III, 0.1-10 perms) slows moisture movement while allowing some drying, making it better suited for walls and roofs in most climates.
Using a vapor barrier where a retarder is needed can trap moisture, leading to mold, rot, and structural damage. In cold climates, interior vapor retarders manage moisture while allowing drying. In hot, humid areas, materials that permit some drying are generally more effective. Always match the product to your climate and building assembly type.
Are smart vapor retarders suitable for all climate zones?
Smart vapor retarders are versatile and can be used across all climate zones, but how well they work depends on the specific climate and the building's design. Made from polyamide, these materials adjust their permeability based on humidity levels -- when relative humidity exceeds 60%, they allow more moisture to pass through, helping prevent buildup inside walls. This makes them especially valuable in colder zones (5-8), where controlling moisture is crucial, but they can also help manage moisture in warmer areas if applied correctly.
When deciding if a smart vapor retarder is the right choice, consider your climate, the type of insulation you are using, and the overall building design. Proper installation is essential to ensure they function as intended under different conditions.
How can I figure out my climate zone to choose the right vapor retarder?
To determine your climate zone, consult the U.S. Department of Energy (DOE) climate zone map, which divides the country into eight zones based on temperature and weather patterns. Zones are further classified by moisture conditions: A (moist), B (dry), and C (marine). You can search by ZIP code or county, or contact your local building officials for confirmation.
For colder zones (5-8), vapor retarders are usually placed on the interior side of walls to stop warm indoor moisture from reaching cold surfaces where it could condense. In warmer, humid zones (1-2), interior vapor retarders are generally avoided. Always ensure the type and placement align with your zone's specific temperature and humidity levels.
What can go wrong if a vapor retarder is installed incorrectly?
Moisture problems can escalate quickly when a vapor retarder is installed incorrectly. Instead of keeping moisture out, it may trap it in places where it does not belong. This can result in mold, mildew, wood rot, and even long-term structural damage. The danger is greater if the moisture has no way to escape or dry. Wet insulation also loses its thermal performance (R-value), resulting in heat loss during winter and heat gain in summer, which increases energy costs.
Preventing these issues starts with careful attention to installation guidelines and selecting materials suited to your specific climate and building needs. A misstep in installing a vapor retarder can cause more damage than it prevents, making proper planning and precise execution absolutely critical.