Step-by-step, beginner-friendly guide to planning, wiring, and testing shed electrical systems — safety, permits, supply options, and materials.
Shed Electrical Wiring: Complete DIY Guide
Bringing reliable power to a backyard workshop changes what you can build: lighting for precise work, outlets for tools, and the option of a heater or compressor. This guide on shed electrical wiring explains how to plan capacity, choose a supply method (feeder, separate meter, or solar), install conduit and wiring safely, protect circuits with GFCI/AFCI devices, and test and document the system so it passes inspection. Readers will get concrete load-calculation examples, material specs, trenching and conduit guidance, and a commissioning checklist that reduces mistakes and rework.
TL;DR:
- Plan loads first: a basic workshop (lights + 4–6 outlets + one large tool) usually fits on a 30–60A feeder; do a simple watts-to-amps calculation before you pick wire.
- Prioritize protection: use GFCI for all outdoor/outlet circuits and AFCI on branch circuits where code requires; bond and ground per NEC and schedule an inspection.
- Choose supply by needs: feeder from the house costs less and supports 120/240V; a separate meter gives independence but costs more; small PV + battery can run lights and chargers during the day.
Shed Electrical Wiring: Overview and Safety Essentials
Shed electrical wiring carries many of the same hazards as house wiring: shock, arc faults, and fire. Electrical failures are a common cause of residential structure fires; U.S. Fire Administration data show that wiring issues are a significant ignition source in outbuildings and garages. Early planning and the right protective devices cut risk: ground-fault circuit interrupters (GFCIs) stop dangerous current paths through people, arc-fault circuit interrupters (AFCIs) help prevent fires from arcing faults, and correctly rated breakers prevent overheating.
Key standards and procedures to reference include the National Electrical Code (NEC), local building codes, and utility company rules. Local variations matter: trench depth, conduit type, and whether NM-B (Romex) is allowed depend on jurisdiction. Contact the local building department before starting and check utility requirements for service upgrades or meter work. Call a licensed electrician for service-level tasks such as new service disconnects, meter installations, or any work over 60A on the main service.
Basic terms to know: feeder (conductors from service to a subpanel), branch circuit (circuit protecting outlets or lights), grounding (connecting equipment to earth), bonding (connecting conductive parts to return path), THHN/THWN (insulated conductor types), and NM-B (Romex).
For a brief primer on pre-work safety and considerations, see this checklist from Summit College about running power to a shed: what to know before you run electrical power to a shed.
Key Points Checklist for Shed Electrical Wiring
Quick-read Safety and Planning Checklist
- Calculate load: Add lighting, outlets, and largest tool wattages; convert watts → amps using V=120 or 240V.
- Choose supply type: Feeder from house, separate meter/service, or solar + battery.
- Select feeder size: Match expected continuous loads and allow 25% margin for future growth.
- Pick protection: GFCI for outdoors, AFCI for branch circuits where required, correct breaker trip curves for motors.
- Plan grounding and bonding: Follow NEC for electrode systems and equipment grounding conductors.
- Trenching and conduit: Call 811 to locate utilities; confirm trench depth with local code.
- Conductor type: THHN/THWN in conduit for exterior runs; NM-B allowed only inside a finished, dry shed as permitted.
- Schedule inspection: Pull permit early; maintain one-line diagram and inspection record.
Essential Permits and Inspections to Confirm Before Work
- Permit pulled: Obtain a building/electrical permit before running feeder or installing a subpanel.
- Plan review: Submit load calculations if required.
- Rough inspection: For underground conduit, bonding, and panel location.
- Final inspection: After terminations, labeling, and protective devices are installed.
For layout guidance that ties into outlet placement and lighting (useful for the checklist above), see these workshop layout ideas. For permit specifics in some jurisdictions, review local permits and inspections.
Planning Shed Electrical Wiring: Load Calculations, Circuits, and Permits
How to Estimate Shed Electrical Load
Start with a list of devices with watt ratings. Example for a 12x20 workshop:
- Lighting: 6 LED fixtures × 30W = 180W
- General outlets: assume 8 receptacles, estimate 1500W diversity (tools not all on at once)
- Table saw: 2000W (large motor)
- Air compressor: 1500W start, 800W run (motor starting loads matter)
Total assumed continuous load ≈ 4,000W. At 120V a single-phase calculation: 4,000W ÷ 120V = 33.3A. For 240V feed (split-phase), 4,000W ÷ 240V = 16.7A. Design feeders for continuous loads as 125% per NEC where applicable and allow for motor starting currents; that pushes recommended feeder to 40–60A for this example.
Convert watts to amps using I (amps) = W (watts) ÷ V (volts). Include diversity: lighting and intermittent tool use rarely run at full load simultaneously, but fixed loads like heaters should be counted as continuous.
Sizing Circuits and Choosing Breakers
Common circuits:
- 120V general-purpose: 15A (14 AWG) or 20A (12 AWG)
- Dedicated 20–30A circuits: for table saws, compressors, or heaters (10 AWG for 30A)
- 240V dedicated: 30–50A for welders, large compressors, or electric heaters
Wire gauge practical guide appears later in the materials section. Match breaker trip amps to conductor ampacity and equipment requirements. For motor loads, account for full-load amps and inrush; use time-delay breakers if needed. For multi-wire branch circuits, ensure proper handle-tied breakers and correct neutral wiring.
Permits, Code References, and Inspection Process
Permits vary by jurisdiction. Pull an electrical permit before excavation or connecting feeders. The NEC provides the baseline standard nationwide; many authorities adopt the most recent code edition with local amendments. Utilities may have specific metering and service application procedures. Use the solar cost calculators if integrating PV into load planning or budget considerations.
When in doubt about code interpretation, request a pre-application meeting with the building department. Pack documentation: single-line diagram, conductor sizes, load calculations, and equipment cut sheets.
For international readers or regionally differing rules, the high-level approach still applies: plan loads, document, and get permits.
Running Power to Your Shed: Supply Options and Pros/cons
Choosing how to feed the shed depends on budget, distance, 240V needs, and desire for independence.
| Supply Option | Typical DIY Capacity | Pros | Cons |
|---|---|---|---|
| Feeder from house (subpanel) | 20–60A common | Lower cost, uses existing service, supports 120/240V | Requires routing, may need service panel space, utility approval for added load |
| Separate meter/service | 60A–200A+ | Metered independent service, higher capacity, separate billing | Higher upfront cost, utility and inspection complexity, trench and meter base required |
| Off-grid solar + battery | Small: 500W–3kW; larger systems possible | No trench to house, daytime operation, backup power option | Limited capacity unless battery bank sized; higher initial cost, requires inverter and battery enclosure |
Feeder-from-house is the most common choice for a DIY workshop under 60A. It typically requires running conduit with three conductors (hot, hot, neutral) and an equipment grounding conductor, then installing a subpanel in the shed. A subpanel allows branch circuits and local overcurrent protection.
If planning PV or battery backup, start with the small workshop solar sizing guide for day-use systems and consult the battery enclosure guide for safe battery housing and ventilation. For mid-sized or higher capacity off-grid designs, the 3kW tiny house solar guide and the 10kW off-grid overview provide scaling examples. For typical DIY feeder runs, expect 20–60A; for permanent, heavily-used workshops with 240V equipment, consider 60–100A and consult an electrician.
This DIY video shows you the hands-on process:
.Step-by-step for Shed Electrical Wiring: Trenching, Conduit, and Cable
Planning the Route and Required Clearances
Plan the path from service to shed with minimal crossing of driveways or future landscape work. Call 811 to locate buried utilities before digging. Maintain separation from gas and sewer per local code. If the route crosses a driveway, use a protective sleeve with rigid conduit under the slab.
Trenching Depth, Conduit Types, and Direct Burial Cable
Typical burial depths (subject to local code): direct-buried UF cable often requires 24 inches of cover, while PVC conduit with THHN/THWN can often be placed at 18 inches; Schedule 80 PVC is used where mechanical protection is needed (near grade and driveways). Check local code—depths can vary.
Conduit options:
- PVC Schedule 40: common, affordable for underground runs not subject to impact.
- PVC Schedule 80: thicker walls, used where extra protection is needed.
- Metallic conduit (EMT/Rigid): provides mechanical protection and can be useful above grade or where required by code.
- Direct burial cable (UF): cheaper and faster to install but harder to re-route and less forgiving for repairs.
Comparison—conduit vs direct burial vs above-ground:
- Conduit: easier to pull/replace conductors, better long-term serviceability.
- Direct burial: lower initial cost, limited changes, needs full depth cover.
- Above-ground rigid conduit: best where frost or obstacles make trenching difficult; requires secure supports.
Pulling Conductors, Splice Boxes, and Weatherproofing
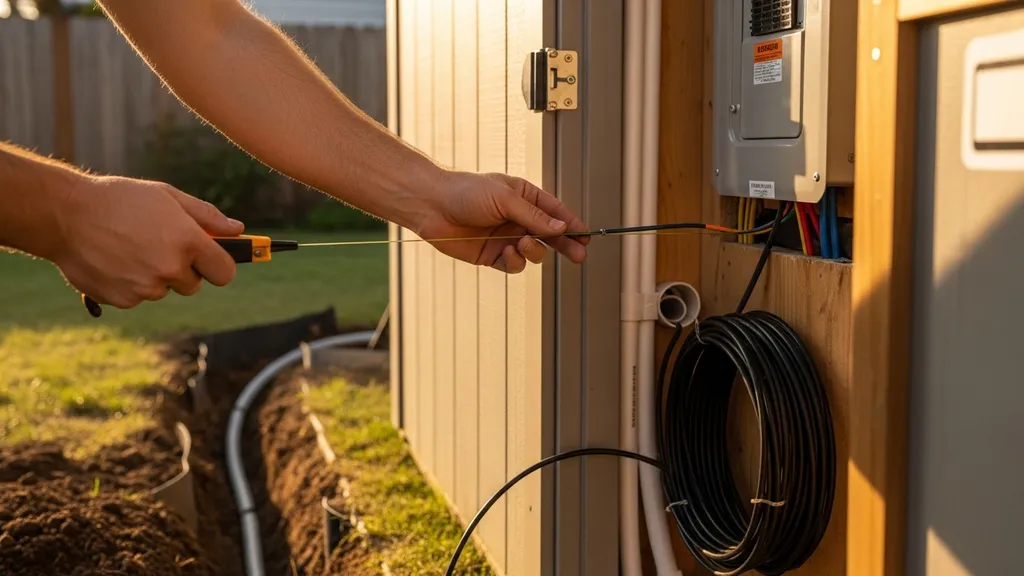
Use fish tape or a conduit puller and lube for long runs. Keep pulls below conductor fill limits. If splices are necessary, use junction boxes rated for the location (buried splices require approved underground splice kits and a readily accessible box). At the shed entry, transition to a weatherproof enclosure and use a drip loop and gaskets to protect against moisture. Where conductors enter the shed wall, seal with foam grommets or caulk and tie into a small service or subpanel.
For wall penetrations where insulation or moisture control matters, consider advice from this exterior wall insulation guide to avoid thermal bridging and to keep enclosures dry.
Installing Circuits in Shed Electrical Wiring: Lighting, Outlets, and Protection
Lighting Layout and Recommended Fixtures for Workshops
Aim for bright, even task lighting. For bench areas, plan 500–800 lumens per square foot of task-level light; overhead LED shop lights (e.g., 4,000–6,000 lumens per fixture) work well. Space fixtures to avoid shadows on benches. Include a dedicated light circuit separate from heavy-load outlets to avoid nuisance trips. Consider motion-sensing or switchable circuits for security lights.
Outlet Placement, Dedicated Circuits, and 240V Considerations
Place general-use outlets every 6–12 feet along work areas; local code for garages often requires outlets within 6 feet of each workbench, and that rule is a useful starting point for workshops. Dedicate circuits to motor-driven equipment: table saw, compressor, and welder should each have a dedicated circuit sized to the nameplate full-load amps. For heavy equipment requiring 240V, a 2-pole breaker and a 2-hot plus ground (and neutral if equipment needs it) are required.
A sample wiring layout: one 20A lighting circuit (12 AWG), one 20A general circuit feeding 4–6 outlets (12 AWG), one dedicated 30A circuit for table saw (10 AWG), and optional 240V 30–50A circuit for welder or heater (8 or 6 AWG depending on amperage).
GFCI and AFCI Protection: Where and Why
GFCI protection is required for most outdoor receptacles and for receptacles in garages and accessory buildings that may be damp. AFCI protection is required by NEC for many branch circuits in habitable and finished spaces to reduce fire risk from arcing faults. Use combination GFCI/AFCI breakers or receptacles where both protections are needed. Test devices during commissioning to verify proper operation.
Choosing Materials and Specs for Shed Electrical Wiring: Wire, Conduit, and Panels
Common Wire Sizes and Breaker Pairings (practical Guide)
This table gives practical guidance—consult the NEC and local inspectors for code compliance.
| Wire Size (AWG) | Typical Amp Rating | Typical Use |
|---|---|---|
| 14 AWG | 15A | Lighting circuits (120V) |
| 12 AWG | 20A | General-purpose outlets (120V) |
| 10 AWG | 30A | Small workshop machines, water heater circuits |
| 8 AWG | 40–50A | Small 240V loads, short feeder runs |
| 6 AWG | 55–65A | Larger feeders, 240V appliances |
Label this as practical guidance; actual ampacity depends on conductor insulation, ambient temperature, and installation method.
THHN/THWN conductors in conduit are standard for exterior feeder runs; NM-B (Romex) is common inside dry, finished buildings. Use individual insulated conductors in conduit for underground feeder conduit entries. For direct burial, UF cable or conductors listed for direct burial are used. Choose copper conductors for best conductivity; aluminum is sometimes used for large feeders but requires anti-oxidation measures and correct lugs.
Panel and Subpanel Selection for Sheds
Small load centers come as main lug or main breaker panels. A main lug subpanel in the shed is common; ensure the neutral and ground are not bonded in a subpanel (keep neutral isolated). Install a main disconnect within or near the shed per utility and code. For weather-exposed equipment, use NEMA 3R or higher rated enclosures. If a meter is required for a separate service, coordinate equipment selection with the utility.
Consider future expansion: pick a panel with extra spaces for breakers and reserve conduit for future PV inverter or EV charging. For cold climates, review the cold climate insulation advice to protect batteries and enclosures.
Sustainable options for enclosures and wiring include low-VOC finishes and long-life fixtures; see the sustainable materials guide for alternatives. For very large inverter or PV systems, consult the 10kW tiny house system for sizing context when selecting feeders and conduit.
Testing, Commissioning, and Troubleshooting Shed Electrical Wiring
Pre-inspection Checklist and Common Tests
- Visual inspection: Verify conductor routing, conduit fill, proper connectors, and labeling.
- Continuity: Check conductors for continuity and correct termination.
- Polarity: Verify hot-to-neutral-to-ground polarity at receptacles and fixtures.
- GFCI/AFCI testing: Use built-in test buttons and an external tester.
- Voltage checks: Measure at the panel and at remote outlets under no-load conditions.
- Panel torque: Tighten lugs to manufacturer torque specs.
Industry testers and multimeters are used for voltage and continuity. If available, use a megohmmeter for insulation resistance testing on long feeder runs.
Using a Multimeter and GFCI/AFCI Testers
A digital multimeter checks line voltage (expect ~120V or ~240V depending on points measured). To check a GFCI, press the test button, then confirm power is cut and the reset works. Use an AFCI/GFCI tester to simulate faults and confirm correct trip behavior. For live testing, follow safe practices: use insulated probes and wear PPE.
Troubleshooting Frequent Issues
Common faults and fixes:
- Loose neutrals: Tighten neutral lugs; loose neutrals cause intermittent power and arcing.
- Incorrect GFCI wiring: Swap hot and neutral if the device won't reset.
- Tripped multi-wire branch circuit (MWBC): Ensure shared neutral is on tie-breaker and breakers are on opposite phases.
- Nuisance trips: Investigate shared loads, harmonic-rich devices, or miswired neutrals.
If wiring interfaces with PV or batteries, consult these solar troubleshooting tips.
Maintaining and Future-proofing Shed Electrical Wiring
Regular Maintenance Tasks and Inspection Intervals
- Annual visual check: Look for corrosion, weather damage, insect nests, and moisture.
- Tighten lugs: Inspect and re-torque main lugs and panel connections annually (manufacturer specs).
- Replace weathered components: Swap cracked conduit, worn receptacles, and degraded seals.
- Label updates: Keep the one-line diagram and circuit labels current.
Upgrading for EV Charging, Larger Tools, or HVAC
Plan conduit and panel space with upgrades in mind. If EV charging or HVAC is likely, consider upsizing the feeder now to avoid trenching again. Leave an empty conduit sleeve for future power lines. Reserve spare breaker spaces and choose a subpanel with room for larger 2-pole breakers.
Preparing Wiring for Solar and Battery Integration
Leave a clear, ventilated area in the shed for an inverter/charge controller and run a conduit stub to the roof or array location. The 1kW tiny house starter is a good model for minimal backup; larger systems should follow battery safety guidance and enclosure requirements in the battery enclosure guide. Dispose of batteries per EPA guidance and local regulations.
The Bottom Line
Plan loads and permits first, then choose the supply method that matches capacity and budget. Use the right conductors, conduit, and protection devices (GFCI/AFCI), document the system, and test thoroughly before final inspection. For service-level changes or systems above typical DIY capacity (over 60A or separate meter work), consult a licensed electrician.
Frequently Asked Questions
Do I need a permit to wire a shed?
Usually yes. Most jurisdictions require an electrical permit for new feeders, subpanels, or any work that alters or extends service. Submit load calculations and a one-line diagram if requested and schedule rough and final inspections. Check with the local building department for exact requirements, and plan to keep the permit record and inspection certificate with your project files.
Can I run Romex (NM-B) to a shed?
NM-B (Romex) can be used inside a dry, finished accessory building if local code permits, but it is not rated for direct burial or exposed outdoor runs. For exterior feeder runs, use THHN/THWN in conduit or UF/direct-burial cable listed for that application. Always check local code and inspector preferences before choosing Romex for a shed.
What size feeder do I need for a 20x10 workshop?
It depends on actual loads. A common DIY workshop with lights, several outlets, and one large tool often fits on a 30–60A feeder. Do a watts-to-amps calculation: total watts ÷ voltage = amps. Include continuous loads at 125% and motor starting currents. If future expansion or a 240V welder is likely, choose a larger feeder now to avoid rework.
Should outlets in a shed be GFCI protected?
Yes—outdoor receptacles and outlets in garages or accessory buildings are typically required to have GFCI protection under the NEC. Where the shed is exposed to moisture or used for power tools, GFCI protection reduces shock risk. Use GFCI breakers or GFCI receptacles and test them during commissioning.
When must I hire a licensed electrician?
Hire a licensed electrician for service-level work such as installing or modifying the service disconnect, meter base, or main panel; for jobs above the local DIY amperage threshold (commonly 60A); or when local code requires it. For complex 240V systems, large motor loads, or when permits insist on licensed contractors, professional help ensures compliance and safety.