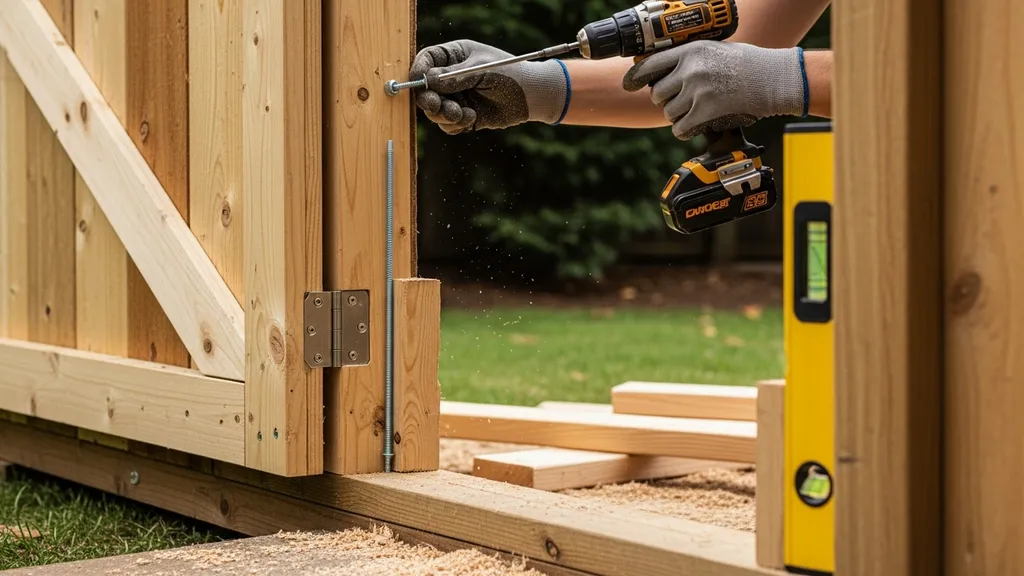
Step-by-step guide to framing, fitting, and hanging a shed door — planning, header sizing, jamb setup, weatherproofing, and common fixes for DIYers.
Shed Door Installation: Framing and Hanging
Installing a shed door correctly saves time, prevents water damage, and keeps the building secure. This guide to shed door installation walks through choosing the right door, sizing and framing the rough opening, building an appropriate header, setting the jamb and threshold, hanging hardware, and weatherproofing so your door works for years. Read on for specific measurements, fastener sizes, material choices, and troubleshooting steps to help a budget-conscious DIYer complete a reliable exterior door install.
TL;DR:
- Add ~2" width and 2–2.5" height to the door slab for a pre-hung rough opening; allow 1/8"–3/16" side gaps and use 3" hinge screws into jack studs for strong attachment.
- Install a sill pan and flashing tape (sill pan first, then side and head flashing) and fill jamb gaps with low-expansion foam to stop water and drafts; prioritize sill pan and screws over cosmetic trim.
- If the opening carries roof or rafter loads, use an appropriately sized header (double 2x10 or 1-1/8" LVL for larger spans); check local span tables or an engineer for loads over typical shed widths.
Planning Your Shed Door Installation: Pick the Right Door and Opening
Choosing the proper door type and planning the opening prevent costly rework. For most DIY sheds, a pre-hung shed door is the fastest route because the jamb, sill, and hardware come factory-aligned. A slab door costs less up front but requires a separate jamb and more precise carpentry to fit. Other options: Dutch doors for ventilation, double doors for wide equipment access, and insulated metal doors for better thermal performance.
Door types for sheds (pre-hung, slab, Dutch, double doors)
- Pre-hung door: Fast install, consistent reveal, includes jamb and threshold.
- Slab door: Lower material cost, needs jamb and mortising for hinges and hardware.
- Dutch door: Good for ventilation and light, more complex trim and threshold detailing.
- Double doors: Use for large openings; require coordinated hardware and stronger headers.
Sizing the Rough Opening and Swing Direction
- Typical door widths: 30", 32", 36". Rough-opening rule-of-thumb for pre-hung units: add ~2" to width and 2–2.5" to height to allow for jamb and shims (measure your specific unit before cutting). For example, a 36" door usually needs a 38" rough opening.
- Gap targets: 1/8"–3/16" per side for exterior doors; 3/8"–1/2" at the head can be okay depending on threshold type.
- Swing direction: Choose swing to suit site access and water flow. Out-swing doors shed water better but require exterior clearance. In-swing doors are protected under an overhang but need interior space.
Permits, Site Prep, and Tools Checklist
- Permits: Many jurisdictions treat sheds under a certain size as permitted without a full building permit, but door openings or structural changes can trigger permitting. See local rules for guidance; for a general reference on permitting basics, consult local permit requirements.
- Site prep: Ensure grade slopes away from door, provide a compacted base at threshold, and avoid locating the door where water pools.
- Tools: Level (4' and 2'), framing square, cordless drill/impact driver, 3" and 2-1/2" exterior-rated screws, circular saw, jigsaw (for thresholds), shims (plastic or cedar), pry bar, caulk gun, low-expansion foam, utility knife.
Framing the Door Opening: Step-by-step Guide
A durable rough opening and correctly sized header transfer loads to the studs and keep the door square. Follow sequence: mark opening, cut sheathing, install cripples/jacks, set header, then re-sheath and temporarily brace.
Measure and Mark the Rough Opening
- Confirm finished door size and add the recommended clearances for your unit.
- Transfer marks to top and bottom plates and exterior sheathing. Double-check diagonals for squareness—diagonals should match within 1/8".
- Cut sheathing first, then the framing members if needed. Remove any insulation in the opening area to inspect framing.
Build and Install the Header (common Options)
- Header options: double 2x8, double 2x10, or engineered LVL are common. Use a header when the opening carries roof, floor, or concentrated loads from rafters/trusses. For small lean-to sheds with no roof load-bearing over the opening, a simple doubled 2x8 might suffice; check local codes and span tables.
- Fastening: toe-nail or use structural screws; attach jack studs with 3" screws and use metal hangers as required.
- Temporary bracing: Use a diagonal brace to keep the wall plumb while installing the header.
Comparison/specs table for common header options
| Header Type | Typical Span (unfactored) | Pros | Cons |
|---|---|---|---|
| Double 2x8 | up to ~6' | Cheap, easy to source | Limited span, lower stiffness |
| Double 2x10 | up to ~8' | Stronger for moderate spans | Heavier, slightly more material |
| 1-1/8" LVL | up to 12'+ depending on size | High stiffness, consistent | Higher cost, more eco-impact unless recycled |
Notes: Spans vary by species, grade, loads, and local code. For load-bearing openings supporting trusses or a roof ridge, consult span tables or an engineer. For related real-world framing sequencing, compare techniques in our shed framing update. Also consider how roof sheathing and truss reactions affect header sizing in our roof sheathing update.
Set Jack Studs, Cripple Studs, and Prepare the Sill
- Jack studs: Install one or two jack studs under each end of the header; use full-length studs if required by code for the load.
- Cripple studs: Place above the header to support sheathing and provide nailing surface.
- Sill preparation: Make the sill level and, if using a sill pan, slope the cut sill slightly (1/16" per inch) toward the exterior or install a sloped threshold to shed water.
Fastening and temporary bracing
- Use 16d nails or 3" exterior screws for framing. For header-to-stud connections, 3" structural screws give superior withdrawal resistance.
- Brace the wall plumb with temporary studs while jamb and door hardware are installed.
Installing the Door Jamb and Threshold for a Tight Fit
A plumb, square jamb and a proper sill pan are the backbone of a watertight, airtight shed door. Small mistakes here lead to binding or leaks.
Setting a Square, Plumb Jamb with Shims
- Lift the pre-hung unit into the rough opening and set it on temporary shims so the sill is at final height.
- Shim the hinge side jamb at each hinge location directly behind the hinge with stacked shims so hinge screws (3" recommended) can reach framing. Drive long screws through the hinge leaf into the jack stud for strength.
- Check reveal: measure the gap at top and bottom and both sides; aim for even reveals, 1/8"–3/16" at each side.
- Secure the strike side with shims at latch height and mid-height, then fasten with long screws through the jamb into the framing. Re-check plumb and square as you tighten.
Installing a Sill Pan or Flashing Under the Threshold
- Purpose: A sill pan collects water entering the jamb gap and directs it outside the sill flashing, stopping interior leaks.
- Basic steps: Dry-fit the sill pan (rolled or formed), apply compatible sealant at the back dam, set sill pan into place, apply flashing tape up the jambs over the pan edges, then install the threshold.
- For an aluminum or composite threshold, pre-drill fastener holes and use neoprene washers if provided. Seal underside edges with a bead of exterior sealant.
Bottom Clearances and Threshold Choices
- Threshold materials: aluminum (durable, thermally conductive), thermally-broken thresholds (better for cold climates), composite (low maintenance), and wood (cheapest but short-lived).
- Clearance: Provide adequate clearance for floor coverings and to avoid scraping—about 1/8" above finished exterior grade is common. For sheds, consider a slightly higher threshold to reduce splash-in during heavy rain.
- Thermal bridging: Aluminum thresholds can create a cold path. For insulated sheds or those used as workshops, choose thermally-broken thresholds or add insulating strips under the threshold.
For methods to keep continuous wall insulation where the door interrupts the envelope, see the exterior insulation guide. For planning drainage around the shed perimeter and preventing pooling at the threshold, consult the rainwater collection guide.
Hanging the Door and Adjusting Hardware
Hanging hardware correctly ensures secure, long-lasting operation. A visual walk-through helps—watch the step-by-step for hinge shimming and strike alignment before attempting tight fits.
Watch this step-by-step guide on installing an exterior pre-hung door on a concrete slab (step-by-step guide!):
Mounting Hinges and Hanging Pre-hung vs Slab Doors
- Pre-hung: With shims in place under hinge locations, drive the top hinge screw first to hold the unit, then the bottom, then middle. Use 3" exterior-grade screws for the hinge leaf screws so they penetrate the framing.
- Slab: Mortise hinge recesses accurately (typically 3-4.5" or 7" depending on hinge size). Transfer hinge locations from jamb to slab using a template. Use longer screws into the jamb and studs when fastening hinges.
- Hinge placement: Typical hinges are at ~7" from top and bottom and one centered; with 4.5" butt hinges you may place a third hinge mid-height for heavy doors.
Fitting Latch, Strike Plate, and Door Hardware
- Strike plate alignment: With the door closed, check latch engagement. If the latch rubs, move the strike plate slightly by chiseling or filing recess depth, or shift plate horizontally in small increments.
- Deadbolts and key hardware: Use corrosion-resistant finishes for outdoor exposure (stainless steel, coated finishes). For security, use long screws in strike plates so screws anchor into framing.
Final Adjustments for Smooth Operation
- Check even reveal around door with a 6' level: check plumb, twist, and square. If binding occurs, re-shim and retighten rather than forcing the slab.
- If the door drags on the threshold, plane the bottom edge in small passes or adjust the threshold height.
- Lubricate hardware with a silicone-based lubricant; avoid petroleum on weatherstripping.
For optional daylighting near door areas, see our guide on how to install solar tubes.
Weatherproofing and Insulating Around the Shed Door
Proper weatherproofing keeps water out and reduces air leakage. The correct flashing sequence, compatible sealants, and selective insulation create a durable barrier.
Flashing, Head and J-channel Details
- Standard sequence: sill pan → jamb flashing (tape up the jambs, 6" minimum) → head flashing over the top of the jamb tape so water flows over it. This prevents water from being trapped behind siding.
- J-Channel: Use J-channel with sidings like vinyl for neat termination at the jamb. Ensure the head flashing overlaps the J-channel to direct water.
Air-sealing: Spray Foam, Backer Rod and Sealants
- Use low-expansion polyurethane foam around jamb gaps to prevent jamb distortion. Manufacturers typically recommend low-expansion foam specifically for windows/doors.
- For larger gaps (>1/2"), use backer rod before applying sealant to get a proper joint profile. Recommended sealants: high-quality exterior-grade polyurethane or silicone for durability.
- The U.S. Department of Energy provides guidance on air sealing that highlights the importance of continuous air barriers—address jamb penetrations, sill transitions, and any mechanical penetrations.
Door Weatherstripping and Threshold Insulation
- Weatherstripping types: compression (for tight seals), bulb (good for uneven gaps), and door sweeps (under-door seals). Combine sweep plus jamb weatherstripping for best performance.
- Choose corrosion-resistant sweep materials (stainless fasteners or aluminum backing) for exterior use.
- For R-value gains, sealing gaps prevents convective losses. While the door's nominal R-value matters, gaps dominate heat loss; sealing improves performance more than a marginally higher-R door.
For detailed installation of weatherstripping, see our door weatherstripping tips. To find common leakage sources to address during weatherproofing, review air leakage points.
Common Problems and Troubleshooting During and After Installation
Problems often stem from one of three causes: poor framing alignment, improper flashing, or wrong fasteners. Below are diagnostics and fixes.
Door Rubs, Binds, or Drags — Causes and Fixes
- High/low jamb: Check reveal at top and bottom. Re-shim hinge side or strike side as needed; loosen screws, adjust, then re-tighten with long screws into studs.
- Door sags: Tighten hinge screws; if the hinge leaf is stripped, replace screws with longer 3" screws that reach framing, or install longer hinge screws that pass through jamb into framing.
- Binding across top: Shim under the hinge side top or plane the top edge of the slab slightly.
Water Leaks at Sill or Head — Diagnosing Paths
- Hose test the exterior while a helper watches inside to find leak entry points.
- Common paths: failed sill pan, missing head flashing, or siding not lapped over head flashing. If water runs in after heavy rain, remove threshold and inspect sill pan and flashing tape continuity.
- Fix: reinstall or add a properly integrated sill pan, reseal flashing laps, and ensure head flashing overlaps siding terminus.
Drafts, Uneven Gaps, and Long-term Maintenance
- Drafts: Replace weatherstripping and check sealant joints. Low-expansion foam can be added to gaps, or backer rod and sealant in larger joints.
- Maintenance: Annually inspect fasteners, re-caulk gaps, check threshold seal, and lubricate hardware. Replace worn sweeps and compressional strips.
Poor ventilation in tightly sealed sheds can cause moisture buildup. If you notice condensation, consult our balanced ventilation guide for solutions that manage humidity without undoing your air-sealing work.
Materials, Tools, and Budget Tips for DIY Shed Door Installs
Choose where to invest and where to save. Spend on flashing, screws, and a good sill pan; save on trim and cosmetic choices.
Essential Tools (what to Buy vs Rent)
- Buy: Cordless drill/impact driver, set of levels, shims, 3" exterior screws, caulk gun, combination square, pry bar, sealant.
- Rent: Table saw or planer for occasional heavy milling, siding brake for metal flashing, or a larger compressor for pneumatic nailers.
Material Choices with Eco-friendly Alternatives
- Door materials: Steel doors offer durability; fiberglass doors often give good thermal performance; reclaimed wood doors create a lower embodied-carbon option if protected properly.
- Flashing: Use recycled-content flashing tapes when available; choose thermally-broken thresholds (reduces thermal bridging).
- Fasteners and sealants: Use stainless steel or hot-dip galvanized screws to avoid corrosion.
Cost-saving Tips Without Sacrificing Durability
- Buy a basic pre-hung door and upgrade weatherstripping and the threshold rather than purchasing a top-tier factory door.
- Reuse a reclaimed solid wood slab for interior sheds where weather exposure is limited.
- Never skimp on the sill pan, flashing tape, and screws into framing; poor flashing leads to expensive water damage.
Itemized short budget checklist
- Door (pre-hung): $150–$600 depending on type
- Hardware (hinges, lockset): $30–$150
- Flashing tape and sill pan: $20–$60
- Screws and fasteners: $10–$30
- Sealant and foam: $15–$40
For eco-friendly material guidance, see the sustainable materials guide and green material choices. For broader project planning and self-build context, review how to build your own home. If you plan solar or electrical, consider door placement relative to panels in our solar sizing for sheds.
Key Points Checklist: Framing and Hanging a Shed Door
- Confirm rough opening: Pre-hung add ~2" width and 2–2.5" height.
- Header: Size based on roof/truss loads; consult local span tables or engineer.
- Jack studs: Install and fasten with 3" screws into header and plates.
- Jamb: Set plumb, shim at hinge locations, use 3" hinge screws into framing.
- Sill pan: Install before threshold and lap flashing correctly.
- Air-seal: Use low-expansion foam for gaps; use backer rod and sealant for larger joints.
- Weatherstripping: Install sweep and jamb seals; inspect annually.
- Fasteners: Use corrosion-resistant, long screws to anchor hardware into framing.
The Bottom Line
Good planning, correct header sizing, and careful jamb setting are where most successful shed door installations start. Prioritize a proper sill pan and flashing over cosmetic elements, and fasten hinges and strike plates into framing with long screws for strength and longevity.
Frequently Asked Questions
How big should the rough opening be for a pre-hung shed door?
As a rule of thumb, allow about 2" extra in width and 2–2.5" extra in height for a pre-hung exterior door to accommodate the jamb and shims. For example, a 36" x 80" door typically needs a rough opening of about 38" x 82" before trim and finish. Always measure the specific pre-hung unit before cutting the opening—manufacturers vary slightly.
Can I install a pre-hung exterior door by myself?
Yes, many DIYers install pre-hung doors alone, but having a second person helps for leveling and holding. Single-person installs are easiest with lighter doors and strong temporary blocking. Use shims and screw through the hinge jamb into the jack studs with 3" screws to secure the unit. For larger double doors or heavy steel units, two people are safer.
Do shed doors need headers?
Headers are required when the opening carries significant loads from the roof, floor joists, or concentrated truss reactions. Small garden sheds with gable roofs that do not transfer load across the opening may sometimes use a simplified header, but always verify with local code span tables or consult an engineer for anything beyond typical small spans. When in doubt, build a header sized for the expected load (double 2x10 or LVL for larger spans).
How do I stop water from getting under the shed door?
Install a proper sill pan and flashing sequence: place the sill pan first, tape up the jambs over the pan, then install head flashing so water exits the cladding over the head. Ensure the ground slopes away from the door, seal the threshold edges, and use a threshold with a drip or slope. A simple hose test can reveal leak paths to fix before interior finishes are installed.
What’s the best weatherstripping for an exterior shed door?
Combine a compression or bulb-type jamb weatherstrip with an adjustable door sweep at the bottom for best results. Compression seals create a tight interior seal, while a sweep handles uneven thresholds and keeps out drafts. Choose materials rated for exterior use and replace them if they become compressed or brittle; checking and replacing weatherstripping annually is good maintenance practice.