Build update 4: framing the power shed including wall layout, stud spacing, header installation, and bracing for a small outbuilding.
This is part 4 of my Nova Scotia build series. Catch up on Build Update 3: Slab Form Prep & Pouring Concrete if you missed it.
---
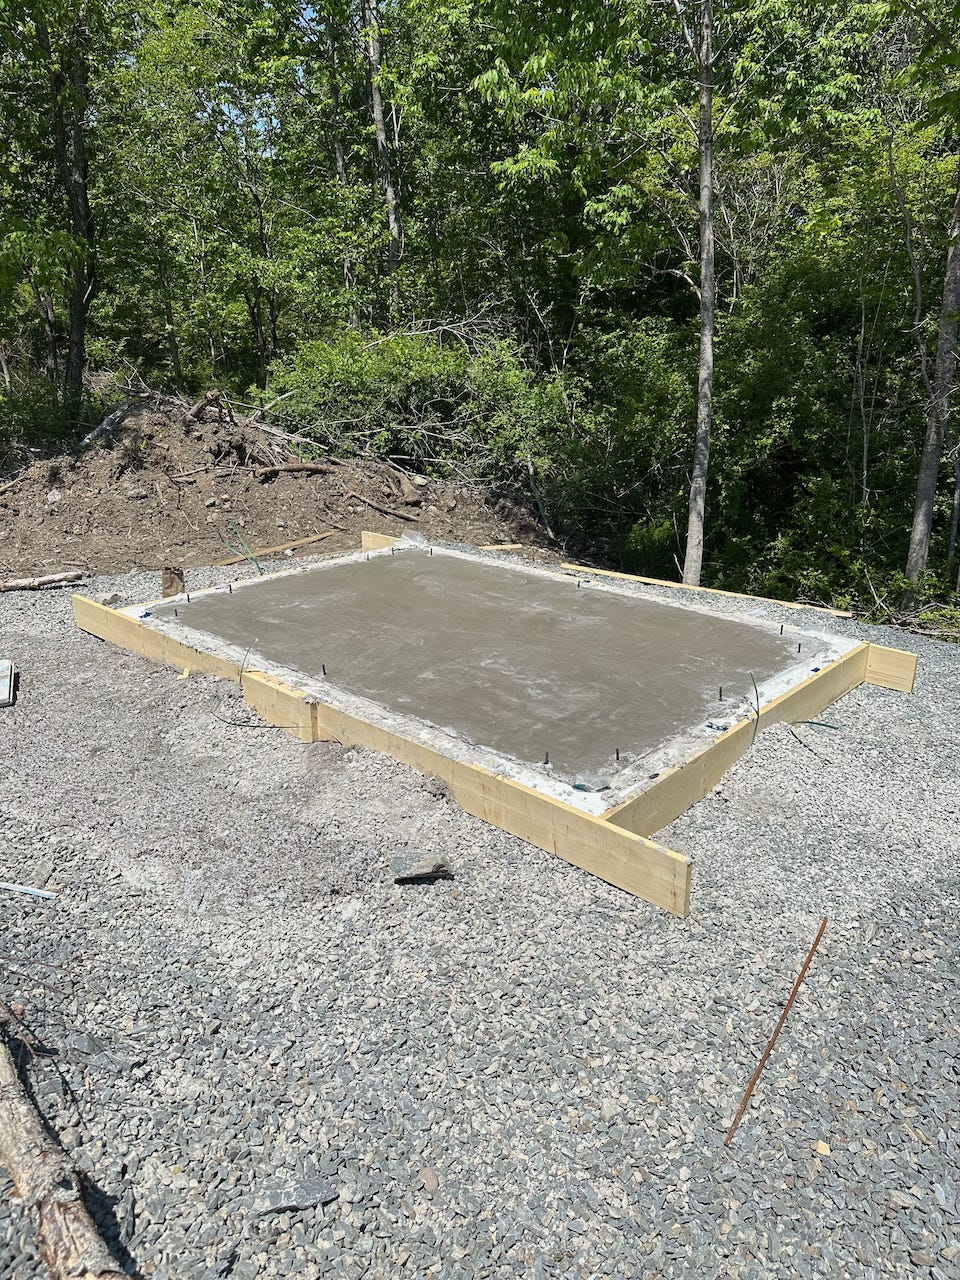
Once the concrete slabs were poured, it was time to get started on the wall framing. The nice part about using the insulated concrete slabs is that you immediately have a surface on which to mount the walls, with the bolts to do so in place, and you don’t have to think about flooring (of course, you can add flooring if you want to).
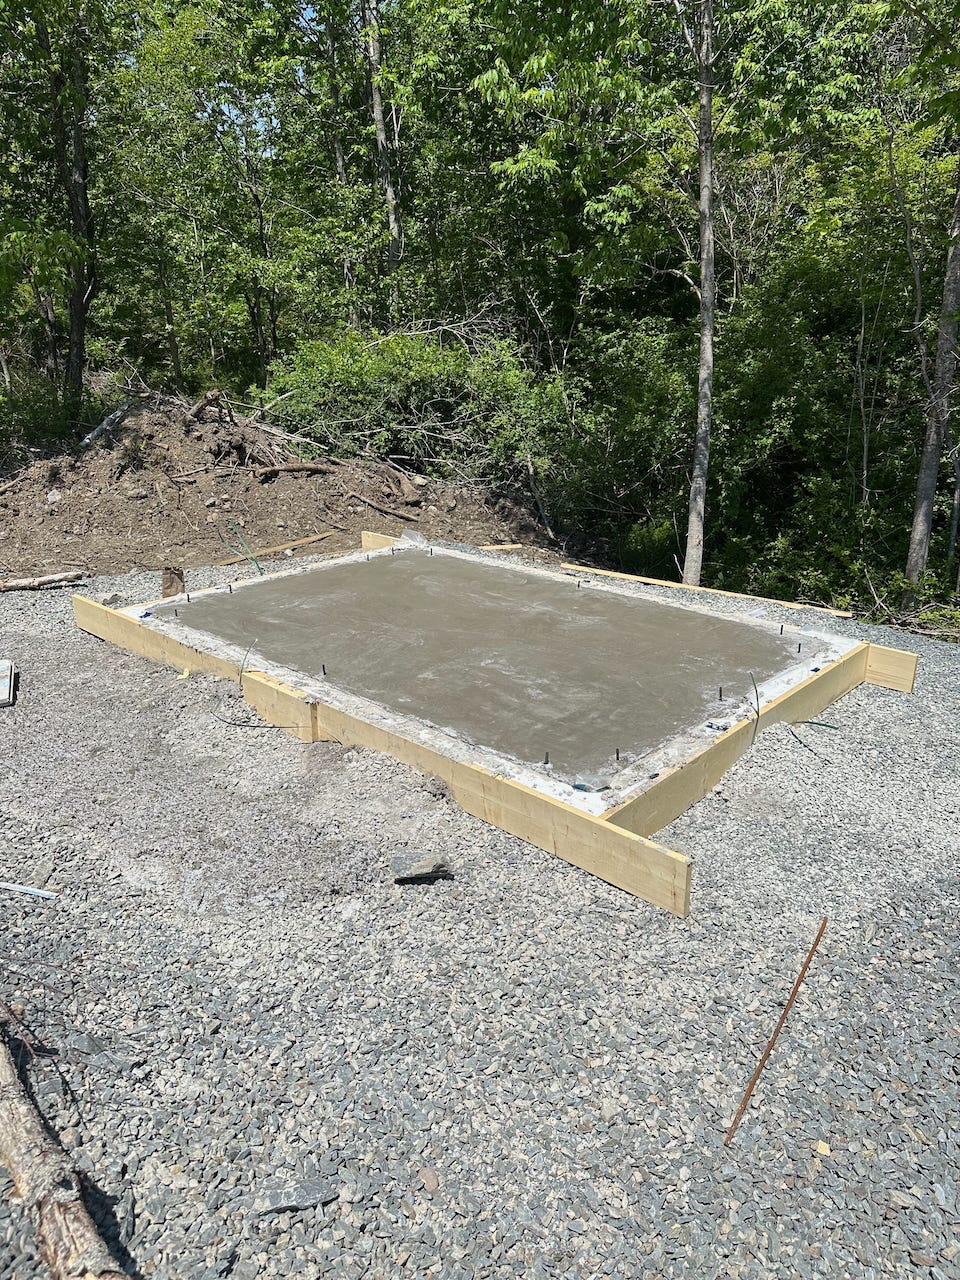
Prior to this project, I had no experience at all with framing walls. But I did enough research, and looked around enough in-progress builds, that it wasn’t too complicated.
2x4 vs. 2x6 Framing
There are a thousand different ways to design a wall, but for wood-frame construction, many of the debates come down to some variation of this one: 2x4 or 2x6.
It depends largely on the overall design you choose—single stud, double-stud, Larsen truss, etc. Single stud would be the most common for the majority of builds.
I chose 2x6 for a couple reasons:
- More insulation potential within the wall itself
- 24” on centre stud spacing, which matches up with the roof trusses, and can then be extended to the Larsen trusses
I think this makes the overall build simpler, and it adds a nice symmetry in terms of support between the roof, wall and Larsen truss system.
I’ll talk about Larsen trusses in more detail in a future update, but for now it suffices to know they are a non-structural extension on the outside of the main framing.
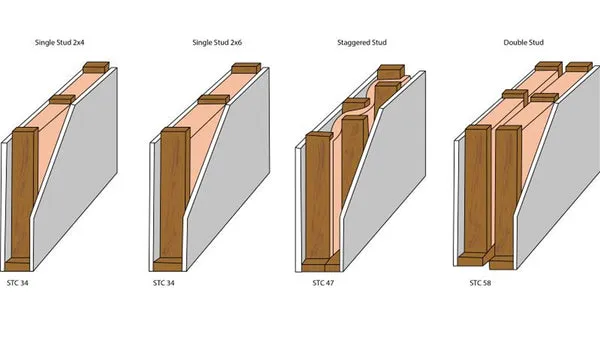 This simple diagram shows basic wall design (from here)
It’s worth noting that I knew nothing about how framing or building walls in houses worked when I started this journey, but it’s one of the things you learn over time, and really isn’t that complicated.
I had my uncle helping when we started the framing for the small power shed, which helped in terms of having a second set of eyes. He isn’t a carpenter, but he’s helped out on building projects before, so he’s got much more experience than I did.
Building a Wall
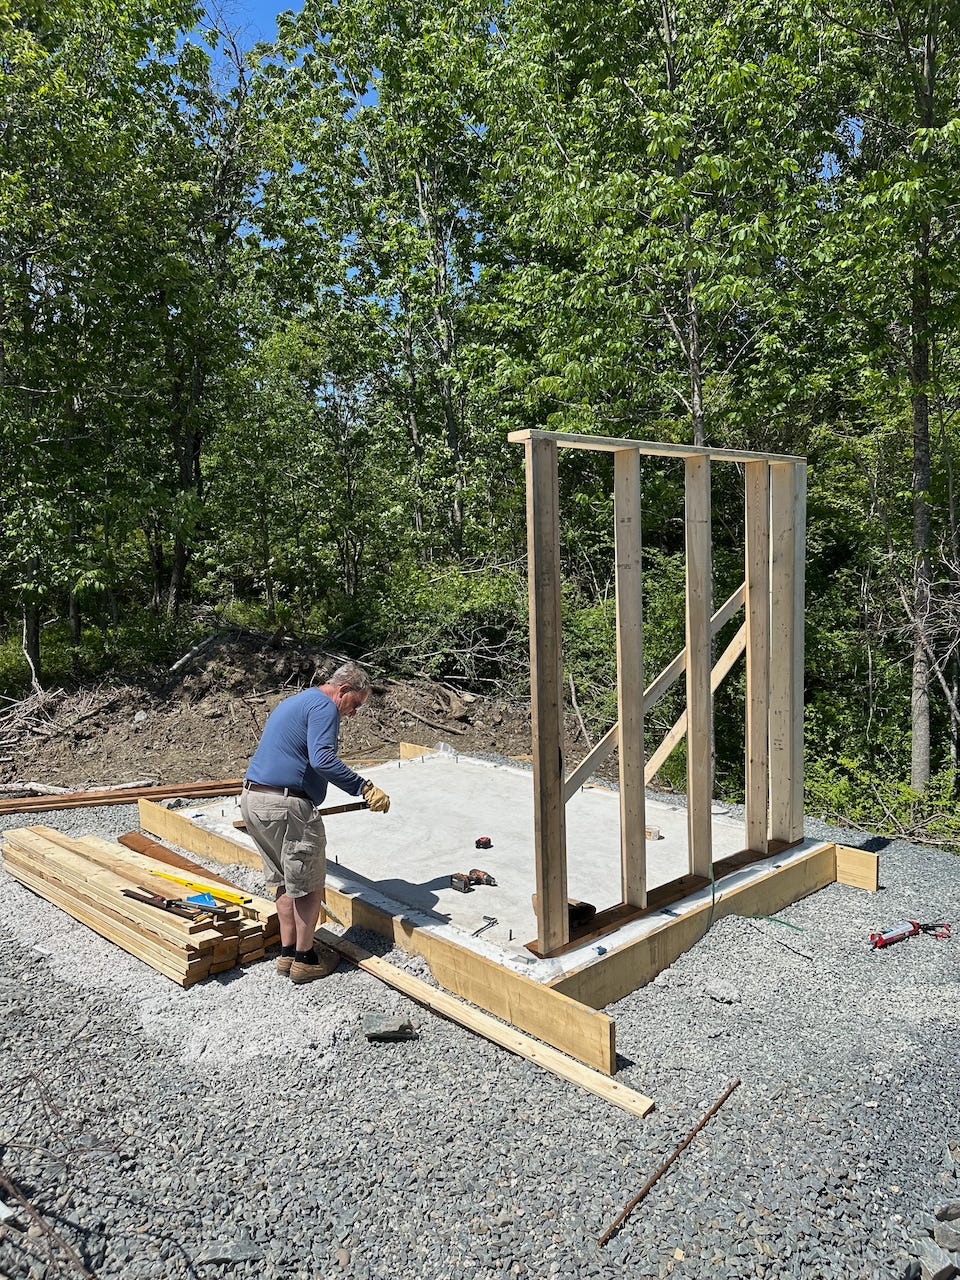
There are three main components to a wood stud wall: the sill plate (aka bottom plate, or sole plate), the studs, and the top plate(s). The following diagram is for an interior wall, but you get the idea:
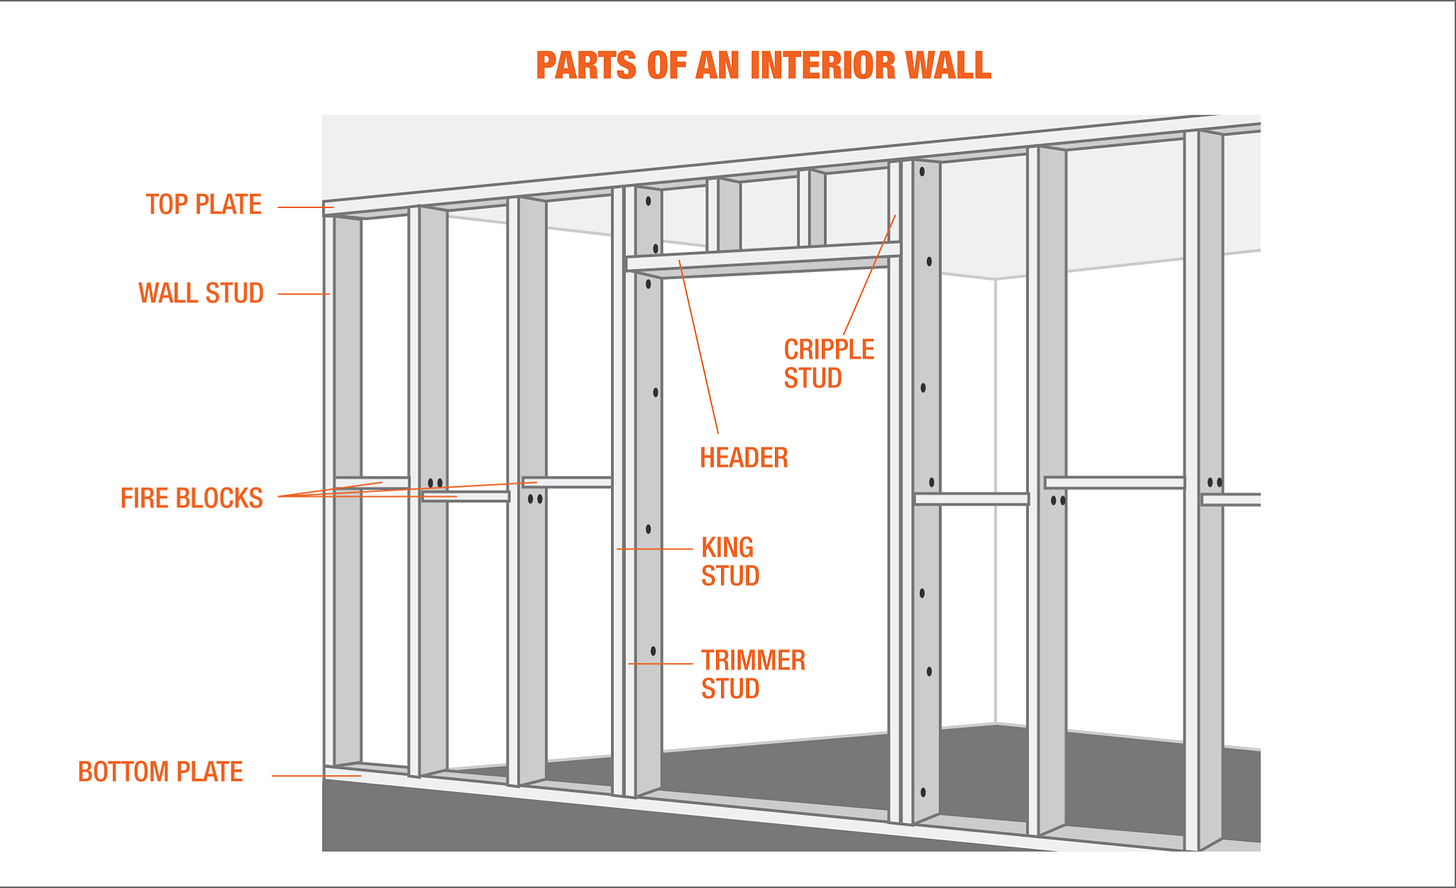
The sill plate is pressure-treated lumber (to avoid rot) when being mounted to concrete, the studs are typically 2x4 or 2x6, and then the sill plate is another 2x4 or 2x6 mounted horizontally. The top plate is often doubled up, which allows easy connection between perpendicular walls or different wall sections.
As mentioned, I chose 2x6 wall framing, so all my lumber was 2x6.
To speed up the process, I bought pre-cut wall studs, which are a little more expensive, but are slightly shorter than the full 8’ normal length, to account for the sill plate and top plate, yet still make it possible to fit 4x8 sheathing over top.
You should check at your local building supply the state of the pre-cut stud lumber; they sometimes have multiple sizes, and in my case, one size had very little use, so the lumber had sat for months and was in terrible condition.
The pre-cut length that was more commonly used in my area was 93 1/4”. This saves time when putting together the walls as you don’t need to cut the studs from 8’ to this length.
A more common pre-cut stud length is 92 5/8” (like here at Home Depot, where it’s currently cheaper than an 8ft length), but in my experience it makes little difference.
An 8’ sheet is 96”, so 93 1/4” + 1.5” bottom plate + 1.5” top plate = 96 1/4”, still more than 8ft, meaning you can have ~half of the sill plate and first top plate overlapped by the sheathing. If you’re using Zip sheathing and tape (more on this later), this will be covered over anyway.
Assembling the wall involves a few simple steps:
- Laying out the sill plate, wall studs, and one of the top plates on the floor, as if the wall was sitting on the floor itself
- Nailing the sill plate to the studs
- Nailing the top plate to the studs
- Tipping the wall up and securing in place
There are a few things to note before doing this, however:
- Locating and drilling the anchor bolt holes in the sill plate (if applicable)
- Locating and planning the location of windows and doors in the wall (if applicable)
For the power shed (the smaller shed), I only had a single door, and no windows, so this process was fairly simple.
First, I lined all the sill plates up with where they would go, measured the depth of the anchor bolts (since they all varied slightly), and drilled slightly larger holes than needed (3/4” for 1/2” bolts) to give me some wiggle room.
Then, for most walls, there was no window or door accounting needed, so I measured out all the stud locations, and then lined things up and nailed them in place.
There are two main nailing techniques you can use for perpendicular connections like stud-to-wall: end nailing and toe nailing.
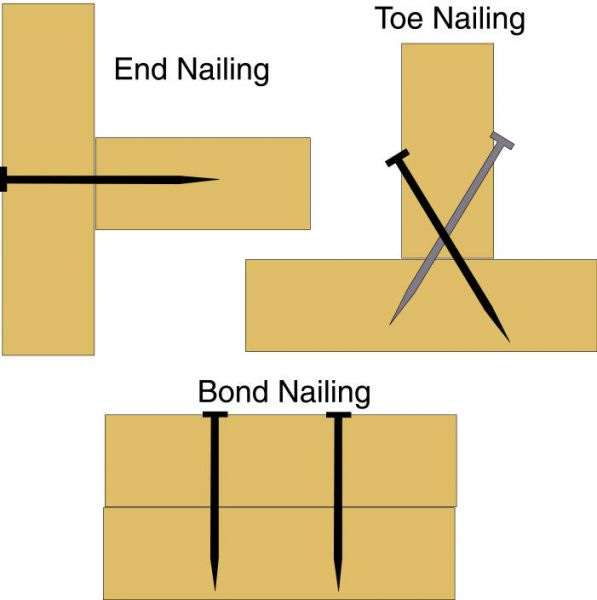
End nailing is the simplest, you just nail through the sill plate or top plate and into the stud. This is possible on the sill plate only before it is mounted because the bottom needs to be exposed to do so.
I use 3 nails for end-nailing in 2x6, and 3 1/4” nails. I do the same for the top plates.
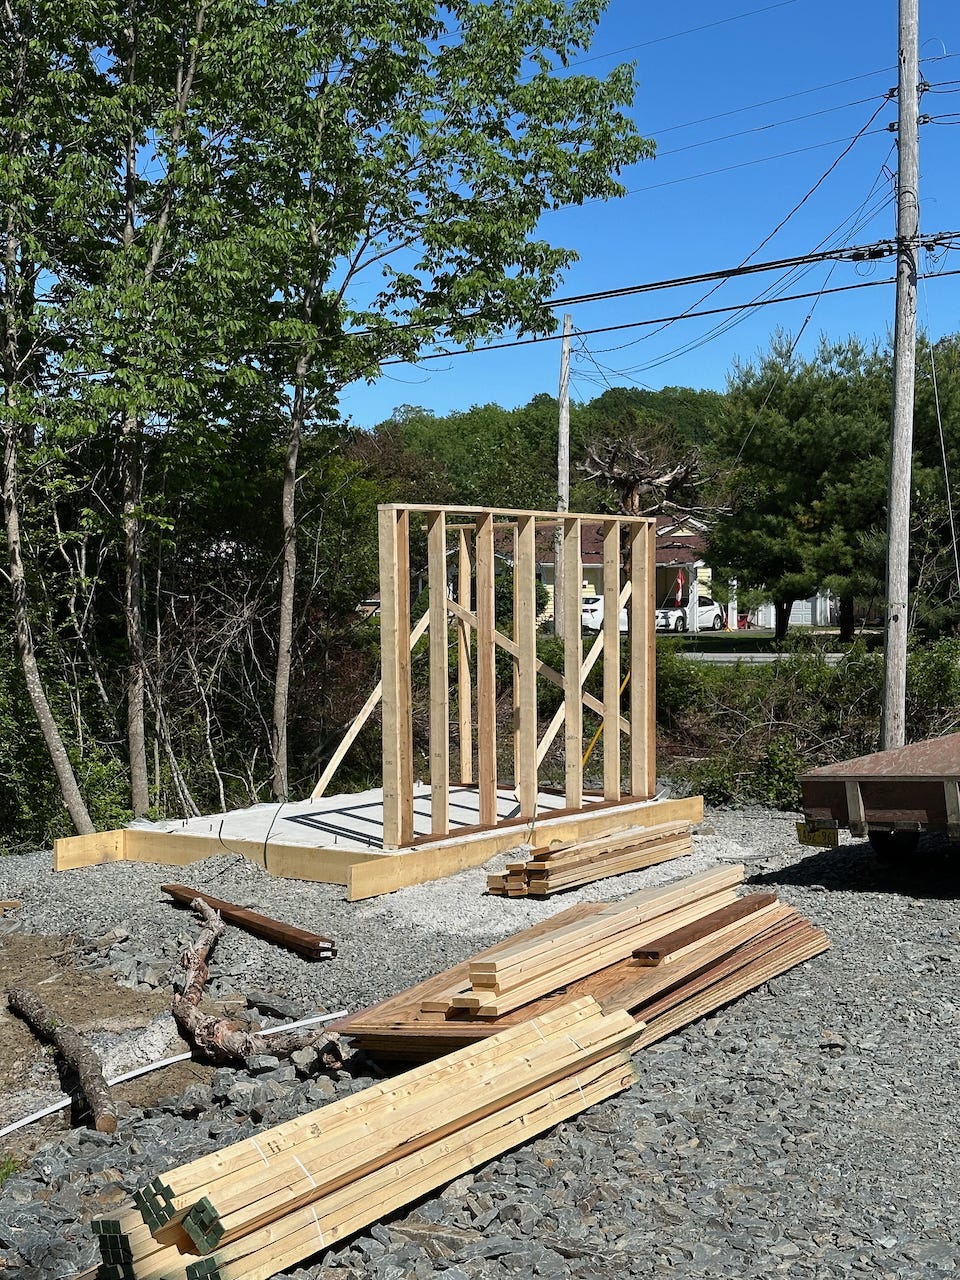
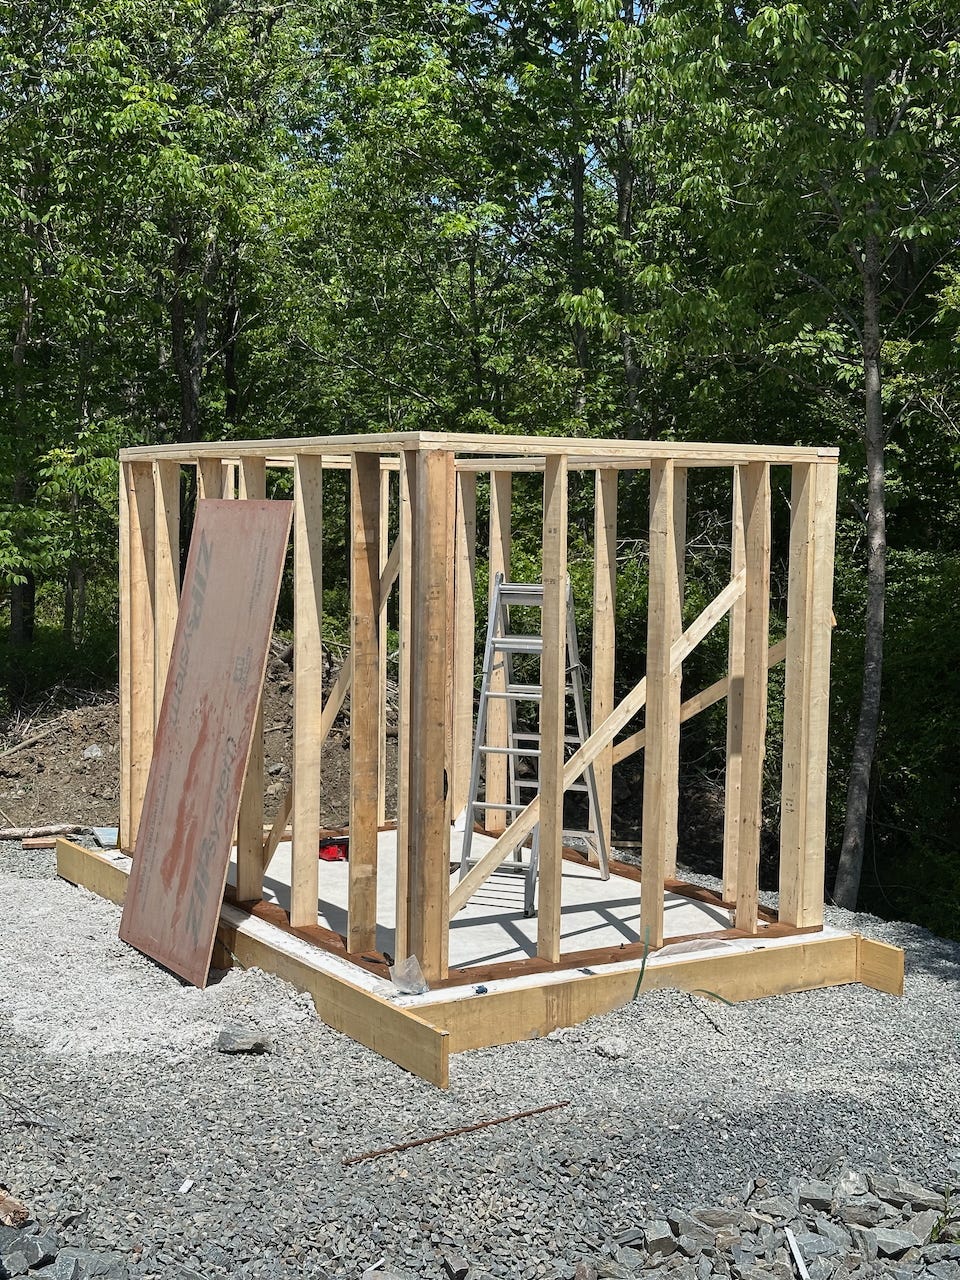
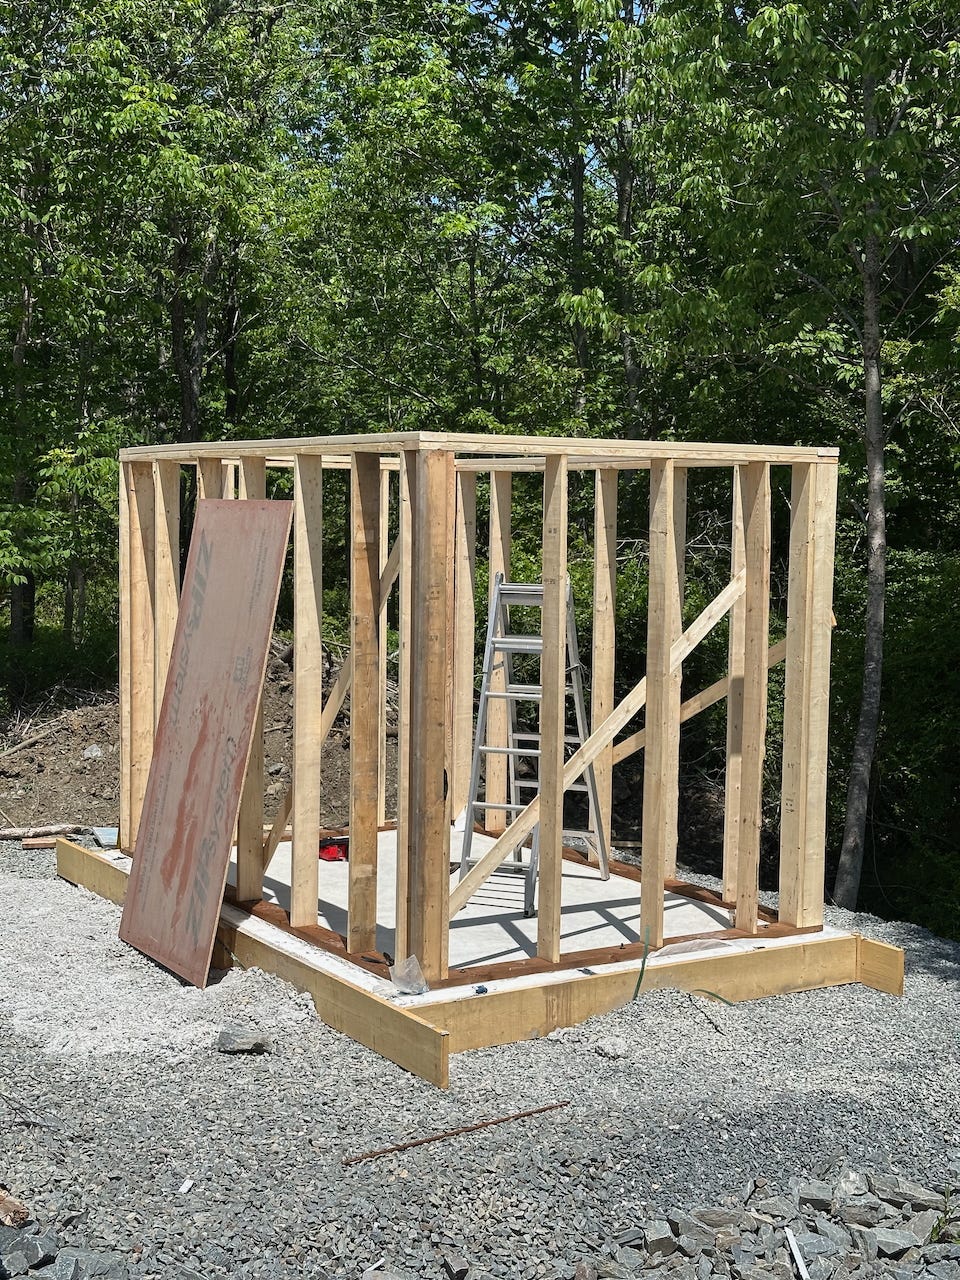
We did this for three of the walls, which had no windows or doors, and propped those walls up, adding supports once they were up.
Sill Plate Sealing
In my planned design, the air/vapour barrier layer is provided by the sheathing (more on that later).
For a good air seal, the connection between the sill plate and the concrete slab is critical.
I read enough anecdotes to buy into using an EPDM (rubber, essentially) gasket under the sill plate, along with a bead of acoustic sealant above and below the gasket.
However, EPDM is relatively expensive, and only available from the US (as far as I could find) from a company called Conservation Technology, so I decided to save the good stuff for the cottages, where it would matter more.
For the shed builds, I simply used the foam gaskets you can buy from your local hardware store, again with a bead of acoustic sealant above and below.
Acoustic sealant is nasty stuff; it will get on everything, and takes a long time to “harden”, never actually getting to a point where it’s completely hard (that’s kind of the point).
I would recommend being very careful, using some disposable gloves instead of your normal work gloves, and probably a dedicated caulking gun.
When a wall was ready to be tipped up, I’d put down a bead of sealant, the gasket, then another bead of sealant, before placing the wall on top, and then adding the washers and nuts to the bolts.
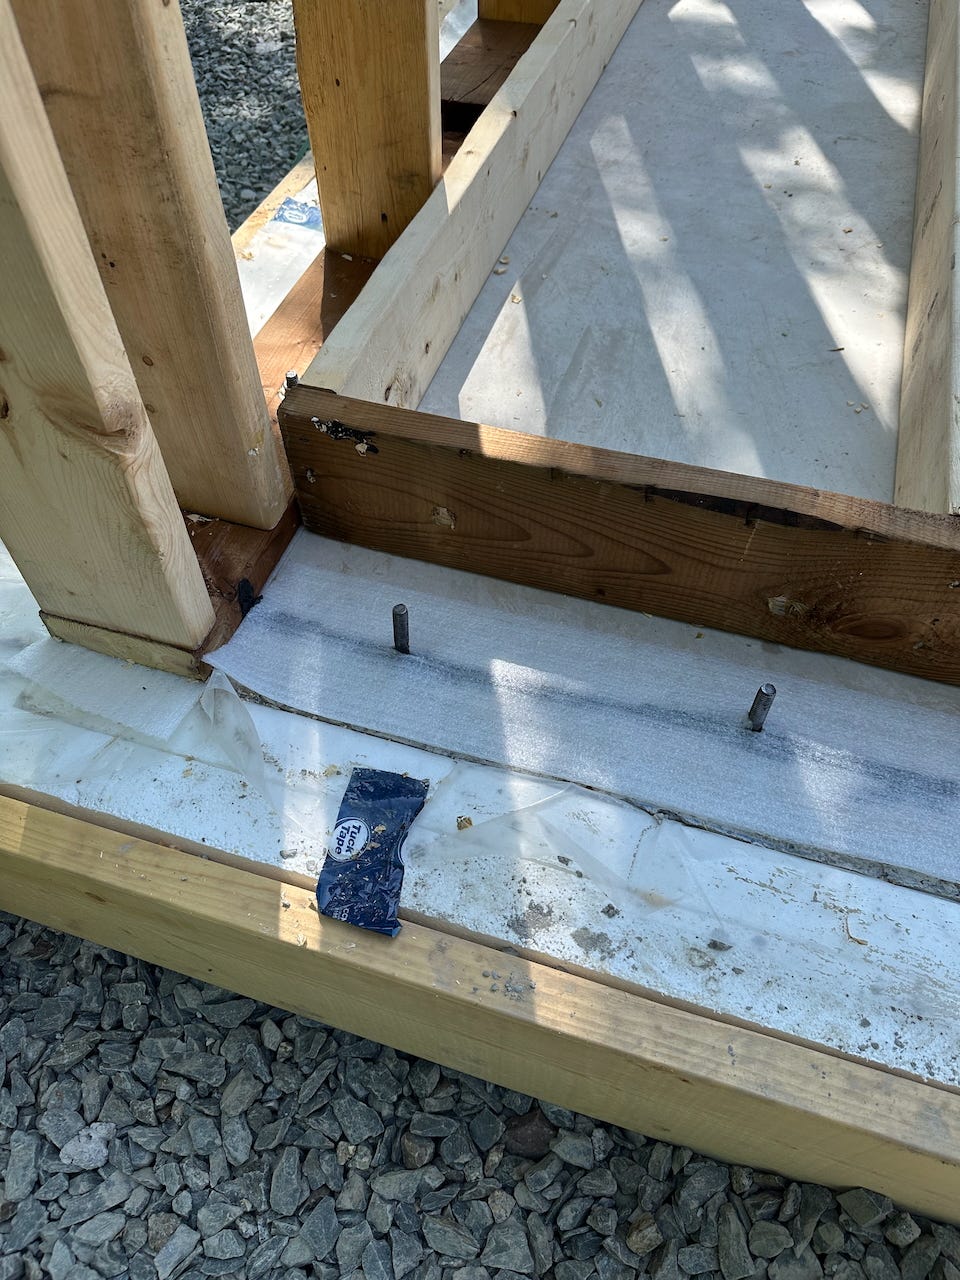
Here you can see the foam sill gasket, with a layer of acoustic sealant underneath (another will be added on top before the wall goes down). The wall has pre-drilled holes for the anchor bolts.
A key thing to remember when placing sealant and gaskets: don’t put it over where a door will go. I left the sill plate over the door opening when building the walls (and cut it out later), and a couple times forgot to stop putting sealant over that gap, which creates a mess later.
Squaring Walls
Once a wall was up, we’d put some 1x4s out for support, as well as lightly tightening the anchor bolts on the sill plates.
Then we’d evaluate how square they were using a 4-foot level. We’d take an 8- or 10-foot 1x4, screw one end into a stud (on the inside to avoid sheathing), and then push/pull the wall in the direction we needed to make it square. Once we had it there, we’d put a screw through the 1x4 near the other end into a stud to hold the wall in place.
We’d re-check with the level to make sure it was square, and then move on to the next wall.
At the end of this process, all walls should be square in one axis. You can then just join them all together with the second top plate and you should have four square walls. If you like, you can also do diagonal measurements from corner-to-corner to verify squareness.
Using screws on the second top plate makes this a reversible process, so you can screw in those top plates, check everything, and adjust if needed before nailing.
Adding Sheathing
At this point, we were ready to add sheathing.
Sheathing is the flat, 4x8 sheets that are attached to the outside of the walls. They provide structural rigidity to the walls, and enclose the structure.
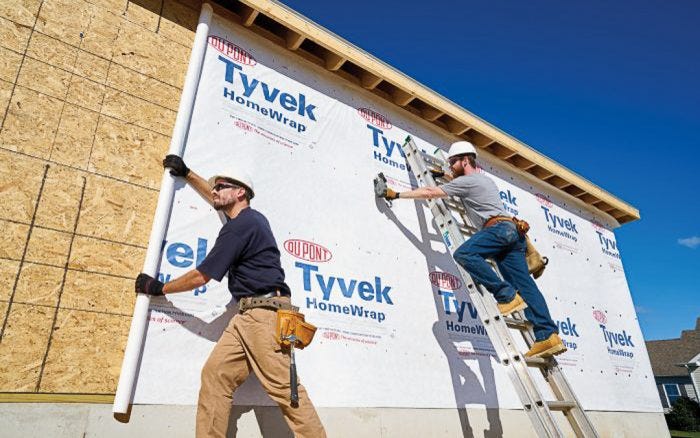
Typically, oriented-strand board is used, and then housewrap (like Tyvek) is attached overtop to provide a moisture barrier.
 Oriented-strand board (OSB) plus Tyvek (source), standard wall sheathing
I chose to use Zip sheathing for the sheds, as it seemed like a much simpler and easier way of getting a good air and vapour seal than alternative methods (often using some kind of membrane).
Zip sheathing is OSB, but treated on one side to have an air and vapour-resistant coating. You then add tape to the seams, and you get a much better air seal than you would with the normal OSB + housewrap method.
Admittedly, it is more expensive up front, though some of this cost is offset by the other materials you’re avoiding using. Ultimately, it felt worth the tradeoff for both speed and ease of getting a good air-sealing result.
 The green boards + tape in between are the Zip system sheathing + tape (source)
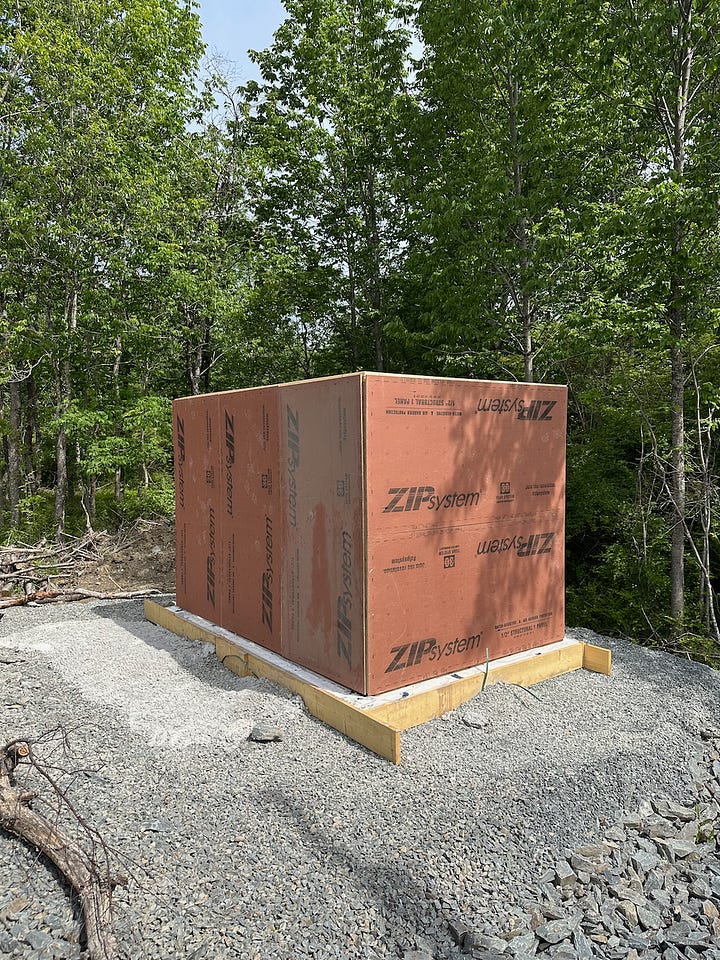
I messed up on the small shed build by choosing 1/2” Zip sheathing for everything (brown color instead of green); in future I’ll only use 7/16” (which is cheaper and slightly lighter) on the siding, and then 1/2” on the roof, where it’s recommended for the extra strength.
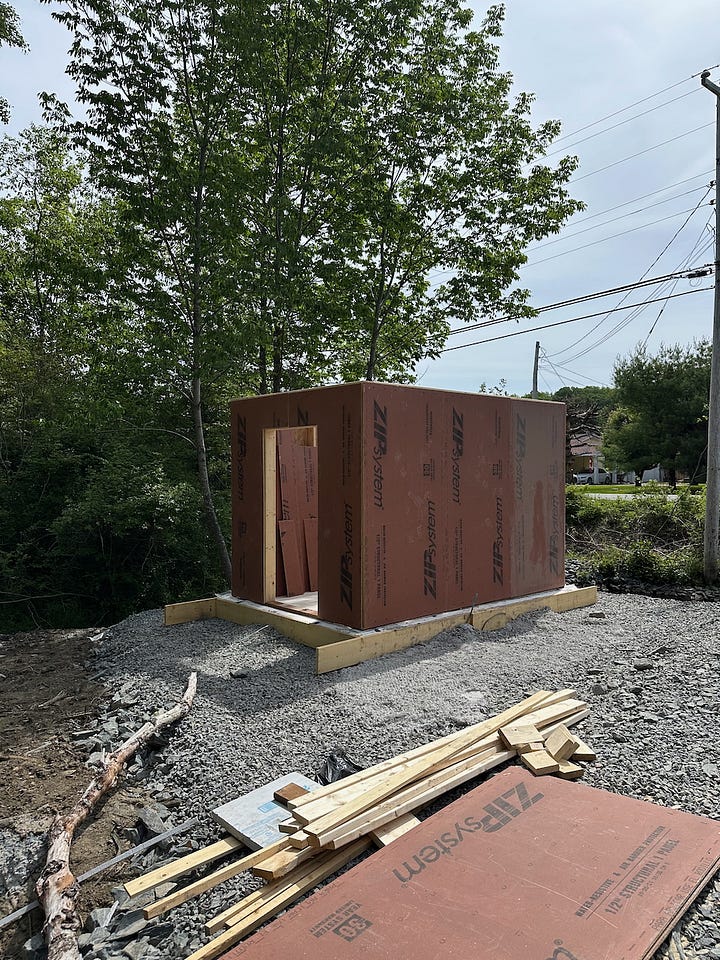
On the power shed we struggled a bit to get the sheathing in place (one person kind of holding it, the other adjusting and then adding a couple screws). I later learned some tricks to make this easier, namely, adding a couple screws in the middle of the sill plate to sit the sheathing on while adjusting it in place.
<ImageGallery columns={2} caption='Zip sheathing added to the framed walls (no tape yet)'>
</ImageGallery>
Putting the sheathing on the walls also revealed one of our rookie mistakes: spacing studs a full 2’ apart for all studs.
In reality, for the first stud from an end, this should be 2’ minus half the width of a stud—3/4”—so that the edge of the sheathing lines up in the middle of the stud. Then the spacing can be 2’ after that (through the middle of the wall).
Fixing this is relatively easy; you can add a second stud next to the first if needed, or you shave a little bit off the sheathing, or you can usually just let it hang off the end a little bit with no penalty.
Since it was our first time, I screwed in most of the initial sheathing to make sure things fit well, before going back to nail it in.
For nailing, we switched to 2 3/8” nails for the sheathing. In terms of technique, the main mistake we made was not angling the nails enough to go through the sheathing and into the stud. If the angle is too shallow, the nail tends to avoid the stud, and you get lots of nails that don’t make it into the stud and look bad inside (not to mention compromising the structure).
When we finished the sheathing and moved on to the roof trusses, we also realized a second mistake: we should have put the roof trusses up before the sheathing, because we planned to use hurricane ties.
The hurricane ties have to go on before the sheathing because otherwise they’re offset, and this compromises their strength.
Taping Sheathing
Once the sheathing is applied, the next step of the Zip system is to tape the seams using their special tape.
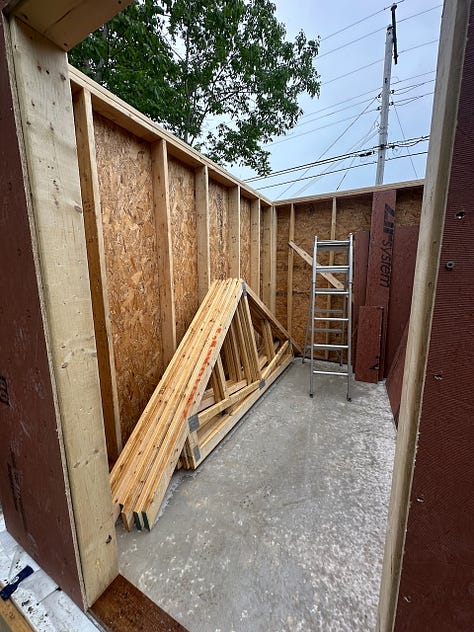
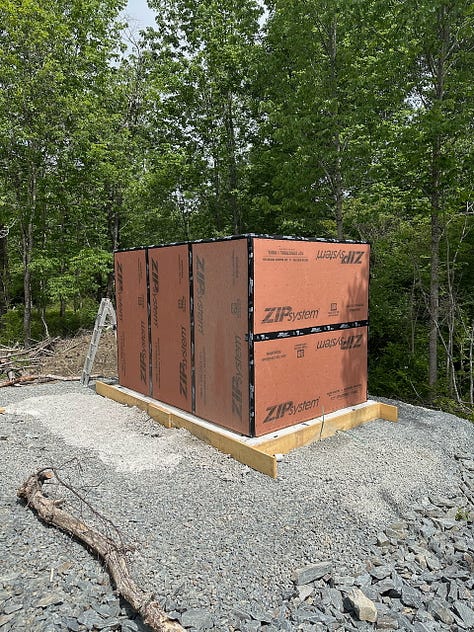
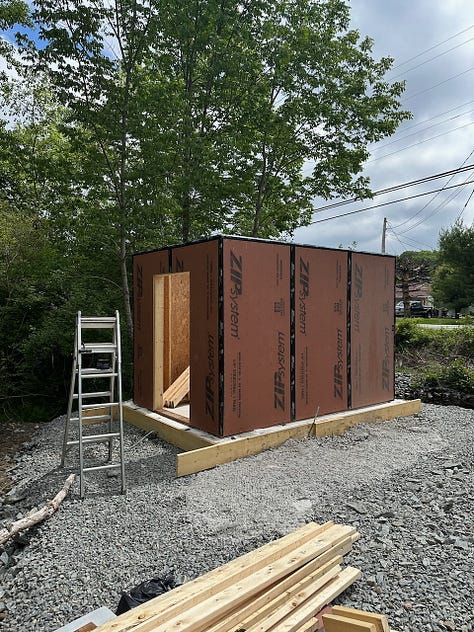
There’s nothing special here, other than we’re shooting for a very tight air seal to get close to passive house specification. That means being careful about all potential penetrations, and doing things like sealing the sheathing-to-top plate connection, which someone might not otherwise do.
<ImageGallery columns={3} caption='Inside view + all the Zip sheathing taped and sealed'>
</ImageGallery>
One of the unique things about the Zip system is that you have to use their special roller (which has a special price to go with it).
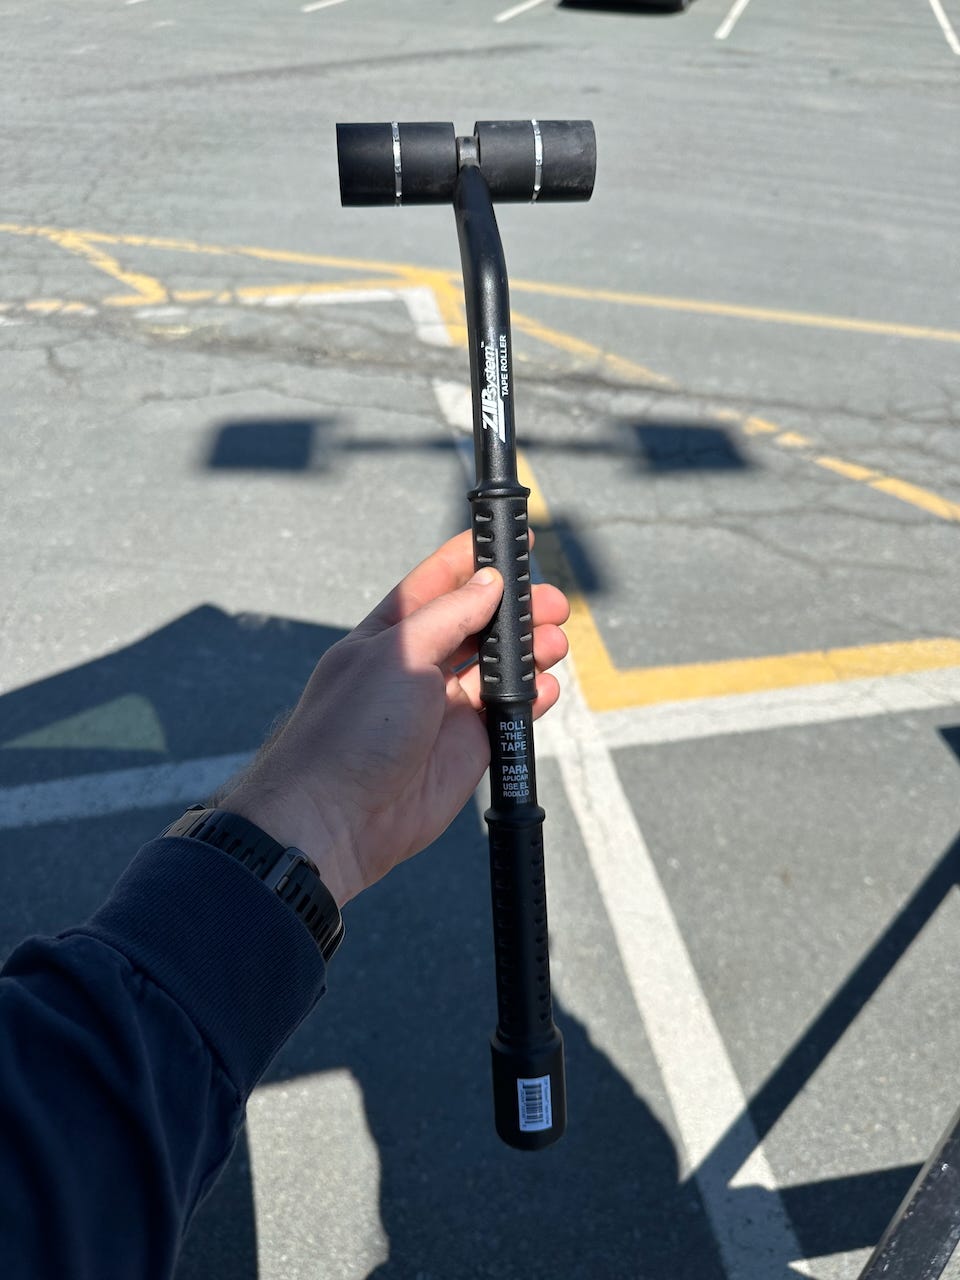
The reason is that the roller imprints small “Z”s in the tape, which confirms that you’ve pressed hard enough to trigger the pressure-activated adhesive, and be valid for potential warranty claims in future.
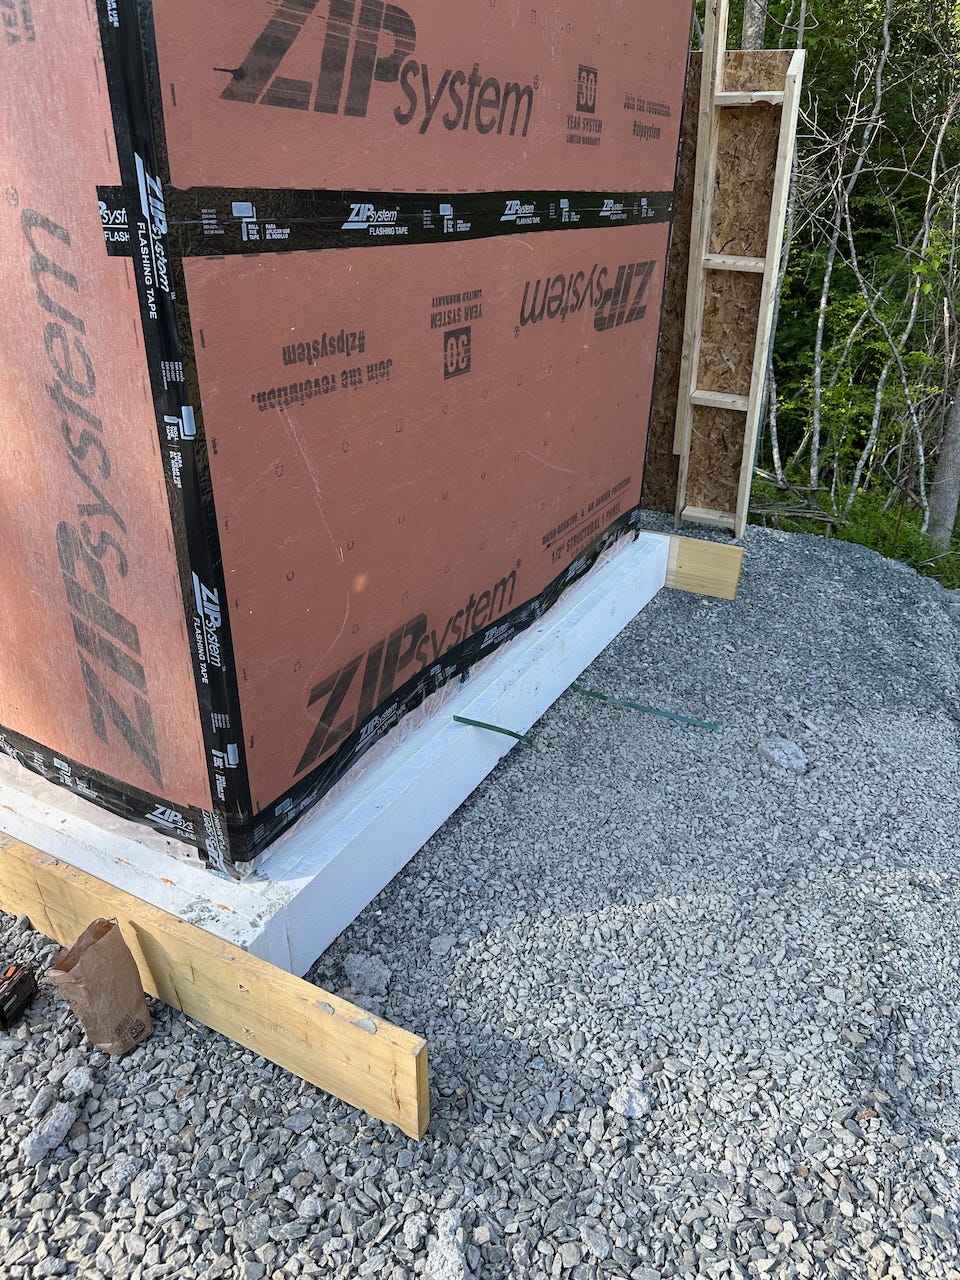
The other tricky area to seal is the bottom of the sheathing to the sill plate.
The poly vapor barrier we laid down before the concrete comes up and out above the styrofoam insulation around the slab. Theoretically, this is providing the air and vapor barrier below the slab.
To keep this continuous, we taped it to the sheathing with more Zip tape. I wasn’t super happy about this; the poly was bunched up in places, and different height, and it just didn’t feel very robust.
We’ll add a bead of acoustic sealant on the inside wall edge to help back this up, but in future I’ll be exploring better options.
Mistakes Made/Learnings
There were lots, but thankfully none that were catastrophic:
- Not thinking about doors when putting down acoustic sealant: I put a continuous bead, and had to wipe it off later; not a big deal but also a bit of a pain.
- Spacing the first stud from a corner 2’ instead of 2’ minus 3/4”: if you don’t do this, you’ll have no overlap to nail to for the first sheet of sheathing. It’s a bit hard to picture until you see it, but trust me; the first stud should go 23 1/4” from the end, and then you can just measure 2’ for every one thereafter.
- Not nailing sheathing at enough of an angle: when you’re nailing sheathing to a wall stud, you want it to be almost 45 degrees to make sure the nail hits the stud. Any shallower, and the nail will probably deflect around the stud, meaning it’s not actually attached, and will show through on the inside of the wall.
- Adding sheathing before roof trusses: normally this wouldn’t be a problem, but we were using hurricane ties (specified by the truss manufacturer), and the extra width of the sheathing messed up their mounting. The small shed isn’t subject to building inspection, so it’s not a big deal, but I’ll avoid this in future builds.
- Not having enough under-slab vapor barrier overlap: I should have made sure the vapor barrier was coming out from under the concrete at least 12” on all sides (it was more like 6”). Inevitably, some gets caught under the concrete, or rips, or is bunched in a way that makes taping hard. As I researched more, having this overlap up the walls might also protect the bottom of the walls from moisture better, preventing rot in the future.
- Not getting materials delivered ahead of time: I made so many trips to the building supply store that wasted time. I thought this would help me minimize extra material, but the reality is that I would have used any extra material on the next builds, and going to the store killed 2 hours every time I did it. For the next build, I’ll be placing a big order ahead of time and getting it delivered.
- Choosing 1/2” sheathing for the walls instead of 7/16”: this was a stupid mistake by me, simply ordering the wrong thing. 1/2” is stiffer, and often is specified for roof use, but it’s not needed for walls and it’s more expensive.
- Not ordering build-specific lumber lengths: the small shed (the power shed) was 8’x12’. These are common lumber sizes. Yet all I ordered was 8’ lengths. I should have ordered 12’ lengths where appropriate, for things like the bottom and top plates. This would have made the build simpler and faster (less cutting), but also more robust.
Tools That Made Framing Easier/Faster
- Nail gun: I wasn’t sure if I should buy one right away, but that thought quickly disappeared. This made things SO much easier. I went Milwaukee because those are the tools and batteries my dad had already, so I could borrow things to start until I expanded my own collection. So far it’s been great.
- Impact driver: also should be obvious, but putting in screws is the other most common task when it comes to framing, so a great impact driver is important. Here I started out using a Ridgid driver (my dad’s), but eventually also got a Milwaukee one.
- Aluminum work platform: this is just high enough to allow me to work at the top of a wall, something that happens often, but is much lighter and easier to move around than a step ladder.
---
Continue to Build Update 5: Roof Trusses & Sheathing →