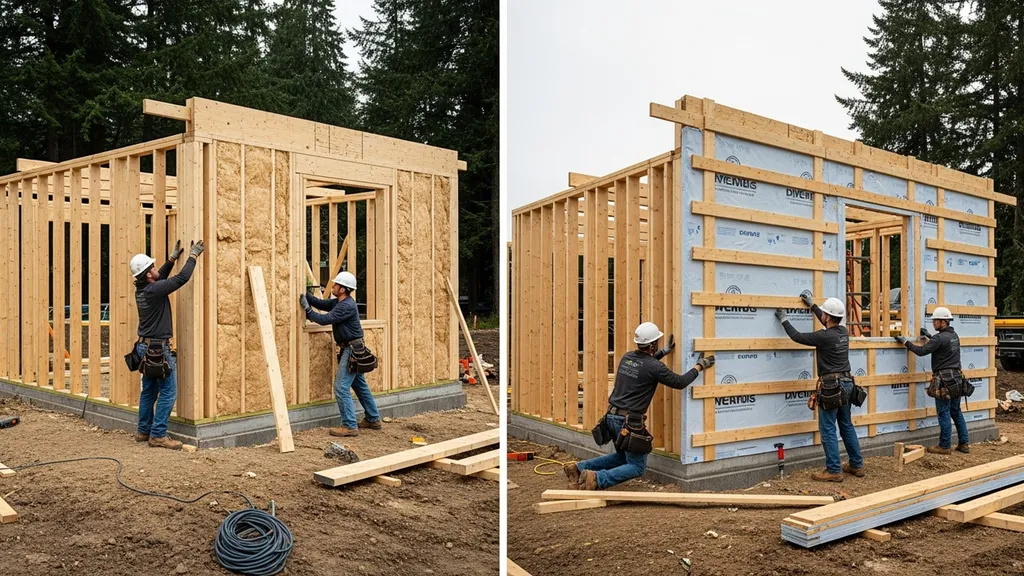
A practical comparison of Larsen truss walls and continuous exterior insulation—tradeoffs in thermal performance, moisture risk, cost, and DIY fit.
Larsen Truss vs Exterior Insulation: Which Is Better?
A homeowner planning a cold-climate small house often faces one core decision: reduce thermal bridging by adding a continuous layer of insulation outside the structural frame, or increase cavity depth with a Larsen truss and dense-packed fibrous fill. This comparison—larsen truss vs exterior insulation—walks through how each approach performs for thermal comfort, moisture management, cost, and DIY fit so an owner-builder can choose with confidence. The article explains assembly details, failure modes, and real-world scenarios where one approach usually makes more sense than the other.
TL;DR:
- Larsen truss gives 2–8 inches of extra cavity for dense-packed cellulose or mineral wool, reducing thermal bridging at studs by separating structure and insulation; best for retrofit depth increases and low-cost fibrous fills.
- Continuous exterior insulation (rigid foam, mineral wool boards, nailbase) delivers the cleanest thermal-bridging reduction and simpler path to Passive House targets when you can add thickness outside the sheathing.
- Choose Larsen truss for volunteer-built or budget cellulose projects and where cladding replacement is hard; choose continuous exterior insulation for new builds aiming for tight airtightness and straightforward wall vapor control.
Larsen Truss vs Exterior Insulation: Quick TL;DR and Comparison Table
TL;DR — Which Wins in Common DIY Scenarios
There’s no single winner. For builders prioritizing cheap, high-R cavity fills and retrofit-friendly builds, the Larsen truss often wins. For teams focused on eliminating thermal bridges and simplifying vapor control to meet Passive House or very low-energy targets, continuous exterior insulation (CI) typically performs better. Later sections unpack strengths, weaknesses, and scenario recommendations with wiring and flashing details for DIYers.
| Category | Larsen truss | Continuous exterior insulation |
|---|---|---|
| Typical R-value approach | Cavity fill: dense-packed cellulose or mineral wool (R ≈ 3.5–4.0 per inch). Truss adds 2–8" cavity. | Rigid foam: polyiso (≈ 5.0–6.5 R/in), EPS/XPS (≈ 3.5–5.0 R/in), mineral wool boards (≈ 3.0–4.0 R/in) |
| Thermal bridging reduction | Medium — reduces bridging by moving insulation outside studs but studs still continuous at inner framing | Low — continuous layer over sheathing greatly reduces thermal bridges |
| Moisture / condensation risk | Medium — exterior sheathing can be colder, needs careful rainscreen and vapor strategy | Low-to-medium — CI warms sheathing and reduces condensation risk if detailed correctly |
| Cost estimate range (relative) | Low–medium materials, higher labor for dense-pack | Medium–high materials (rigid boards), lower finishing labor if nailbase used |
| Labor / skill level | Medium — dense-pack requires blower; careful air-barrier continuity | Medium — cutting/fastening large boards; mechanical fastening or adhesives |
| Material waste | Low–medium — fibrous bulk vs cut boards | Medium — rigid boards generate offcuts, but nailbase reduces waste |
| Retrofit friendliness | High — easy to add outside or inside trusses without full tear-off | Medium — easiest during re-clad; can be invasive if not removing cladding |
| Passive House suitability | Possible with careful detailing and extra cavity + CI hybrid | High — common Passive House approach when thickness permitted |
For numeric R-value primers, see the insulation R-value basics and the R-value selection guide for practical targets by climate.
Larsen Truss vs Exterior Insulation: Option — Larsen Truss Explained
What a Larsen Truss Wall Looks Like and How It’s Built
A Larsen truss adds a second row of vertical members fastened through the exterior sheathing, creating an outer cavity separated from the load-bearing studs. The "truss" may be simple 2x2 or 2x3 battens or deeper engineered I-joists depending on desired cavity depth. That extra cavity accepts dense-packed cellulose, mineral wool, or loose-fill fiberglass and typically adds 2–8 inches of insulation depth. The inner stud wall houses structure, wiring, and the air barrier; the outer truss provides thermal separation without changing interior finishes.
For a visual demonstration, check out this video on roof overhangs with continuous exterior insulation - no:
The video above shows typical fastening patterns, how to maintain sheathing continuity, and common mistakes like under-fastening truss members and failing to maintain an exterior rainscreen gap.
Strengths of the Larsen Truss Approach
- Adds cavity depth without changing interior space — useful in small houses where interior floor area matters.
- Compatible with fibrous, low-embodied-carbon fills such as dense-packed cellulose and exterior mineral wool.
- Retrofit-friendly — can be attached to existing sheathing or installed during re-clad.
- Good for owner-builders using volunteer labor: framing carpentry skills are common; dense-pack can be subcontracted or rented.
- Allows the inner wall to host a continuous air barrier and service runs without disrupting the outer insulation layer.
Industry resources show Larsen trusses are used effectively in high-performance renovations when integrated into an IDP process. See the LEEP case study for data on high-performance renovation outcomes: LEEP Larsen Truss case study (April 2025).
Weaknesses and Common Failure Modes
- Exterior sheathing can be colder; if vapor control is wrong, condensation and rot risk increases. Continuous rainscreen and proper flashing are non-negotiable.
- Air-barrier continuity must be carefully detailed across the inner wall and at service penetrations; otherwise performance suffers.
- Thermally, there are still studs and fasteners bridging the cavity; the reduction in bridging is real but not as complete as CI.
- Dense-packed cavities require trained installers or rental equipment; poor installation causes settling or voids.
- Inspection and code review can raise questions about sheathing temperature and moisture safety — plan for documentation and engineering when in doubt.
For cold-climate adaptations and detailing to avoid those failure modes, consult the cold-climate installation guide and the full wall assembly guide.
Best For: Ideal Use Cases and DIY Fit
- Retrofit projects where adding exterior thickness is limited or interior floor area must be preserved.
- Builders focused on low-carbon cavity fills like dense-packed cellulose.
- Volunteer-built or budget-conscious projects where material costs must be minimized and skilled insulation contractors can be avoided or minimized.
- Situations where cladding will be replaced or where the exterior already allows for added depth.
Research and manufacturer guidance (for example, Passive House wall strategies) recommend careful integration of the air barrier and rainscreen when using truss walls; see design notes on continuous exterior layers at Rmax's Passive House wall assembly guidance.
Larsen Truss vs Exterior Insulation: Option — Continuous Exterior Insulation (rigid Foam, Mineral Wool, Nailbase)
Types of Exterior Continuous Insulation and How They’re Installed
Continuous exterior insulation (CI) is applied over the sheathing to create an unbroken thermal layer that reduces or eliminates stud-to-outside thermal bridging. Common materials:
- Polyiso: High R/inch (≈ 5.0–6.5) but performance drops at low temperatures; often used with capillary breaks and under rainscreens.
- EPS/XPS: Lower R/inch on average (≈ 3.5–5.0), durable, widely available.
- Exterior mineral wool boards (stone wool): Lower R/inch (≈ 3.0–4.0) but non-combustible and highly vapor-permeable, helpful for drying.
- Nailbase panels: Rigid insulation laminated to OSB or plywood, simplifying cladding attachment and reducing labor for furring.
Installation methods vary: mechanical fasteners and washers, long screws through sheathing into studs, or adhesives for some foam panels. Weather-resistive barrier (WRB) sequencing and a ventilated rainscreen are standard practice.
Science reviews show adding exterior insulation to wood-framed assemblies offers thermal advantages and improved hygrothermal behavior when detailed properly; see this review of high-R wood-frame walls for context: A review of high R-value wood framed and composite wood wall systems.
Strengths of Exterior Insulation Strategies
- Best thermal-bridging reduction of the options — continuous layer covers studs and headers, simplifying heat-flow calculations.
- Easier path to Passive House and low-energy certifications since CI maintains warmer sheathing temperature and reduces condensation risk.
- Nailbase panels speed installation and minimize secondary furring details.
- Exterior mineral wool boards pair well with high-permeability WRBs for assemblies that dry to the exterior.
- Simpler to inspect for continuity compared with cavities that require dense-pack verification.
Weaknesses and Installation Pitfalls
- Material cost for rigid boards or nailbase panels can be higher than bulk cavity fills.
- Polyiso's R-value sensitivity to low temperatures requires climate-aware selection; performance claims vary with supplier and test conditions.
- Attachment requires longer fasteners and careful detailing at windows, doors, and eaves to maintain WRB continuity and structural anchorage.
- Exterior insulation produces larger wall thickness that can affect window jamb depths and require deeper trim or custom sills.
- Offcuts generate waste unless panels are sized or nailbase used.
Pair CI with a ventilated rainscreen and proper WRB sequencing to manage moisture — see the rain screen assembly guide for best practices. For selecting compatible sheathing and attachment methods, consult the guide to wall sheathing. For material-choice tradeoffs between natural and synthetic options, see natural vs synthetic insulation.
Best For: Ideal Use Cases and DIY Fit
- New builds where exterior thickness can be planned into window and roof details.
- Projects aiming for Passive House, net-zero, or strict energy code targets.
- Teams wanting a simpler hygrothermal strategy (warm sheathing) and a cleaner path to reduce thermal bridging.
- Contractors or DIYers comfortable cutting and fastening large panels; nailbase panels lower skill barriers.
Larsen Truss vs Exterior Insulation: Alternative Wall Approaches Worth Comparing
Double-stud Walls as an Alternative
Double-stud walls create a wide cavity by building two stud walls separated by a gap. They allow thick fibrous fills with low embodied carbon and avoid most exterior foam. Advantages include large R-value potential and simpler interior finishes. Drawbacks are thicker assemblies, possible thermal bridging at plates and headers, and longer drying paths for moisture. For a side-by-side read, see double-stud vs larsen.
Nailbase Panels, Sips and Hybrid Assemblies
- Nailbase panels combine CI with sheathing and simplify cladding attachment; they reduce field labor and waste where panels are factory-sized for openings.
- SIPs (structural insulated panels) offer excellent airtightness and high R-values but require precise fabrication and limited on-site modification.
- Hybrids pair CI with additional cavity insulation (for example, a nailbase panel plus a shallow Larsen truss) to reach higher R-values with better moisture control.
When closed-cell or spray-foam is considered for cavities, it changes hygrothermal behavior and should be compared against fibrous fills; see the spray foam vs cellulose comparison for tradeoffs: spray foam vs cellulose.
When Hybrids Beat Pure Larsen or Pure Exterior Insulation
Hybrids work well when the project must meet a high R-value within a constrained total wall thickness or when combining fast installation (nailbase) with low-carbon cavity fills (cellulose). Hybrids can also simplify detailing for high wind or seismic regions where fastening and diaphragm continuity matter. DIYers should anticipate different inspection checkpoints and check local code acceptance for alternative assemblies.
Small table: assembly thickness vs R potential vs retrofit feasibility
| Assembly | Typical thickness added | R-value potential | Retrofit friendliness |
|---|---|---|---|
| Larsen truss + cellulose | 2–8" | Medium-high (cavity dependent) | High |
| CI (polyiso or mineral wool) | 1–6" | Medium–high per inch | Medium (best with re-clad) |
| Double-stud | 8–16" | Very high | Low–medium (takes interior space) |
Permitting varies by jurisdiction. DIYers should expect inspectors to ask for drawings that show vapor control, fastening schedules, and sheathing temperatures for non-standard assemblies.
Larsen Truss vs Exterior Insulation: Which Should You Choose? Scenario-based Recommendations
Cold-climate & Passive House Priorities
If the primary goal is meeting Passive House or very low heating loads in climate zones 6–8, continuous exterior insulation is often the simpler path. CI keeps the sheathing warmer, lowering condensation risk and simplifying vapor control. That said, a deep Larsen truss filled with dense-packed cellulose plus an exterior thin CI layer can match or exceed performance while improving embodied-carbon outcomes. For design tips focused on small efficient homes, consult passive house design tips and for whole-house strategies see the net-zero home guide.
Checklist:
- If Passive House target is priority: choose CI or a CI + truss hybrid.
- If maximizing low-carbon insulation and preserving interior area: consider Larsen truss with mineral wool or dense-packed cellulose.
Tight Budget or Volunteer-built Projects
Larsen truss projects tend to be more forgiving on material costs; dense-pack cellulose is cheaper per installed R than many rigid foams. Labor is higher for dense-pack setup but the tradeoff often favors owner-builders. For material sourcing and low-cost options, read about budget-friendly green materials.
Tiny Homes, Cabins, and Off-grid Builds
Space is premium in small dwellings. Larsen truss lets builders move insulation outward without shrinking interior rooms. However, tight energy budgets and off-grid heating may favor CI because it simplifies airtightness and reduces heating load per wall thickness. Determine the acceptable wall thickness versus interior floor area and run quick thermal models before committing.
Renovation and Retrofit Decisions
If replacing cladding or performing a full re-clad, adding continuous exterior insulation is straightforward and often produces the biggest reduction in thermal bridging. If cladding replacement is not planned or minimal disruption is required, adding a Larsen truss can improve R-value with less work. For very cold retrofits, consult government examples of Larsen applications in renovations: BASC PNNL example of Larsen truss walls.
Decision-tree style checklist:
- Can you remove cladding? Yes → CI is feasible. No → Consider Larsen truss.
- Is Passive House or tested airtightness required? Yes → CI or hybrid. No → Larsen truss acceptable.
- Is low embodied carbon a priority? Yes → favor cellulose/mineral wool in Larsen or hybrid assemblies.
- Is skilled labor available? No → nailbase CI or simple truss builds reduce specialized steps.
The Bottom Line
Both Larsen truss and continuous exterior insulation can produce high-performance walls when detailed correctly. Choose a Larsen truss for retrofit friendliness, low-carbon fibrous fills, and projects where interior area matters; choose continuous exterior insulation for the simplest thermal-bridging solution and the clearest route to Passive House targets. Match the choice to your climate, budget, and willingness to manage vapor and air-barrier detailing.
Frequently Asked Questions
Can I combine Larsen truss with exterior continuous insulation?
Yes. A common high-performance hybrid adds a thin layer of CI over the sheathing and then installs a Larsen truss for extra cavity depth. This approach warms the sheathing (reducing condensation risk) while still allowing dense-packed cellulose or mineral wool in the outer truss. The hybrid is popular where Passive House targets are strict but low-carbon cavity fills are preferred.
When combining systems, ensure continuous WRB and air-barrier continuity from interior to exterior and maintain a ventilated rainscreen gap outside the CI. Document fastening schedules and sheathing temperatures for the building inspector.
How do I avoid condensation and moisture problems with each approach?
For Larsen truss walls, keep the sheathing able to dry and warm it where possible: use a ventilated rainscreen, match vapor control placement to climate, and avoid impermeable vapor barriers on the exterior. See the cold-climate installation guide for targeted detailing. For CI assemblies, use breathable CI materials like mineral wool if exterior drying is desired, and seal WRB and window openings carefully so water doesn't reach the insulation-sheathing interface.
For guidance on where to place vapor control based on your assembly and climate, consult [vapor barrier placement](/blog/wall-vapor-barrier-placement-interior-vs-exterior) and for practical steps, see the [vapor barrier step-by-step](/blog/vapor-barrier-installation-for-walls-step-by-step-guide).
Rough cost and time differences per square foot?
Exact dollars vary by region and material market, but relative bands are useful. Larsen truss with dense-packed cellulose typically has lower material cost per R but higher labor for the cavity work and blower rental; it's often classified as low-to-medium cost. CI with polyiso or nailbase has higher material cost but can lower some labor hours if panels are large and fast to install. Timewise, CI can be faster for a small crew; truss work takes longer but can be staged over multiple weekends for owner-builders.
Estimate labor hours, consider rental equipment, and price both materials and trades before locking a decision.
How much does each approach reduce thermal bridging?
Continuous exterior insulation offers the greatest reduction in thermal bridging because the thermal layer is unbroken over studs, headers, and plates. Larsen truss reduces bridging compared with a single stud wall by adding a decoupled outer cavity, but some bridging remains through fasteners and at framing intersections. For numeric guidance on R-values and how assemblies add up, see insulation R-value basics.
Are there common permitting or inspection issues I should expect?
Inspectors often ask for details on vapor control, sheathing temperatures, fastening schedules, and structural connections for non-standard assemblies. Larsen truss walls may trigger questions about sheathing moisture because the exterior face can be colder; having a written hygrothermal rationale or citing case studies helps. CI assemblies may prompt checks on attachment of cladding through thick insulation (fastener lengths and structural blocking). Provide clear drawings and manufacturer fastening tables to speed approvals.