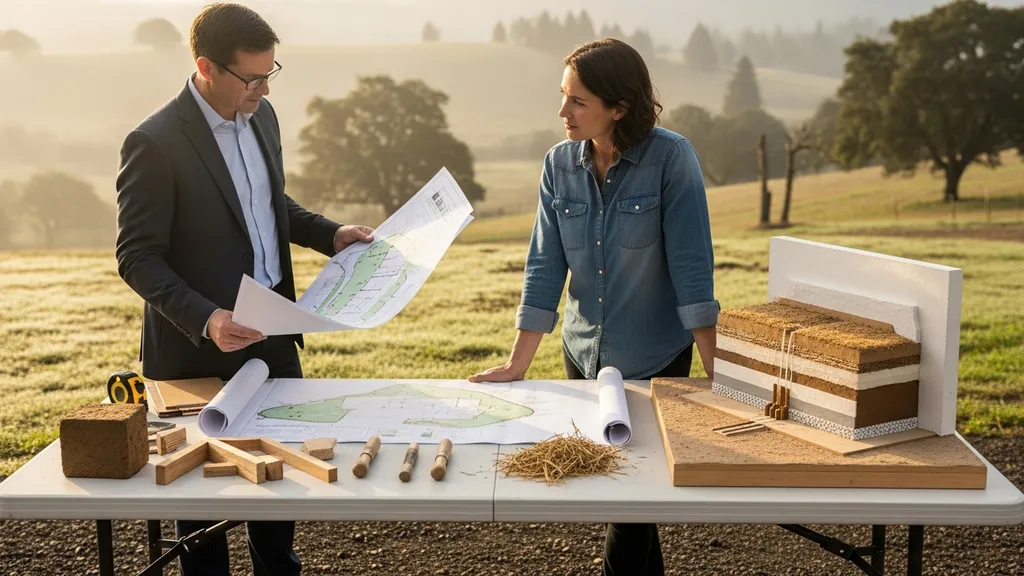
A practical guide for DIYers on securing permits for natural-material homes and meeting building code requirements.
Natural Building Permits: Navigating Code Requirements
A homeowner planning a straw-bale cabin or an earthbag studio needs to understand natural building permits before buying materials or breaking ground. Natural building permits are the formal approvals required to construct habitable structures using earthen, plant-based, or other nonstandard materials; they set the rules for safety, utilities, and long-term resaleability. This guide explains what triggers a permit, common code concerns for straw-bale, cob, adobe, hempcrete, and earthbag systems, and practical steps to prepare a permit-ready application so your project passes review and inspection.
TL;DR:
- Expect to show structural, moisture, and fire performance for natural builds—plan for 2–12 weeks of plan review and permit fees from a few hundred to several thousand dollars depending on jurisdiction.
- Use either a prescriptive or a performance-based compliance path; performance routes (engineering, testing, energy modeling, or PHIUS/Passive House certification) often cost more but reduce on-site framing changes.
- Meet officials early: request a pre-application meeting, bring wall samples or mock-ups, and include clear drawings, cut sheets, and lab reports so inspectors can approve your assemblies.
What Are Natural Building Permits and Why They Matter
Defining Natural Building and Common Systems (straw-bale, Cob, Adobe, Hempcrete, Earthbag)
Natural building covers methods using locally sourced or low-embodied-energy materials such as straw bales, cob (clay-sand-straw mixes), adobe bricks, hempcrete (hemp-lime composite), and earthbags. These systems may be load-bearing or infill, and they vary widely in thermal, moisture, and fire behaviors. Building codes treat natural-material assemblies as they treat any wall, roof, or foundation: the assembly must meet structural, fire, moisture, and energy requirements for the intended occupancy.
What Triggers a Permit: Size, Occupancy, Utilities, and Permanent Foundations
Common permit triggers include habitable square footage above local thresholds, permanent foundations, plumbing or electrical installations, septic or sewer connections, and any attached accessory structures. Small, very temporary shelters sometimes fall below thresholds, but most cabins intended for seasonal or year-round use will require a permit. For municipal basics and typical permit categories, see the federal guidance on permitting and building records at usa.gov or consult your local building department.
Risks of Building Without Permits (safety, Resale, Insurance, Fines)
Building without permits risks having work red-tagged, required demolition, insurance denial for claims, and reduced resale value. Lenders and title companies may refuse to finance or insure unpermitted structures. Local governments can levy fines and require retroactive approvals that are often more expensive than getting permits upfront. For DIYers, the practical payoff of permitting is documented safety, clearer inspection milestones, and preserved future property value. For a broad beginner primer on paperwork and process, see our DIY building permit guide and review material-property interactions in our sustainable materials guide.
Common Code and Inspection Issues Unique to Natural Materials
Structural Resistance and Load-path Documentation
Inspectors focus on continuous load paths and connections. For load-bearing straw-bale or earthbag walls, provide calculations showing compressive strength, settlement allowances, and lateral resistance under wind and seismic loads. When engineered calculations are required, expect stamped drawings from a licensed structural engineer. If your assembly is non-load-bearing (bales as infill in a timber frame), document the frame sizing, connection details, and how the infill is supported.
Fire Performance and Combustibility Concerns
Straw, hemp, and wood-based components draw scrutiny for combustibility. Codes assess assemblies for allowable fire-resistance ratings and ignition risk at likely exposure points (eaves, rooflines, attached garages). Tests such as ASTM fire-exposure or surface-burning performance are commonly referenced by reviewers. Adding non-combustible finishes, plaster thicknesses, or protective detailing at vulnerable junctions can reduce objections. For comparative performance context, see our comparison of hempcrete vs ICF.
Moisture Durability, Pests, and Rot Control
Natural materials are sensitive to prolonged moisture. Inspectors want to see capillary breaks, breathable yet water-shedding claddings, roof overhangs, and foundation details that prevent splashback and rising damp. Document vapor profiles and drainage planes; include insect and rodent protection at sill plates. For adobe and cob, toe-sill and plinth details are frequent failure points—show how you’ll keep the wall dry at the base. For material-specific concerns, our adobe building methods post describes common durable details.
Thermal Performance and Energy-code Interfaces
Energy codes (for example IECC-based local codes) require minimum U-values or an approved energy model. Natural walls often rely on thick assemblies for thermal mass and R-value. For compliance you can use prescriptive thicknesses or run a performance model that demonstrates compliance. Passive-house or PHIUS routes provide another performance-based option when seeking tight envelopes with mechanical ventilation. For indoor-air quality testing approaches after completion, see our guide to IAQ testing methods.
External authority: state and county permit guides can vary; some jurisdictions publish detailed checklists—see New Mexico’s residential permit guide for an example of what officials typically expect (BUILDING permit guide for residential construction).
How to Prepare a Permit Application for a Natural Build
Essential Documents: Site Plan, Floor Plans, Elevations, and Materials Spec
Prepare a concise permit packet: a site plan with setbacks, driveway and emergency access; floor plans with room names, areas, and egress; elevations showing heights and openings; and an assembly materials specification sheet listing wall, roof, foundation, and finish layers. Include manufacturer cut sheets, plaster mixes, and insulation products. File formats commonly accepted are PDF for plans and JPEG/PNG for photos; check your jurisdiction for size limits.
Before submission, schedule a pre-submittal meeting and bring a one-page summary that defines your construction system and identifies the code path you intend to follow. That proactive step often prevents surprises in plan review. See an example jurisdiction checklist in the Polk County customer guide (Customer guide to permitting - polk county).
When You Need Engineered Structural Calculations or Third-party Testing
Hire an engineer when spans exceed simple hand-calculated limits, when seismic or high-wind loads are controlling, or when you’re proposing load-bearing earthen walls with nonstandard connections. Typical engineering fees for a small single-story design often run from $1,000 to $5,000 depending on complexity. Third-party testing (compressive strength, fire resistance, durability) may be necessary if your local code official requires lab data; testing costs commonly range from a few hundred to several thousand dollars per test. Keep test reports, product data, and precedent approval letters together in your submission package.
Energy Compliance Paths: Modelling, Phius/passive House Options, or Prescriptive Substitutions
Energy compliance can follow prescriptive tables (if your assemblies match approved materials), a performance model demonstrating compliance, or certification under standards such as PHIUS/Passive House. Performance-based compliance requires an energy model or blower-door and duct testing at specified thresholds. For an example of an advanced performance certification, see the Living building challenge overview. Use our permit cost reference to budget for modeling and any required blower-door testing: permit cost breakdown.
Watch this step-by-step guide on pulling your own building permits as a homeowner:
Strategies to Meet Code: Prescriptive Vs. Performance-based Approaches
What the Prescriptive Path Looks Like for Natural Builds
The prescriptive path follows tables and details in the code that accept specific materials and minimum dimensions. For a straw-bale build, a prescriptive acceptance might require a noncombustible exterior plaster of a minimum thickness, reinforced bond beams, and specific foundation heights. This route is usually faster and cheaper for straightforward projects because it relies on accepted details rather than custom analysis.
How Performance-based Compliance Works (energy, Structural Demonstration)
Performance-based compliance relies on calculations, lab data, or field testing to show equivalence with code intent. Examples include structural analysis stamped by an engineer, energy models showing compliance with IECC targets, or fire-test data proving a natural assembly meets required ratings. This route allows more flexibility but typically increases plan-review time and cost.
When to Request an Alternative Materials/means and Methods Approval
If your chosen material isn’t listed in prescriptive tables, submit an alternative materials application. This typically includes a narrative that explains equivalency, supporting test reports, precedent approvals, and construction controls that will maintain safety. Municipalities review these on a case-by-case basis and may require mock-ups or hold-point inspections.
Comparison table: Prescriptive vs Performance-Based
| Path | Documentation Required | Timeline | Typical Cost Range | Best For |
|---|---|---|---|---|
| Prescriptive | Plans matching accepted details, product cut sheets | 2–8 weeks | $200–$2,000 | Simple builds using conventional or code-listed natural details |
| Performance | Energy model, engineered calculations, lab tests | 4–16+ weeks | $1,000–$10,000+ | Innovative assemblies, tight envelopes, complex spans |
| Alternative materials | Equivalency report, test data, mock-ups | 6–20+ weeks | $500–$8,000 | New or uncommon natural materials needing formal acceptance |
For planning and sequencing as an owner-builder, see our self-build planning guidance. Also review model approaches to municipal permitting reform in industry briefs like the MB&A checklist (Top 15 ways local jurisdictions can streamline the permit ...).
Working with Building Officials and Inspectors: Practical Tips
How to Set Up a Productive Pre-application Meeting
Request a pre-application meeting with the plan reviewer and chief inspector. Bring a concise one-page project summary, scaled plan sheets, and at least two physical samples or a small assembly mock-up. Ask clear questions: which code path do they expect, which inspections are hold points, and what documentation will satisfy each hold. Prepare an email agenda in advance and follow up with minutes so there’s a record.
Documenting Assemblies and Offering Demonstration Mock-ups
A 1m x 1m mock-up of a finished wall or corner is often persuasive. Include the full plaster build-up, water-resistive layers, and any special flashings. Photograph the mock-up with labels and include those images in your application. Bring lab reports and product cut sheets that match what’s in the mock-up.
Staging Inspections to Reduce Repeated Rechecks
Sequence inspections to reduce rework: foundation and below-grade (including termite/rodent protection), framing and structural connections, weather-resistant barrier and rough mechanical, insulation and air-sealing, and final systems and occupancy checks. Agree on hold points in writing. For projects in sensitive habitats, consider preparing a wildlife impact assessment in advance. For ventilation and IEQ priorities—especially with tight envelopes—use our ventilation code checklist to document compliance during inspections.
External guidance from the EPA offers model code language and green-code examples that some tribal and municipal authorities use during reviews: Tribal green building code guidance.
Special Permit Topics: Off-grid Systems, Sanitation, and Remote Builds
Permitting Off-grid Electrical and Solar Systems
Permits are usually required for electrical work and interconnection of PV systems, even in off-grid setups. Inspectors will want to see system diagrams, inverter cut sheets, battery specs, overcurrent protection, and grounding plans. For practical wiring and inverter considerations, refer to our guide on connecting PV systems: solar inverter connection. If you intend to disconnect from the utility, confirm whether the local utility or authority requires additional disconnect permits or metering changes.
Alternative Sanitation: Composting Toilets, Graywater, and Septic Approvals
Composting toilets and graywater systems have specific approval pathways. Some jurisdictions permit approved composting toilet models without a full septic permit; others require engineered septic designs when there’s any liquid discharge. Prepare manufacturer data, maintenance plans, and a plan for emergency backups. See our survey of compliant off-grid systems: off-grid sanitation options and the regional off-grid permit checklist for examples: off-grid permit checklist.
Access, Fire Safety, and Emergency Services Considerations for Rural Sites
Remote sites typically face questions about driveway grades, turnaround areas for fire apparatus, defensible space, and water supply for firefighting. Show access drawings, indicated fire separation distances, and on-site water storage or hydrant plans if required by the authority having jurisdiction. For broader green-building policy approaches and sample ordinance language, see EPA guidance on green codes (Tribal green building code guidance).
External reference on material recycling and waste considerations: California’s green building resources give examples of required documentation for efficient systems and waste reduction (Green building - calrecycle).
Regional Differences and When to Hire an Architect or Engineer
Urban Vs. Rural Permitting: What Changes
Urban jurisdictions often have tighter rules on setbacks, stormwater, and multi-unit occupancy; plan review tends to be faster but more prescriptive. Rural counties may be more flexible on materials but stricter about access, septic, and wildfire safety. Local precedents—existing projects approved in the same county—carry weight. Review local guides such as the California permit guide for a model of how state and local expectations layer.
State/province Variations and Examples (california Guide as a Model)
States and provinces differ in energy codes, allowable sanitation options, and licensing thresholds for who may sign drawings. Use a local guide as your baseline and treat statewide documents as minimum standards. When in doubt, call the plan-review desk for jurisdiction-specific checklists.
Cost Trade-offs: DIY vs Hiring Professionals
Decide to hire an architect or engineer when spans exceed expertise, when you need sealed drawings for a bank, or when the local reviewer requests stamped calculations. Typical professional fees vary widely: a simple stamp may cost a few hundred; full design and coordination for a small custom dwelling can run several thousand. Factor these costs into your budget using our regional cost guide and the general permit cost breakdown.
Decision criteria for hiring:
- Complex structural spans or multi-storey elements
- Unfamiliar jurisdiction with strict review practices
- Need for energy modeling, HVAC balancing, or special inspections
- Desire to reduce plan-review rounds and back-and-forth with officials
Key Points Checklist for DIY Natural Builders
Short Permit-ready Checklist (10 Items)
- Site plan: Show property lines, setbacks, drive access, and utilities.
- Floor plans: Label rooms, exits, and square footage.
- Elevations: Indicate heights, materials, and roof slopes.
- Foundation details: Include footing sizes, drainage, and termite protection.
- Wall assemblies: Show plaster, insulation, and moisture controls.
- Structural calculations: Include engineer stamps if needed.
- Energy compliance: Provide prescriptive details or an energy model.
- Sanitation plan: Show septic/composting/graywater systems and approvals.
- Inspection staging: List hold points and contact info for the inspector.
- Fees and forms: Attach application, plan-check fees, and contractor licenses.
Use the list as a submission cover sheet and keep copies on-site for inspectors.
Documentation Templates to Prepare Before Submission
Prepare one-page product data summaries for each specialty item (inverter, battery, composting toilet, plaster mix). Create a labelled photo set of any field mock-ups and a short equivalency narrative if using alternative materials.
Common Inspection Pitfalls and How to Avoid Them
Inspectors commonly reject incomplete foundation water-proofing details, missing HVAC ventilation documentation, and unclear connection details at roof-wall junctions. Avoid rechecks by providing cross-sections at all junctions, mechanical ventilation schedules, and mock-up photos. Review hidden project costs before you start: our hidden cost checklist highlights permit-related surprises to budget for.
The Bottom Line
Meet the building department early, prepare clear drawings and sample mock-ups, and choose either a prescriptive or performance-based compliance path that fits your design and budget. Budget for possible engineering, testing, and staged inspections so your natural build satisfies safety, resale, and insurance requirements while delivering the low-impact home you want.
Frequently Asked Questions
Do I always need a permit for an earthen or straw-bale structure?
Not always, but most habitable or permanently sited structures will require a permit. Permitting depends on occupancy, square footage, foundation type, and whether plumbing or electrical work is involved. Small temporary structures or sheds under local size thresholds can sometimes be built without permits, but anything intended for year-round occupancy typically triggers review.
Next action: call the local plan-review desk and ask about size thresholds and utility triggers before buying materials.
Can I get an approval based on past projects or photos?
Photos and precedent approvals help, but officials usually want documentation specific to your site and assembly: stamped calculations, lab reports, or a mock-up. Some jurisdictions accept a letter of equivalency referencing previously approved projects, but that letter should be backed by test data or an engineer’s report.
How long does a natural building permit review usually take?
Review times vary: simple prescriptive submittals may take 2–8 weeks; performance-based or alternative materials reviews can take 6–20+ weeks. Time depends on local workload, the clarity of your submission, and whether you need engineering or testing. Scheduling a pre-submittal meeting often shortens the review cycle.
Are there special inspections for natural materials?
Yes. Expect hold-point inspections for foundations, any engineered structural elements, weather-resistive barriers, and final envelope inspections. Authorities may specify additional checks for mock-ups, plaster thickness, or installed systems (solar, batteries, septic). Document hold points clearly on your plans to reduce surprises.
What if my local code official rejects my alternative material?
If an official rejects your materials, ask for clear written reasons and what specific documentation would allow approval. Options then include revising details to match prescriptive requirements, submitting additional test data or engineered calculations, or pursuing an appeal or variance through the local permitting authority.
Helpful step: request a conference or mediation with the reviewer and bring a mock-up and supporting reports to demonstrate equivalency.