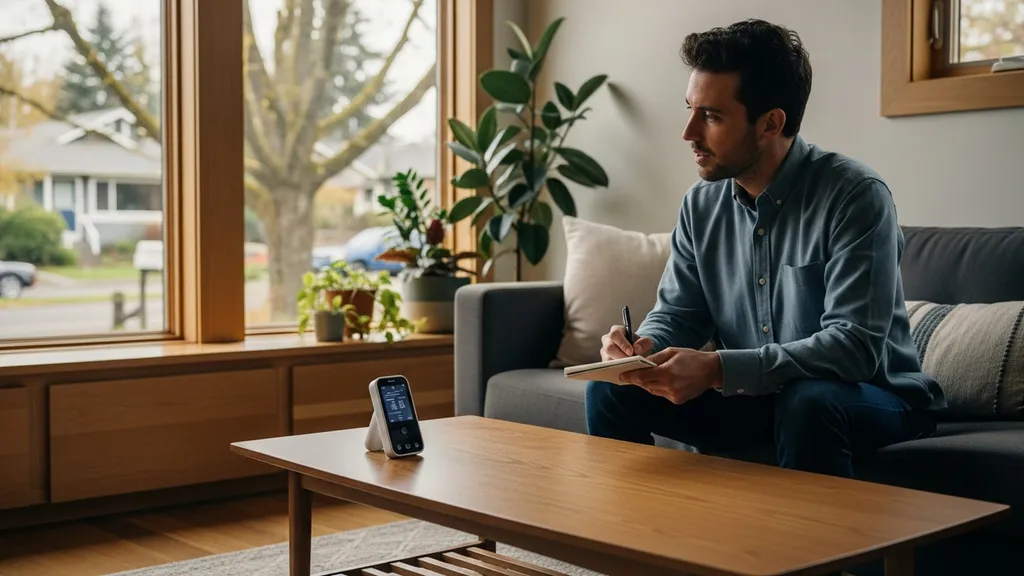
Practical, budget-friendly DIY indoor air quality test methods, tools, and next steps to find and fix pollutants in your home.
Indoor Air Quality Testing: DIY Methods
Indoor air quality test results can reveal hidden problems—off-gassing from new furniture, radon seeping from soil, or fine particles after wildfire smoke—and give homeowners the data needed to prioritize fixes. This guide explains affordable DIY approaches to measure particulate matter, CO2, VOCs, radon, moisture, and combustion gases, how to run repeatable tests, and which results require professional follow-up. Expect clear timelines (hours, days, weeks), estimated costs, and practical steps you can take right away.
TL;DR:
- Use a 72-hour baseline: log PM2.5 and CO2 for 48–72 hours with a portable monitor and expect to spend $100–$400 for reliable consumer devices.
- Screen for radon and VOCs: buy a short-term radon kit ($10–$30) and a VOC/TVOC detector for spot checks; send samples to a lab if results exceed action levels.
- Prioritize fixes by source: immediate steps—open windows, run a portable HEPA filter, stop the source; medium-term—seal drafts, fix moisture; verify improvements with repeat testing.
Why Run an Indoor Air Quality Test?
A targeted indoor air quality test helps answer a short list of practical questions: Is ventilation adequate? Are combustion appliances exposing occupants to carbon monoxide? Is there elevated radon? Are particulate levels elevated after wildfire smoke or cooking? Testing provides objective data to prioritize solutions and avoid unnecessary expense.
Who Benefits From a DIY Test
- Homeowners after renovations who want to check off-gassing from paints, flooring, or furniture.
- Owners of new builds assessing ventilation and tightness before occupancy.
- Residents in smoke-prone regions after wildfire events.
- Occupants noticing ongoing symptoms like headaches, nasal irritation, or chronic coughing.
When to Test (events and Triggers)
- After renovations or new furniture installation to check for VOCs/formaldehyde spikes.
- Following water intrusion, a leak, or an extended period of dampness to check for mold indicators.
- During wildfire season or after known outdoor pollution events to monitor PM2.5.
- If occupants report unexplained symptoms or a gas appliance was recently serviced.
Research and government guidance back testing as an initial step. For practical building-level strategies to prevent and resolve indoor air problems, consult the EPA’s Building Air Quality Guide: a guide for building owners and facility managers. Testing before and after fixes creates measurable proof of improvement and helps prioritize low-cost interventions.
The Main Indoor Pollutants a DIY Test Should Check For
A focused DIY program checks the pollutants most likely to affect occupants and that are measurable with consumer tools.
Particulate Matter (PM2.5 and PM10)
- What it is: Tiny particles from combustion, cooking, candles, tobacco, and wildfire smoke. PM2.5 penetrates deep into lungs.
- Sources: Cooking (especially frying), wood or pellet stoves, candles, tobacco, outdoor smoke that infiltrates.
- Thresholds: The WHO interim target for 24-hour PM2.5 is 35 µg/m3, with lower being better; many consumer monitors report µg/m3 and relative changes.
- Priority: High during wildfire smoke or heavy indoor combustion. Use a HEPA filter for mitigation.
Carbon Dioxide (CO2) as a Ventilation Proxy
- What it is: CO2 itself is not toxic at typical indoor levels but is a convenient proxy for ventilation effectiveness.
- Sources: People (exhalation), crowded rooms, poor mechanical ventilation.
- Thresholds: 800–1,000 ppm is commonly used as a comfort/ventilation threshold; sustained readings above 1,000 ppm suggest inadequate fresh-air exchange.
- Priority: High for homes with mechanical ventilation concerns or tight building envelopes.
Volatile Organic Compounds (vocs) and Formaldehyde
- What it is: A broad group of gases emitted from paints, adhesives, cleaners, new cabinetry, and some insulation materials.
- Sources: New furniture, fresh paint, some insulation and sealants, and household cleaners.
- Thresholds: Formaldehyde has specific health benchmarks; for general TVOC meters there is no universal limit—interpretation requires care.
- Priority: Medium-high after renovations or with new furnishings. If high, consider source removal or professional lab testing for speciation.
Radon and Combustion Gases (CO)
- What it is: Radon is a radioactive gas from soil; carbon monoxide (CO) is an acute toxic combustion byproduct.
- Sources: Radon enters from soil in contact with foundation; CO from malfunctioning gas appliances, generators, or vehicle exhaust.
- Thresholds: EPA radon action level is 4 pCi/L (picocuries per liter). Any CO reading above alarm thresholds requires immediate action.
- Priority: Radon requires testing everywhere eventually—high priority in known radon zones; CO is urgent if detected above alarm levels.
Moisture, Mold Indicators, and Allergens
- What it is: High humidity and moisture lead to mold and dust mite growth; allergens include pet dander and pollen.
- Sources: Crawl spaces, plumbing leaks, poor drainage, inadequate ventilation.
- Priority: High when there is visible mold, musty odors, or recurrent dampness. For DIY remediation options see our guide to crawl space moisture fixes and short-term options like moisture absorbers.
For standards and technical guidance on design and commissioning for IAQ, ASHRAE’s Indoor air quality guide is a useful reference for ventilation rates and design-level recommendations.
DIY Testing Tools and Methods for an Indoor Air Quality Test
This section lays out common consumer tools, how they compare, and practical guidance on placement and sampling duration.
Low-cost Particulate Monitors and What They Measure
- Typical devices: PurpleAir, handheld optical sensors using laser scattering.
- What they show: Real-time PM2.5 and PM10 concentrations, sometimes PM1.0.
- Caveats: Optical sensors can over- or under-report depending on particle composition; relative trends are generally reliable.
- Use case: Continuous logging to capture spikes from cooking, smoking, or smoke infiltration.
CO2 Monitors and Best Placement
- Typical devices: NDIR CO2 monitors (non-dispersive infrared) from brands like Aranet or CO2Logic.
- Placement: At breathing height in occupied rooms, away from direct windows, vents, or cooking sources. For bedrooms, place near the head of the bed.
- Sampling duration: 48–72 hours recommended to capture occupancy cycles.
Short-term VOC Samplers and Spot Tests
- Devices: Handheld TVOC detectors and passive sorbent tubes for lab analysis.
- Notes: Consumer VOC sensors report TVOCs (total VOCs) and are not species-specific; they can spike near alcohol-based cleaners or perfumes.
- When to send to lab: If a consumer VOC detector shows sustained high readings or if you need specific compound identification (e.g., benzene, formaldehyde).
Radon DIY Test Kits (charcoal Canisters and Alpha Track)
- Types: Short-term charcoal canister kits (2–7 days) and alpha-track long-term kits (90+ days).
- Accuracy: Short-term kits are good for screening; long-term kits reduce variability. If short-term results are near the EPA action level, repeat with a long-term kit or hire a professional.
- Typical cost: $10–$30 for DIY kits; lab analysis extra if not included.
Moisture Meters, Humidity Logging, and Visible Mold Checks
- Tools: Pin or pinless moisture meters; digital hygrometers for RH logging.
- Thresholds: Aim for indoor relative humidity 30–50% to reduce mold risk.
- Use case: Monitor basements, crawl spaces, and bathrooms for spikes after storms or leaks.
Combustion Appliance Checks: Simple CO Detectors
- Devices: UL-listed CO alarms for immediate safety; low-range CO meters for monitoring (ppm).
- Action level: Any CO alarm going off is an emergency—ventilate and evacuate if necessary.
Comparison/specs table
| Tool Type | Typical Price | What It Measures | Accuracy Notes | Best Use Case |
|---|---|---|---|---|
| Consumer PM monitor (PurpleAir-type) | $150–$400 | PM1.0/2.5/10 (µg/m3) | Good relative accuracy; affected by particle type | Continuous PM logging, wildfire tracking |
| NDIR CO2 monitor | $80–$300 | CO2 (ppm) | NDIR is reliable for indoor ranges | Ventilation checks, occupancy studies |
| TVOC detector (handheld) | $60–$250 | TVOC (ppb or index) | Not species-specific; cross-sensitivity common | Spot checks after remodels |
| Short-term radon kit | $10–$30 | Radon (pCi/L) via lab analysis | Short-term variability; lab-read accuracy | Initial radon screening |
| Moisture meter / hygrometer | $20–$150 | %RH and surface moisture | Hygrometer accurate; moisture meter varies by material | Mold risk assessment, crawl space checks |
| CO alarm / meter | $20–$300 | CO (ppm) | Alarms certified; meters vary | Safety monitoring for combustion appliances |
Calibration and placement guidance
- Calibrate or zero new sensors according to manufacturer instructions and allow warm-up.
- Place PM monitors on stable surfaces, away from direct source plumes unless testing a specific source.
- For CO2, place in the breathing zone, not immediately adjacent to windows or HVAC returns.
- Combine sensors: use a PM monitor with a CO2 monitor and humidity logger for a fuller picture.
Note on HVAC and heat pumps: when assessing appliance-related pollutants or planning ventilation improvements, consider HVAC alternatives and their IAQ implications. See our air source heat pump guide and background on heat pump efficiency when weighing system changes.
For technical measurement strategy and data-gathering recommendations, the Environmental Law Institute’s state guide and TSI’s IAQ handbook are helpful—see the ELI state guide for clean indoor air and TSI’s Indoor air quality handbook.
Step-by-step: How to Run an Indoor Air Quality Test at Home
This is a practical checklist for a repeatable test plan. The goal is a defensible baseline plus targeted tests to identify sources.
Plan: Choose Targets and Timeline
- Pick pollutants to test: PM2.5, CO2, TVOCs, radon, humidity, and CO depending on concerns.
- Choose devices: a PM monitor and CO2 monitor for baseline logging; a short-term radon kit; a hygrometer; and a CO alarm.
- Timeline: 72-hour baseline for PM/CO2; 7–14 days for short-term radon kits that require longer exposure depending on kit instructions; spot VOC checks of 24–72 hours.
Prepare the House (control Variables)
- Close windows for baseline indoor testing, but record weather and outdoor air quality (wildfire smoke can skew results).
- Minimize atypical sources during baseline (avoid deep cleaning with solvents, barbecues, or hosting many guests).
- Record occupancy, appliance use, and activities in a simple log—time-stamped notes are invaluable.
For tests that require evaluating airtightness or sealed conditions, consult guidance on airtight membrane installation and vapor barrier placement to understand how building assemblies affect test outcomes.
Run Tests: Placement and Logging
- Place PM monitor in the main living area at ~1–1.5 m height (breathing zone).
- Put a CO2 monitor in the same room and in a frequently occupied bedroom.
- Deploy radon kit in the lowest occupied level, following kit instructions for placement and exposure length.
- Log humidity with a digital hygrometer in basement, bathroom, and living area.
This video explains the fundamentals:
This video shows placement of PM, CO2, and VOC monitors and setting up a radon short-term kit—use it as a model for consistent placement and documentation.
Documenting Results and Repeat Testing
- Save raw data and screenshots; record date/time, room, and activity.
- Repeat tests after mitigation steps to verify improvements.
- Use simple spreadsheets to chart pre- and post-intervention values.
For more extensive measurement strategies consult TSI’s IAQ handbook for sampling plans and data collection protocols: Indoor air quality handbook – tsi.
How to Interpret DIY Indoor Air Quality Test Results
Raw numbers are only useful if placed against thresholds and context. This section explains typical benchmarks and common sensor issues.
Common Thresholds and What They Mean
- PM2.5: 24-hour averages under 12 µg/m3 (annual WHO guideline) are ideal; values above 35 µg/m3 indicate unhealthy short-term exposure.
- CO2: Sustained values under 800 ppm usually indicate adequate ventilation for comfort; 800–1,000 ppm suggests ventilation could be improved; consistently above 1,000 ppm signals poor air exchange.
- Radon: EPA action level is 4 pCi/L—if tests exceed this, plan mitigation such as a sub-slab depressurization system.
- CO: Any CO alarm activation is an immediate hazard—ventilate and evacuate until the source is fixed.
False Positives and Sensor Limitations
- TVOC sensors react to many compounds (cleaners, alcohol, perfumes). A spike after cleaning may not indicate hazardous long-term exposure.
- Optical PM sensors report relative concentrations but are influenced by particle composition and humidity.
- Sensor drift over months is common; periodic calibration checks or replacement may be needed.
For guidance on interpreting home test strategies and context-based analysis, see Atmotube’s practical advice on how to test home air quality.
When Results Indicate an Immediate Risk
- CO alarm sounds or meter shows >30 ppm sustained: evacuate, ventilate, and call emergency services if symptoms occur.
- Radon above 4 pCi/L: schedule mitigation planning and consider long-term testing to confirm exposure.
- PM2.5 extremely high from wildfire smoke (>150 µg/m3): seal the house, run HEPA filtration, and consider temporary relocation for sensitive individuals.
If moisture-related pollutants appear likely, consult our guides on fixing structural moisture: crawl space tips and consider wall assembly strategies like rain screen assembly to reduce intrusion.
DIY vs Professional Indoor Air Quality Testing: Cost, Accuracy, and When to Call a Pro
DIY testing is a cost-effective first step but has limits.
What DIY Testing Can Reliably Show
- Ventilation problems via CO2 trends.
- PM spikes from cooking, smoking, or wildfire smoke.
- Initial radon screening using short-term kits.
- Immediate combustion hazards if a CO alarm is present.
Limitations Where Professionals Add Value
- Precise VOC speciation (identifying benzene, formaldehyde) requires sorbent tubes and lab GC-MS analysis.
- Formal protocols for legal disputes, real-estate transactions, or insurance claims require chain-of-custody and certified lab results.
- Complex mold mapping or hidden-source identification tied to structural moisture is often best done with a trained building scientist.
Typical Cost Comparison and Turnaround
- Consumer monitors: $50–$600 depending on functionality.
- Short-term radon kits: $10–$30; lab analysis might be included.
- Lab VOC/PAH speciation: $100–$500+ per sample depending on compounds.
- Professional IAQ assessment: $300–$2,000+ depending on scope and instrumentation.
For guidance on material choices that reduce long-term IAQ problems, see our posts on how to source local materials and the sustainable materials guide. These resources help reduce the frequency of repeat testing by choosing low-VOC products at the outset.
Research indicates a two-step approach works well: DIY screening to prioritize fixes, then professional testing when high-risk results or formal documentation is necessary.
Fixes and Next Steps After an Indoor Air Quality Test
After testing, prioritize immediate mitigations, medium-term repairs, and long-term strategies.
Immediate Mitigation: Ventilation and Source Control
- Open windows when outdoor air is good; when outdoor air is poor, keep windows closed and use indoor filtration.
- Use portable HEPA filters sized for the room (CADR matching room area).
- Stop or move sources: avoid indoor smoking, delay painting until occupants are away, and remove suspect furnishings temporarily.
Medium-term Repairs: Sealing, Insulation, and Moisture Control
- Seal drafts and gaps around foundations, windows, and service penetrations to reduce soil gas and outdoor particle entry—see our air sealing materials guide.
- Fix drainage, gutters, and grading to reduce crawl-space moisture; for step-by-step repairs see crawl space moisture fixes.
- Replace or service combustion appliances and ensure venting is intact.
When selecting insulation or air-sealing materials, consider lower-VOC options like spray foam alternatives and natural fiber insulation to reduce future off-gassing.
Long-term Strategies: Material Choices and HVAC Upgrades
- Upgrade HVAC filtration to MERV 13 or better (compatible with system pressure drop) or add whole-house HEPA where feasible.
- Integrate mechanical ventilation balanced to local code and occupancy needs.
- In smoke-prone regions, adopt strategies from our wildfire-resistant construction guidance and use passive measures like passive solar shading to reduce heat-driven off-gassing.
Always verify repairs with repeat testing. Fixes that rely on sealing should be checked against ventilation to avoid trapping indoor pollutants.
Quick Key Points and Checklist for an Indoor Air Quality Test
Essential Tools to Buy or Borrow
- CO2 monitor (NDIR) for ventilation checks.
- Portable PM2.5 monitor (PurpleAir-style) for particulate tracking.
- TVOC detector for spot checks.
- Short-term radon kit.
- Digital hygrometer and moisture meter.
- UL-listed CO alarm.
Minimum Test Plan for a Typical Home
- 72-hour PM and CO2 logging in main living space.
- One short-term radon kit in the lowest occupied level (follow kit timing).
- 7-day humidity log in basement or crawl space if moisture is suspected.
Red Flags That Require Urgent Action
- Any CO alarm activation or sustained CO above alarm thresholds.
- Radon results above 4 pCi/L.
- Sustained PM2.5 spikes above 35 µg/m3 during normal use.
- Visible mold, constant musty smells, or relative humidity over 60%.
For readers inspecting mechanical layouts or plans to locate ventilation paths, see our guide to reading construction blueprints.
The Bottom Line: Indoor Air Quality Testing: DIY Methods Summary
An indoor air quality test is an affordable, practical first step to identify common hazards and prioritize fixes. DIY monitoring—PM2.5, CO2, TVOCs, humidity, and a radon kit—will reveal most household problems, but high-risk results such as radon above 4 pCi/L, repeated CO alarms, or complex VOC profiles should prompt professional follow-up. Repeat testing after interventions provides measurable proof of improvement.
Frequently Asked Questions
How accurate are low-cost air quality sensors?
Low-cost sensors (optical PM monitors and inexpensive TVOC sensors) are generally accurate enough to show trends and spikes, but their absolute accuracy can vary with particle type, humidity, and sensor drift. For PM2.5 they reliably detect relative increases and decreases; for absolute numbers expect ±20–50% variance compared with research-grade instruments. Periodic calibration and cross-checking with a second device or a known reference improves confidence.
How long should I test for radon with a DIY kit?
Short-term charcoal or canister kits commonly run for 2–7 days and are useful for initial screening. Because radon fluctuates daily and seasonally, a long-term alpha-track test (90+ days) provides a more reliable average exposure. If a short-term kit returns values near or above the EPA action level of 4 pCi/L, follow up with long-term testing or professional measurement before making mitigation decisions.
Where should I place a CO2 monitor for accurate ventilation readings?
Place CO2 monitors at breathing height (about 1–1.5 meters) in occupied rooms, away from windows, doors, or direct vents. Avoid placing them right next to occupants, stoves, or HVAC exhausts. For bedrooms, position the monitor near the bed but not obstructed; for open-plan spaces, test in the main gathering area and a secondary room to capture differences.
Do HEPA filters remove VOCs?
HEPA filters are very effective at removing particulate matter (PM2.5 and larger) but do not remove gases or most VOCs. To control VOCs, use activated carbon filters or specific gas-phase filters designed for organics, and address the source (remove or ventilate off-gassing materials). Combining HEPA filtration with carbon stages is a practical approach for many homes.
Can renters and tenants run indoor air quality tests?
Yes. Renters can and should perform basic IAQ screening—CO alarms, a short PM/CO2 monitoring period, and a radon kit if desired. When tests reveal hazards (CO, high radon, persistent mold) document results with photos and logs and raise the issue with the landlord or property manager. For building-level problems or remediation needs, use test records to request repairs.