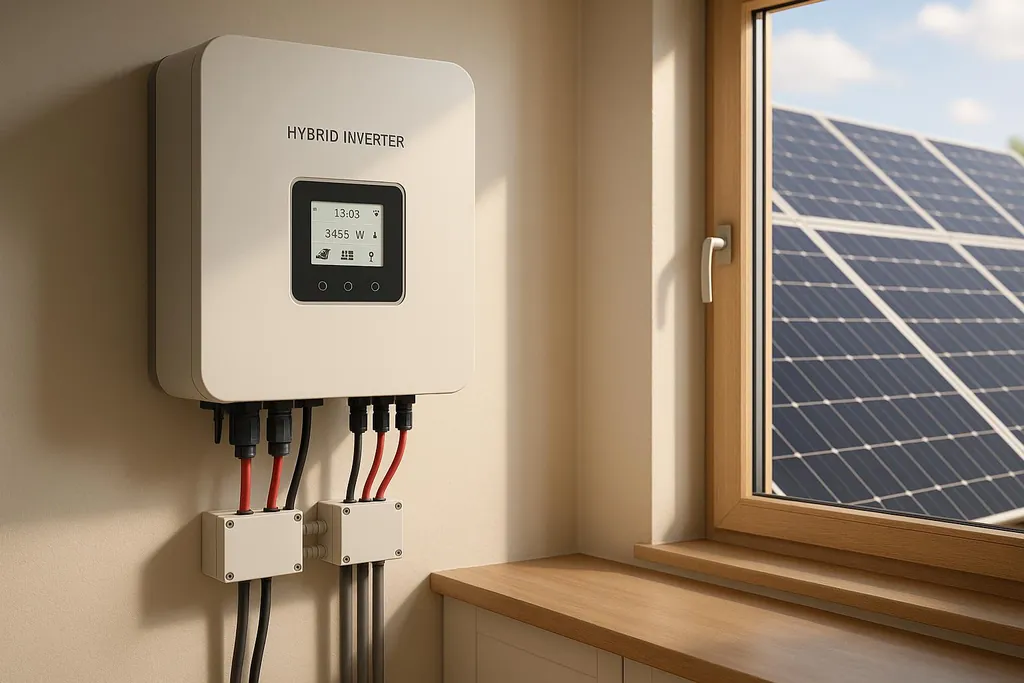
Learn how to safely connect solar panels to a hybrid inverter for efficient energy management and long-term performance.
How to Connect Solar Panels to a Hybrid Inverter
Want to set up solar panels with a hybrid inverter? Here's how you can do it safely and effectively. A hybrid inverter is the heart of your solar system, managing energy from solar panels, batteries, and the grid. Proper connections ensure reliable performance and long-term efficiency.
Before wiring anything, sanity-check your load assumptions with the Solar System Sizing Calculator so the inverter, battery bank, and array are in the right planning range.
Key Steps:
- Prepare Tools & Safety Gear: Use insulated tools, a digital multimeter, and protective equipment like gloves and goggles. Always follow safety standards.
- Mount Solar Panels: Install panels in a location with maximum sunlight, ideally south-facing. Ensure they’re securely mounted and free from shading.
- Wire Panels to Inverter: Choose series or parallel wiring based on your inverter’s specifications. Use weatherproof MC4 connectors for secure connections.
- Connect Batteries: Match the inverter and battery specs. Install fuses or breakers to protect against overloads.
- Link to Grid & Home: Wire the inverter to your electrical panel. Follow local codes and consult your utility company for grid connection approval.
- Test & Configure: Verify all connections, set up the inverter, and monitor performance using its interface or app.
Safety Tips:
- Turn off all power sources before starting.
- Ground all components properly.
- Keep a fire extinguisher nearby.
By following these steps, you’ll have a functional solar system that powers your home efficiently and safely. Regular maintenance and monitoring will ensure long-term reliability.
Solar Panel Setup Made EASY with PowMr 3000W Hybrid Inverter

Tools, Materials, and Safety Requirements
Having the right tools, materials, and safety measures in place is essential for a smooth and safe solar installation. These elements set the foundation for wiring and system configuration.
Required Tools and Components
To handle the job effectively, you'll need tools and components across three categories: hand tools, testing equipment, and electrical supplies.
- Hand tools: Include insulated screwdrivers, crimping pliers, cable cutters, diagonal cutters, stripping tools, long nose pliers, cable tie tools, torque wrenches, hex keys, and adjustable wrenches.
- Testing tools: A digital multimeter is a must-have for checking circuits are de-energized. Other tools include voltage testers, clamp meters, insulation testers, and a measuring tape.
- Electrical tools and consumables: Hammer drills for mounting and conduit installation, electric wrenches for mechanical connections, and consumables like cable ties, busbars, heat shrink tubing, wire nuts, solder, conduit, cable glands, terminal crimpers, and electrical tape.
For solar-specific components, you’ll need MC4 connectors, safety gloves, and your hybrid inverter with its manual. MC4 connectors are the go-to choice for solar panel connections - they’re built to withstand outdoor conditions. Always consult your inverter manual for details like fuse or circuit breaker sizes before starting.
Safety Steps
Solar installations operate with potentially hazardous voltages, so safety has to be your top priority. Even 110 volts can be deadly .
Start by disconnecting all power sources. Turn off the main breaker and solar disconnect switches, and cover the solar panels to stop them from generating electricity - panels can still produce dangerous voltages even on cloudy days.
Personal protective equipment (PPE) is non-negotiable. Wear insulated gloves, safety goggles, steel-toe boots, and arc-rated clothing. For rooftop work, hard hats protect against falling tools or debris, and fall protection gear like harnesses and lanyards is essential. If working near traffic or in dim light, high-visibility clothing is a smart choice.
Before touching any wires, double-check for voltage using a multimeter or tester. Short circuits, often caused by corroded cables, loose wiring, or poor grounding, are a common source of electrical shocks. Keep all connectors clean and dry to avoid these issues.
Make sure your installation aligns with the National Electrical Code (NEC) and local regulations. Proper grounding and bonding of all metal components reduce the risk of shocks and faults. Emergency shut-off switches and disconnect mechanisms are critical for quickly deactivating the system in emergencies or during maintenance.
Fire safety is another key consideration. Keep a Class C fire extinguisher nearby, as it’s designed for electrical fires. Never use water on an electrical fire - it conducts electricity and can worsen the situation.
Lastly, consider environmental factors. Work during cooler parts of the day, stay hydrated, and take regular breaks. When working on rooftops, always use proper anchor points for your fall protection equipment.
With solar installations growing at a 59% annual rate over the past decade, maintaining high safety standards and proper practices is more important than ever .
Step 1: Mount and Prepare Solar Panels
Setting up your solar panels correctly is key to maximizing energy production. The placement and installation process play a major role in how much power your hybrid inverter system can generate.
Pick the Installation Location
Choosing the right spot for your solar panels can significantly affect their performance. In the United States, south-facing roofs are ideal because they receive the most sunlight throughout the day. Panels installed in this orientation can boost energy production by as much as 30% or more .
> "We tell people that a solar panel costs the same amount regardless of what orientation it gets installed in, but the same solar panel facing south will produce more power than a solar panel facing any other direction." > > - Aaron Nitzkin, executive vice president of solar at Citadel Roofing and Solar
If a south-facing setup isn’t an option, east-west facing roofs can still deliver solid results, capturing sunlight for a good portion of the day. A well-designed east-west system typically loses only 10–15% of its annual output compared to a south-facing setup . Additionally, panels positioned just 10 degrees west of the ideal direction lose less than 1% of their yearly production .
Before finalizing your location, conduct a shading analysis. Check for nearby trees, buildings, or other objects that could block sunlight during peak hours. If shading is unavoidable on your roof, consider a ground-mounted system. These systems offer more flexibility in terms of positioning and angle adjustments .
For optimal energy production, tilt your panels to match your latitude, which typically falls between 25° and 45° in the continental U.S. Adjusting the tilt seasonally - raising it in winter and lowering it in summer - can further enhance performance .
Once you’ve identified the best spot with minimal shading, you can securely mount the panels.
Install the Panels
Before installation, inspect your roof to ensure it can handle the weight of the panels and withstand additional weather-related stresses. Use a mounting system designed for your local weather and seismic conditions. Be sure to waterproof any roof penetrations to maintain its structural integrity . In areas prone to earthquakes, include safeguards around the array to prevent damage during seismic events . Additionally, understanding seasonal wind patterns can help keep your setup secure year-round .
When positioning the panels, allow for proper airflow underneath them. Adequate ventilation reduces heat buildup, which can improve efficiency and extend the lifespan of your panels .
For areas with frequent storms, consider adding lightning protection to safeguard your system .
Check Panel Compatibility
After installing the panels, confirm that their electrical specifications align with your hybrid inverter and battery system. This includes verifying that the voltage, wattage, and current of the panels are compatible with your setup to ensure efficient charging.
Most residential solar panels operate at a nominal voltage of 24V or 48V. If you’re using a 48V battery system, your solar array must match this requirement to charge the batteries effectively.
Make sure your panel array produces enough power to fully charge your battery system. A system that’s too small may leave your batteries undercharged, while an oversized array might require additional charge controllers to manage the excess energy.
Finally, confirm that your charge controller is compatible with both your solar array and battery system. MPPT (Maximum Power Point Tracking) controllers are often the preferred choice for hybrid setups, as they optimize energy capture from your panels. When evaluating your hybrid inverter, also check for features like power rating, voltage range, communication protocols, monitoring tools, firmware updates, and compliance with safety and grid connection standards.
Step 2: Wire Solar Panels to the Hybrid Inverter
Once your solar panels are securely mounted and verified for compatibility, the next step is connecting them to the hybrid inverter. This requires careful attention to wiring configurations, proper connections, and following safety measures to ensure the system operates efficiently.
Choose the Right Wiring Setup
The way you wire your solar panels - whether in series, parallel, or a mix of both - determines the system's voltage and current output. Series connections increase voltage while keeping the current constant, while parallel connections boost current while maintaining the same voltage .
> "The way in which solar panels are wired determines how the system performs and what inverter the system can be paired with." - Catherine Lane, Solar Industry Expert
Before you decide, check your hybrid inverter's voltage and current specifications. String inverters typically require higher voltages, making series connections a better match, while parallel connections work well with microinverters since they handle individual panels .
| Aspect | Series Connection | Parallel Connection |
|---|---|---|
| Voltage | Adds up across panels | Stays the same as a single panel |
| Current | Stays the same as a single panel | Adds up across panels |
| Best Suited For | High-voltage systems, grid-tied | Low-voltage, high-current systems, off-grid |
| Shading Impact | Higher (affects entire string) | Lower (affects only shaded panels) |
| Inverter Compatibility | String inverters | Microinverters, MPPT controllers |
Distance matters too. For longer cable runs between panels and the inverter, series connections are more efficient because they reduce power loss . However, if your panels are in a location with partial shading, parallel connections are better since shading only impacts the affected panels instead of the entire string .
Many systems benefit from a combination of series and parallel configurations, balancing voltage and current to meet inverter requirements . Once you've decided on the wiring setup, you can move on to connecting the DC cables.
Connect DC Cables
With your wiring plan in place, you’re ready to connect the cables. Always check polarity with a multimeter before making connections, as incorrect polarity can damage the inverter or other components .
MC4 connectors are the go-to choice for solar panel connections because they are secure, weatherproof, and easy to work with . Start by routing the positive and negative DC wires from the solar array to the inverter’s location. Keep cable runs as short as possible by placing the panels close to the inverter .
For outdoor installations, use PV wire, which is designed to handle UV exposure and harsh weather conditions . Before powering up the system, install fuses or breakers on the positive cable to protect against overloads . Once all connections are complete, use a multimeter to confirm the voltage at each connection point to ensure everything is functioning correctly.
Manage and Secure Cables
After wiring the DC connections, proper cable management is essential for safety and long-term reliability. Poorly managed cables can lead to faults, fires, and stress on junction boxes .
Here’s how to handle it:
- Use UV-resistant cable ties, clamps, and routing clips to secure wires . Standard plastic ties often degrade under heat and UV exposure, so opt for materials specifically made for solar setups .
- Metallic clips and hangers provide better durability compared to plastic alternatives .
- Route cables in straight lines rather than curved paths to reduce stress and prevent early wear .
- Secure cables directly to the mounting system or racking with clips and clamps to keep them from moving in the wind and causing wear at connection points .
For areas where cables are exposed to potential damage - from foot traffic, equipment, or environmental risks - install conduits or protective ducts . Use corrosion-resistant materials like stainless steel or coated aluminum to avoid long-term damage from contact corrosion .
Pay close attention to bend radius limits when routing cables around corners or obstacles. Tight bends can damage the conductors inside, leading to performance issues . Bundle cables neatly with ties or clips, but avoid over-tightening, which could harm the insulation .
Regular inspections and maintenance of cable management can help you catch and fix issues before they escalate .
Step 3: Connect the Hybrid Inverter to Batteries and Grid
Once your solar panels are wired to the hybrid inverter, the next step is to link the inverter to your battery bank and your home's electrical system. This setup allows energy storage, powers your home, and integrates with the utility grid for a seamless energy management system.
Connect to Battery Bank
When connecting the inverter to your battery bank, safety and compatibility should be your top priorities. Always switch off the inverter and disconnect the battery before starting any connections . Make sure your battery bank matches the inverter's specifications . Lithium batteries are often a popular choice due to their high energy density, long lifespan, and minimal maintenance needs .
Use cables that are appropriately rated for your system's current requirements . If you're working with lead-acid batteries, ensure you're in a well-ventilated area to avoid exposure to harmful gases . Double-check the polarity while connecting to ensure the positive and negative terminals of the battery align with those on the inverter .
To protect against short circuits or overloads, install a fuse or breaker rated for your system between the battery bank's positive terminal and the inverter . Tighten all connections securely to reduce resistance and prevent voltage drops . If your setup includes a Battery Management System (BMS), confirm that any communication cables between the BMS and the inverter are properly connected .
Once the battery bank is safely connected, you can proceed with routing the inverter’s AC output to your home’s electrical panel.
Wire AC Output to Electrical Panel
After setting up the battery bank, the next step is to connect the inverter’s AC output to your home’s electrical panel. This process requires careful planning and adherence to electrical codes . Route cables from the inverter’s AC output to the electrical distribution panel, ensuring the live, neutral, and ground wires are properly connected .
Place the inverter in a well-ventilated space to prevent overheating . Use cable glands and conduits to shield the wiring from physical damage and harsh weather . Follow all safety protocols, including proper grounding, by connecting the inverter, batteries, and solar panels with ground wires and linking the equipment grounding conductor to your home’s grounding system .
If your inverter isn’t UL-listed as a main power source, configure the breaker box as a sub-panel . Clearly label the solar circuit inside the breaker box and ensure compliance with local code requirements . If you’re unsure about wiring specifics, it’s best to consult a licensed electrician .
Grid Connection Steps
Before connecting to the grid, obtain approval from your local power company and follow their interconnection policies . Ensure all electrical work complies with local and national standards, such as those outlined in the National Electrical Code (NEC) .
To safely work on the system, cover your photovoltaic panels with opaque materials or disconnect the DC-side circuit breaker to stop power generation during installation . Confirm that all cables are securely connected, properly insulated, and meet the necessary specifications . Ground all wiring correctly to prevent power issues and meet utility requirements .
Once connected, the grid enables the inverter to distribute power to your system and batteries for storage. It also manages energy flow, ensuring surplus power is routed efficiently . After installation, test the system to confirm it operates correctly in all modes, including solar charging, battery backup, grid-tie functionality, and load management .
System Setup and Testing
Once all physical connections are in place, the next step is configuring your hybrid inverter and verifying that the system operates safely and efficiently. This phase is essential to ensure your solar setup performs as intended and protects your investment.
Set Up the Hybrid Inverter
Proper configuration of the hybrid inverter is key to managing power from your solar panels, batteries, and the grid effectively . Most inverters offer a control interface, either through an LCD display or a smartphone app, to make setup straightforward.
Start by selecting the correct battery type and capacity to match your system. Adjust the grid voltage (120V/240V) and frequency (60Hz) for U.S. standards. Additionally, program charge and discharge schedules to take advantage of peak and off-peak energy rates. If you're planning to sell surplus energy back to the grid, enable grid-tie functionality .
SOC (State of Charge) Settings play a critical role in determining how the system switches between power sources. For example:
- The SOC recovery value decides when the inverter switches from the grid back to battery power.
- The low DC protection SOC setting dictates when the system transitions to grid power to prevent battery over-discharge.
- In off-grid mode, the discharge protection value determines when the inverter shuts down if no grid power is available.
Monitoring Setup is another important step. Use the inverter's display or app to track performance metrics and configure alerts for issues like low battery voltage, grid outages, or system faults . Set data logging intervals to collect performance data for future analysis.
Once the settings are complete, it's time to test the system to ensure everything is functioning properly.
Run Initial Tests
Initial testing confirms that all components are working together as intended. Start with a visual inspection of connections, checking for loose terminals, damaged insulation, or overheating signs . Make sure solar panels are clean and free of debris that could hinder performance .
Next, use a digital multimeter to measure the DC open-circuit voltage from the solar panels. Compare these readings with the manufacturer’s specifications to confirm they fall within 10% of the rated voltage and match your inverter's input range . For AC output, measure voltage and current, and use an oscilloscope if available to verify a clean sine wave output .
Power Output Calculations help evaluate system efficiency. Calculate power output using the formula _Watts = Volts × Amps_ and compare it with your solar panels' rated wattage . Measure both input and output power to determine inverter efficiency by dividing AC output power by DC input power .
Simulate fault conditions, such as overvoltage or overcurrent, to test the inverter's protection features . Check all disconnect switches and circuit breakers to ensure they operate correctly . Record key metrics like system efficiency, daily energy yield, and Performance Ratio (PR) to establish baseline measurements .
Monitor and Maintain the System
Once the setup is verified, regular monitoring and maintenance are essential to keep the system running at its best. Modern hybrid inverters come equipped with monitoring tools that allow you to track performance through display screens or smartphone apps .
Set up real-time alerts for critical metrics, such as power output, battery charge levels, and system efficiency . Schedule routine maintenance:
- Check the inverter display monthly for error messages.
- Inspect wiring and connections every quarter.
- Clean solar panels as needed to maintain efficiency.
- Monitor operating temperatures to avoid performance drops caused by excessive heat .
Software and Documentation are also crucial for long-term system health. Regularly check for firmware updates and install them following the manufacturer’s instructions . Keep a log of maintenance activities, performance data, and energy production to track trends and identify any seasonal variations.
> "Hybrid inverters merge solar and battery inverter functionalities into a single unit, enhancing system efficiency and simplifying operations."
Finally, create a maintenance checklist to cover essential tasks like inspecting terminal connections, verifying safety disconnects, and ensuring the monitoring system provides accurate data . Address any issues promptly to maintain system performance and safeguard your renewable energy investment.
Conclusion
Connecting solar panels to a hybrid inverter requires careful attention to detail. By following the outlined steps, you can ensure a safe and effective installation process, from mounting the panels to configuring the system.
Main Points to Remember
Safety should always come first. Turn off all power sources before starting, use proper protective gear, and double-check that all wiring is secure, grounded, and meets local electrical codes. A final review of your work is crucial to avoid any issues.
Proper panel mounting and placement are key to performance. Position the panels in a spot with maximum sunlight and minimal shading. Use manufacturer-recommended mounting hardware to ensure the panels can withstand local weather conditions while maintaining the correct alignment.
Wiring must be done correctly to ensure efficiency and durability. Use cables rated for your system, confirm all connections meet specifications, and shield them from environmental wear and tear to maintain long-term reliability.
Configuring the inverter is essential for managing power effectively. Select the right battery type, adjust voltage settings to match U.S. standards (120V/240V at 60Hz), and program charge schedules that balance energy use and cost savings.
Final DIY Installation Tips
For a successful and long-lasting system, keep these additional tips in mind:
- Adhere to local electrical codes and secure any required permits before starting. Many areas mandate professional inspections for solar installations, especially for grid-tied systems. Contact your local building department to understand the specific regulations in your area.
- Consider hiring a professional for complex electrical tasks, such as connecting your system to the main electrical panel or setting up grid-tied functionality. Licensed electricians can ensure compliance with safety standards and handle high-voltage connections properly.
- Regular maintenance is crucial. Clean your solar panels regularly to maximize efficiency, and use the inverter's tools or apps to monitor daily energy production, battery levels, and overall system performance. Schedule annual professional inspections to check components and ensure safe operation.
Keep a detailed record of your installation and maintenance activities. This documentation will be invaluable for troubleshooting, warranty claims, or future upgrades. Remember, different components have varying lifespans - solar batteries typically last 5 to 15 years, while string inverters may need replacement after 10 to 15 years.
By investing time and care into your hybrid solar system, you’re not just setting up a renewable energy source - you’re securing years of reliable performance and maximizing your return on investment.
For more guides and tips on energy-efficient living, visit [DIY Eco Homes](/).
FAQs
What are the benefits of using a hybrid inverter with your solar panel system?
A [hybrid inverter](/blog/hybrid-inverter-maintenance-checklist) serves as both a [solar inverter](/blog/5-common-solar-inverter-issues-and-fixes) and a battery inverter, offering a range of practical benefits. By enabling the storage of excess solar energy in batteries, it allows you to use that energy later, cutting down your dependence on the grid and helping to lower your electricity costs.
These inverters also come in handy during power outages by keeping essential appliances running smoothly. On top of that, they improve the efficiency of your solar system by managing energy usage and storage more effectively, making them a smart choice for those aiming to gain more control over their energy needs.
How can I choose between series and parallel wiring for my solar panels when connecting to a hybrid inverter?
To figure out whether to use series or parallel wiring for your solar panels, start by checking the voltage and current specifications of your hybrid inverter. Series wiring boosts voltage while keeping the current the same, making it a good fit if your inverter needs higher voltage input. In contrast, parallel wiring increases current while maintaining the same voltage, which works better for setups requiring more current, like battery charging systems.
Your decision should match your system's design and energy needs. For instance, series wiring is often chosen for longer cable runs since it helps reduce energy loss. Meanwhile, parallel wiring is more effective in shaded areas to ensure consistent performance. Always refer to your inverter’s manual and double-check its requirements before making a choice.
What safety precautions should I take when connecting solar panels to a hybrid inverter?
When working on connecting solar panels to a hybrid inverter, keeping safety front and center is absolutely essential. Begin by switching off the DC circuit breaker and covering the solar panels to avoid any risk of accidental shocks from live wires. Make sure to wear the right safety gear, including insulated gloves and a hard hat, to protect yourself throughout the process.
Double-check that all wiring is done using cables with the correct ratings to prevent voltage drops or electrical issues. Install properly rated fuses or circuit breakers on both the PV input and battery leads to add an extra layer of protection. Most importantly, stick to the manufacturer’s instructions, and if you’re unsure about any part of the installation, don’t hesitate to reach out to a licensed electrician to ensure everything is done safely and up to code.