Learn how to source local materials for your DIY home, saving costs and supporting your community while ensuring quality and compliance.
How to Source Local Materials for DIY Homes
Sourcing local materials for your DIY home saves money, supports nearby businesses, and reduces transportation costs. It also helps your project align with your region’s climate and building conditions. Here's how to get started:
- Why Choose Local Materials: Lower shipping costs, reduced carbon emissions, and direct access to inspect quality. Plus, you support your local economy.
- Common Local Materials: Timber, stone, clay, reclaimed wood, straw bales, and earth materials are widely available and often suited to regional climates.
- Finding Suppliers: Visit sawmills, quarries, salvage yards, and surplus stores. Use online tools like Google Maps or Facebook Marketplace to locate materials nearby.
- Quality Checks: Inspect for defects, ensure compliance with building codes, and verify certifications like grade stamps or fire resistance ratings.
- Cost-Saving Tips: Build relationships with suppliers, negotiate bulk discounts, and plan early to avoid price hikes or delays.
Unlocking Earth Building Recipes: Sourcing Local Natural Materials & Making High-Performing Mixes
How to Find Local Material Suppliers
Tracking down local suppliers involves a mix of old-school networking and modern digital tools. The goal is to connect with suppliers who offer quality materials at competitive prices. This is especially important when aiming to build cost-effective, environmentally conscious homes.
Where to Look for Local Materials
Salvage yards and architectural reclaim centers are treasure troves for unique building materials. These places often dismantle old buildings and sell items like vintage hardwood flooring, reclaimed bricks, and steel beams. They may also carry surplus materials from construction projects.
Local quarries and gravel pits are excellent sources for natural stone, sand, and aggregates. Since these suppliers often deal directly with customers, there’s usually room to negotiate pricing. Many of them also offer bulk delivery, which can help cut costs.
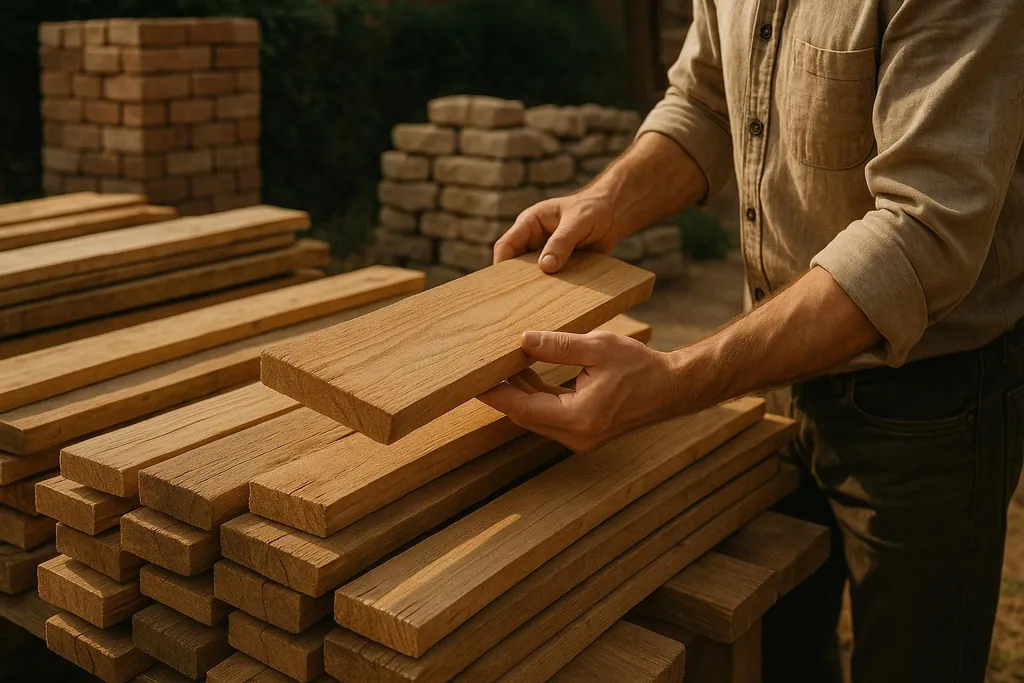
Sawmills and lumber operations near you can supply freshly cut timber at lower prices compared to large retailers. Smaller mills often specialize in native wood species and may even custom-cut lumber to meet your project’s needs. Byproducts like wood chips, bark, and sawdust are often available and can be used for landscaping or insulation.
Agricultural suppliers and farms can provide materials like straw bales, clay, and stone. Farmers may sell these items directly, especially during harvest seasons when supplies like straw bales are more plentiful.
Construction surplus stores are another great option. These stores purchase leftover materials from large building projects and resell them at discounted prices. You might find everything from roofing supplies to electrical components.
Online marketplaces such as Facebook Marketplace, Craigslist, and local classifieds are perfect for snagging surplus or reclaimed materials from contractors and homeowners.
Tips for Researching and Connecting with Suppliers
Start by creating a list of potential suppliers in your area. Tools like online directories, Google Maps, and local business listings can help you identify quarries, sawmills, and specialty suppliers within a 50-mile radius. This range keeps delivery costs manageable while providing a variety of options.
Make in-person visits. Meeting suppliers face-to-face allows you to check out their inventory, evaluate material quality, and establish relationships that could benefit your project down the line. During these visits, ask about the origin of materials, their processing methods, and any certifications they hold.
Understand supplier capabilities and inventory cycles. For instance, some quarries may only extract certain types of stone during specific seasons. Knowing these details can help you plan your purchases more effectively.
Tap into local networks. Builders and contractors in your area are often great resources for supplier recommendations. Many of them have longstanding relationships with reliable suppliers. Attending local trade meetings or home-building association events can also open doors to valuable connections.
Discuss minimum orders and delivery options upfront. Some suppliers may require you to purchase more than you need, while others are more flexible with smaller orders. Clear communication about delivery schedules and costs ensures your materials arrive when you need them.
Verify licenses and insurance. Make sure each supplier has the proper business licenses and liability insurance. This protects you and adds peace of mind.
Finally, ask for references from past customers. Reliable suppliers won’t hesitate to share feedback from other builders or DIYers. Strong references can give you confidence in their service and the quality of their materials.
Building solid relationships with local suppliers takes effort, but it pays off in better pricing, priority service, and access to high-quality materials when you need them most. These connections can also help you ensure that your materials meet building codes and project requirements.
How to Check Material Quality and Suitability
Evaluating local materials is a key step to ensure they meet your project's requirements and comply with building codes. This process safeguards your investment, ensures durability, and keeps your DIY home safe and up to code. Think of it as the bridge between choosing a supplier and constructing a secure, compliant home.
Checking for Defects and Structural Problems
Start by inspecting materials visually. Look for obvious signs of damage or wear that might compromise their use.
For reclaimed wood, test for rot by pressing a screwdriver into the surface - softness is a red flag for decay. Check for insect damage in the same way, and watch for fresh debris around the material. While older wood may show warping, splitting, or surface cracks (known as checking), it might still be usable depending on your project's needs.
Stone and brick require a slightly different approach. Tap stones with a hammer and listen for hollow sounds, which can indicate internal cracks or voids. If you notice white, chalky deposits (efflorescence), it could signal moisture issues that might lead to freeze-thaw damage. For bricks, examine the mortar joints for crumbling or missing sections that could weaken the structure.
When inspecting metal materials like steel beams or roofing, look for rust, corrosion, or fatigue cracks. Surface rust might not be a dealbreaker, but deep pitting or flaking is a warning sign of severe deterioration. Pay close attention to connection points and welds, as these areas often show stress-related issues first.
For wood, use a moisture meter to ensure framing lumber has a moisture content below 19%, while finish materials should fall between 6-8%. Also, measure the lumber's thickness, width, and length, ensuring variations don’t exceed 1/8 inch. This helps prevent construction problems. Finally, confirm materials are straight and square using a level and square.
Thorough inspections not only keep your project on track but also promote sustainable building practices.
Making Sure Materials Meet Building Codes
Once you've confirmed the physical quality of your materials, the next step is ensuring they comply with local building codes. Using materials that don’t meet these standards can lead to failed inspections, expensive rework, or even unsafe conditions.
For structural materials like lumber, steel, and concrete, check that they meet specific grade requirements. For example, lumber should have grade stamps from organizations like the Southern Pine Inspection Bureau or West Coast Lumber Inspection Bureau, which indicate species, grade, moisture content, and mill identification. For structural purposes, look for grades such as "Stud", "Construction", or "Select Structural."
Fire resistance ratings are another critical factor. Materials used in fire-rated assemblies must have proper certifications. Look for labels from UL (Underwriters Laboratories) or ICC-ES (International Code Council Evaluation Service) that document fire performance.
For insulation materials, ensure they meet the R-value requirements outlined in your local energy code. If you're using reclaimed or surplus insulation, check that the labels showing thermal performance values are intact. Additionally, vapor barrier materials should have specific permeability ratings, measured in perms.
Electrical and plumbing materials are subject to strict codes as well. Electrical wires must be rated for their intended use and bear UL listing marks, while plumbing materials need NSF International certification for potable water applications.
If you're uncertain about a material's compliance, contact your local building department. Inspectors can clarify whether reclaimed or alternative materials are acceptable. In some cases, jurisdictions allow engineered solutions or alternative compliance paths for non-standard materials.
For critical structural elements, consider a professional evaluation. A structural engineer can assess materials like reclaimed beams or columns and provide calculations to confirm their adequacy. This documentation will be necessary for your permit application and can help ensure inspection approval.
Keep detailed records of all materials, including supplier details, grade stamps, certifications, and any professional evaluations. Building inspectors will likely ask for this documentation during inspections.
If a material lacks clear documentation, consider using independent testing services. Labs can assess properties like strength or fire resistance to verify code compliance. While this adds to your costs, it could be worth it for expensive or hard-to-replace materials.
Taking the time to understand and verify quality and code compliance upfront can save you from costly mistakes down the road. It’s a step that ensures your DIY project runs smoothly and, most importantly, keeps your family safe.
Ways to Save Money on Local Materials
Cutting costs on materials can significantly reduce the overall expense of a DIY home-building project. With construction materials typically making up 40–60% of the total project cost , even small savings can add up quickly. By combining smart purchasing strategies, building strong supplier relationships, and planning ahead, you can make the most of your budget.
How to Negotiate Prices and Buy in Bulk
Building good relationships with suppliers pays off. Reliable communication and paying on time can lead to discounts, flexible terms, and even priority access to materials. Suppliers are more likely to offer better deals when they know they can count on you as a repeat customer.
Buying in bulk is another way to save. Discounts for volume purchases often range from 5–20%, and paying promptly or in cash can sometimes earn you an additional 1–3% off . For materials like lumber or stone, ask about bulk pricing tiers to see how much you can save when ordering larger quantities.
If you're planning multiple projects or phases, consider committing to long-term contracts with a single supplier. This can lock in lower prices and shield you from sudden market changes. Competitive bidding is also a powerful tool. Create a detailed request for proposal (RFP) that outlines your material needs, quantities, delivery expectations, and timelines. Share this with several local suppliers to gather bids, giving you leverage to negotiate better deals.
Don't overlook delivery costs. Many suppliers waive delivery fees for larger or repeat orders, so always ask if free delivery is an option. Prompt payments and clear forecasts of your material needs can also help you qualify for better pricing tiers and discounts, reducing financial risks along the way.
Planning Early to Find Better Deals
Starting your material sourcing process early can help you lock in favorable prices and avoid sudden market fluctuations. By giving yourself time to shop around and compare options, you can secure better deals while improving your cost estimates for the entire project.
Careful planning also prevents waste and shortages. When you take the time to review your material needs and purchase only what’s necessary, you not only save money but also improve the efficiency of your DIY project. Combining these strategies with thorough quality checks ensures that you're not just saving money but also maintaining the standards required for a successful build.
Local Materials Comparison for DIY Homes
When planning a DIY home project, selecting the right materials is a crucial step. Each material has unique properties, costs, and suitability for different applications. To make an informed choice, it’s important to weigh factors like cost, insulation performance, structural strength, installation difficulty, weather resistance, and local code compliance. These decisions can significantly influence the success of your eco-conscious, community-oriented build.
Below is a handy comparison table that breaks down key attributes of popular local materials:
Material Comparison Table
| Material | Cost | Insulation Performance | Structural Use | Installation Difficulty | Weather Resistance | Availability |
|---|---|---|---|---|---|---|
| Straw Bales | Low | High | Non-load-bearing walls | Moderate | Effective when protected | Common in rural areas |
| Rammed Earth | Moderate | Low insulation, high thermal mass | Load-bearing walls | High | Excellent in right regions | Found in clay-rich areas |
| Cordwood | High | Moderate | Infill walls | Moderate | Good with proper mortar | Common in forested regions |
| Adobe Blocks | Moderate | Lower insulation | Load-bearing walls | Low to Moderate | Less suited for humid areas | Typical in the Southwestern U.S. |
| Reclaimed Lumber | Variable | Varies by quality | Framing, siding, flooring | Low | Depends on treatment | Common in urban/industrial areas |
| Local Stone | High | Minimal insulation value | Foundations, walls | High | Excellent | Available in rocky regions |
| Earth Bags | Low–Moderate | Moderate | Load-bearing walls | Moderate | Better with proper finishing | Widely available |
| Bamboo | Moderate | Moderate | Framing, flooring | Moderate | Good when treated | Available in select regions |
This table provides a quick overview to help you evaluate materials that align with your project’s needs.
Material Insights
- Straw Bales: Known for their excellent insulation, straw bales are ideal for cold climates when properly sealed against moisture. However, they may face building code restrictions and require careful detailing around openings to perform well.
- Rammed Earth: Valued for its durability and thermal mass, rammed earth naturally stabilizes indoor temperatures. It requires significant labor and specialized equipment, and in colder climates, additional insulation might be necessary.
- Reclaimed Lumber: A versatile choice for DIY builders, reclaimed lumber can be used for framing, siding, and flooring. However, it’s essential to inspect it for rot, insect damage, or structural weaknesses before use.
- Local Stone: Extremely durable and weather-resistant, local stone is perfect for foundations and walls. Its high thermal mass makes it suitable for passive solar designs. That said, advanced masonry skills and heavy equipment are often needed for installation.
- Earth Bags: Cost-effective and sturdy, earth bags are filled with moistened earth and stacked like bricks. Adding barbed wire between layers enhances stability. Proper plaster finishing improves their weather resistance.
Climate and Code Considerations
Choosing materials isn’t just about their properties - it’s also about how they perform in your local environment. For example, adobe and rammed earth shine in hot, dry climates but struggle in regions prone to freeze-thaw cycles or heavy rain. Conversely, straw bales offer excellent insulation for colder areas if they’re well-protected from moisture.
Building codes can also impact your choices. Conventional materials like reclaimed lumber often meet requirements with minimal hassle. However, alternative materials like straw bales or earth bags may need engineered plans or special permits. Always check local codes early in the planning process to ensure your chosen materials are acceptable.
Building DIY Homes with Local Materials
Using local materials to build your DIY home connects your project to the community by incorporating resources like reclaimed lumber, local stone, or straw bales that are specific to your region.
Sourcing locally doesn’t just cut down on transportation costs - it can also save money through direct purchases and bulk discounts. Plus, visiting nearby suppliers allows you to personally check for quality and ensure the materials meet building codes. (For detailed tips on quality checks, refer to the earlier guidelines.)
There’s also a practical and environmental upside to using materials native to your area. These resources are often better suited to the local climate, which can improve the durability of your home and reduce the need for extra treatments. For instance, adobe works well in dry climates, while timber construction is a good choice in areas with freeze-thaw cycles. By relying on materials that align with your environment, you not only save on costs but also create a home that’s built to last.
Building strong relationships with local suppliers adds another layer of benefit. Connecting with quarry owners, sawmill operators, and other producers can open doors to unique materials and turn one-off purchases into long-term collaborations. These relationships can also help you secure hard-to-find resources or negotiate better deals.
It’s wise to start your search early and have backup options ready to avoid delays. Keeping a detailed record of your suppliers and nurturing those relationships can prove as valuable as the materials themselves.
For more in-depth advice on sustainable building and cost-effective eco-friendly construction, check out [DIY Eco Homes](/). They offer step-by-step tutorials to guide you through every phase of building with local materials, making it easier to bring your environmentally conscious project to life.
As emphasized earlier, thoughtful planning and preparation are essential for making the most of local materials. By choosing resources from your area, you support the local economy, reduce environmental impact, and create a home that feels truly connected to its surroundings.
FAQs
How can I make sure the local materials I use for my DIY home project meet building codes and safety standards?
To make sure your materials align with U.S. building codes and safety standards, your first step should be reaching out to your local building department or zoning office. They’ll provide you with the specific codes, regulations, and permits required for your area. Securing the right permits and scheduling inspections throughout your project will help ensure everything stays on track and meets the necessary requirements.
It’s also important to confirm the quality and safety of the materials you’re using. Check for recognized certifications or standards that verify the materials are free from hazardous substances like asbestos or lead. Choosing certified materials not only helps guarantee safety but also prevents potential delays or fines down the line. These precautions will give you peace of mind, knowing your DIY project is both safe and compliant with local codes.
What are the best ways to negotiate prices with local suppliers for DIY home materials?
To snag the best deals from local suppliers, start by nurturing strong relationships. When you consistently work with the same suppliers, you may unlock loyalty perks like discounts or special pricing. You can also negotiate better rates by offering to buy in bulk or committing to long-term agreements - these strategies show suppliers you're a reliable partner.
When it comes to negotiations, active listening can make all the difference. By understanding your supplier's needs and limitations, you can craft solutions that work for both sides. Don’t shy away from asking for extras - things like free delivery, discounted offcuts, or waived fees for small customizations can lead to meaningful savings over time. And remember, it’s always smart to compare quotes from multiple suppliers. This ensures you're getting the most value for your money without sacrificing quality.
What challenges might arise when using materials like straw bales or rammed earth in different climates, and how can you overcome them?
Using materials like _straw bales_ or _rammed earth_ for construction comes with its own set of challenges, especially when factoring in the local climate. Take straw bales, for instance - they're highly vulnerable to moisture. In humid or rainy areas, they require careful sealing with waterproof coatings and must be paired with effective drainage systems to prevent damage. Meanwhile, rammed earth stands up well in most climates but can struggle with water exposure unless stabilized. In colder regions, it might also need extra insulation to maintain comfort and efficiency.
To overcome these challenges, it’s crucial to implement climate-specific strategies. This might include adding moisture barriers, applying protective coatings, or installing proper insulation. A detailed assessment of your site combined with materials tailored to the local environment can go a long way in ensuring your home remains durable and functional.