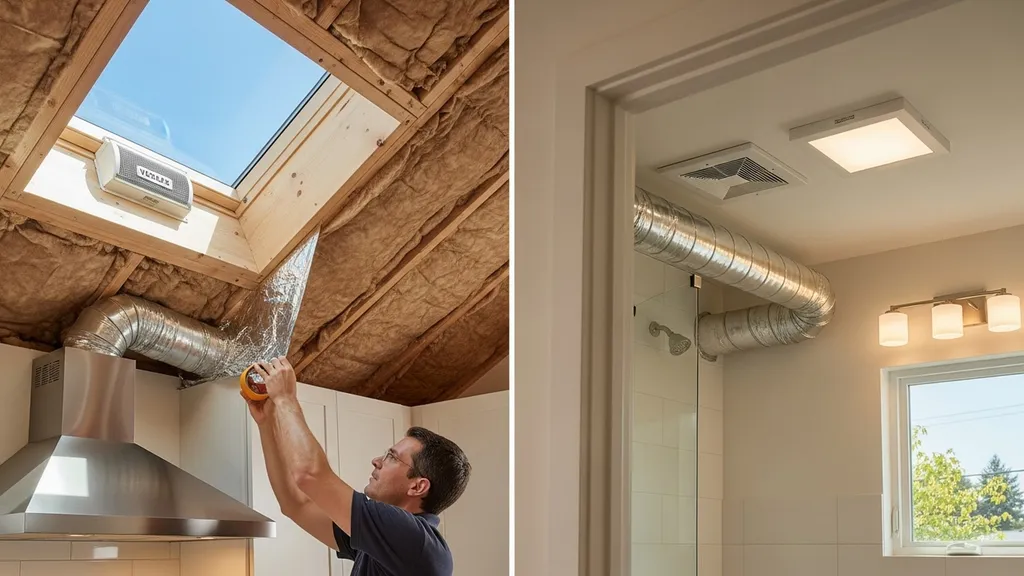
Practical guidance for sizing and choosing kitchen and bathroom exhaust — CFM rules, hood vs whole-house, ducts, noise, passive-house and off-grid tips.
Kitchen and Bath Exhaust: Sizing and Selection
Proper kitchen exhaust sizing and bathroom ventilation prevent moisture damage, remove pollutants, and keep a tight eco home comfortable. This guide explains how to choose the right kitchen exhaust and bath fans, how airflow is measured, practical CFM rules and examples, ducting and termination best practices, and how to integrate spot exhaust with passive-house or off-grid systems. Readers will get simple calculators, comparison data, and step-by-step tips to avoid common installation mistakes.
TL;DR:
- Aim for 100 CFM per linear foot for heavy cooktops or 300–1200+ CFM for strong range hoods; bathrooms typically need 50–150 CFM depending on size.
- Choose ducted hoods over recirculating when possible; verify rated CFM at expected static pressure and target ≤1.5 sones for quiet operation.
- Seal and insulate ducts, minimize elbows (each 90° ≈ 8 ft straight-duct penalty), and use humidistats/timers to limit run-time and energy on off-grid systems.
How Kitchen and Bath Exhaust Systems Work
Kitchen and bath exhaust are spot ventilation systems: they capture pollutants at the source (cooking, showers) and remove them outdoors, unlike whole-house ventilation that exchanges a controlled volume of indoor air constantly. Core function is simple: a fan creates pressure difference to move indoor air through ducts to a termination. Typical household moisture and contaminant sources include cooking (grease, particulates, water vapor), showers (moisture), and fuel-burning appliances (combustion byproducts).
Core formula and terms:
- CFM (cubic feet per minute): volume flow rate. Use it for fan sizing.
- ACH (air changes per hour): ACH = (CFM × 60) / room volume. Rearranged: CFM = (ACH × room volume) / 60.
- Static pressure: resistance in the duct system measured in inches of water column (in. w.c.). Higher static pressure reduces delivered CFM; fans are rated at specific static pressures.
Quick numbers:
- Bathroom fans: 50–150 CFM typical.
- Range hoods: 200–1200+ CFM depending on cooktop and hood type; small apartment hoods can be 200–400 CFM.
Research and retrofit guidance helps with routing and performance; see the Pacific Northwest National Laboratory's Kitchen exhaust retrofit duct guide for retrofit-specific rules and airflow considerations.
When selecting fans, compare the fan curve (CFM vs static pressure) to the expected duct impedance. For example, a fan rated 400 CFM at 0.1 in. w.c. may deliver only 250 CFM with a long run, multiple elbows, and a narrow duct. That’s why knowing static pressure qualitatively and checking manufacturer curves matter.
For whole-house vs spot: balanced systems like HRV/ERV provide continuous ventilation and heat recovery, but they usually can’t remove cooking grease and large moisture pulses as effectively as a dedicated range hood or bathroom exhaust. That trade-off is discussed later under passive-house integration.
Sizing Kitchen Exhaust: Range Hoods and Whole-kitchen Ventilation
Two practical rules of thumb:
- Linear-foot rule: 100 CFM per linear foot of cooktop for typical cooking; increase to 200 CFM per linear foot for high-heat or commercial-style ranges and high-BTU burners.
- BTU/power-based rule: For gas ranges, some codes and manufacturers recommend 1 CFM per 100 BTU/hr of total input, or using hood manufacturer tables keyed to combined burner BTU. This method is more precise for high-BTU equipment.
Examples:
- 24" two-burner apartment cooktop (2 linear feet): 2 × 100 = 200 CFM minimum for light-to-moderate cooking.
- 30" four-burner range (2.5 linear feet): 2.5 × 100 = 250 CFM baseline; for heavy cooking bump to 500 CFM.
- High-BTU or wok/char-grilling: target 600–1200+ CFM, particularly for open-concept kitchens.
Hood types and trade-offs:
- Ducted hoods: Best at removing grease, odors, and moisture. They exhaust outdoors and are preferred in tight or passive homes.
- Recirculating (ductless) hoods: Use charcoal or mesh filters to reduce odor and particulates, but they do not remove moisture and perform poorly on grease. Use only when ducting is impossible.
- Make-up air: For powerful ducted hoods (typically above 400–600 CFM), local codes or best practice may require mechanical make-up air to avoid depressurizing the house.
Grease capture and filters:
- Baffle filters perform well for grease and are easier to clean; mesh filters capture particles but clog faster.
- Grease capture efficiency drops with very high capture velocities; hood design (capture area, depth, distance from cooktop) matters more than raw CFM.
Practical recommendations:
- For most small to compact kitchens, aim for 200–600 CFM ducted hood depending on cooking style; in tiny kitchens refer to our tiny-house kitchen planning guide for layout-driven choices.
- If you use propane or other high-BTU appliances, review the propane stove options and the impact on ventilation loads; consider the off-grid cooking appliances article for heat load implications.
Industry guidance for commercial systems is available in best-practice documents such as AIRAH’s Commercial kitchen exhaust management guide — while aimed at commercial kitchens, it helps illustrate capture hood geometry and fire/grease management that inform high-performance residential designs.
Include a hood that matches the cooktop width and places the lip 24–30 inches above the burners when possible. If you can duct, choose ducted over recirculating for moisture control and long-term indoor-air-quality.
Sizing Bathroom Exhaust: CFM, Multiple Bathrooms, and Moisture Control
Bathroom Sizing Quick Chart (rule-of-thumb):
- Powder room or toilet-only: 50 CFM.
- Standard full bath (toilet, sink, shower): 50–80 CFM.
- Bath with tub/shower combo or larger volume: 80–150 CFM.
- Very large luxury bathrooms or multiple fixtures: size by ACH or combined fixture method.
Use the ACH formula for precise sizing:
- Example: Bathroom volume 8 ft × 8 ft × 8 ft = 512 ft³. For 8 ACH: CFM = (8 × 512) / 60 ≈ 68 CFM.
Multiple bathrooms on one fan:
- It's common to vent two small bathrooms to a single inline fan. When doing so, size the fan to meet the sum of required CFM and design the duct network to avoid cross-contamination and excessive static pressure.
- If two 80 CFM baths share a single fan, the fan should be rated for at least 160 CFM at the expected static pressure. Use backdraft dampers at each branch.
Run-time and controls:
- Run a fan for 20–30 minutes after showering to remove moisture, or install a humidistat that runs the fan until relative humidity drops to a setpoint (e.g., 60% → 40%).
- Continuous low-flow ventilation (e.g., 20–30 CFM continuously) can reduce spikes but consumes more energy long-term; choose energy-efficient low-power fans or pair with an HRV if heat recovery is needed.
Studies and measurement:
- Research into real installed performance shows many hoods and fans underperform their ratings once duct losses and installation are considered. See the Texas A&M study on residential range hood airflow and performance for measurement context: Data analysis of residential kitchen range hood airflow and performance.
Comparison table example (bath fan choices by room size) — keep this simple:
| Room Type | Recommended CFM | Typical use-case |
|---|---|---|
| Powder room | 50 | Quick use, no shower |
| Standard full bath | 50–80 | Single shower, standard volume |
| Bath with tub/shower | 80–150 | Frequent long showers, high humidity |
| Multiple small baths on one fan | Sum of required CFMs | Use inline fan sized for total and include dampers |
Use a humidistat or timer if you want automatic control; timers reduce unnecessary run-time, humidistats react to actual moisture.
Choosing the Right Fan or Hood: Noise, Efficiency, and Controls (comparison Table)
Key specs that matter:
- CFM at realistic static pressure: Confirm performance at expected duct resistance.
- Sones: Noise unit. Lower is quieter. Aim for ≤1.5 sones for comfortable daily use; ≤3 sones acceptable for infrequent use.
- Watts: Power draw. For off-grid or energy-conscious builds, prefer low-watt models or variable-speed fans.
- HVI certification: The Home Ventilating Institute tests airflow and efficiency; certified ratings are more reliable.
Controls and features:
- Humidistats and timers for bath fans prevent mold and save energy.
- Variable-speed controls let you run low flow continuously and higher flow intermittently for events (cooking, showers).
- Remote/inline fans place the motor in an attic or exterior to reduce kitchen/bathroom noise.
Comparison/specs Table:
| Product Type | Typical CFM Range | Typical Sones | Typical Power (W) | Best for | Notes |
|---|---|---|---|---|---|
| Ducted under-cabinet range hood | 200–600 | 1.5–4 | 50–200 | Most residential kitchens | Best grease removal, needs ducting |
| Wall-mounted chimney hood | 300–1200 | 2–5 | 100–400 | High-heat cooking | Larger capture area, louder at high speed |
| Recirculating hood (ductless) | 100–400 | 2–4 | 40–150 | Retrofit/no duct option | Removes odor, not moisture; filter cost |
| Inline/remote bath fan | 80–250 | 0.5–2 | 15–80 | Multiple baths/shared runs | Low noise in rooms, needs longer ducts |
| Ceiling-mounted fan with light | 50–150 | 1–3 | 10–60 | Typical single bath | Simple install, choose HVI-rated models |
| Low-power continuous fan | 20–80 | 0.3–1.5 | 6–40 | Continuous ventilation | Great for passive/off-grid when paired with HRV |
Sone guidance: 1 sones is roughly the sound of a quiet refrigerator; 4 sones is noticeably loud in a small room. The AIVC and LBNL studies show installed noise and airflow often differ from lab ratings; check the test conditions used in manufacturer tables and prefer HVI-certified products when possible. See the AIVC performance assessment for context on hood performance and installed flow rates: Performance assessment of U.S. residential cooking exhaust hoods.
Buying checklist:
- Confirm rated CFM at your expected static pressure.
- Verify HVI or equivalent certification.
- Target ≤1.5 sones for frequently used fans.
- Choose grease filters suitable for your cooking (baffle for heavy grease).
- Confirm duct size compatibility and test the assembled system if possible.
Also consider electrical load and off-grid compatibility; our guide to tiny house electrical options explains how fan wattage affects inverter and solar sizing.
Ducting and Installation Best Practices
Good ducting preserves fan performance. Before installing, plan runs to minimize length and turns. Use rigid or smooth semi-rigid metal ducting; avoid flexible accordion ducting where possible — it creates turbulence and high resistance.
Duct sizing and elbow penalties:
- Match duct diameter to manufacturer recommendations. Reducing diameter from 6" to 4" can dramatically increase static pressure and cut delivered CFM.
- Typical equivalent lengths (approximate):
- 45° elbow ≈ 3–4 ft of straight duct
- 90° elbow ≈ 8 ft of straight duct
- Flexible duct run (per 10 ft) ≈ 8–12 ft equivalent when crushed or highly curved
These are practical estimates; consult the fan curve and manufacturer charts for exact pressure loss.
Termination and backdraft prevention:
- Roof cap vs sidewall: Roof terminations are often shorter for straight vertical runs; sidewall terminations can be simpler for retrofit. Both require a damper or backdraft prevention. Screened terminations help keep pests out but can collect grease — choose designs with accessible cleaning.
- Install the backdraft damper at the fan outlet or first junction to prevent cold air infiltration into the home.
- For high-flow hoods, include a makeup air arrangement if required by code or to avoid depressurizing a tight building.
Sealing, insulation, condensation:
- Seal all joints with mastic or UL-approved foil tape — do not use standard cloth-backed duct tape.
- Insulate ducts that run through unconditioned space to avoid condensation and heat loss; use at least R-4 insulation for cold climates.
- In cold climates, include a short insulated straight run near the termination to reduce dew-point issues. For retrofit tips see ENERGY STAR's kitchen exhaust guidance: Local mechanical exhaust airflow requirements for kitchens.
Common installation mistakes:
- Long flexible duct runs with multiple sharp turns.
- Undersized ducts or reducers near the fan.
- No backdraft damper or outside-vented hood converting to recirc without updating expectations.
- Poorly sealed transitions causing leaks and reduced performance; inspect penetrations and use guidance for sealing around ducts from common air leakage references such as common air leakage points builders miss.
Watch this step-by-step guide on installing a bathroom exhaust fan + ducting - full walkthrough (broan 688):
This video demonstrates correct duct routing, proper sealing methods, and roof/sidewall termination techniques. Watch it for practical installation steps and visual cues (support mounting, slope for condensate, and damper placement).
Integration with Passive-house and Off-grid Designs
Balanced ventilation vs spot extraction:
- Passive-house designs emphasize airtightness and controlled, balanced ventilation via HRV/ERV. HRV/ERVs recover heat from exhaust air and provide continuous ventilation at low energy cost.
- Spot exhaust (range hood, bath fan) is still needed for cooking moisture and episodic pollutant removal. The rule: use HRV/ERV for continuous low-level ventilation and spot exhaust for short high-load events. Avoid relying solely on HRV to clear grease or steam from cooking.
Avoiding depressurization:
- Powerful spot exhaust without make-up air can depressurize tight homes, risking backdraft of combustion appliances and infiltration. Include mechanical make-up air or ensure the HRV can be supplemented to supply needed makeup when the hood runs.
Power budgeting for off-grid:
- Fan wattage matters. A typical efficient bath fan uses 10–40 W; older or high-speed fans use 60–200 W. Range hoods and large in-line fans can draw 100–400+ W at high speed.
- Estimate daily energy use: Watt × hours per day = Wh/day. Example: 40 W fan running 1 hour/day = 40 Wh/day. For continuous low-flow 20 W at 24 hours = 480 Wh/day.
- Use variable-speed controls and humidity sensors to minimize energy use. When designing solar arrays and batteries, include worst-case run times and surge starting loads. LBNL’s analysis of range hood energy impacts shows how widespread use changes energy demand: Energy impacts of effective range hood use for all U.S. homes.
Passive-house retrofits and design:
- When retrofitting airtight homes, coordinate exhaust locations with the HRV/ERV intake and bypass strategies. See our DIY passive house retrofit overview and applying passive principles for larger projects.
- In very tight homes, adding a high-capacity hood may require a dedicated controlled makeup air system or a timed damper that triggers building supply.
Common Mistakes, Troubleshooting, and Maintenance
Under- and Oversized Exhaust:
- Undersized symptoms: lingering odors, visible condensation, peeling paint or mold in bathrooms, smoky kitchens.
- Oversized symptoms: draftiness, unnecessary heat loss, noise, and higher energy use.
Fixes: measure airflow and compare to design. If underperforming, check ducting, dampers, and static pressure. If oversized, install variable-speed control or reduce run-time with timers/humidistats.
Troubleshooting checklist:
- Measure airflow with a handheld anemometer at grille and calculate CFM. Compare to rated CFM.
- Inspect for crushed or kinked flexible ducting and excessive elbows.
- Listen for rattles and motor noise indicating worn bearings.
- Inspect grease filters — clogged filters reduce flow and increase fire risk.
Maintenance:
- Clean grease filters monthly for heavy cooking; every 3 months for moderate use.
- Replace charcoal odor filters on recirculating hoods as manufacturer recommends.
- Replace blower motors or entire fan unit when bearings fail — many residential fan motors have a service life of 5–15 years depending on usage.
- Check exterior terminations seasonally for obstructions and to ensure damper operation.
Condensation in ducts:
- Insulate ducts in cold zones and slope horizontal runs toward the termination or include a trapless condensate path.
- If condensation persists, reduce run-time or add inline heating for rare cases (usually not needed for residential).
For more on sealing around penetrations and preventing uncontrolled flows, see common air leakage points builders miss.
Key Points Quick Reference
Short Checklist for Sizing and Selection
- Determine cooking style and peak loads before sizing.
- Calculate required CFM using linear-foot or BTU-based rules.
- Prefer ducted exhaust for moisture and grease control.
- Verify rated CFM at expected static pressure and check fan curves.
- Aim for ≤1.5 sones for frequently used fans.
- Include humidistats or timers for bathrooms.
Buying Checklist Before Installation
- Confirm fan/hood is HVI-certified or has clear test data.
- Match duct diameter and plan shortest straight run.
- Check grease-filter type (baffle vs mesh) and accessibility for cleaning.
- Verify electrical supply and circuit capacity.
- Order backdraft dampers and insulated duct for cold runs.
- Plan for makeup air for high-CFM hoods if required by code.
The Bottom Line
Match CFM to the actual cooking and bathroom loads rather than guessing; smaller fans installed poorly often perform worse than correctly installed higher-quality units. Prioritize ducted exhaust, verify performance at realistic static pressure, and plan sealing and insulation to preserve airflow and avoid condensation. For off-grid and passive-house builds, balance spot extraction with HRV/ERV strategies and size electrical supply for realistic run-times.
Frequently Asked Questions
How many CFM do I need for my kitchen?
Use the linear-foot rule as a quick guide: about 100 CFM per linear foot of cooktop for typical residential cooking, and about 200 CFM per linear foot for heavy or high-BTU cooking. For example, a 30" (2.5 ft) range suggests ~250 CFM baseline; increase to 500 CFM for more intense cooking or if you have high-BTU burners. If you use gas or run a commercial-style cooktop, consult manufacturer BTU-based tables or local code and consider makeup air for flows above 400–600 CFM.
Can I use a recirculating hood in a passive-house?
Recirculating hoods reduce odors and some particulates but do not remove moisture or grease from the house. In a passive-house, where airtightness and moisture control are critical, a ducted hood is strongly preferred. If ducting is impossible, accept the performance limits of a recirculating hood and use supplementary strategies like increased HRV/ERV runtime and more frequent cleaning of filters.
How long should a bathroom fan run after a shower?
Run the fan for at least 20–30 minutes after showering to clear moisture. A better approach is a humidistat that runs the fan until relative humidity drops to a setpoint (for example from 80% to 50–60%). This avoids wasted energy from fixed timers and reduces mold risk from lingering moisture.
What is an acceptable noise level for a bath fan?
Target ≤1.5 sones for a quiet, comfortable experience in frequently used bathrooms. Up to 3 sones is acceptable in secondary or utility bathrooms. Check HVI-rated sones and remember installed noise can differ from lab conditions, so prefer inline or remote fans for quieter room noise when necessary.
Can I run multiple bathrooms on one fan?
Yes, multiple small bathrooms can share an inline or remote fan if the fan is sized for the combined required CFM and each branch has a backdraft damper. Design the duct layout to minimize static pressure and avoid long small-diameter branches. Confirm local codes for shared-venting rules and ensure the fan provides adequate airflow at expected static pressure.