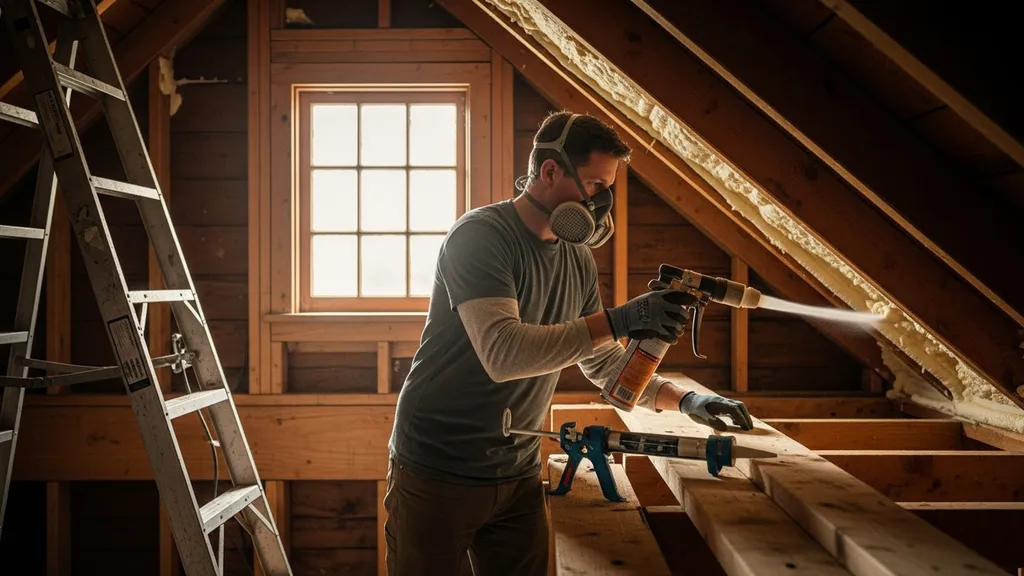
Practical DIY steps to find and seal air leaks in existing homes for comfort, lower bills, and better indoor air — step-by-step, tools, materials, and costs.
Air Sealing Existing Homes: DIY Guide
Cold drafts, high energy bills, and uneven rooms are often signs that a home is leaking conditioned air. This guide explains how to approach air sealing existing homes with practical inspection methods, costed materials, and a weekend retrofit plan. Readers will learn how to run simple air leak detection checks, when to rent or hire a blower door test, which materials work best for rim joists and attic hatches, and how to avoid moisture or ventilation problems after sealing.
TL;DR:
- Sealing the biggest leaks (attic bypasses and rim joists) often cuts heating/cooling loss by 10–30% and saves roughly $100–$400 per year for a typical home.
- Use a tiered workflow: visual inspection → smoke/IR spot tests → blower door test for whole-house measurement; rent a blower door for $100–$300/day or hire pros for accurate diagnostics.
- Prioritize attic air sealing and proper ventilation upgrade (ERV/HRV if needed), avoid over-sealing without mechanical ventilation, and test before/after.
Related guides: Best DIY air sealing materials techniques beginners, Air sealing tools and materials what you need, Ultimate guide to recycled materials for DIY homes, Best DIY Crawl Space Repairs to Stop Moisture and Mold: Top 10 Picks for 2026, and The ultimate guide to recycled aggregate concrete for DIY builders 2026.
Why Air Sealing Existing Homes Matters
Air sealing existing homes reduces energy waste, improves comfort, and lowers moisture-driven problems. The U.S. Department of Energy notes that typical homes can lose about 20–30% of their heating and cooling energy to air leakage, which makes sealing one of the highest-impact retrofit tasks. Research and retrofit case studies often report a 10–30% reduction in whole-home energy use after focused sealing and insulation work.
Comfort gains are immediate: fewer cold pockets, less stack-effect draft up stairwells, and more stable indoor temperatures. That matters in both cold and hot climates—reducing drafts in winter and stopping hot attic air from infiltrating living spaces in summer.
There are also health and durability angles. Improper or incomplete sealing can move moisture into cavities and create mold risk. Industry standards and organizations such as RESNET and ASHRAE set measurement and ventilation guidelines, and Passive House targets (about 0.6 ACH50) give context for airtight builds. For practical planning and health-and-safety checklists when working in occupied buildings, consult the British Columbia Housing retrofit guide for air sealing and insulation best practices (Best practice guide for air sealing and insulation retrofits).
How to Find Air Leaks: Tools and Tests
Start with a prioritized workflow: visual inspection, simple spot tests, then a whole-house blower door measurement if accuracy is needed. This saves time and targets the highest-impact fixes first.
DIY visual inspection checklist
- Inspect attic hatches, kneewalls, and the area where HVAC and plumbing stacks penetrate ceilings.
- Look for dark dust lines at top plates and band joists; these often mark airflow paths.
- Check for gaps around recessed can lights, bathroom fans, and chimneys.
- Examine sill plates and rim joists in basements and crawlspaces for gaps around piping, wiring, and rim-to-foundation intersections.
Blower door testing basics (DIY vs pro)
A blower door test quantifies whole-house airtightness (ACH50). Older homes commonly test between 3–10 ACH50; Passive House projects target 0.6 ACH50. Homeowners can rent blower door kits (brands like Retrotec and Minneapolis Blower Door) for roughly $100–$300/day. Professional testers typically charge $300–$700 for a single test with diagnostics and a leak map.
DIY blower-door setups are useful for before/after verification, but professionals often provide more accurate calibrated fans, pressure control, and diagnostic experience. If combustion-safety or code compliance is involved, hire a trained tester.
Smoke pencil, incense, and infrared camera tips
- Use a smoke pencil or incense to check around windows, outlet plates, and weatherstripping while the blower door or exhaust fans are running.
- Infrared (IR) cameras (FLIR, Seek Thermal) reveal temperature differentials and make leaks visible. Rental options and affordable handheld units are available; pair IR imaging with the blower door to map airflow paths more clearly.
- A small handheld anemometer or thermal leak detector can help quantify spot air velocity and temperature difference.
The ENERGY STAR wall air-sealing guideline offers measurement and procedural details helpful for wall and whole-building checks (Measure guideline: wall air sealing and insulation methods). For passive builders or readers chasing low ACH50 targets, see our internal guide on how to air seal house passive builder.
This DIY video shows you the hands-on process:
Common Leak Locations and How to Prioritize Fixes
Not all leaks matter equally. Target locations that drive stack effect and connect conditioned space to unconditioned space.
Top priority: attic, roof/soffits, and penetrations
Attic bypasses are often the highest-impact leaks. These include gaps at ceiling top plates, plumbing stacks, chimneys, recessed lights, and attic hatches. Sealing the attic-to-house interface typically yields the fastest energy savings. In many retrofit audits, attic and roofline fixes are the top prioritized measures because warm air rising through ceiling gaps carries both heat and moisture into cold cavities.
High-impact secondary: rim joists, band joists, and basements
Rim joist air sealing is particularly valuable because rim joists are continuous around the house and often poorly sealed around subfloor-to-foundation interfaces. For below-grade areas, sealing sill plates and installing a proper crawlspace or basement vapor barrier reduces heat loss and moisture transfer; see our internal guide on install basement vapor barrier right way.
Windows, doors, and mechanical penetrations
Windows and doors generally have smaller-width leaks but are easier to fix with weatherstripping and caulk. Mechanical penetrations (dryer vents, HVAC ducts, combustion appliance flues) require careful sealing and testing—especially where combustion appliances are present.
Key points — fastest ROI:
- Seal attic bypasses first. Expect a high return in most climates.
- Focus on rim joist air sealing next for steady year-round savings.
- Fix easy window and door leaks last; they improve comfort but usually offer smaller energy savings per dollar.
Regional note: In humid climates, stop large-scale attic-to-living-space air leakage quickly to avoid moving moisture into attics; in cold climates, prioritize attic and rim joist work to prevent ice damming and frozen cavities. The Department of Energy provides practical guidance on caulking and weatherstripping as quick-return measures (Air sealing your home).
Air Sealing Materials and Techniques for Existing Homes
Choosing the right material for each gap matters more than choosing a single "best" product. Below is a compact comparison table summarizing common materials.
| Material | Typical use-case | Cost | Durability | DIY ease | VOC concerns, suitability |
|---|---|---|---|---|---|
| Silicone caulk | Window perimeter, small cracks | $0.50–$1.50/ft | 15–25 years | Easy | Low VOC options; exterior-rated choices for sun exposure |
| Acrylic latex caulk | Interior trims, paintable gaps | $0.20–$0.80/ft | 5–10 years | Very easy | Low VOC, paintable |
| Butyl tape | Rim joist seams, flashing | $0.50–$2/ft | 10–20 years | Easy | Low VOC, best for horizontal joints |
| Low-expansion spray foam | Window/door jambs, small gaps | $8–$20/can | 10–30 years | Moderate | Choose low-VOC; avoid overfilling at frames |
| Canned PU foam (wide-gap) | Large voids, odd shapes | $5–$15/can | 10–30 years | Moderate | Off-gassing during cure; ventilate |
| Closed-cell spray foam | Rim joists, thermal+air barrier | $1.00–$2.00/ft² installed | Durable, vapor retarder | Hard for DIY at large scale | Professional application recommended for large areas |
| Gaskets / foam seals | Door bottoms, hatch seals | $0.20–$1/ft | 5–15 years | Easy | Low VOC |
| Airtight tapes & membranes | Sealing sheathing seams, air barrier repairs | $3–$10/roll | 10+ years | Moderate | Follow product compatibility; see membrane guide |
For larger or continuous air-barrier repairs, use an airtight membrane system. Our airtight membrane guide walks through sealing seams and detailing penetrations for retrofits. The Insulation Institute’s priority air-sealing locations guide is a useful technical reference for where to apply these materials (Priority air sealing locations - insulation institute).
Material selection tips:
- Use low-expansion foam around window frames to avoid frame distortion.
- Don’t cover or insulate directly over non-IC-rated recessed light fixtures—follow fixture documentation or replace with insulated, airtight IC-rated cans or LED retrofit housings.
- Prefer durable tapes and mechanical fastening where UV exposure or movement will stress a caulk bead.
- Choose low-VOC formulas if occupants are sensitive; allow curing time and ventilate during application.
When to avoid spray foam: large cavity fills and whole-wall spray foam installations are often best handled by contractors with industrial equipment and proper PPE. Small-volume cans and foam-in-a-bottle are fine for isolated gaps.
For more detailed beginner-friendly material guidance, see our internal best DIY air sealing materials and techniques.
Step-by-Step DIY Air Sealing Plan for a Weekend Retrofit
A focused weekend plan works well for many owners. Below is a practical, time-boxed approach for a 1,200–2,000 ft² house.
Prep work, safety, and materials list
- PPE: NIOSH-rated N95 respirator or half-mask with organic-vapor cartridges for foam, gloves, eye protection.
- Tools: caulk gun, low-expansion foam gun or cans, utility knife, ladder, flashlight, smoke pencil/incense, drill with nut driver for access panels.
- Materials: acrylic and silicone caulk, canned low-expansion foam, foam gaskets, weatherstripping, airtight tape, disposable rags.
- Safety: turn off power when working around wiring, follow manufacturer safety for spray foam, and do not seal combustion appliance flues without testing.
Weekend schedule: day 1 attic and roofline
- 0.5–1 hr: prep and safety briefing, gather tools and materials.
- 4–6 hrs: attic inspection and sealing. Seal large bypasses at top plates, plumbing stacks, attic hatches, and any gaps around chimneys (maintain required clearances).
- 0.5–1 hr: install attic hatch gasket and simple LED IC-rated recessed conversions if needed.
- Optional: take before photos and note major leaks.
Day 2 band joists and exterior penetrations
- 0.5 hr: move materials to basement/crawl.
- 3–5 hrs: rim joist sealing—install foam board and tape or spray foam small gaps; use caulk for smaller cracks.
- 1–2 hrs: seal around dryer vents, electrical meter base, and sill plates; apply weatherstripping to doors.
- Finish: run a simple smoke test at windows and doors while turning on attic/exhaust fans to find persistent leaks.
Small tasks (1–2 hrs each):
- Windows: apply exterior-grade caulk to gaps and interior latex to paintable gaps; install compression weatherstripping or new sash seals if drafty.
- Recessed lighting: retrofit airtight covers or replace non-IC cans with sealed LED fixtures.
- Outlets: use foam gaskets behind outlet plates on exterior walls.
Total estimated time: 10–16 hours for a motivated two-person team on an average house. For detailed insulation pairing and R-values to insulate any newly exposed cavities, see insulation R-value basics. For measured impacts and cost-effectiveness of these measures, the AIVC paper on performance and costs offers supporting data (Performance and Costs of Air Sealing and Ventilation Measures).
After the weekend: consider a simple before/after blower door or at least visual smoke tests. If a blower door shows little improvement, recheck attic top plates and hidden bypasses.
Costs, Permits, and When to Hire a Pro
DIY material costs are modest; professional services vary widely based on scope.
Typical cost ranges:
- DIY materials for a moderate retrofit: $100–$800 depending on size and whether closed-cell foam is used.
- Blower door rental: $100–$300/day. Professional diagnostic test: $300–$700.
- Contractor air-sealing package (with blower door, duct sealing, and attic work): $800–$2,500+ depending on house size and access.
Measured retrofit studies show that targeted caulking and sealing can reduce infiltration rates by roughly 20–30% on average, with simple paybacks often in the 2–6 year range depending on local energy costs and heating/cooling intensity. For in-depth retrofit energy-economics analysis, see the Lawrence Berkeley National Laboratory review of measured energy savings (Measured energy savings and economics of retrofitting existing single-family homes).
Permits and codes:
- Cosmetic sealing and weatherstripping rarely need permits.
- Structural changes, permanent insulation added to sheathing, or alterations to combustion appliance ventilation may trigger code review and permits. Always check local building department rules.
- If installing continuous exterior air barrier systems like ZIP sheathing, professional installation or permit review is commonly required—see our zip sheathing guide for typical code considerations.
When to hire a pro:
- Combustion appliance zone (CAZ) testing and any work that affects flues or burners.
- Large-volume spray foam for rim joists or full-wall cavities—professionals have equipment, containment, and ventilation systems.
- When you want an official blower door report for resale disclosure, rebate programs, or incentive applications.
Sample payback calculation:
- Retrofit cost $800, annual heating/cooling savings $200 → simple payback = 4 years. Adjust for local fuel prices and climate.
Moisture, Ventilation, and Health: Avoiding Common Mistakes
Sealing without adding or verifying ventilation can trap moisture and pollutants. That’s the short answer; here’s the practical guidance.
Why sealing without ventilation can cause problems
Air sealing reduces uncontrolled leaks but also reduces natural infiltration that previously diluted indoor pollutants and moved moisture out. If mechanical ventilation is inadequate, relative humidity can rise, and volatile organic compounds (VOCs) can accumulate. In worst cases, moisture can condense in wall cavities or attics, causing rot and mold.
Choosing and sizing ventilation: exhaust vs balanced systems (ERV/HRV)
ASHRAE Standard 62.2 sets minimum whole-house ventilation rates based on floor area and occupant counts. For many sealed homes, an exhaust-only bathroom/kitchen fan setup can be adequate, but balanced systems (ERV/HRV) are recommended when sealing is substantial, especially in cold or very humid climates. ERVs exchange heat and some moisture and are helpful in cold climates; HRVs exchange heat but not moisture, which can be useful in dry climates.
Sizing tip: Calculate required ventilation from ASHRAE 62.2 (CFM = 0.03 × floor area + 7.5 × bedrooms) or consult a ventilation professional. For guidance on why ERV vs HRV choices matter by climate, see our article on difference erv hrv why matters cold climates (internal — link context).
Combining air sealing with insulation upgrades
Air sealing pairs with insulation to keep the thermal boundary continuous. Decide on vapor control strategy by climate: consult our vapor barrier placement guide to choose interior vs exterior vapor control and avoid trapping moisture in walls. In short, seal first, then insulate; but plan ventilation before completing the airtight barrier.
Practical rules:
- Don’t reduce ventilation below ASHRAE 62.2 levels.
- If installing an ERV/HRV, balance airflow and include MERV-rated filters for particulate control.
- After major sealing, perform humidity monitoring for a few months to confirm behavior.
The Bottom Line
Air sealing existing homes yields comfort, lower utility bills, and improved durability when done thoughtfully: start with inspection, prioritize attic and rim joist air sealing, use appropriate materials, and add mechanical ventilation where needed. For most homeowners, a focused weekend retrofit plus a blower door verification (rented or professional) is the most cost-effective path to results.
Frequently Asked Questions
How do I know if my house needs air sealing?
Look for signs like drafts, large temperature differences between rooms, high heating or cooling bills, and dust trails near ceiling or rim-joist intersections. Use simple tests: hold an incense stick near window/door gaps and watch for smoke movement, run exhaust fans and check for return airflow through leaks, or rent a blower door to get a quantitative ACH50 reading.
If your home tests above 3 ACH50, there are usually clear, cost-effective sealing opportunities; older homes often sit between 3–10 ACH50 while very tight homes are below 1 ACH50.
Can I use spray foam everywhere?
Small cans and low-expansion foams are excellent for jambs, rim-joist gaps, and odd-shaped cavities. But large-scale spray foam—especially closed-cell—typically requires professional equipment, experience, and careful attention to ventilation and curing. Avoid overfilling around window frames (use low-expansion foam) and don't hide or cover non-rated recessed lights. For large cavity fills or when moisture control is complex, hire a contractor.
Will sealing my house cause moisture problems?
Sealing alone can increase indoor humidity and trap pollutants if ventilation is inadequate. That's why pairing sealing with a ventilation strategy—meeting ASHRAE 62.2 minimums or installing an ERV/HRV for balanced ventilation—is essential. Also address any existing moisture issues before sealing to avoid trapping moisture inside assemblies.
How long does air sealing last?
Durability depends on materials and location: high-quality silicone caulk and sealed tapes can last 10–25 years; closed-cell foam and properly taped membranes can last decades if protected from UV and mechanical damage. Regular inspection—every few years—catches seal failures around penetrations and doors.
Do I need a blower door to make improvements?
No. Many effective fixes can be done after a visual inspection and spot testing with smoke or IR imaging. However, a blower door is the best way to quantify whole-house airtightness, verify before/after improvements, and locate stubborn leaks when paired with an IR camera. Rent a unit for DIY verification or hire a pro for a diagnostic test if you need an official report.