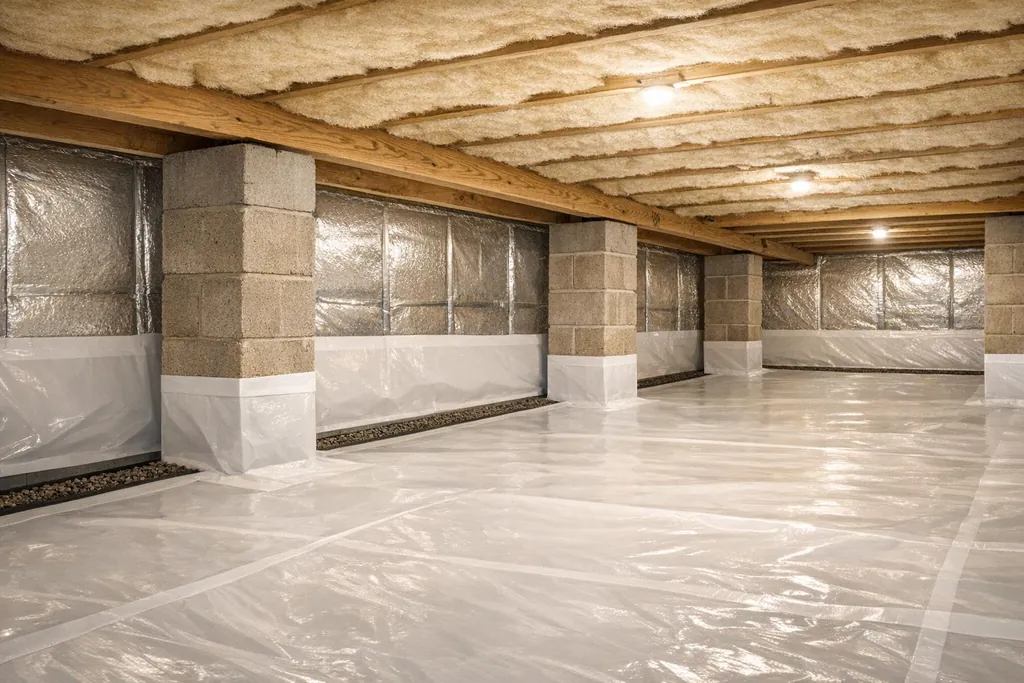
Stop crawl space moisture with vapor barriers, moisture-resistant insulation, and proper drainage to prevent mold, rot, and high energy bills.
How to Fix a Damp Crawl Space: Insulation, Sealing, and Drainage Tips
A damp crawl space can damage your home's structure, increase energy bills, and harm indoor air quality. Moisture leads to rotting wood, mold growth, and higher heating or cooling costs. Here's how you can address it:
- Identify Moisture Problems: Look for musty smells, standing water, mold, or sagging wood. Use tools like a hygrometer to measure humidity (keep it under 60%).
- Fix the Causes: Ensure proper drainage by fixing sloping yards, clogged gutters, or plumbing leaks. Seal crawl space vents and cracks to block humid air.
- Insulate Properly: Use moisture-resistant materials like closed-cell spray foam or rigid foam boards. Avoid fiberglass, which absorbs water.
- Install a Vapor Barrier: Lay thick polyethylene sheeting on the crawl space floor and seal it to walls to block ground moisture.
- Add Drainage Systems: Use interior French drains and sump pumps for high water tables, and improve exterior grading to direct water away from the foundation.
- Maintain Regularly: Inspect annually, test sump pumps, clean gutters, and monitor humidity to prevent future issues.
These steps can protect your home from structural damage and improve energy efficiency. A dry crawl space also helps maintain healthier indoor air.
5 Things Every Crawl Space Needs to Stay Dry!
How to Identify Moisture Problems in Your Crawl Space
Spotting moisture issues in your crawl space is a critical first step before tackling insulation, sealing, or drainage fixes. Catching these problems early can safeguard your home's structure and protect your family's well-being. Once you know the signs, pinpointing the issue becomes much easier.
Start by observing your home's interior. Musty smells that linger, hardwood floors that appear cupped, or sudden spikes in your energy bills can all hint at moisture problems. From there, take a closer look at your crawl space for more evidence.
When inspecting the crawl space, look for standing water, condensation on pipes or walls, and visible mold or structural damage. Pay attention to floor joists and support beams - sagging wood, wet insulation, mold growth, or spongy spots are clear indicators of moisture. You might also notice signs of pests, as damp environments often attract termites and rodents. Even small gaps can serve as entry points for these unwelcome guests.
> "While water puddles in your crawl space are nothing to smile about, the water itself isn't the problem. The real issues come from the vapor from these puddles. It's water vapor that leads to mold growth, attracts pests, and increases your water bills." > > - Blake H., BAY Crawl Space & Foundation Repair
Using tools like a hygrometer can provide more precise insights. If the relative humidity in your crawl space stays above 60%, it creates an ideal breeding ground for mold, mildew, and bacteria . A moisture meter can also help you measure the moisture content in wooden joists - anything above 15% should prompt a closer look for potential rot . These tools take the guesswork out of the equation, giving you tangible data to work with.
What Causes Crawl Space Dampness
To resolve crawl space moisture issues, you need to identify the root cause. One common culprit is poor drainage around your home. If your yard slopes toward your foundation, rainwater will naturally flow in that direction. Clogged gutters and downspouts that release water too close to the house can make things worse.
In areas with high water tables, groundwater seepage can become a major issue, especially after heavy rainfall. Water can rise through the soil and sneak in through foundation cracks. Plumbing leaks, whether from burst pipes or dripping connections, can also add moisture directly to the crawl space. Another source of trouble is uninsulated cooling ducts in your HVAC system, which can form condensation that drips onto the floor.
Warm, humid outdoor air entering through crawl space vents can also lead to condensation when it meets cooler surfaces like metal ductwork or floor joists. This problem is particularly noticeable in summer. Additionally, if your crawl space has a dirt floor without a proper vapor barrier, the soil itself will release moisture into the air. It's worth noting that air movement is responsible for over 98% of water vapor transfer in building cavities .
Tools You'll Need for Inspection
Once you've identified potential indoor signs, it's time for a hands-on crawl space inspection. To do this safely and thoroughly, you'll need the right tools. Start with a high-powered flashlight to illuminate dark areas and spot water stains, mold, or structural damage. A moisture meter is essential for checking dampness in wooden framing, and a hygrometer can help you track humidity levels throughout the space.
A long-handled flat-head screwdriver is another handy tool. Use it to gently probe floor and rim joists for soft spots that could indicate decay. Your smartphone can come in handy for documenting problem areas with photos or videos. Don’t forget personal protective gear - wear an N95 respirator, gloves, and coveralls to shield yourself from mold spores and pest droppings.
> "The first priority when conducting any inspection is safety... Crawlspaces, for the most part, are dark and damp, sometimes cluttered or obstructed." > > - Don Richards, A.C.E., CPI, Your Crawlspace™
Before heading into the crawl space, start with an exterior check. Look for sloping ground that directs water toward your foundation, cracks in foundation walls, or downspouts that release water too close to the house. Once you're inside, follow the "3D" routine: look down at the floor for standing water, around the walls for damp spots or efflorescence (a white, powdery residue), and up at the joists for sagging insulation or mold. Taking at least six moisture readings - one at each corner and two in the center - will help you get a complete picture of the moisture levels in your crawl space.
Tools and Eco-Friendly Materials You'll Need
::: @figure 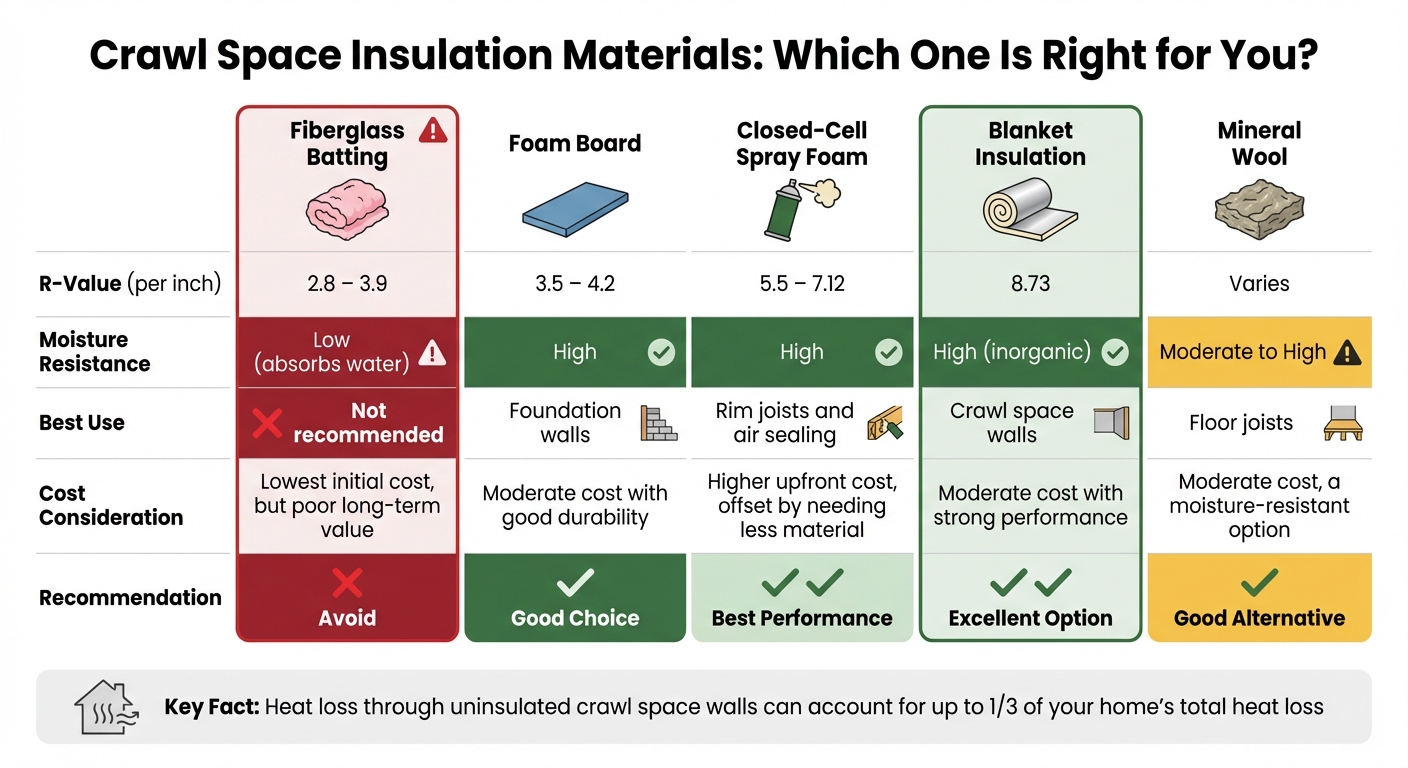 :::
:::
Before tackling damp crawl spaces, make sure you have all the tools and materials ready to avoid unnecessary trips to the store. Essential tools include a caulk gun, box cutters, fastening hardware (screws or masonry nails), and safety gear like glasses, gloves, and a dust mask. Don’t forget a flashlight or headlamp for dark areas - it’s a lifesaver when working in tight, poorly lit spaces.
When it comes to insulation, choose materials that resist moisture. Steer clear of fiberglass batt insulation - it absorbs water, encourages mold growth, and attracts pests . Instead, go for moisture-resistant options specifically designed for damp conditions. Let’s explore some eco-friendly insulation and sealing materials to secure your crawl space.
Best Insulation Materials for Crawl Spaces
Closed-cell spray foam is a top-tier choice. With an R-value between 5.5 and 7.12 per inch, it seals air leaks effectively, handles moisture like a pro, and works great for insulating rim joists - a common spot for air leaks and condensation. While it’s pricier upfront, you’ll need less material overall thanks to its efficiency .
> "Most builders and contractors agree that spray foam is a far better product for use in a potentially damp environment. This rigid foam insulation repels water and is resistant to biological growth." > > - Acculevel
Rigid foam board is another reliable option. With R-values between 3.5 and 4.2 per inch, it’s ideal for foundation walls and resists moisture well. To install, use mechanical fasteners instead of adhesives, which may fail in damp conditions. Some EPS foam boards even come with termite-resistant treatments, making them safer for ground contact . If you're choosing between polyiso, EPS, and XPS for crawl-space walls, our rigid foam comparison breaks down moisture performance and below-grade suitability.
Mineral wool (rock wool) is a moisture-resistant alternative for insulating floor joists. While it doesn’t absorb water like fiberglass, it can still trap moisture if leaks occur. For crawl space walls, blanket insulation made from inorganic materials provides an impressive R-value of 8.73 and performs well in these environments .
Once you’ve chosen your insulation, focus on sealing to ensure complete protection.
Best Sealing Materials for Crawl Spaces
A vapor barrier is your first defense against moisture from the soil. Opt for polyethylene sheeting that’s 6 to 20 mil thick. This thickness makes it puncture-resistant and qualifies it as a Class 1 vapor barrier .
> "A puncture-resistant, single-layer vapor barrier is the best type." > > - Michael Church, Founder, Crawl Space Ninja
To install, overlap the sheets by at least 12 inches and seal the seams with waterproof seam tape. Attach the barrier to foundation walls using rubberized butyl tape for a permanent, airtight seal. Extend the barrier at least 6 inches up the walls for full coverage .
For sealing gaps and cracks, use expanding spray foam for openings larger than ¼ inch around pipes, wires, and rim joists. For smaller gaps, standard caulk works well. Consider adding a sill gasket or a rubberized roofing membrane between the foundation and sill plate to stop moisture from wicking into the wood framing .
Insulation Materials Comparison
Here’s a quick comparison of insulation materials to help you decide what works best for your crawl space:
| Insulation Type | R-Value (per inch) | Moisture Resistance | Best Use | Cost Consideration |
|---|---|---|---|---|
| Fiberglass Batting | 2.8 – 3.9 | Low (absorbs water) | Not recommended | Lowest initial cost, but poor long-term value |
| Foam Board | 3.5 – 4.2 | High | Foundation walls | Moderate cost with good durability |
| Closed-Cell Spray Foam | 5.5 – 7.12 | High | Rim joists and air sealing | Higher upfront cost, offset by needing less material |
| Blanket Insulation | 8.73 | High (inorganic) | Crawl space walls | Moderate cost with strong performance |
| Mineral Wool | Varies | Moderate to high | Floor joists | Moderate cost, a moisture-resistant option |
Heat loss through uninsulated basement or crawl space walls can account for up to one-third of your home’s total heat loss . Choosing high-quality insulation and sealing materials not only boosts energy efficiency but also helps create a healthier indoor space.
How to Insulate Your Crawl Space
Preparing the Space Before Insulation
Once you've inspected your crawl space and identified any moisture problems, it's time to get the area ready for insulation. Here's how to do it step by step.
Start by addressing any water issues. Ensure the ground around your home slopes away at a rate of ½ inch per foot, and make sure gutters and downspouts are clear to prevent water buildup. If there's standing water in the crawl space, use a shop vac or pump to remove it. Afterward, run fans and a dehumidifier to dry the space completely - this could take anywhere from 10 hours to a few days, depending on the severity.
Next, clean the area thoroughly. Remove debris, mold, and mildew from the framing and HVAC components. Test for radon and check that your furnace and water heater are venting correctly to avoid carbon monoxide backdraft when the space is sealed. Seal exterior vents using rigid foam inserts and spray foam, and close any gaps smaller than ¼ inch with caulk. For larger openings, expanding spray foam will do the trick.
> "Excess moisture will rust mechanical \[parts\] in the area or deteriorate the wood itself." > > - Ted Towne, Owner, T3 Inspections
To protect your framing, install a capillary break between the foundation wall and the wood sill plate. Then, cover the crawl space floor with a 6‑mil (or thicker) polyethylene vapor barrier. Overlap the seams by about 12 inches and seal them with waterproof tape. Extend the barrier up the foundation walls by 8 to 12 inches, securing it in place with rubberized butyl tape or mechanical fasteners.
Installing the Insulation
Once moisture issues are under control, you can move on to installing the insulation to improve energy efficiency.
Start with the foundation walls. Attach rigid foam boards using masonry fasteners with large button-cap washers. The insulation should run from the top of the wall down to the finished grade, with an additional 24 inches if required by local building codes.
Pay special attention to the rim joist, a common source of air leaks. Cut rigid foam to fit snugly into each joist bay, and seal the edges with expanding spray foam to create an airtight seal.
If you live in a termite-prone area, leave a 3‑inch strip of bare foundation wall for inspections. For better visibility, you can paint this strip white. Don’t forget the access door - glue rigid foam to the inside of the hatch and apply weather stripping around the frame to block air leaks.
Finally, maintain a dry environment by adding a drying mechanism. You can either use a standalone dehumidifier or connect a small supply of conditioned air from your HVAC system. Aim for about 1 cubic foot per minute of airflow for every 50 square feet of crawl space. This will help keep the area dry and efficient over the long term.
How to Seal Your Crawl Space
Installing a Vapor Barrier
Once you've insulated your crawl space, the next step is adding a vapor barrier to block ground moisture. For this, you’ll need polyethylene sheeting that’s at least 6 mil thick - this meets the minimum standard for a Class 1 vapor retarder. If you want something tougher and longer-lasting, go for reinforced plastic in the 10–20 mil range.
Roll out the sheets, ensuring that seams overlap by at least 12 inches. Use waterproof PVC tape to secure the overlaps. Extend the barrier 6–12 inches up the foundation walls and around support piers to create a capillary break. For a more permanent attachment, use double-sided rubberized butyl tape or pressure-treated wood furring strips to secure the plastic to concrete surfaces.
> "It \[a vapor barrier\] does not stop it, but slows it down so that an active humidity control device, like a dehumidifier, can remove the moisture from the air." > > - Michael Church, Founder, Crawl Space Ninja
To keep the barrier in place, anchor it with landscape fabric stakes. Keep in mind, a vapor barrier is most effective when combined with active humidity control. Adding a dehumidifier will help maintain relative humidity below 60%.
Once the vapor barrier is installed, move on to sealing cracks and gaps to complete your moisture control setup.
Sealing Cracks and Gaps
Even with a well-installed vapor barrier, air leaks can undermine your efforts. Air movement is responsible for more than 98% of water vapor transfer in building cavities. Carefully inspect your crawl space for foundation cracks, gaps around utility lines, and openings at the sill plate.
For gaps smaller than ¼ inch, use low-VOC caulk. Larger gaps can be filled with expanding spray foam. Be thorough - seal every visible crack, gap, and utility penetration.
Pay special attention to the connection between the foundation and the wooden sill plate. If a capillary break wasn’t added during the initial setup, now’s the time to install one. Use a rubberized roofing membrane or ice-dam protection material to stop moisture from wicking upward.
Before sealing everything up, test for radon and ensure any combustion appliances are venting properly to avoid gas buildup. Once you’ve confirmed safety, finish sealing to create a reliable moisture barrier that protects your home’s foundation.
How to Install Drainage Systems
Once you've tackled insulation and sealing, the next step to keeping your crawl space dry is ensuring proper drainage.
Interior Drainage Options
If water pools inside your crawl space or you’re dealing with a high water table, an interior drainage system is a must. A popular choice is the French drain - a 4-inch perforated pipe placed in a gravel-filled trench along the foundation wall. Make sure the pipe’s holes face downward, which helps direct water upward while minimizing sediment buildup.
Use 1.5–2-inch washed river rock to reduce the risk of clogging. The trench should slope toward a sump pump basin, typically 30 to 36 inches deep, to ensure proper drainage flow. DIY installations for French drains cost under $1,500, while hiring professionals can range from $5,000 to $8,000.
> "A sump pump is the preferred method of water evacuation because the force of the pumping action keeps the exit drain clear of debris." > > - Don Richards, Crawlspace Industry Expert
To maximize efficiency, install a check valve on the sump pump's discharge line. Also, drill a small release hole (1/4-inch to 3/8-inch) in the discharge pipe below the check valve to prevent vapor lock, which can make the pump struggle to start. A battery backup system is essential, as flooding often coincides with power outages. Ensure the discharge pipe ends at least 10 feet away from your foundation and in an area sloping away from your home.
For tight spaces, strip drains are a good alternative. These compact drains (2 inches wide by 4 inches deep) require narrower trenches and less gravel than traditional French drains, making them easier to install in confined areas. Before starting any drainage project, test for radon gas, as drainage systems can create pathways for radon to enter your home.
While interior systems handle water that’s already inside, exterior solutions aim to keep it from reaching your foundation in the first place.
Exterior Drainage Improvements
Before investing in interior drainage systems, address potential issues outside your home. In many cases, exterior drainage fixes are more affordable and can resolve the root cause of crawl space moisture.
Start with your gutters and downspouts. Clean them regularly and attach extensions to direct water at least 5 to 10 feet away from your foundation. Professional gutter cleaning typically costs between $120 and $225.
Next, evaluate your soil grading. The ground around your home should slope away at a minimum 5% grade, meaning a 3-inch drop over 5 feet. If you notice low spots near your foundation, add topsoil or organic material to create an even slope. For areas prone to heavy runoff, consider installing swales (shallow ditches) or dry creek beds filled with river rock to channel water safely away from your property.
> "Sloping the soil away from your home at about 1/2 inch per foot is usually the best way to reduce crawlspace moisture." > > - Laurie M. Nichols, Registered Contractor
Exterior drainage solutions are ideal for surface water issues. However, if you’re contending with a high water table or hydrostatic pressure forcing water up through the ground, an interior sump pump system will still be necessary.
Drainage Methods Comparison
The right drainage system complements your insulation and sealing work, ensuring your crawl space stays dry for the long haul.
| Drainage Method | Installation Difficulty | Cost Range | Performance in High Water Tables |
|---|---|---|---|
| French Drain (Interior) | High (labor intensive) | $501–$1,500 DIY; $5,000–$8,000 professional | Effective for groundwater; may clog over time |
| Sump Pump | Moderate | Moderate | Best option; pumping force keeps lines clear |
| Strip Drain | Low to Moderate | Moderate | Ideal for tight spaces; proven efficiency |
| Exterior Grading | Low to Moderate | Low (DIY) to High (professional) | Prevents surface water but not rising groundwater |
Your choice of drainage method should align with the source of your water problem. For surface runoff, start with exterior fixes like grading or swales. If your issue stems from a high water table or persistent seepage, an interior sump pump system is the way to go. Interior systems are often preferred for existing homes, as they avoid disrupting landscaping, decks, or walkways.
How to Keep Your Crawl Space Dry Long-Term
Once you've installed insulation, sealing, and drainage systems, the next step is consistent maintenance. This ensures the measures you’ve taken continue to protect your home from moisture and structural damage.
Regular Inspection and Cleaning Schedule
Make it a habit to inspect your crawl space once a year. Early detection of issues can save you from costly repairs down the road. Use a hygrometer during these inspections to monitor relative humidity, keeping it between 50% and 60% - this range helps prevent mold and mildew growth.
Examine the floor joists, subflooring, and vapor barrier for any signs of mold, rot, or damage. Keep the wood moisture level below 17% - this is key to avoiding fungal damage and preserving the structural integrity of your home. Check that the vapor barrier is still intact and properly secured, extending 8 to 12 inches up the foundation walls. If you notice gaps around plumbing or vents, seal them with caulk or spray foam. Even tiny openings (as small as 1/4 inch) can let in humid air and pests like mice.
> "The moisture content of the wood in the crawlspace must remain below 17%." > > - Nick Gromicko and Ben Gromicko, InterNACHI
Maintaining Your Drainage Systems
Your drainage systems also need regular attention to keep your crawl space dry. Test the sump pump every three months by pouring water into the pit. This ensures the float switch activates and the check valve is functioning properly. Don’t forget to check the battery backup - around 34% of homeowners install sump pumps to address crawl space flooding, so it’s essential that yours is ready to work when needed.
Keep gutters clean to ensure water is directed away from your foundation. Downspouts should extend at least 10 feet away from your home. Also, check the slope of the ground around your house. It should drop 6 inches over the first 10 feet, which equals a 5% grade.
If you use a dehumidifier, clean or replace its filters regularly and empty the collection tank if it doesn’t drain automatically. Monitor humidity levels monthly to ensure they stay below 50%. Additionally, keep an eye on the moisture content of rim and floor joists to confirm your systems are effectively managing moisture.
Final Thoughts
Dealing with a damp crawl space involves a three-step approach. Start with insulation and sealing, but don’t overlook the importance of ongoing maintenance for lasting results. If your crawl space is beyond saving and you're planning new construction, a cold-climate slab-on-grade foundation sidesteps most of these moisture problems by eliminating the air gap entirely. Once you’ve addressed external water issues - like grading and drainage - seal any gaps with a continuous vapor barrier and use moisture-resistant insulation, such as rigid foam board or closed-cell spray foam. Managing airflow is just as crucial , and it’s wise to steer clear of materials that absorb water like sponges.
Of course, installation is just the beginning. With proper care, a crawl space encapsulation system can last anywhere from 15 to 25 years . However, even small maintenance oversights can lead to expensive problems. Thanks to the stack effect, up to 50% of the air on your home’s first floor originates from the crawl space . Keeping this area dry not only protects your home’s structure but also contributes to a healthier living environment.
> "Controlling moisture can make your home more energy-efficient, less costly to heat and cool, more comfortable, and prevent mold growth." > > - U.S. Department of Energy
To maintain a dry and efficient crawl space, make annual inspections part of your routine. Test your sump pump, clean your gutters, and aim to keep humidity levels below 50%. These simple steps can help you avoid costly repairs and protect your home for years to come.
FAQs
How can I tell if my crawl space moisture problem needs professional attention?
If your crawl space is dealing with serious moisture problems, it’s time to bring in a professional. Here’s what to watch for:
- Mold or mildew on joists, insulation, or flooring. These can lead to health issues like allergies or respiratory problems and might even spread into your living areas.
- Musty odors, warped hardwood floors, damp carpets, or higher energy bills. These are all signs that excess moisture is impacting your home’s structure and efficiency.
- Humidity levels above 65%. You can measure this with a digital hygrometer. Elevated humidity speeds up mold growth and wood deterioration.
- Standing water, puddles after rain, or evidence of wood rot or pest damage. These point to drainage problems that need professional attention.
If you spot any of these red flags - especially mold or structural damage - don’t hesitate to call an expert. They can assess the situation, install effective drainage solutions, and properly seal and insulate your crawl space. Trying to handle severe issues on your own might leave hidden moisture behind, which can lead to even more expensive repairs down the road.
What are the best eco-friendly insulation options for a damp crawl space?
If you're considering insulating your crawl space with environmentally friendly materials, here are a few great options to explore:
- Reflective bubble insulation: This lightweight material, often coated with foil, works by reflecting heat back into your home. When sealed correctly, it also acts as a vapor barrier. It's particularly useful in colder climates and can help cut down on energy bills.
- Rigid foam board insulation: Materials like polyisocyanurate or extruded polystyrene are excellent choices for lining crawl space walls. They create an air-sealed thermal barrier that reduces heat loss and keeps condensation off joists and ducts.
- Polyethylene vapor retarder: A polyethylene sheet placed beneath the insulation serves as a moisture barrier, stopping ground moisture from entering the crawl space while boosting energy efficiency.
These materials not only improve your home's insulation but also align with eco-conscious practices, offering a smart way to maintain a dry and energy-efficient crawl space.
How often should I check my crawl space to keep it dry and free of mold?
To maintain a dry, mold-free crawl space, aim to inspect it twice a year - spring and fall are ideal since seasonal weather changes often lead to higher moisture levels. If your region tends to be humid or experiences frequent rainfall, consider checking it more often.
During these inspections, keep an eye out for standing water, condensation, or musty smells. Also, make sure your insulation, [vapor barriers](/blog/vapor-barrier-installation-for-walls-step-by-step-guide), and drainage systems are functioning properly. Regular monitoring can help you catch minor problems early, saving you from expensive repairs down the line.