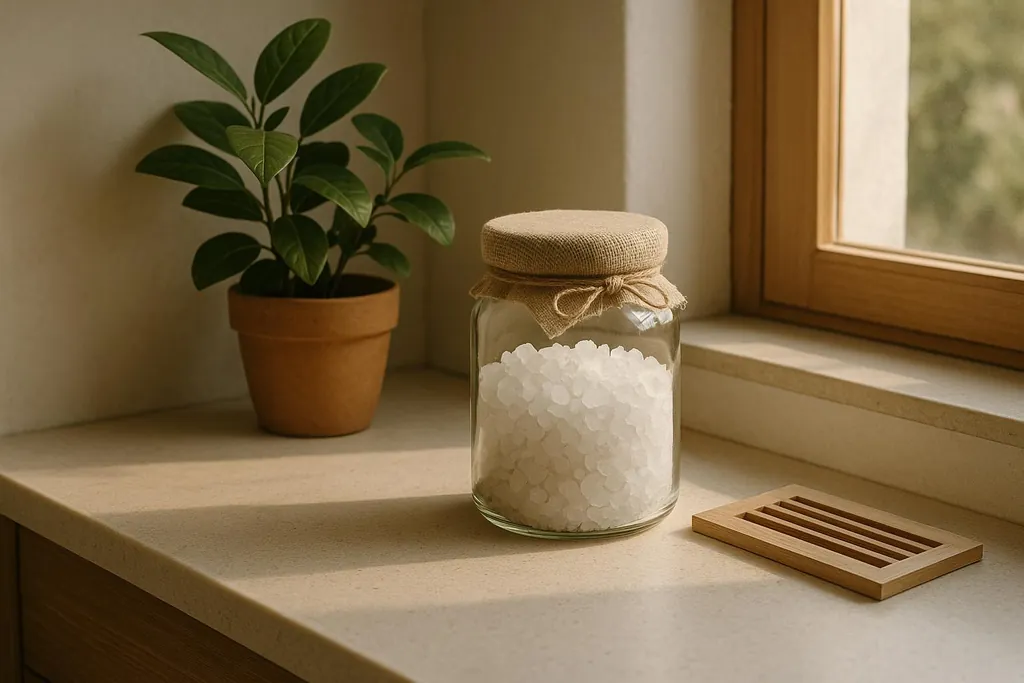
Explore 6 budget-friendly, eco-friendly DIY dehumidifiers using natural materials to combat excess humidity and protect your home.
6 DIY Dehumidifier Ideas for Eco Homes
Excess humidity can damage your home, promote mold growth, and harm natural materials like wood or bamboo. While electric dehumidifiers work, they consume energy, making them less ideal for eco-conscious living. This guide shares 6 DIY dehumidifier methods using low-cost, natural materials like baking soda, silica gel, and activated charcoal. These solutions are energy-free, budget-friendly, and easy to maintain.
Quick Overview of DIY Methods:
- Fan-Assisted Dehumidifier: Uses a small fan and desiccants like silica gel or rock salt to remove moisture. Great for medium spaces.
- Silica Gel Container: Perfect for small spaces like closets or cabinets. Silica gel is reusable and absorbs moisture quietly.
- Rock Salt Bucket: A simple setup for larger areas like basements or garages.
- Activated Charcoal: Controls both humidity and odors in small to medium spaces.
- Baking Soda Bowl: Ideal for small, enclosed areas like cupboards or drawers.
- Calcium Chloride Hanging: Effective for persistent moisture in high-humidity areas.
Each method is low-cost and easy to set up, with maintenance involving periodic material replacement or reactivation. Whether you're tackling a damp closet or an entire room, these DIY options can help you manage moisture without relying on electricity.
DIY Non Electric Dehumidifier
What to Consider Before Making DIY Dehumidifiers
Before starting your DIY dehumidifier project, think about how the size of your space influences your approach. A small 3' x 4' closet will need far less moisture control than a larger room. For compact areas, simple options like bowls of baking soda or small silica gel containers might work perfectly. On the other hand, bigger spaces may call for multiple units or even a fan-assisted design to keep humidity in check.
Understanding your home's humidity levels is another key step. Ideally, indoor humidity should range between 30% and 50%. If your home regularly exceeds 60%, you'll need a solution that can handle a heavier moisture load. For moderately humid conditions, less intensive methods might do the trick, but higher humidity levels demand more robust solutions.
Tailor your method to the specific needs of the space. For example, basements often require a different setup than bedrooms or closets. Poorly ventilated areas might benefit from methods that don’t rely solely on air circulation, while spaces with good airflow can make use of fan-assisted designs. You’ll also need to decide whether you prefer a portable option that can be moved around or a more permanent setup for areas with persistent moisture issues.
Safety should always be a top priority when working with dehumidifier materials. Substances like calcium chloride can irritate the skin and eyes, so make sure to wear gloves and safety glasses while handling them. Store all materials in clearly labeled containers and keep them out of reach of children and pets. Activated charcoal and silica gel packets should also be kept away from curious hands or paws. Placing your DIY dehumidifiers on high shelves, inside cabinets, or in other inaccessible spots can minimize risks. Using mesh bags or perforated containers is another smart move, as they allow for air circulation while keeping materials safely contained.
Regular upkeep is essential for keeping your dehumidifiers effective. Check them periodically and replace or regenerate the moisture-absorbing materials once they’re saturated. This ensures your eco-friendly solution continues to work as intended.
Lastly, think about how these methods might affect your home's building materials. If your home features natural materials like untreated wood or bamboo flooring, be cautious about making rapid changes to humidity levels. A gradual reduction in moisture is better for these materials, as aggressive dehumidification could lead to issues like cracking or warping. This approach helps protect the integrity of natural elements in your home while addressing humidity concerns effectively.
1\. DIY Dehumidifier with a Fan
This DIY project combines desiccants and a fan to speed up moisture removal. By using materials like activated charcoal, silica gel, or rock salt, paired with a fan for air circulation, you can create an efficient system to tackle humidity in your home.
To get started, you'll need a 4–6-inch computer fan, a container with a secure lid, your chosen desiccant, and a USB adapter or battery. Drill one intake hole in the lid and several smaller holes on the sides for airflow. Mount the fan so it pulls air into the container, forcing it through the desiccant material before releasing it back into the room. This setup ensures that humid air is actively processed, making it especially effective in areas with limited ventilation.
Ideal Room Size/Application
This fan-assisted dehumidifier is perfect for medium-sized spaces, such as bedrooms, home offices, or small basements (around 150 sq ft). It’s particularly effective in enclosed areas like walk-in closets, pantries, or storage rooms, where natural air circulation is minimal.
It also performs well in high-moisture spaces like bathrooms and laundry rooms. Unlike passive dehumidifiers that may struggle in such conditions, the fan ensures steady and reliable performance even when humidity levels are high.
Cost (in US Dollars)
The total cost for this project ranges from $15–25. Here’s a breakdown:
- Computer fan (4-inch): $8-12
- Plastic container: $3-5
- Desiccant material: $2-4
- USB power adapter: $2-4 (if you don’t already have one)
In terms of electricity, this setup is very affordable. Computer fans typically use only 2-5 watts of power, costing about $2-4 annually if run continuously, based on an average electricity rate of $0.12 per kWh.
Maintenance Frequency
The desiccant will need refreshing every 2–3 weeks in humid conditions or about once a month in drier weather. The fan itself requires little upkeep - just dust it off every few months to keep airflow unobstructed.
If you’re using silica gel, it can be recharged by spreading it on a baking sheet and heating it in an oven at 200°F for 1-2 hours. Rock salt, on the other hand, will need to be replaced entirely once it becomes saturated. Activated charcoal should be swapped out every 2-3 months for optimal performance.
Eco-Friendliness (Reusability, Natural Materials)
This design is a sustainable alternative to commercial dehumidifiers. The fan and container are reusable, and silica gel can be regenerated multiple times, reducing waste. Additionally, the system consumes very little energy compared to electric dehumidifiers that typically use 300-700 watts.
For an even greener approach, consider using natural desiccants like rock salt or activated charcoal. These materials are biodegradable and can be safely disposed of when they’re no longer effective. Plus, the entire system can be easily disassembled for repairs or upgrades, making it a low-waste solution compared to store-bought options.
Next, we’ll dive into another method that uses everyday household items to combat humidity effectively.
2\. Silica Gel Container Dehumidifier
This method uses silica gel packets to absorb moisture from the air effectively. Instead of tossing out those little packets that come with shoes or electronics, you can reuse them or buy loose silica gel in bulk to create a low-maintenance dehumidifier that works continuously.
To set it up, you'll need a perforated container - this could be a plastic box with drilled holes or even a mesh laundry bag. Fill it with silica gel packets or beads, ensuring air can circulate freely. Silica gel works by capturing water molecules in its porous structure, gradually reducing the humidity in the air. The best part? It operates silently and doesn’t require electricity.
This setup is hassle-free and clean. Unlike other DIY solutions that might leave residue or require frequent attention, silica gel stays neatly contained and provides consistent moisture control for weeks.
Best Uses and Room Size
Silica gel dehumidifiers are ideal for small to medium spaces up to 100 sq ft. They excel in areas like closets, storage spaces, bathroom cabinets, or enclosed cases such as gun safes, toolboxes, or camera bags - places where even a little moisture can cause damage.
Additionally, they’re perfect for spaces where quiet is a must, like bedrooms, nurseries, or home offices, as they don’t produce any noise. They also work well in seasonal storage areas like attics or basements, where you might not check on them frequently but still need reliable moisture control.
Cost (in US Dollars)
Setting up a silica gel dehumidifier is very affordable, with costs depending on your materials:
- Repurposed silica packets: Free (from product packaging)
- Bulk silica gel beads (2 lbs): $10–12
- Perforated container: $3–5
- Mesh bags (optional): $2–3
This makes it one of the most budget-conscious options. Plus, since silica gel can be recharged many times, there’s almost no ongoing expense - just the small cost of oven energy to reactivate the gel.
Maintenance
Silica gel needs refreshing every 4–6 weeks in moderately humid areas, or every 2–3 weeks in very damp spaces like basements or coastal homes. You’ll know it’s time to recharge when the gel changes color or stops absorbing moisture effectively.
Recharging is simple: spread the gel on a baking sheet and bake it at 200–250°F for 1–2 hours. This process removes the absorbed moisture, restoring its effectiveness. Once cooled, the gel is ready to use again - just make sure it’s completely dry to avoid condensation.
Eco-Friendly Features
Silica gel dehumidifiers are incredibly sustainable. The gel can be recharged and reused hundreds of times, drastically reducing waste compared to disposable options.
They require no electricity during daily use, which keeps their carbon footprint low. While reactivation does use oven energy, it’s an infrequent process - usually once a month - making the overall energy impact minimal, especially when compared to electric dehumidifiers that run constantly.
Silica gel is also non-toxic and stable, so it’s safe for both you and the environment. It’s no wonder this material is widely used in commercial products for its safety and durability.
Up next, we’ll look at another DIY dehumidifier option that relies on common minerals to tackle moisture effectively.
3\. Rock Salt Bucket Dehumidifier
The Rock Salt Bucket Dehumidifier is a straightforward way to manage moisture. It works using rock salt, which naturally absorbs humidity from the air. The setup typically involves two containers: the top one holds the salt, while the bottom collects the water that drips down as the salt draws in moisture.
Ideal Room Size/Application
This option is perfect for medium-sized areas like basements, garages, or storage spaces where you want a simple, electricity-free solution for moisture control. Up next, we'll look at a method that uses activated charcoal to tackle humidity issues.
4\. Activated Charcoal Dehumidifier
The Activated Charcoal Dehumidifier is a simple yet effective way to tackle both humidity and odors in your home. By using activated charcoal placed in breathable fabric bags, this method naturally absorbs moisture from the air while neutralizing unpleasant smells. The secret lies in the porous structure of activated charcoal, which traps moisture and odors effortlessly.
To set this up, you’ll need a few basic materials: activated charcoal (commonly found at pet stores or aquarium supply shops), breathable fabric bags, and a shallow dish to catch any excess moisture. Fill the bags with the charcoal and position them in areas where you need moisture control. It’s that easy!
Cost (in US dollars)
Expect to spend about $15–25 for a 5-pound bag of activated charcoal. Adding breathable fabric bags or cheesecloth will cost another $5–10, bringing the total to approximately $20–35.
Ideal Room Size/Application
This method shines in small to medium-sized spaces up to 200 square feet. It’s perfect for closets, bathrooms, bedrooms, pantries, or any area where controlling both humidity and odors is important. For example, it’s particularly useful in damp basements with musty smells or rooms with lingering pet odors. Activated charcoal works best in enclosed spaces with limited air circulation.
Maintenance Frequency
To keep the charcoal effective, it needs monthly maintenance. Every 4–6 weeks, reactivate it by spreading the charcoal on a baking sheet and placing it in direct sunlight for 2–3 hours. Alternatively, you can bake it in an oven at 200°F for about an hour.
Eco-friendliness (reusability, natural materials)
This dehumidifier is a great choice for those looking to reduce their environmental impact. Activated charcoal is a natural material and can be reused for 6–12 months with proper care. Once it’s no longer effective, you can repurpose the spent charcoal as a soil amendment for your garden, where it adds valuable carbon to the soil. Plus, since this method doesn’t require electricity, it’s a zero-waste, energy-free solution that fits seamlessly into any eco-conscious lifestyle.
Up next, we’ll take a look at how everyday baking soda can help you manage moisture in your home.
5\. Baking Soda Bowl Dehumidifier
Let’s dive into another simple, energy-free way to reduce moisture in your home. The Baking Soda Bowl Dehumidifier is an easy, low-cost solution that uses baking soda, or sodium bicarbonate, to soak up excess moisture from the air. It’s a natural desiccant, meaning it absorbs water until it hardens into a solid cake - your sign that it’s time for a refill.
To make one, just pour baking soda into shallow bowls and cover them with a breathable fabric like cheesecloth. This setup allows air to flow through while keeping the baking soda contained. Place the bowls in areas prone to dampness, and they’ll quietly do their job.
Cost (in US dollars)
Baking soda is budget-friendly. A standard 1-pound box costs about $1–2, while a larger 13.5-pound bag is priced around $8–12. With an investment of $10–15, you’ll have enough baking soda to keep moisture at bay for several months.
Best Uses and Room Size
This method shines in small, enclosed spaces with limited airflow. Think closets, cabinets, cupboards, wardrobes, or small sections of unfinished basements. If you’re dealing with a larger room, you’d need a significant amount of baking soda, making other methods more practical.
Maintenance Tips
When the baking soda starts to cake, it’s time to replace it - usually every 2–4 weeks, depending on humidity levels. To extend its life, stir the baking soda every few days to expose fresh surfaces to the air.
Environmentally Friendly Option
Baking soda is natural, non-toxic, and safe to use around kids and pets. While it can’t be reused once it’s absorbed moisture, you can repurpose it. Use the hardened baking soda for cleaning, toss it into your compost, or sprinkle it in trash cans as a deodorizer. Plus, the bowls and cloth covers are reusable, keeping waste to a minimum.
Next up, we’ll look at a stronger option for tackling persistent humidity: the calcium chloride hanging dehumidifier.
6\. Calcium Chloride Hanging Dehumidifier
When dealing with persistent humidity, a calcium chloride hanging dehumidifier can be a dependable passive solution. This approach relies on calcium chloride, a hygroscopic salt that naturally attracts and absorbs moisture from the air . As the salt absorbs moisture, it dissolves into a liquid brine that drips into a container placed below .
Creating one at home is simple: fill an old sock with calcium chloride (commonly available as ice melt at hardware stores), tie it securely with string, and hang it over a large bowl or container to catch the dripping brine .
Calcium chloride is highly effective, capable of absorbing several times its weight in water . Its performance improves in environments with higher humidity levels. For the best results, opt for higher-purity calcium chloride (94–97% CaCl₂), as it absorbs moisture more efficiently compared to lower concentrations (74–77%) . Below is a table comparing the performance and applications of different calcium chloride concentrations.
Method Comparison Table
When deciding on a DIY dehumidifier, your choice should reflect your specific needs and the resources you have on hand. Below is a quick overview of several methods along with their key details:
| DIY Dehumidifier Method | Key Details |
|---|---|
| DIY Fan Dehumidifier | Limited information available on performance and costs. |
| Silica Gel Container | Uses silica gel that can be reactivated in a low-temperature oven. Limited data. |
| Rock Salt Bucket | Relies on natural rock salt to absorb moisture. Limited performance data. |
| Activated Charcoal | Helps with moisture control and also reduces odors. Limited data available. |
| Baking Soda Bowl | Known for its affordability, costing just a few dollars . |
| Calcium Chloride Hanging | Often used in high-humidity areas. Limited performance data available. |
Among these, the baking soda bowl method is particularly appealing for its low cost, though detailed performance data is lacking for most options. Next, we’ll cover essential care and safety tips to keep in mind when using these DIY methods.
Care and Safety Tips
After setting up your DIY dehumidifiers, taking care of them and following safety practices is essential to keep them working well and to protect your home. Proper maintenance and safe handling are key to avoiding accidents and ensuring these devices do their job effectively. Each type of dehumidifier requires specific attention to maintain performance and prevent issues.
Start by regularly checking the water collection areas and materials for signs of saturation. For example, rock salt or calcium chloride will dissolve or become mushy when saturated, while silica gel packets will feel heavier as they absorb moisture. Baking soda may form a hard crust on its surface when it has absorbed water. These are clear indicators that it’s time to replace or refresh the materials.
When replacing materials, pay attention to visual and tactile cues. Rock salt should be replaced once it has completely dissolved, and activated charcoal needs refreshing when it no longer neutralizes odors effectively. Keeping an eye on these signs will help your dehumidifiers stay efficient.
Placement is another important factor. Always position dehumidifiers on stable, low-traffic surfaces to prevent them from tipping over. If you’re using hanging units, like those with calcium chloride, make sure they’re securely fastened to handle the added weight of absorbed moisture. Additionally, keep all dehumidifiers at a safe distance from electrical outlets and appliances to reduce the risk of water damage.
Handling materials with care is equally important. Some substances, like calcium chloride, can cause skin irritation or burns if they come into contact with wet skin. To avoid this, wear gloves when handling these materials.
Be vigilant for warning signs that something might be wrong. White residue around containers could mean salt-based materials are overflowing, while strong chemical odors might indicate degradation of the materials. Visible mold growth is a clear signal that the dehumidifier isn’t controlling moisture effectively and requires immediate attention.
To avoid spills, empty water collection containers before they fill up completely, and check them regularly to see when they need to be emptied. Proper storage of replacement materials is also crucial. Keep rock salt and calcium chloride in airtight containers to protect them from moisture, store reactivated silica gel in sealed bags, and ensure baking soda stays in its original container with the lid tightly closed.
Conclusion
Making your own dehumidifier offers an affordable and eco-conscious way to manage indoor humidity. While commercial dehumidifiers can cost anywhere from $150–$500 for portable units to $1,500–$2,800 or more for whole-house systems , DIY options provide a budget-friendly alternative. By using natural materials like activated charcoal or baking soda, you can cut down on energy use from traditional electrical devices. Even DIY electric models typically use less power than their commercial counterparts, which can help trim your monthly utility bills. This combination of savings and reduced energy use makes DIY dehumidifiers a smart choice for environmentally conscious households.
Another advantage of the DIY route is the ability to customize your dehumidifiers to meet the needs of specific spaces. For instance, you can add a fan to improve air circulation in a larger room or design compact units for smaller areas like closets . Mixing and matching different methods can help you find the best solution for maintaining ideal humidity levels in spaces ranging from bedrooms to basements.
To get the most out of your DIY dehumidifiers, regular upkeep and attention to safety are key. With proper care, these solutions can improve air quality, prevent mold growth, and create a more comfortable living environment - all while aligning with your eco-friendly lifestyle.
FAQs
What’s the best DIY dehumidifier method for each room in my home?
Choosing the best DIY dehumidifier approach depends largely on the size and type of space you're dealing with. For smaller, enclosed spots like closets, cabinets, or pantries, moisture absorbers - such as silica gel, activated charcoal, or calcium chloride - are simple and effective options.
For larger or more open areas like basements, living rooms, or garages, you might want to try rock salt as a natural solution. Alternatively, a compact, energy-efficient dehumidifier can be a great choice for tackling higher humidity levels. Just make sure to evaluate the room's dimensions and moisture levels to pick the most suitable method for managing dampness.
What safety precautions should I follow when working with materials like calcium chloride and activated charcoal?
When working with calcium chloride, it’s crucial to prioritize safety. Always wear gloves, safety glasses, and protective clothing to shield your skin and eyes from potential irritation or burns. Make sure to store it in a cool, dry, and well-ventilated space, ensuring the containers are tightly sealed. Also, steer clear of contact with strong oxidizers or acids, as this can lead to dangerous reactions.
Handling activated charcoal requires similar precautions. Use gloves to protect your skin, especially if the charcoal has been soaked or treated, and rinse it thoroughly to remove any leftover salts. Always adhere to the manufacturer’s guidelines for handling and disposing of both materials, ensuring safety and reducing any environmental risks.
How often should I maintain my DIY dehumidifiers to keep them working properly?
To keep your DIY dehumidifier working efficiently, it's a good idea to check and maintain it monthly. This involves tasks like emptying and cleaning the water reservoir, wiping down filters, and clearing any dust or blockages from the vents. Regular maintenance not only helps prevent moisture buildup but also ensures proper airflow and extends the lifespan of your dehumidifier.
If you notice it’s not performing as well as usual, consider inspecting it more often and addressing any problems right away to keep it running smoothly.