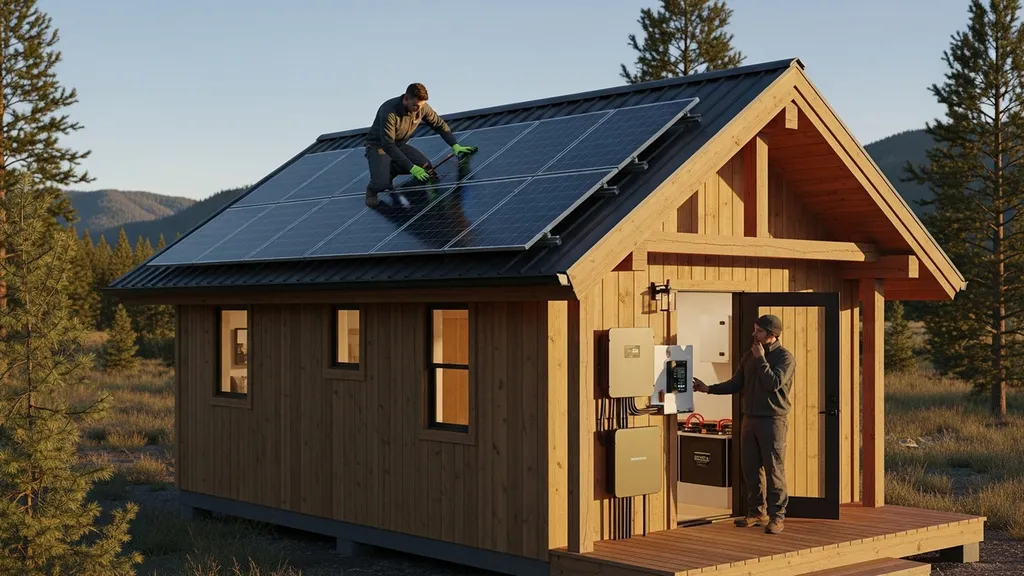
Practical guide to sizing a 2kW solar system for a cabin — panels, batteries, inverter, costs, and real-world examples for weekend or full-time use.
2KW Solar System for Cabin: Complete Sizing Guide
A 2kw solar system for cabin is a practical choice for weekend getaways and small full-time cabins that run modest loads. This guide shows how much energy a 2 kW array typically produces, how to build a usable load worksheet, what panels, batteries, inverter, and charge controller to choose, and realistic budgets for DIY installation. Read on to get concrete kWh estimates, worked battery-sizing examples, component specs with cost ranges, and permit and winter-care reminders so you can decide whether 2 kW will meet your needs.
TL;DR:
- A 2 kW array produces about 6–12 kWh per day depending on 3–5 peak sun-hours and performance ratio; plan on 6–8 kWh/day in many temperate sites.
- For a weekend cabin, 1–3 days autonomy often means 3–6 kWh usable battery capacity (LiFePO4 4 kWh bank recommended); full-time minimal living needs 8–12 kWh usable.
- Typical parts-only budget ranges $3,000–$8,000: panels $900–$1,800, inverter/charger $500–$2,000, batteries $600–$5,000. Check permits and incentives before ordering.
How Much Energy Will a 2kw Solar System Produce for a Cabin?
A nominal 2 kW PV array is the sum of module wattages (for example, six 335 W panels ≈ 2,010 W). Actual daily energy depends on peak sun-hours and system derate. Use NREL PVWatts or the Department of Energy's homeowner guidance to get site-specific insolation numbers and system loss expectations; the DOE notes real-world systems rarely deliver nameplate output under all conditions (Department of Energy's guide to energy efficiency and solar).
Daily output examples using array wattage × peak sun-hours × performance ratio:
- 3 peak sun-hours: 2,000 W × 3 h × 0.80 = 4.8 kWh/day
- 4 peak sun-hours: 2,000 W × 4 h × 0.80 = 6.4 kWh/day
- 5 peak sun-hours: 2,000 W × 5 h × 0.80 = 8.0 kWh/day
Monthly estimates (30-day month) scale accordingly: 4.8 kWh/day ≈ 144 kWh/month. Typical performance ratio assumptions range 0.75–0.85 to account for inverter conversion, soiling, temperature, and cable losses. In cold, clear climates panels can perform better by efficiency but face snow/shading losses; in hot, low-elevation sites temperature-related losses reduce output.
Quick conversion table for reader | Array size | Peak sun-hours | kWh per day | kWh per month | |---|---:|---:|---:| | 2,000 W | 3 | 4.8 | 144 | | 2,000 W | 4 | 6.4 | 192 | | 2,000 W | 5 | 8.0 | 240 |
Key considerations:
- Latitude and shading: Use NREL PVWatts for a location-specific baseline. Tree shading during key hours can cut production by 20–60% for a string inverter if not mitigated.
- Seasonal variation: Expect 30–60% lower winter output in higher latitudes. Plan battery and load management for low-production months.
- Compare to small-system guides: If you’re scaling from a tiny system, see the 1kW tiny-house guide, 1kW shed sizing, or the 2kW shed guide for layout and production differences.
Sizing Your Cabin Loads: a Step-by-step Worksheet
Start by creating a simple spreadsheet that lists each appliance, its wattage, expected run-hours per day, and calculated daily kWh (Watts × hours / 1000). That spreadsheet is the core of system sizing.
How to Build a Usable Load Spreadsheet
- List appliances: Lights, fridge, phone chargers, pump, heater, induction cooktop, fans.
- Estimate wattage: Use appliance nameplate watts or Energy Star labels.
- Estimate run-hours: Be realistic—fridges cycle, pumps run only while pumping.
- Compute daily energy: watts × hours / 1000 = kWh/day.
- Sum loads and add 20% for inverter/standby losses and unexpected use.
Example profiles (daily kWh):
- Weekend cabin (lights, phone, 12 V fridge, small fans): 1.5–3.0 kWh/day; weekend total ~6–8 kWh for a two-day stay.
- Part-time (fridge 24/7, water pump, occasional induction): 4–8 kWh/day.
- Full-time minimal-electric (efficient fridge, LED, limited cooking): 8–12 kWh/day.
Compare these numbers to the 2 kW array outputs from earlier. A 2 kW array in a 4 sun-hour site (~6.4 kWh/day) fits weekend or light part-time profiles but will struggle for full-time living with electric heating, electric cooking, or high hot-water loads.
Typical Appliance Wattages and Examples
- LED light fixture: 8–12 W
- Smartphone charge (overnight): 5–10 Wh/day
- Energy Star compact fridge (12 V off-grid model): 300–600 Wh/day
- Small well pump (solar water pump): 500–1500 W while running; 0.5–2 kWh/day depending on cycles
- Induction cooktop: 1,200–1,800 W when active — cooking for 1 hour can consume 1.2–1.8 kWh
Low-tech Demand Reduction Ideas
- Replace incandescent or halogen with LED bulbs.
- Use propane or wood for heating and cooking to keep electrical loads small; see refrigeration options for trade-offs.
- Install a high-efficiency 12 V or small DC fridge and thermalize its enclosure.
- Time heavy loads midday when solar production peaks.
For cabin design choices that reduce energy use, see the guide on building a small cabin and use the cold-climate insulation guide if you’re in a northern site. For sizing methodology reference, SolarTech’s off-grid sizing guide covers end-to-end calculation steps and validation techniques (Complete off grid solar system guide 2025 - solartech).
Core Components: Panels, Batteries, Inverter, and Charge Controller
Selecting components for a 2 kW cabin system requires balancing cost, weight, lifespan, and maintenance.
Panel Choices and Expected Specs for a 2kw Array
- Typical modules: 300–400 W monocrystalline panels. Expect 5–7 modules to reach ~2 kW.
- Monocrystalline: higher efficiency, better space utilization on small roofs.
- Polycrystalline: cheaper per watt but bulkier.
Choose panels with good temperature coefficients and a 25-year performance warranty for long-term value.
Battery Options and Sizing Rules of Thumb
| Chemistry | Usable DoD | Cycle life (approx) | Pros | Cons | Typical cost range (per kWh) |
|---|---|---|---|---|---|
| Flooded lead-acid | 50% | 500–1,200 | Lower upfront cost | Maintenance, ventilation | $100–$200 |
| AGM/gel | 50% | 400–800 | Sealed, low maintenance | Lower cycles, heavier | $150–$250 |
| LiFePO4 | 80–90% | 2,000–5,000 | High DoD, light, long life | Higher initial cost | $400–$1,000 |
Rules of thumb:
- For lead-acid assume 50% DoD (usable = rated × 0.5). For LiFePO4 assume 80–90%.
- To size kWh: required usable kWh ÷ DoD = battery bank kWh.
- Convert to Ah at nominal voltage: Ah = (kWh × 1000) ÷ nominal voltage (12 V, 24 V, or 48 V).
Inverter and Charge Controller Selection
- Inverter sizing: pick continuous rating equal to expected peak AC load plus margin. For a 2 kW array, a 2,000 W continuous inverter is common; include surge capacity (3,000–6,000 W) for motors or compressor starts.
- Battery voltage: 12 V systems are simpler for small setups but 24 V or 48 V reduce wire losses and allow smaller conductors.
- Charge controller: MPPT controllers sized to handle PV array amps. Example: 2,000 W array at 48 V ≈ 42 A; use a controller rated for higher than peak (e.g., 60 A MPPT).
- AC coupling vs DC coupling: see the AC/DC coupling guide for hybrid configurations and energy flow considerations (AC/DC coupling basics).
For practical battery housing techniques, consult the step-by-step DIY battery enclosure. For inverter failure modes and fixes, see our troubleshooting guide ([inverter troubleshooting]( /blog/5-common-solar-inverter-issues-and-fixes)).
Estimated component cost ranges (parts only):
- Panels (2 kW): $900–$1,800
- Mounting and racking: $150–$500
- MPPT charge controller: $200–$800
- Inverter/charger: $500–$2,000
- Batteries: $600–$5,000 (depending on chemistry and capacity)
- Wiring, breakers, fuses, combiner box: $150–$500
System Configuration Choices: Off-grid, Grid-tied, or Hybrid for a 2kw Cabin
Choosing configuration affects cost, complexity, and available services.
Pros and Cons for Cabins
- Off-grid: Complete independence; requires battery bank sized for autonomy and backup generator for multi-day outages. More upfront battery cost and system control complexity.
- Grid-tied: Simpler and cheaper (no batteries required); ideal when utility access exists. But grid-tied without batteries offers no backup when the grid fails.
- Hybrid: Batteries plus grid tie allow backup, time-shifting, and partial islanding. Hybrid systems typically use an inverter/charger that supports both modes.
When a 2 kW array fits:
- Off-grid: 2 kW can support light loads with battery storage; good for weekend cabins or well-managed part-time living.
- Grid-tied: 2 kW offsets grid use and may be sized without batteries for net metering.
- Hybrid: 2 kW + modest battery gives limited backup and peak-shifting ability.
When to Pick Off-grid vs Grid-tied vs Hybrid
- Off-grid if grid access is unavailable and you accept battery and generator management.
- Grid-tied if connection is cheap and uninterrupted power is desired.
- Hybrid if you want backup and liveability during outages or want to expand later.
Permit and interconnection considerations vary by utility and locality. Check incentive databases such as DSIRE and local rules. For a detailed feature comparison, see the grid and off-grid primer (grid vs off-grid). For hybrid wiring specifics consult the hybrid wiring guide. Generation Ecostore provides practical kit-level commentary helpful for cabin decision-making (Off-Grid solar kit: the ultimate guide for cabins and tiny houses).
Practical Array Design and Mounting Options for Cabin Roofs and Grounds
A small cabin often forces trade-offs between roof space, tilt angle, and shading. Thoughtful layout maximizes energy per panel.
Roof Layout Examples and Array Orientation
- Portrait vs landscape: Portrait mounting (taller modules) can fit near ridgelines and vents better. Landscape fits eave-to-ridge runs. Example: five 370 W panels in portrait on a south-facing 12' × 8' roof section fits most small cabins.
- Tilt optimization: Roof pitch often matches tile; add tilt racks for seasonal optimization. Use latitude minus 10° for summer-leaning, plus 10° for winter-leaning, or follow NREL guidance.
- Roof loading and attachments: Use flashings and rails attached to rafters. Follow local code and our installation safety tips.
Ground and Pole Mounts: Trade-offs and Siting Tips
- Ground mounts allow ideal tilt and orientation and easier service access. Pole mounts cost more but require less excavation.
- Consider ground shading, snow drift, and theft risk. Use simple fences or anchoring for remote sites.
Snow, Shading, and Wind Protection Strategies
- Snow-shedding: Steeper tilt (>30°) helps snow slide off panels; for heavy snow areas design for manual snow clearing access.
- Shading mitigation: If partial shading occurs, consider microinverters or power optimizers for per-panel MPPT; string inverters are cheaper but more shading-sensitive.
- Wind protection: Follow manufacturer wind-load specs and attach racking to structural rafters. Unbound Solar’s design guide explains mounting basics for small arrays (How to size an off-grid solar system).
Watch this step-by-step guide on installing an off grid solar system at your home:
.Battery Bank Sizing Examples: Weekend Getaway, Seasonal, and Full-time Cabin
Sizing batteries requires daily load, desired autonomy (days without sun), and DoD assumptions.
Weekend Cabin Example Calculation
- Daily load (two-person weekend): 3 kWh/day.
- Desired autonomy: 2 days (weekend).
- Usable energy needed: 3 kWh × 2 = 6 kWh; add 20% reserve → 7.2 kWh usable.
- Battery chemistry: LiFePO4 with 80% DoD → required bank = 7.2 ÷ 0.80 = 9.0 kWh nominal.
- Round to a 10 kWh LiFePO4 bank (e.g., two 5 kWh modules) for headroom. With a 2 kW array in a 4 sun-hour site, recharge from 2 kW nominal yields ~6.4 kWh/day; overnight recharge after one sunny day is feasible.
Part-time Seasonal Example
- Daily load: 6 kWh/day (fridge, pump, lights).
- Desired autonomy: 3 days.
- Usable needed: 18 kWh; with 80% DoD LiFePO4 → 22.5 kWh bank nominal.
- A 24–25 kWh bank provides comfort; charging time at 2 kW average is slow — one sunny day recharges ~6–8 kWh usable, so plan for longer recharge windows or a generator.
Full-time Minimal-electric Example and Reserve Days
- Daily load: 10 kWh/day.
- Desired autonomy: 2 days.
- Usable needed: 20 kWh; LiFePO4 at 80% DoD → 25 kWh bank nominal.
- This size is near the practical limit where a 2 kW array struggles to recharge quickly; consider scaling array to 4 kW or supplementing with a generator or micro-hydro where available. Jackery’s guide provides practical production expectations for 2 kW systems and recharge rates in varied conditions (Ultimate guide to 2kw solar panel system - jackery australia).
Charging limits and C-rate:
- LiFePO4 typical safe charge rate: 0.2–0.5 C (a 10 kWh battery safely accepts 2–5 kW charge). A 2 kW array charges slowly but gently; for faster recharge add a generator or larger PV array.
For wiring and layout considerations for these battery sizes, see tiny-house electrical options.
Costs, Permits, and Budgeting for a 2kw Cabin Solar System
Plan a parts-and-labor budget and include permit and inspection fees in your contingency.
Rough Parts and Labor Cost Breakdown (examples)
- Solar modules (2 kW): $900–$1,800
- Racking and hardware: $150–$500
- MPPT charge controller: $200–$800
- Inverter/charger (2 kW continuous): $500–$2,000
- Batteries (LiFePO4 10 kWh): $4,000–$8,000; lead-acid alternatives lower cost up front
- Wiring, breakers, AC/DC disconnects: $150–$500
- Permits and inspection: $50–$500 (varies widely)
- Contingency and transport: 10–20%
Parts-only DIY low-end example: $3,000–$4,500 for a simple weekend setup with lead-acid battery. Mid-range LiFePO4-equipped system: $6,000–$12,000.
Use a solar cost modeler to refine site-specific figures and compare DIY vs installer quotes: see the solar cost calculator.
DIY vs Hiring an Installer — Cost and Risk Trade-offs
- DIY saves labor but requires electrical and structural competence. Mistakes on wiring, grounding, or racking can be costly or dangerous.
- Hiring an NABCEP-certified installer adds labor costs but reduces inspection friction and warranty risks.
- For grid interconnection, utilities sometimes require licensed contractor sign-off.
Permitting, Inspections, and Incentive Checklists
- Typical municipal requirements: electrical permit, building permit for roof penetrations, and utility interconnection paperwork for grid-tied systems.
- Check local permit checklists as examples, such as a sample municipal permits checklist.
- Incentives and rebates: DSIRE and local utility pages list net metering and tax credit programs. Factor timelines — permitting and interconnection can take 2–8 weeks depending on locality.
When sizing water pumps, reference pump-solar details in the solar water pumps guide to add accurate pump-cycle energy to load calculations.
Maintenance, Common Problems, and Winter Care for Small Cabin Solar Systems
Routine maintenance keeps systems reliable and safe, and seasonal attention prevents performance loss.
Routine Maintenance Checklist
- Visual panel inspection for cracks, debris, and soiling; clean panels when >10% soiled.
- Check racking fasteners and roof penetrations annually.
- Inspect wiring, terminals, and cable connections for corrosion or looseness.
- For flooded batteries: check water levels monthly in active seasons.
- Firmware updates: keep inverter and controller firmware current.
Common Inverter, Controller, and Battery Issues and Quick Fixes
- No output from inverter: check DC breaker, battery voltage, and inverter fault codes. See inverter troubleshooting steps in our inverter guide (inverter troubleshooting).
- Batteries not charging: confirm PV open-circuit voltage, MPPT status, and charge controller settings.
- High voltage or low voltage disconnects: adjust inverter low/high voltage thresholds and check battery state-of-charge.
When issues persist, contact qualified service technicians, especially for battery and AC-side faults.
Winter-specific Care: Snow, Cold Batteries, and Charge Strategies
- Cold reduces battery capacity; place batteries in insulated enclosures or inside conditioned space. Use a battery heater pad if temperatures plunge.
- Charge more aggressively before long cold spells to maintain state-of-charge. Avoid deep discharges in winter.
- Keep panels clear of heavy snow on frequently-visited cabins; for seldom-used cabins mount panels at a steeper tilt or ensure a secondary charging plan (generator) for prolonged snow cover.
The Bottom Line: is a 2kw Solar System the Right Choice for Your Cabin?
A 2kw solar system for cabin typically supplies 6–8 kWh/day in many temperate locations and matches well with weekend or light part-time cabins. For full-time occupancy with electric heating, cooking, or heavy refrigeration, scale to 3–5 kW or plan additional generation/storage. Quick checklist: measure loads, map sun-hours, choose battery chemistry and days of autonomy, check permits/incentives, decide on DIY vs pro, and plan maintenance.
Next steps: run a plug-load meter for 2–4 weeks, model your site with NREL PVWatts, and prepare detailed installer or shopping questions.
Frequently Asked Questions
Can I run a fridge on a 2kW system?
Yes—if the fridge is an efficient 12 V or small AC model and your daily fridge energy is within the system's production and battery capacity. A modern low-draw 12 V fridge often uses 300–600 Wh/day, which a 2 kW array in 4 sun-hours (≈6.4 kWh/day) can support alongside modest additional loads. For full-time use, ensure batteries sized to cover nighttime fridge draw and several days of autonomy in case of low sun.
How many batteries do I need for a 2kW cabin system?
It depends on daily kWh and desired autonomy. For a weekend cabin needing ~6–8 kWh usable, plan a nominal 9–10 kWh LiFePO4 bank (two 5 kWh modules or equivalent). For part-time 18 kWh usable, a 24 kWh nominal bank is typical. Use DoD assumptions: 80% for LiFePO4, 50% for lead-acid, and convert kWh to Ah using your chosen system voltage.
Can I expand a 2kW system later?
Yes. Many cabins start with a 2 kW array and add panels or batteries later. Design the system with scalable components: pick an inverter/charger and charge controller with headroom or modular batteries that can link in parallel. Confirm inverter and charge controller maximum PV input and battery bank limits before purchasing to avoid compatibility issues.
What is the typical permit timeline for a cabin solar install?
Permitting and interconnection timelines vary by municipality and utility. Simple off-grid DIY installs may only require a building and electrical permit (1–4 weeks), while grid-tied or hybrid systems need utility interconnection paperwork that can take 2–8 weeks. Use a local permit checklist such as the sample permits page for a concrete example of typical steps and times (permits checklist).
Any safety tips for DIY installation?
Always de-energize circuits before working, verify inverter and battery voltages, use correct fuse sizes, and follow manufacturer torque spec for terminal connections. For roof work, use fall protection and follow an installation safety checklist (installation safety tips). If you’re unsure about AC interconnection, hire a licensed electrician to finalize wiring and inspections.