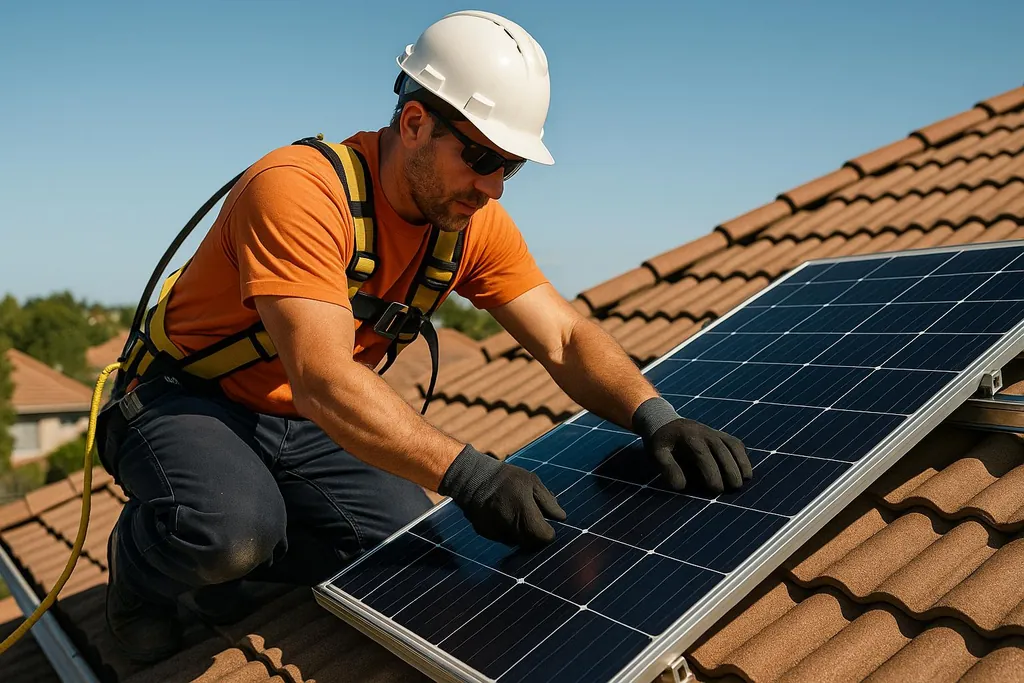
Learn essential safety practices for solar panel installation, from roof assessments to electrical safety measures, ensuring a secure and efficient setup.
Ultimate Guide to Solar Installation Safety
Installing solar panels involves working at heights, handling electrical systems, and navigating weather challenges. Safety isn’t just about following rules - it’s about protecting lives, ensuring system reliability, and preventing costly mistakes. Here’s a quick breakdown of what matters most:
- Key Risks: Electrical hazards, fall dangers, structural issues, equipment handling, and weather conditions.
- Preparation: Inspect your roof, secure permits, and choose durable equipment.
- Safety Measures: Use fall protection systems, handle panels carefully, and follow electrical safety protocols like grounding and lockout/tagout.
- Maintenance: Regular inspections, cleaning, and professional audits keep your system safe and efficient.
Solar DIY Step 1: Safety First! How to Stay Safe While Installing Your Solar Panels
Planning and Preparation
Before diving into solar panel installation, it's essential to ensure your roof can handle the added weight. This initial assessment will guide your equipment choices and help you set a realistic timeline.
How to Check Roof and Site Conditions
Start by checking your roof's structural strength. Solar panels, along with their mounting hardware and the weight of installers during setup, typically add 2–4 lbs per square foot. Most modern roofs are built to handle around 20 lbs per square foot, so this extra load is usually well within safe limits .
Next, inspect your roof for any visible issues. Look for cracked or missing shingles, signs of sagging, water stains, or soft spots. Pay close attention to the roof decking and framing, checking for signs of rot, undersized supports, or other structural weaknesses .
The age of your roof is another key factor. Since solar panels are designed to last 25–30 years, installing them on an older roof could lead to costly complications down the road. For example, if your asphalt shingles are already 10–12 years old (with a typical lifespan of 15–25 years), it’s often more economical to repair or replace the roof before installation. This avoids the future expense of removing and reinstalling the panels when the roof needs work .
Once your roof passes inspection, focus on selecting durable equipment and securing the necessary permits to move forward confidently.
Site Safety Protocols and Best Practices
Once you've confirmed your roof's load capacity, the next step is implementing safety measures to ensure a secure installation process. Working at heights with heavy equipment demands strict protocols to keep everyone safe.
Fall Protection Systems
When working on rooftops, personal fall arrest systems are a must. These systems include a full-body harness, a shock-absorbing lanyard, and anchor points rated to handle at least 5,000 lbs per person. A properly fitted harness should secure snugly around your chest, shoulders, and thighs without limiting your movement.
Guardrail systems are another critical safety feature. Installed correctly, they act as a physical barrier to prevent falls. Guardrails should be at least 42 inches high, with mid-rails and toe boards encircling the work area, allowing you to focus on the task at hand without worrying about edges.
For larger installations, safety nets provide an additional layer of protection. These nets should be placed within 30 feet below the work area and extend 8 feet beyond it. Inspect them daily for any damage, such as tears or worn-out hardware, to ensure they remain reliable.
Ladder safety is equally important. Set up extension ladders at a 4:1 angle - 1 foot of base distance for every 4 feet of ladder height. Always secure the top of the ladder to prevent shifting, and maintain three points of contact while climbing. These measures are especially crucial when handling heavy or awkward equipment like solar panels.
Safe Handling of Solar Panels
Residential solar panels, weighing between 40–50 lbs and measuring about 65″ x 39″, can be tricky to handle, particularly on sloped surfaces or in windy conditions.
Team lifting is key to safe installation. Always have at least two people handle each panel, with one person at each end. Use clear communication or hand signals to coordinate movements, ensuring everyone is on the same page.
Weather conditions play a big role in safety. Wind speeds above 25 mph can make handling panels dangerous, as their large surface area can act like sails. Extreme temperatures may also affect grip strength and the flexibility of materials, so aim to schedule installations during mild weather.
Proper grip techniques are essential to avoid accidents. Always hold panels by the frame, never by the glass or electrical components. Wearing work gloves with a good grip can help prevent slipping, and avoid handling panels when they’re wet from dew or rain.
When it comes to staging and storage, plan carefully. Designate areas away from the installation zone for temporary storage, and use carts or dollies to move multiple panels across flat surfaces. Always secure stored panels to prevent them from shifting or being displaced by wind.
Emergency Preparedness
Being ready for emergencies is just as important as the installation itself.
Start with first aid readiness. Keep a fully stocked kit accessible from ground level, including items like burn gel for electrical burns, instant cold packs for sprains, and sterile gauze for cuts. At least one team member should hold a current CPR and first aid certification.
Communication systems are vital during emergencies. Set up check-in procedures with someone not on-site, and ensure every team member has a working cell phone or two-way radio. Pre-program emergency contact numbers to save time if something goes wrong.
Your emergency action plan should address scenarios like falls, electrical shocks, severe weather, and medical emergencies. Know the fastest route to the nearest hospital and the exact address of the installation site to share with emergency responders. Practice these procedures with your team before starting work.
Prevent accidents by securing tools and equipment. Use lanyards to secure tools and prevent them from falling. Tool belts or buckets can help keep small parts organized. Designate a "no drop zone" below the work area and post warning signs to alert others.
Finally, monitor the weather closely. Check forecasts daily, and have a plan to secure materials and evacuate quickly if storms are approaching. High winds, lightning, and ice can create dangerous conditions, so prioritize safety over sticking to a schedule.
Electrical Safety Measures
After addressing site and fall safety protocols, it's equally important to prioritize electrical safety, especially when dealing with solar systems. These systems operate with high-voltage DC power that remains active as long as sunlight is present. Solar panels generate electricity whenever exposed to light, making strict adherence to electrical safety measures essential during installation.
Proper Grounding and Bonding
Grounding is the cornerstone of electrical safety in solar installations. According to the National Electrical Code (NEC), all metallic components - like solar panel frames, mounting rails, and inverters - must connect to a grounding electrode system. This ensures that any fault currents are safely directed into the ground, reducing the risk of electrical shock.
For most 200-amp residential systems, use at least #4 AWG copper grounding electrode conductors, as specified in NEC Article 250. The grounding electrode must connect to at least two grounding points, such as ground rods driven 8 feet deep and spaced 6 feet apart.
To meet NEC standards, use appropriately sized conductors and stainless steel bonding jumpers coated with anti-corrosion compound. Avoid relying solely on mounting hardware or rails as grounding paths.
Ground-fault protection is another critical component. Devices like ground-fault circuit interrupters (GFCI) or ground-fault detection systems, as outlined in NEC 690.5, must be installed. These devices detect current leakage and shut down the system within 0.1 seconds if a fault exceeds 30 milliamps.
Once the grounding system is secure, the next step is equipping the worksite with proper protective gear.
Using Protective Equipment
When working on energized solar systems, arc-rated personal protective equipment (PPE) is non-negotiable. Arc flash incidents in solar setups can reach energy levels of 8 cal/cm², so wear arc-rated clothing with at least this rating. This includes long-sleeve shirts, pants, and face shields.
Insulated tools are also essential. Tools rated for at least 1,000 volts DC, such as screwdrivers and pliers that meet ASTM F1505 standards, offer reliable protection. These tools, often marked with bright orange or red handles, are tested to withstand up to 10,000 volts.
Voltage testers are indispensable for confirming circuits are de-energized before beginning work. Use digital multimeters rated for Category III, 1,000V DC to measure solar circuit voltages safely. Always test the meter on a known live source before and after use to ensure accuracy. Non-contact voltage testers designed for DC systems can serve as an additional safety measure.
Rubber insulating gloves rated for electrical work provide another layer of protection. Class 0 gloves, rated for 1,000 volts, are suitable for most solar installations. Inspect gloves carefully before use by inflating them to check for holes or cracks. Pair them with leather protectors to prevent punctures and extend their lifespan.
Safety glasses with side shields are a must to guard against arc flashes and debris. For bright outdoor conditions, use tinted safety glasses to reduce glare while maintaining a clear view of electrical components and warning labels.
With PPE and tools in place, the final step for electrical safety is implementing lockout/tagout procedures.
Lockout/Tagout Procedures
To safely shut down the system, start by turning off the AC disconnect at the inverter, followed by the DC disconnects. Cover the solar panels with opaque materials, such as plywood or heavy tarps, to block sunlight and minimize power generation. Secure coverings to prevent wind displacement, keeping in mind that panels may still generate some voltage from ambient or reflected light.
Verify de-energization using a voltmeter. Test between positive and negative conductors, as well as between each conductor and ground. Perform these tests at multiple points, including the array, combiner box, and inverter, documenting voltage readings to ensure they are below safe working levels.
Apply lockout devices to all disconnect switches. Each worker should use their own padlock and keep the key until work is complete. For panel coverings, use locks or tamper-evident tags to prevent unauthorized removal.
Attach tags to all lockout points, clearly stating the reason for the shutdown, the person responsible, and their contact information. Tags should include warnings like "DANGER - DO NOT OPERATE" along with the date, time, and expected duration of the work.
Only the individual who applied a lock is authorized to remove it. When the work is finished, remove panel coverings gradually while monitoring system voltage. Restore the system in reverse order - DC disconnects first, followed by the AC disconnect. Test all safety systems before completing the installation.
Always double-check circuits to confirm they are de-energized. Even small residential systems can produce lethal voltages, with series-connected panels generating several hundred volts DC under normal sunlight conditions.
Post-Installation Safety Checks and Maintenance
Once your system is installed, it's crucial to carry out thorough safety checks and routine maintenance to keep everything running smoothly and to avoid potential hazards. These steps not only ensure your system operates safely and efficiently but also help protect your investment over time.
Final Inspection Checklist
Start by examining the roof-mounted hardware. Make sure all fasteners, like lag bolts securing rails to rafters, are tightened to the torque levels specified by the manufacturer. Check the flashing and sealants around roof penetrations to confirm there are no gaps or signs of wear that could let water seep through.
Verify that grounding conductors and bonding jumpers meet both local code requirements and manufacturer specifications. Ensure that all bonding components are made from corrosion-resistant materials and are adequately shielded from environmental exposure.
Next, test the DC and AC disconnect switches under load to confirm they operate smoothly and provide reliable contact. These switches should be clearly labeled and positioned in accessible locations, as required by safety standards and manufacturer guidelines.
Inspect all conduit and wiring to ensure they are properly supported and protected. Check that junction boxes are securely covered and that all installation practices align with your system's documentation.
For the inverter, confirm there's enough clearance around the unit for proper ventilation, as recommended by the manufacturer. Also, ensure that the grounding electrode conductor is correctly connected to the main electrical panel's grounding system.
Finally, test the monitoring systems and safety shutoffs following the manufacturer's instructions. This step ensures that fault detection features are working as intended.
With these checks completed, ongoing maintenance will help maintain the system's safety and performance.
Routine Maintenance
While natural rainfall often keeps panels clean, dusty environments may require periodic cleaning. Use deionized water and a soft-bristled brush, avoiding detergents or abrasive materials that could damage the panels' protective coatings.
Inspect electrical connections at least once a year, paying close attention to areas exposed to thermal cycling. Look for signs of overheating or damage in combiner boxes and junction points, and make sure all connections remain secure according to the manufacturer's recommendations.
Inverters may have different maintenance needs. Some require periodic filter cleaning, especially in dusty conditions, while others are mostly maintenance-free but still benefit from routine visual inspections for loose connections or wear.
Keep an eye on your system's performance through the inverter's monitoring platform. If you notice a significant drop in energy production under similar conditions to past performance, investigate the cause promptly.
After severe weather events, perform a detailed inspection for any physical damage. High winds or hail can impact mounting hardware, panels, and junction boxes. Address minor issues quickly to prevent larger problems and maintain your warranty coverage.
Annually, test the grounding system's integrity with proper equipment. Check all electrical connections for signs of corrosion or looseness and address any issues immediately.
Scheduling Safety Audits
Beyond regular maintenance, scheduling professional safety audits can provide an extra layer of assurance. Consider hiring a licensed electrician with solar expertise every few years to conduct a comprehensive review. They can identify issues that might go unnoticed during routine checks.
Advanced diagnostic tools like thermal imaging surveys, performed during peak sunlight hours, can detect hidden hot spots or failing connections. Addressing these problems early can prevent system failures. As your system ages, it’s also wise to have a structural assessment done by an engineer, particularly if you notice roof sagging or water damage near mounting points.
Stay updated on changes to local electrical codes and the National Electrical Code, as new standards may require system adjustments. Keep all documentation - permits, inspection reports, and warranty details - organized and up-to-date. If shutdown procedures change, be sure to inform local emergency services.
Finally, adopt a seasonal inspection routine. A spring check can uncover winter-related damage, a fall review can prepare your system for harsher weather, and summer inspections ensure everything is performing optimally during peak energy production months.
Working with [DIY Eco Homes](/) for Safe Solar Installation

Focusing on safety during your solar installation not only protects lives but also ensures long-term energy efficiency and financial savings. This philosophy aligns perfectly with DIY Eco Homes' mission to help homeowners create energy-efficient, sustainable homes. Below, we’ll explore how safety practices and the resources from DIY Eco Homes can help you achieve a secure solar installation.
Long-Term Benefits of Prioritizing Safety in Solar Installations
Taking safety seriously during your solar installation pays off in the long run. For instance, following proper grounding techniques and using the right mounting and weatherproofing methods can significantly reduce the chances of future issues that might require expensive repairs.
A well-grounded solar system is more resilient against voltage fluctuations, which helps protect key components like inverters - these can be expensive to replace. Additionally, correct installation ensures that your warranty remains valid, giving you peace of mind. By emphasizing safety from the start, you protect your investment and cut down on potential maintenance costs over the years.
How DIY Eco Homes Supports Safe Installations
DIY Eco Homes provides a range of tools and resources to make safe solar installation achievable for homeowners. Their step-by-step guides simplify complex safety procedures, breaking them into easy-to-follow tasks while explaining why each step is crucial.
The platform also includes budgeting tools to help you account for essential safety equipment, like fall protection gear and electrical safety tools, ensuring you’re prepared from the outset. For added support, video tutorials offer visual demonstrations of key safety practices, complementing the written guides and giving you multiple ways to confirm your work.
DIY Eco Homes also fosters a sense of community by connecting you with other DIY enthusiasts who have successfully completed safe solar installations. These shared experiences and insights can help you fine-tune your plans and avoid common pitfalls. Together, these resources make the process smoother while reinforcing the importance of safety every step of the way.
Conclusion
Safety is the backbone of any successful solar installation, and following the practices discussed here ensures both protection and long-term energy reliability. A safe installation not only safeguards your investment but also provides peace of mind as you harness renewable energy for years to come. From initial planning to ongoing maintenance, prioritizing safety at every step is non-negotiable.
Key Takeaways
The success of a solar installation begins with careful planning and preparation. Evaluate your roof's condition, understand local building codes, and secure the necessary permits before starting. This upfront diligence helps you avoid costly errors and reduces risks. Additionally, choosing high-quality mounting systems and certified electrical components ensures your system operates safely and withstands harsh weather conditions.
Two critical areas to focus on during installation are fall protection and electrical safety. Use certified safety gear to reduce fall risks and implement proper grounding methods. Personal protective equipment is essential to prevent electrical hazards that could result in serious injuries.
Routine maintenance and safety checks are just as important as installation itself. Regular inspections help optimize energy output and catch potential problems before they escalate into costly repairs or safety concerns.
Next Steps for Safe Solar Installation
To begin, thoroughly assess your unique situation. Develop a safety plan tailored to your roof type, local climate, and electrical needs, using the protocols outlined in this guide. A well-thought-out plan reduces risks and keeps costs manageable.
For additional guidance, explore the resources offered by DIY Eco Homes. Their platform provides step-by-step guides, budget planning tools for safety equipment, and video tutorials that demonstrate proper techniques. Engage with their community of experienced DIY solar enthusiasts to gain insights and avoid common mistakes.
Keep in mind that solar installation safety doesn’t end once the panels are up. Make regular maintenance and safety checks a priority, stay updated on local building codes, and never cut corners on safety equipment or procedures. By following these steps and leveraging the resources from DIY Eco Homes, you can ensure your solar system operates safely and efficiently for years to come.
FAQs
What safety precautions should I take when installing solar panels on an older roof?
Before adding solar panels to an older roof, it’s important to check if the roof is strong enough to support the extra weight. If the roof is showing signs of wear or is close to the end of its lifespan, it’s a good idea to replace it first. This step can save you from bigger problems down the road.
When working on a roof, safety should always come first. Follow [OSHA](https://www.osha.gov/) fall protection guidelines by using tools like harnesses, guardrails, or safety nets to prevent accidents. Also, make sure the installation doesn’t damage the roof’s waterproofing or weaken its structure. These steps will help ensure your solar panel system is both safe and long-lasting.
How do I make sure my solar panel installation meets local electrical codes and safety standards?
To make sure your solar panel installation meets local electrical codes and safety standards in the U.S., start by adhering to the National Electrical Code (NEC), particularly [NFPA 70](https://www.nfpa.org/product/nfpa-70-code/p0070code), which details the essential guidelines for photovoltaic (PV) systems. Before beginning the installation, it’s crucial to obtain the required permits and arrange inspections with local authorities to confirm everything is up to code.
You’ll also need to review local building codes and zoning regulations. These may include specific fire safety measures or area-specific restrictions that could affect your project. By taking these steps, you can ensure your system is safe, fully compliant, and ready to support your switch to renewable energy.
How can I prepare for emergencies during solar panel installation?
To ensure safety during solar panel installation, preparation for potential emergencies is a must. Start by equipping yourself with the proper personal protective equipment (PPE), including gloves, safety goggles, and non-slip footwear. These essentials can shield you from injuries caused by sharp edges or electrical components.
It's also important to understand basic emergency procedures, like safely shutting off power and responding to electrical shocks. Keep a first aid kit and a fire extinguisher within easy reach, and make sure everyone on-site knows their exact location. These steps can help you manage unexpected situations with confidence and reduce potential hazards.