Practical guide to insulating off-grid cabins in cold climates — material choices, air sealing, moisture control, DIY steps, and cost-saving tips.
Off-Grid Cabin Insulation: Cold Climate Guide
Insulating an off grid cabin insulation project in a cold climate is the single most effective way to cut heating fuel needs, shrink solar and battery sizing, and make living off the grid comfortable year-round. This guide explains where cabins lose most heat, which materials and wall systems perform best in freezing conditions, air-sealing and moisture strategies for tiny structures, and a step-by-step DIY checklist so a budget-conscious builder can prioritize high-impact upgrades. Read on for data-backed targets, quick math for sizing, and links to tools and deeper how-tos.
TL;DR:
- Prioritize air sealing and roof/ceiling insulation first — fixing these two areas typically cuts heating load by 40–60% for a small cabin.
- Use continuous exterior insulation (rigid foam or SIPs) to reduce thermal bridging; aim for ceiling R-values of R-40–R-60 and wall assemblies that meet R-20 to R-40 depending on your climate zone.
- Add a balanced ventilation system (HRV/ERV) and proper moisture control to prevent condensation and ice dams while keeping heating needs low.
For current reference points, review DOE insulation guide and ENERGY STAR insulation recommendations.
Why Off-grid Cabin Insulation Matters in Cold Climates
Heat Loss Basics: Where Cabins Lose Most Energy
Small cabins in very cold climates concentrate heat loss. Typical distribution in a compact 12×16 (192 ft²) off-grid cabin in -20°C conditions looks roughly like this: roof/ceiling ~30%, walls ~25–35%, floors ~10–15%, and uncontrolled infiltration ~20–30%. Those figures vary by build, but they show why attic and roof insulation plus air sealing are high-impact. Research on tiny-house performance, including case studies from academic teams, confirms that poor airtightness and under-insulated roofs drive winter fuel use in off-grid tiny homes — see this UC Berkeley study for measured performance data in several locations: energy and water performance of an off-grid tiny house.
How Good Insulation Reduces Off-grid Heating Needs
The basic physics: heat flow through a component is proportional to the temperature difference divided by the assembly R-value. Increasing R reduces steady-state heat loss roughly in proportion to the change. For a typical cabin, improving ceiling R from R-15 to R-45 can cut that component’s heat loss by about two thirds. That translates into smaller wood-stove fuel needs, or less electrical demand for heat pumps and PV/battery capacity. Passive-house standards (PHIUS/Passivhaus) set airtightness targets — for example, 0.6 ACH50 — that are ambitious for cabins but useful as a reference point when sizing off-grid systems. For practical off-grid planning, aim to combine a high-R envelope with airtightness in the 1–3 ACH50 range; better airtightness shrinks heating system size and reduces thermal comfort swings.
Foundation & Floor Insulation for Cold Off-grid Cabins
Foundation Types and Cold-climate Risks
Common foundation types for small cabins are slab-on-grade, frost-protected shallow foundation (FPSF), and raised wood-framed floors on piers or crawlspaces. Frost heave is the main risk for shallow footings in permafrost-prone or seasonally freezing soils. Good drainage, compacted base material, and insulating the slab edge or perimeter reduces frost depth and heave risk.
Where to Place Insulation: Under-slab, Perimeter, and Suspended Floors
- Slab-on-grade: In cold climates, place rigid foam under the slab and extend vertical perimeter insulation 12–24 inches down the exterior to form a frost-protected shallow foundation. Typical practice: R-10 to R-20 continuous rigid foam under/around the slab in cold zones.
- Raised floors / crawlspaces: Insulate the floor cavity to at least R-30 for living floors in severe cold. If using an unvented conditioned crawlspace, insulate the foundation walls with continuous rigid foam (R-10 or higher) and seal the ground with a vapor retarder.
- Sill plate thermal bridge: Sill plates sitting on concrete create thermal bridges. Use sill gasket and a strip of rigid foam (or insulated sill gasket) between concrete and sill, and consider insulated headers or engineered lintels at openings to reduce bridging.
For small-cabin R guidance and practical examples, see our article on shed insulation R-values, which maps well to cabin-scale targets.
Frost Protection, Moisture, and Ventilation for Crawlspaces
Preventing moisture and frost entry is as important as R-value. Ensure site grading directs water away from the foundation, add perimeter drainage if needed, and use capillary breaks (gravel, geotextile) under slabs. Ventilate or condition crawlspaces depending on your strategy: an unvented conditioned crawlspace with insulated foundation walls and a sealed ground vapor barrier often performs better for tight cabins than a vented, cold crawlspace. Where frost heave is a concern, consult local code and consider FPSF details.
Wall System Choices for Off-grid Cabins (cold Climate Comparison)
Standard Framed Walls with Continuous Exterior Insulation
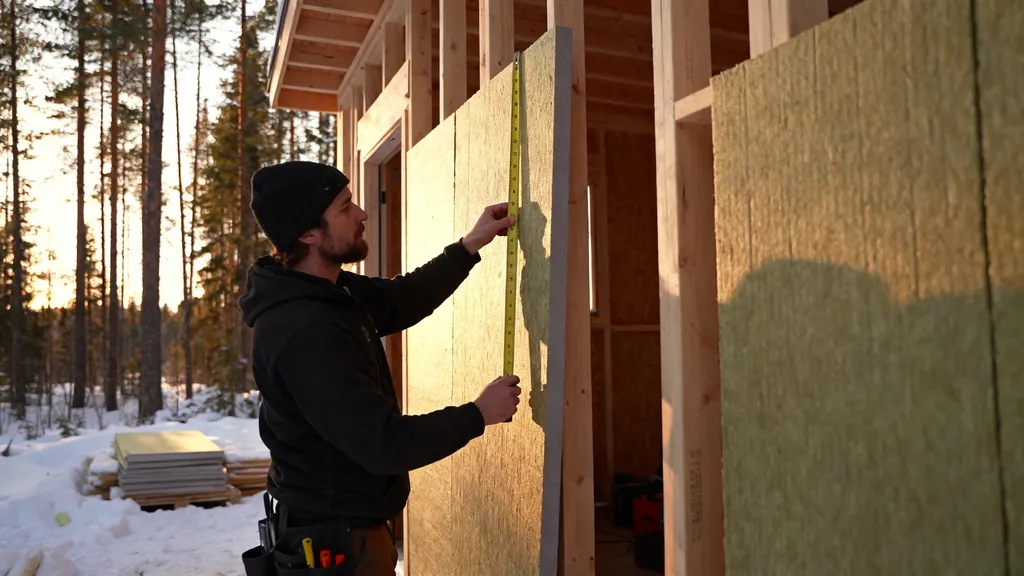
Conventional 2×6 framed walls are common and economical. Adding continuous exterior insulation (CI) — polyiso, EPS, or exterior mineral wool — reduces stud thermal bridging and improves effective wall R. A hybrid of exterior foam plus cavity cellulose or mineral wool gives strong performance at moderate cost. Use a weather-resistive barrier and tape seams on CI for an air-control layer.
SIP Panels, Log and Heavy-timber Wall Options
- SIPs: Structural insulated panels provide high installed R and tight construction. They offer fast assembly and low air leakage but require careful sealing at panel joints and openings.
- Log/heavy timber: Logs provide thermal mass and a distinct look. They perform differently — mass slows temperature swings but has lower nominal R/inch than modern insulation. Use chinking, good window details, and add exterior or interior insulating layers if aiming for low heating loads.
Detailing to Avoid Thermal Bridges and Condensation
Thermal bridges at posts, headers, and window jambs often defeat nominal R-values. Use continuous insulation to break stud bridging, install insulated headers or structural insulated header blocks, and size roof overhangs to manage snow and ice. Condensation control requires understanding the assembly’s vapor profile — in very cold climates, place vapor retarder layers toward the warm side (interior) or use vapor-open exterior insulation strategies so walls can dry outward.
Wall system quick comparison
| Wall type | R/inch (typical) | Typical installed R | Vapor profile | DIY difficulty | Cost range |
|---|---|---|---|---|---|
| 2x6 framing + cavity insulation | 3.1–3.8 | R-20–R-28 | Interior vapor retarder | Moderate | Low–Medium |
| 2x6 + exterior continuous foam | foam 3.6–6.0 | R-30–R-40 | Better drying outward | Moderate | Medium |
| SIP panels | 6.0–7.0 | R-30–R-50 | Tight, interior air barrier | Higher | Medium–High |
| Log/heavy timber | 1.5–2.0 (mass) | R-10–R-18 | Mass-dominant, needs detailing | Moderate | Medium |
| Strawbale | 3.5–4.0 | R-30+ | Thick, vapor-open | Higher | Variable |
For builders wanting to minimize studs and thermal bridges while keeping routine framing skills, see our step-by-step guide to advanced wall framing for layout and cutting strategies.
Roof and Ceiling Strategies to Stop Heat Loss and Prevent Ice Dams
Warm Roof vs Cold Roof: Which Suits Off-grid Cabins?
A cold roof has a ventilated attic: insulation at the ceiling plane and an air gap above the insulation to the roof sheathing. A warm roof moves insulation up to the roof plane (unvented) so the roof stays warm; this is common with SIPs or exterior roof insulation. For cabins, a warm roof using exterior rigid insulation or closed-cell spray foam can reduce ice-dam risk by keeping the roof sheathing closer to outdoor temperature, but it requires careful vapor and condensation control.
For exterior roof insulation approaches and Passive House roof strategies, see exterior roof insulation methods.
Attic Insulation Best Practices and R-targets
Cold climate targets for ceilings and attics typically sit in the R-40 to R-60 range or higher for the coldest zones. Dense-packed cellulose and blown fiberglass are common for deep attic fills; closed-cell spray foam offers combined air sealing and insulation but at higher cost and embodied carbon. Check our detailed guide on how much attic insulation for layering and depth guidance.
Ventilation Approaches and Ice Dam Prevention
Ice dams form when warm attic air melts snow on the roof, which then refreezes at the eaves. Reduce ice dams by:
- Sealing attic penetrations and reducing attic air leakage.
- Increasing ceiling insulation to reduce heat flow to the roof.
- Maintaining proper soffit-to-ridge ventilation for cold roof assemblies.
- When using a warm roof or exterior insulation, ensure no interior air paths deliver warm, moist air to the roof sheathing.
Roof-mounted solar panels add weight and can shade snow melt patterns — coordinate solar mounting with your roof insulation and ventilation strategy.
Air Sealing, Ventilation, and Moisture Control for Off-grid Cabins
Major Leakage Points and Simple Tests
Typical leakage spots in cabins: rim joists, wall-ceiling junctions, plumbing and electrical penetrations, recessed lighting, and around windows and doors. Simple on-site checks:
- Visual: look for daylight around window jambs and sill plates.
- Smoke test alternative: use a stick of incense or a smoke pencil near suspect gaps on a windy day; moving smoke indicates leakage paths.
- Fan door basics: a professional blower-door test quantifies airtightness in ACH50; for DIY, a hand-held fan test or noting pressure differences with an inexpensive manometer gives useful info.
For hands-on sealing techniques, refer to our how-to on air sealing for passive builders and the list of common leakage points.
Balanced Ventilation: HRV/ERV Choices for Cold Sites
In cold climates, a balanced heat-recovery ventilator (HRV) is usually the best choice because it transfers heat from exhaust air to incoming fresh air with minimal moisture transfer. An ERV moves both heat and moisture and can be helpful in moderately cold, humid climates. For cabins with very low heating loads, an HRV sized to deliver 0.3–0.5 air changes per hour (continuous low-speed) will provide good indoor air quality without excessive heat loss.
Vapor Control, Moisture Sources, and Drying Strategies
Moisture in cabins comes from cooking, showers, indoor drying, and occupant respiration. In small off-grid cabins, a single shower or clothes drying session can raise indoor humidity quickly. Strategies:
- Use kitchen and bathroom exhaust connected to a balanced ventilation strategy or run intermittent exhaust when cooking.
- Locate vapor control layers to allow assemblies to dry in at least one direction; in severe cold, avoid trapping moisture between impermeable layers.
- Tie greywater and composting toilet choices into your moisture control plan — composting toilets reduce wastewater but require location and ventilation planning.
Best insulation materials for Off-grid Cabins: Specs, Pros and Cons
Material-by-material Comparison (foam, Mineral Wool, Cellulose, Spray Foam, Cork, Natural Fibers)
The right material depends on your priorities: R-per-inch, moisture tolerance, DIY skill, embodied carbon, and cost. See the table below for a concise comparison and followup notes.
| Material | R/inch | Typical installed R | Moisture tolerance | Fire performance | DIY difficulty | Ballpark cost / ft² |
|---|---|---|---|---|---|---|
| Polyiso (rigid) | 6.0–6.5 | R-6 to R-20 CI | Low moisture tolerance | Combustible, needs protection | Moderate | $0.70–$1.50 |
| EPS foam | 3.6–4.0 | R-3.6 to R-16 | Moderate | Needs thermal barrier | Moderate | $0.30–$0.90 |
| XPS foam | 5.0 | R-5 | Good moisture resistance | Needs thermal barrier | Moderate | $0.80–$1.20 |
| Closed-cell spray foam | 6.0–7.0 | R-6 to R-30+ | Very good (air/moisture) | Class II, needs thermal barrier | High (pro recommended) | $1.50–$3.50 |
| Open-cell spray foam | 3.5 | R-3.5 | Vapor-open, less moisture resistance | Needs thermal barrier | High | $0.80–$2.00 |
| Cellulose (dense-pack) | 3.2–3.8 | R-13–R-55 | Good when dry | Noncombustible treated | Moderate | $0.60–$1.20 |
| Mineral wool | 3.0–3.3 | R-15–R-30 | High moisture tolerance | Noncombustible | Moderate | $0.80–$1.60 |
| Cork (natural) | 3.6–4.2 | R-10–R-25 | Good moisture tolerance | Class C typically | Moderate | $2.00–$4.00 |
DIY-friendliness, Cost, Embodied Carbon and Recyclability
- Closed-cell spray foam gives airtightness and high R but has higher embodied carbon, requires PPE, and is best installed by pros.
- Dense-pack cellulose is low-cost, DIY-possible with the right blower, and has low embodied carbon; dense-pack performs well in retrofits.
- Rigid foam CI (polyiso, EPS, XPS) is common for exterior insulation and perimeter slab work. Polyiso has the highest R/inch but performance drops at very low temperatures; EPS performs more consistently in deep cold.
- Cork and natural fibers are lower-carbon but often cost more and may require special detailing; see our guide on using cork as insulation for specifics.
For a deeper comparison of spray foam vs cellulose performance, sealing, and embodied carbon tradeoffs, consult our spray foam vs cellulose comparison. For rigid foam selection (polyiso vs EPS vs XPS), see our polyiso vs EPS vs XPS guide.
Where Low-carbon and Reclaimed Materials Make Sense
Reclaimed insulation (dense cellulose from clean sources, reused rigid boards) and low-carbon natural materials work best in non-structural applications and where moisture risk is manageable. Use reclaimed or low-carbon materials for interior partitions, non-structural sheathing, or added exterior insulation when you can protect them from long-term wetting.
DIY Installation Checklist for Insulating an Off-grid Cabin
Tools, PPE, and Materials List
- Tools: tape measure, utility knife, circular saw for foam, insulation blower (for cellulose), caulking gun, stapler, respirator for fiberglass/cellulose, proper ladders, and a blower-door or handheld manometer if available.
- PPE: NIOSH-rated respirator for spray foam or fiberglass dust, eye protection, gloves, and coveralls.
- Materials: insulation (by type), air-seal caulk, low-expansion foam for windows, sill gasket, tape for seams, vapor retarder if required, flashing, and fasteners.
Step-by-step Sequence for Walls, Roof, and Floors
- Assess and plan: Measure cavities with the shed insulation calculator for takeoffs and check local code.
- Fix major leaks first: Seal rim joists, service penetrations, and roof gaps using caulk and gasket; follow techniques in air sealing for passive builders.
- Install continuous exterior insulation (if used): Fit and tape seams, add mechanical fasteners, and weather-resistive barrier before siding.
- Insulate roof/ceiling: Install attic or roof insulation to target R; if dense-packing cellulosic material, ensure proper baffles and ventilation as needed; see how much attic insulation.
- Insulate walls: Dense-pack or cavity-fill after air sealing; add interior vapor control if required by the assembly.
- Finish floors and foundations: Add perimeter or under-slab insulation, seal sill plates, and insulate floor cavities.
- Install balanced ventilation: Add HRV/ERV sized for the cabin and route ducts with minimal length.
- Test and tune: Conduct a blower-door test or smoke checks, run the HRV, and monitor humidity for the first winter.
Common Mistakes and Quick Fixes
- Mistake: Installing insulation without air sealing. Fix: seal big gaps at rim joist and ceiling/wall junctions first.
- Mistake: Trapping a vapor-impermeable layer in the middle of a wet assembly. Fix: allow at least one direction for drying (prefer exterior-open sheathing or vapor-open CI).
- Mistake: Leaving window flashing incomplete. Fix: follow 3-step window flashing (sill pan, side flash, head flash).
- Safety note: Spray foam requires professional-grade PPE and ventilation. If using spray foam, either hire a certified installer or follow manufacturer PPE/temperature guidance carefully.
Watch this step-by-step guide on installing blown-in or loose fill insulation:
For overall cabin sequencing and broader build context, consult the complete cabin build guide.
Estimating Costs, Energy Savings, and Heating-size Implications for Insulated Off-grid Cabins
How Improved Insulation Reduces Heating Load: Quick Math
Worked example — 200 ft² cabin (heated floor area), baseline modest envelope:
- Baseline ceiling R-15, walls R-13, floor R-10, and moderate leakage ~3 ACH50.
- Upgrade: ceiling R-45, walls R-28, floor R-30, air leakage reduced to ~1.5 ACH50.
Rough steady-state heating load reduction: 50–65% depending on indoor setpoint and local degree days. Practically, that can turn a 2–3 cord/year wood need into 1 cord or let a 1.5–2 kW electric heat source handle winter loads when paired with efficient ventilation and good passive solar gains.
Using Calculators for Payback and Material Sizing
Use the insulation savings calculator to compare scenarios using local heating fuel costs and degree-day inputs. To size off-grid PV and battery to meet a reduced heating and household load, see our cabin solar sizing guide.
Choosing a Heat Source and Sizing for Off-grid Systems
With a well-insulated, airtight cabin you can consider:
- Wood stove: still common for zero-electricity heating and hot water boil. Estimate cords based on reduced load (use the calculator above).
- Mini split heat pump: very efficient, can run on modest PV if loads are low and batteries sized for peak demand; cold-climate heat pumps are available for sub-zero performance.
- Electric resistance or radiant panels: simple but demand-heavy; size carefully against PV/battery capacity.
Ballpark retrofit cost ranges (very approximate):
- Low budget retrofit: $1,500–$5,000 — air sealing, attic top-up with blown cellulose, and modest window weatherstripping.
- Medium upgrade: $5,000–$15,000 — exterior continuous insulation on walls, dense-pack cellulose, HRV installation.
- High-performance retrofit/new build: $15,000–$40,000+ — SIPs or full CI, closed-cell spray foam in key assemblies, professional airtightness testing, and integrated HRV.
Costs vary widely by region and labor availability; always get local quotes. Upgrading the envelope generally pays back faster in an off-grid setup because it reduces capital required for PV, batteries, or fuel storage.
The Bottom Line: Quick Action Plan for Cold-climate Off-grid Cabins
Air seal first, then insulate the roof/ceiling to R-40–R-60 and the walls to R-20–R-40 with continuous exterior insulation to reduce thermal bridging. Add a properly sized HRV, protect foundations from frost, and use the calculators linked above to downsize your off-grid PV or wood-stove system. For immediate wins: seal rim joists, add attic insulation, and install tight window/door flashings this season.
Frequently Asked Questions
How much R-value do I need for a small cabin in a cold climate?
Target ceiling/attic R-values of R-40 to R-60 in most cold climates and wall assemblies that achieve R-20 to R-40 depending on insulation type and continuous exterior insulation. Floors over unheated spaces should be at least R-30. These ranges balance diminishing returns against construction cost; check local code and degree-day data for precise targets.
Should I use spray foam or cellulose in a cabin retrofit?
Both have uses: closed-cell spray foam provides high R and combines air sealing, useful in tight or compact assemblies, but has higher cost and embodied carbon and usually needs a pro. Dense-pack cellulose is lower-cost, DIY-friendly with the right blower, and has lower embodied carbon; it performs well in cavity fills if assemblies allow drying. Compare tradeoffs in our spray foam vs cellulose comparison.
Do I need an HRV or ERV in an off-grid cabin?
Yes — in cold climates a balanced ventilation system like an HRV is recommended because it recovers heat from outgoing air and keeps indoor humidity in check without major heat loss. ERVs may be considered in milder cold climates where moisture transfer is beneficial. Size the unit to provide continuous ventilation at low speed and higher rates for cooking or drying.
How do I prevent ice dams on a small, steep roof?
Reduce attic air leakage, increase roof/ceiling insulation, and maintain proper soffit-to-ridge ventilation for a cold roof assembly. Alternatively, use a warm roof with exterior insulation so the roof deck stays closer to ambient temperature. Proper flashing, roof edge insulation, and keeping gutters clear also help. See exterior roof insulation methods for warm-roof details.
Will better insulation reduce my solar and battery needs?
Yes. Improving the off-grid thermal envelope reduces average and peak heating demand, which lets you downsize PV arrays and battery capacity. Use the insulation savings calculator and the cabin solar sizing guide to model before buying equipment.