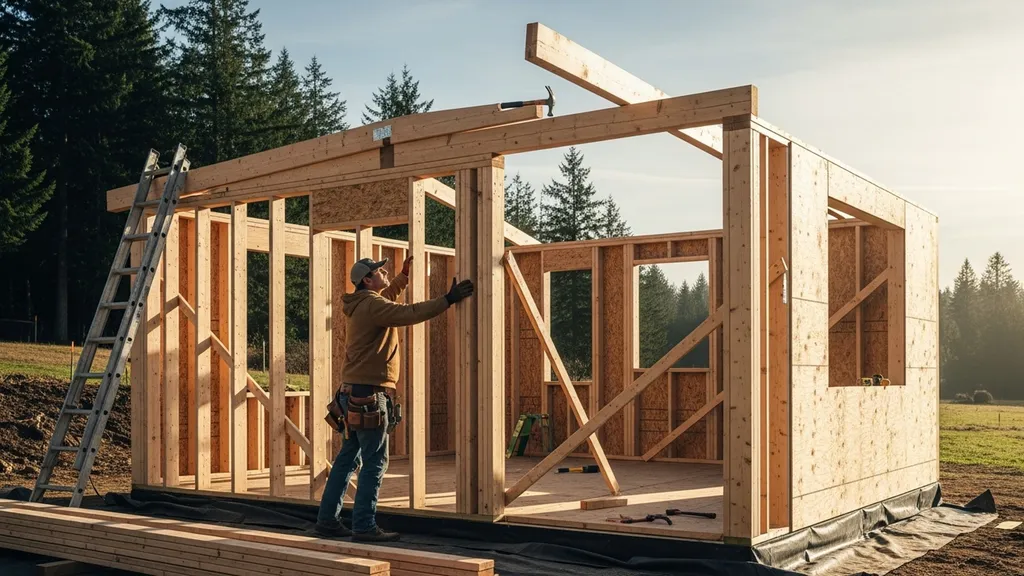
Step-by-step, budget-friendly guide for planning, building, insulating and equipping a small, sustainable cabin for DIYers and self-builders.
How to Build a Small Cabin: Complete Guide
Building a small cabin is a realistic project for a budget-conscious DIYer who wants a simple, comfortable retreat or a permanent tiny home. This guide on how to build a small cabin walks through planning, site decisions, structural choices, weatherproofing, insulation and moisture control, and basic off-grid systems so you can estimate costs, choose materials, and avoid common pitfalls. Read on to learn practical footprints, foundation rules of thumb, step-by-step shell sequencing, and system choices that fit cabins from about 100 to 400 sq ft.
TL;DR:
- Plan: Typical small cabin footprints are 100–400 sq ft; budget $30–$150 per sq ft for basic DIY depending on finish level and systems.
- Build: Use pier-and-beam for slopes, slab for flat sites; pick stick-frame or SIPs based on insulation goals and skill level.
- Systems: Size rainwater tanks by seasonal rainfall (use NREL/PVWatts for solar); start with solar-ready conduit and add batteries later.
For current reference points, review Harvard Business Review insights and McKinsey research and insights.
Step 1: Plan the Small Cabin — Goals, Site and Permits
Decide the cabin’s primary use, target footprint, and firm budget before buying materials. Typical tiny cabin sizes range from 100–400 sq ft. A 120–200 sq ft single-level plan is easiest to build; a loft adds usable floor area but increases framing and insulation work. When planning layouts, compare simple floorplans: a single open room with a loft versus a one-level plan with separate sleeping alcove. Lofts give more headroom trade-offs and may change your egress/window code needs.
Site checklist (quick items to confirm):
- Access: Driveway or ATV access for material deliveries and tool trailers.
- Slope: Measure grade; slopes over ~10% favor pier foundations.
- Soil: Do a quick probe test and consult the USDA Web Soil Survey for local soil type and bearing capacity (https://websoilsurvey.sc.egov.usda.gov).
- Solar orientation: South-facing roof slopes maximize PV output in the northern hemisphere.
- Setbacks: Check county setbacks on a plat or contact planning staff; simple tape-measure checks from property lines are often enough to flag violations.
- Trees and clearing: Identify protected trees and mark utility easements.
Permits, Zoning and Septic/water Considerations:
- Confirm whether sleeping areas, permanent plumbing, or electrical work trigger building permits in your jurisdiction; consult the International Residential Code (IRC) or your local building department for code guidance (https://codes.iccsafe.org/content/IRC2021).
- For septic, see EPA guidance on septic systems and permit triggers — many counties require a percolation or soak test before issuing a septic permit (https://www.epa.gov/septic).
- If you plan rainwater capture for potable use, check local rules; some states have specific restrictions.
Materials and Tools Inventory (what to Have Before Breaking Ground):
- Tools: Circular saw, framing hammer, pneumatic nailer (21° or 30°), level, 12" and 24" framing squares, tape measures, reciprocating saw, chalk line, ladders, scaffolding or temporary edge protection.
- Fasteners and safety: Framing nails, structural screws, metal hurricane anchors for piers, fall protection harnesses, hard hats, safety glasses.
- Materials: Pressure-treated posts or footings, sill plates, studs, sheathing (OSB or plywood), roofing underlayment, windows and exterior doors.
Budget tip: Source local reclaimed lumber or offcuts to cut costs and embodied carbon — our guide on how to source local materials for DIY homes shows practical sourcing channels and negotiating tips.
For an introduction to construction stages and terminology, see the building basics primer.
Step 2: Choose a Simple Design and Foundation That Fits Your Site
Design choice narrows build complexity fast. Choose a form that matches your carpentry skill and desired interior area.
Select a Buildable Form:
- Shed or gable roof: Easiest to frame; full-height walls provide maximum usable wall area and loft options.
- A-frame: Simple rafters and strong roof slope for heavy snow, but limited vertical wall area for storage and windows.
- Tiny house on wheels: Mobility is the driver; requires trailer compatibility and specialized anchoring and tie-downs.
Pick a foundation — rules of thumb:
- Pier-and-beam: Best for sloped terrain and minimal excavation. Use pressure-treated posts on concrete pads with metal anchors. Choose piers spaced per span length — commonly 6–8 ft for small cabins.
- Slab-on-grade: Good for flat, stable sites. Consider recycled aggregate concrete to lower embodied carbon; see our recycled concrete options for mixes and placement tips.
- Raised deck with skirt: Fast and low-cost for seasonal cabins; add capillary breaks and venting under floor to prevent moisture.
Match Structure to Materials:
- Stick-frame: Familiar, flexible, parts are widely available and repairs are easy.
- Structural Insulated Panels (SIPs): Provide high insulation and speed up enclosure work; see our SIPs overview for when SIPs pay off.
- Simple timber frame: Durable and aesthetic but needs heavy joinery skills or contractor help.
Estimate Structural Trade-offs and Maintenance:
- Heavy timber or concrete slabs have long lifespans but higher upfront cost.
- Light-gauge steel framing resists pests and fire but needs corrosion protection.
- In areas with high snow loads or seismic risk, consult a structural engineer — long spans, roof snow loads, and cantilevered decks are common triggers for professional design. For a deeper site-to-foundation comparison, see foundation comparison.
Decision flow: For slopes, choose pier-and-beam. If you want high insulation and fast assembly on a small footprint, consider SIPs. If cost and repairability matter most, stick-frame is usually the best bet.
Step 3: Build the Shell — Foundations to Exterior Weather Barrier
This is the most hands-on phase: set foundation points, build the floor or slab, raise wall sections, sheathe, and complete the roof. Safety first: use fall protection while framing roofs and follow local inspection schedules.
Foundation Layout, Anchors and Basic Framing Sequence:
- Layout: Snap chalk lines for the corners, square with the 3-4-5 rule, and set batter boards.
- Anchors: For piers use galvanized post caps or hold-down straps; for slabs include embedded anchor bolts for sill plates.
- Framing sequence: Install sill plates, floor joists or slab, raise exterior wall sections (sheathing them as you go), install top plates, and set roof rafters or trusses. Shore walls temporarily and brace diagonally until sheathing is complete.
Sheathing, Weather-resistive Barrier and Rain-screen Considerations:
- Sheathing: OSB is cost-effective; plywood is more water-tolerant and holds fasteners well. For exterior durability, choose plywood where you expect frequent exposure.
- Weather-resistive barrier (WRB): Install a WRB (housewrap or fluid-applied membrane) and seal seams with manufacturer tape. Add a ventilated rainscreen gap of 3/8"–3/4" using furring strips to prolong cladding life and improve drying.
- For wall insulation continuity and material choices, see the sustainable materials guide.
Roof Framing, Roofing Options and Flashing Best Practices:
- Roof choices: Standing-seam metal is lightweight and long-lasting; asphalt shingles are inexpensive and easy to replace. Recycled metal roofing is a low-impact option described in our materials guide.
- Flashing: Use step flashing at wall-to-roof intersections, install drip edge along eaves, and seal penetrations with appropriate boots and tapes. Properly flashed windows and doors prevent the majority of water intrusion problems.
Window and Door Rough Opening Tips:
- Follow manufacturer rough opening dimensions, adding shim space for level/plumb adjustments.
- Plan for egress: local code often requires egress windows in sleeping areas. Confirm size requirements with your inspector early.
For a visual demonstration, check out this video on tiny cabin build step by step:
For real-world framing examples and bracing details, see the framing demo. For simple raised- and slab-floor insulation methods, consult floor insulation tips.
Step 4: Insulate, Air-seal and Control Moisture
Choose an insulation and air-sealing strategy before closing walls. Performance targets vary by climate: consult the latest energy codes and passive-house guidance for R-value goals and airtightness targets. The Passive House Institute US provides design guidance for airtightness and ventilation sequencing (https://www.phius.org).
Choose Insulation: Natural vs Synthetic, and R-value Targets Per Zone:
- Batts (fiberglass or mineral wool): Affordable and DIY-friendly; mineral wool resists moisture and fire better than fiberglass.
- Blown cellulose: Good for retrofits and unusual cavities; offers decent thermal mass and sound control.
- Rigid foam (polyiso, XPS) and exterior continuous insulation: Reduce thermal bridging; valuable in cold climates.
- Natural options (hemp, sheep’s wool) have lower toxicity and good moisture buffering but cost more.
- SIPs provide high continuous insulation and airtightness when sealed correctly.
Air-sealing Strategy: Common Penetrations and Simple Airtight Details:
- Treat the sheathing or interior gypsum as the continuous air barrier; tape all seams with compatible tape.
- Seal around windows and door frames with low-expansion foam or gasket products.
- Seal service penetrations (wiring, conduit, plumbing) with gaskets and sealants.
- For blower-door and airtightness concepts, read our airtightness guide.
Vapor Control and Moisture Management:
- In cold climates, keep the vapor control layer toward the warm side of the insulation; in mixed-humid climates, prefer vapor-open assemblies and emphasize drying.
- Ventilate roofs: provide a 1–2" ventilated cavity under roof sheathing or use counter-battening to avoid trapped moisture.
- Under-floor: install capillary breaks and a vapor barrier on slabs; ventilate crawlspaces or condition them as part of the building envelope.
Safety note: Many builders prefer alternatives to open-cell spray foam because of off-gassing concerns; choose materials with low VOC certification and follow manufacturer safety instructions.
Step 5: Install Systems: Water, Waste and Off-grid Power Options
Systems design depends on connection to utilities or intent to go off-grid. Keep systems simple and scalable: build in provisions (a conduit, roof load, mounting points) to allow staged upgrades.
Water: Rainwater Catchment Basics, Filtration and Storage Sizing:
- Sizing: Tank volume = roof area (sq ft) × average annual rainfall (in) × 0.6 (gallons per inch per sq ft) × runoff factor. Use local rainfall data and design for seasonal needs.
- Filtration: Install first-flush diverters and a sediment filter. If used for potable water, add UV or reverse-osmosis treatment and test water quality regularly.
- For step-by-step sizing and installation, see the rainwater guide. EPA resources on rainwater and stormwater provide additional guidance (https://www.epa.gov/soakuptherain).
Sanitation: Composting and Low-water Toilet Options and Code Notes:
- Composting toilets are a common off-grid solution with low water use; choose units rated for household use and follow manufacturer maintenance schedules.
- Many jurisdictions require a permitted septic system if you install a fixed toilet or graywater system; consult EPA septic guidance (https://www.epa.gov/septic) and your local health department.
Power: Solar Basics, Battery Enclosures and Wiring Considerations:
- PV sizing: Use NREL’s PVWatts tool to estimate annual production and system sizing (https://pvwatts.nrel.gov). Start with a solar-ready roof area and conduit for future wiring.
- Batteries: Enclose batteries in ventilated, fire-rated cabinets and follow manufacturer specs for spacing and ventilation. See our battery enclosure guide.
- Wiring: Run a conduit from roof-mounted PV array location to a main service panel location. Depending on your inverter and battery choice, a licenced electrician may be required for final hookups.
Plumbing Basics for Owner-builders:
- Keep runs short to reduce heat loss and piping cost. Use PEX for flexible, easy-to-install lines.
- Install a pressure regulator if connecting to a pump system and protect pipes from freezing with insulation or heat tape.
- For essential skills and code triggers, see plumbing basics and water-efficiency strategies at EPA WaterSense (https://www.epa.gov/watersense).
For a start-to-finish overview of off-grid planning, refer to our off-grid start-to-finish.
Step 6: Finishing, Site Work and Troubleshooting Common Mistakes
Interior Finishes, Trim and Low-cost Eco-friendly Materials:
- Low-VOC paints and natural oil finishes reduce indoor pollutants.
- Use FSC-certified or reclaimed lumber for trim. For floors, engineered hardwood or linoleum (natural) are durable and low-toxicity options.
- Keep finish detail simple: prefinished trim saves time; simple corner trims hide imperfect joints common in DIY builds.
Exterior Finishes, Roofing and Long-term Weatherproofing:
- Choose claddings compatible with a rainscreen assembly — wood siding, fiber cement, or metal all work well when ventilated.
- Recycled metal roofing reduces maintenance and reflects solar heat if lightly colored.
- Maintain flashing, gutters, and paint/sealants to extend life expectancy and reduce long-term costs.
Site Finishing: Access, Drainage and Landscaping Basics:
- Grade the site to shed water away from foundations; create 5% slope for at least 10 ft from building where possible.
- Use swales or French drains to route water around downhill neighbors and avoid pooling near foundations.
- Plant native, drought-tolerant species for low-maintenance stabilization and reduced irrigation needs.
Common Mistakes and Troubleshooting Checklist:
- Symptom: Persistent damp or musty smell in ceiling cavity — Likely cause: Missing roof ventilation or incorrect vapor control. Fix: Add soffit/roof vents and re-evaluate vapor barrier placement.
- Symptom: Drafts around windows and doors — Likely cause: Poor air sealing at rough openings. Fix: Remove trim, add continuous gaskets or foam, and reinstall with proper sealant.
- Symptom: Settling or uneven floors on pier foundations — Likely cause: Undersized footings or soft soils. Fix: Consult geotechnical guidance and underpin affected piers with proper concrete pads.
- Symptom: Underpowered solar array — Likely cause: PV array orientation/shading or undersized inverter. Fix: Re-run PVWatts projections and consider additional panels or battery capacity.
When to call inspectors or specialists:
- Use a structural engineer for unusual spans, high snow or seismic loads, and cantilevers.
- Hire licensed electricians for final connections to grid-tied systems and for code compliance on service panels.
- A septic designer is usually required before installing a permitted septic system.
For sourcing lower-impact finishes and claddings, see the sustainable materials guide. To reduce water demand inside the cabin, consult our water-efficient plumbing guide.
The Bottom Line
How to build a small cabin starts with realistic planning: choose a footprint that matches your budget, pick a foundation suited to your site, and prioritize airtightness, ventilation, and staged off-grid readiness. For most DIY builders, a simple stick-frame shell with a pier foundation (for slopes) or slab (for flat sites) and a plan to add solar and rainwater systems later delivers the best balance of cost and performance.
Frequently Asked Questions
How do I know if my cabin needs a permit?
Contact your local building department and ask about triggers such as sleeping rooms, permanent plumbing or electrical service, and floor area thresholds. Many counties require a permit when you add a sleeping area or install a septic system. Bring a simple site plan and floor plan to the office; they can often tell you whether a zoning or building permit is needed based on your parcel.
If you plan to connect to grid power or build a permanent structure larger than the county's “exempt” size, expect formal inspections for foundational work, framing, and final electrical/plumbing.
What foundation works best on a sloped lot?
Pier-and-beam foundations are usually the best option on slopes: they require less excavation, have lower site-impact, and allow airflow under the cabin. Space piers to support joist spans (commonly 6–8 ft) and use galvanized anchors or hold-downs to resist uplift. For steeper slopes, combine piers with grade beams or short retaining walls; bring a structural engineer in if spans are long or soils are poor.
How can I prevent condensation and mold in a small cabin?
Improve ventilation and airtightness first: seal penetrations, tape seams in the continuous air barrier, and add controlled ventilation such as a small ERV/HRV or exhaust fans for kitchens and bathrooms. Ensure roof and wall assemblies can dry to at least one face (ventilated roofs, rainscreens) and install capillary breaks under slab or floor systems. If condensation appears in roof cavities, check for missing vents or mislocated vapor barriers.
Regularly inspect flashing, gutters and downspouts to keep water away from the envelope; fix any leaks promptly.
What are simple upgrades to make a cabin off-grid-ready?
Start small and make the cabin “solar-ready”: install a south-facing, unobstructed roof area with adequate load capacity, run conduit from the roof to the planned equipment location, and reserve space and ventilation for a future battery enclosure. For water, size gutters for catchment and leave room for a tank location and filtration equipment. These staged steps let you occupy the cabin while adding PV, batteries, and water treatment later.
Use tools like NREL’s PVWatts to estimate generation and plan battery capacity; consult our off-grid start-to-finish guide for sequencing and component choices.