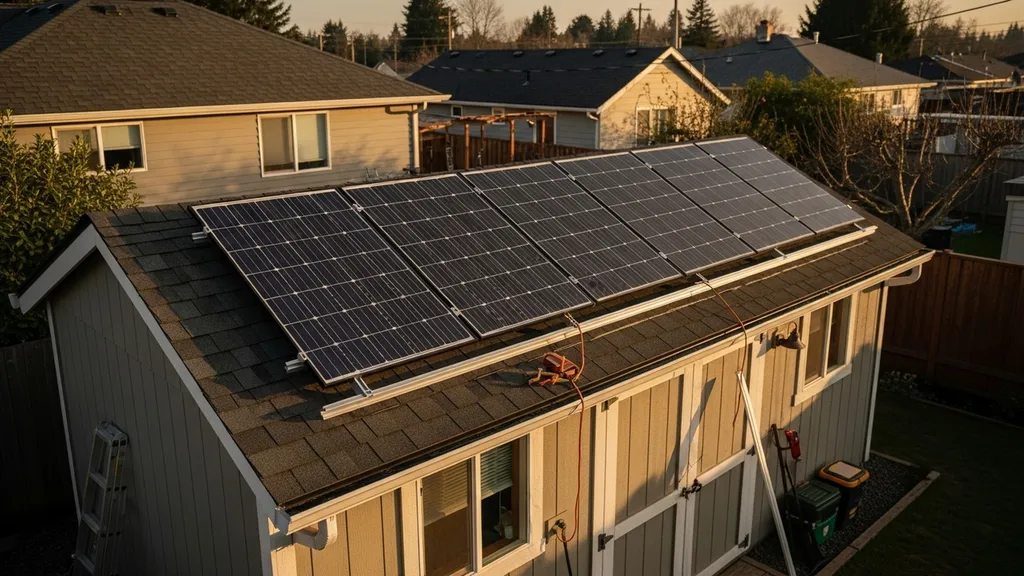
Step-by-step guide to sizing, choosing components, wiring, costs, and storage for a 1kW solar system for a shed — practical DIY advice for budget builders.
1KW Solar System for Shed: Complete Sizing Guide
A 1kw solar system for shed is a compact, affordable way to power lights, phone and laptop charging, a small refrigerator, and occasional power tools. This guide shows how much energy a 1 kW array will likely produce in different locations, how to inventory your loads, which panels and batteries to choose, wiring and permitting basics, and ballpark costs for a DIY install. Read on to decide whether a 1 kW array will meet your shed needs and how to size the battery bank if you want backup.
TL;DR:
- A 1 kW solar array produces roughly 1.9–4.7 usable kWh/day after derate depending on local sun (2.5–5.5 PSH) and system losses.
- For basic lighting and occasional tools, a 1 kW system with a 2–4 kWh usable battery is often sufficient; for a fridge and 1 day autonomy, budget ~6–8 kWh usable.
- Start with a load worksheet, check local peak sun hours with NREL PVWatts, and choose LiFePO4 batteries and an MPPT charge controller if you want reliable, long-life storage.
For current reference points, review DOE Solar Energy Technologies Office and Solar Energy Industries Association.
How Much Energy Will a 1KW Solar System for Shed Actually Produce?
A 1 kW (1,000 W) nameplate array produces energy proportional to the site's peak sun hours (PSH). The simple calculation is: gross kWh/day = 1 kW × PSH. Apply a system derate factor (to account for inverter efficiency, wiring loss, soiling, and temperature) to estimate usable energy.
Daily and Annual Output Estimates (example Calculations)
- Low sun: 2.5 PSH → gross 2.5 kWh/day. Use derate 0.75 → usable ≈ 1.9 kWh/day (≈700 kWh/year).
- Medium sun: 4.0 PSH → gross 4.0 kWh/day. Use derate 0.80 → usable ≈ 3.2 kWh/day (≈1,170 kWh/year).
- High sun: 5.5 PSH → gross 5.5 kWh/day. Use derate 0.85 → usable ≈ 4.7 kWh/day (≈1,720 kWh/year).
Industry tools such as NREL’s PVWatts provide site-specific insolation and production estimates; use that to replace the PSH estimate above for more accuracy. For a quick national guide to sizing, see the Australian government’s primer on solar system size and output: size your solar system.
Key Factors That Change Production (peak Sun Hours, Tilt, Shading)
- Peak sun hours (PSH): The single biggest variable. Coastal and northern locations often have lower PSH than high-desert sites.
- Tilt and orientation: South-facing (northern hemisphere) at an angle near latitude maximizes yearly output. Shallow tilts favor summer; steeper tilts favor winter.
- Shading: Even partial shading of one panel can reduce string output unless microinverters or optimizers are used.
- Temperature and soiling: Higher temperatures reduce module efficiency; dust and bird droppings cut output—clean panels seasonally.
Typical System Losses and Derate Factors to Use
- Inverter efficiency: 95–98% for good modern inverters.
- Wiring and mismatch: 2–5%.
- Soiling and shading: 2–8% seasonal.
- Temperature losses: 2–5% depending on location.
- Recommended derate: 0.75–0.85 for conservative usable-energy estimates.
Use these numbers to set expectations: a 1kw solar system for shed produces modest energy — adequate for low-to-moderate loads in most areas, but insufficient for heavy continuous loads like full-size electric heaters or nonstop air compressors without significant battery backup.
Sizing Your Loads: How to Calculate Whether a 1KW Solar System for Shed Will Meet Your Needs
Sizing starts with a load inventory: list each device, its wattage, and daily hours of use. Convert to daily kWh and sum.
Create a Simple Load Inventory (lighting, Fridge, Tools, Charging)
Example load list:
- LED light, 10 W × 4 hours = 0.04 kWh/day
- Small off-grid fridge, average 60 W run average × 24 hours = 1.44 kWh/day
- Bench drill, 700 W × 0.25 hours = 0.175 kWh/day
- Phone charge, 10 Wh × 2 = 0.02 kWh/day
- Laptop charge, 40 Wh × 1 = 0.04 kWh/day
Total daily energy ≈ 1.67 kWh. Add 10–20% contingency for inefficiencies.
For more building-style examples (useful if your shed has thermal loads), see the cabin sizing guide.
Run-time and Duty-cycle Examples for Common Shed Loads
- LED lighting: very low; switching to 10 W LEDs cuts load dramatically versus older bulbs.
- Refrigerator: duty cycle matters. A small 12V DC fridge may average 50–100 W depending on insulation and ambient temperature.
- Power tools: high peak watts but short duration; ensure inverter surge capability to handle motor starts.
- Heating: space heaters are large continuous loads (1,000–1,500 W) and will overwhelm a 1 kW array without large batteries or generator backup.
Translate Daily Kwh Need Into Whether 1kw is Adequate
- Minimal shed (lights, phone, occasional tools) ≈ 0.5–1.5 kWh/day → 1 kW feasible in most zones.
- Moderate shed (small fridge + lights + tools) ≈ 2.5–4.5 kWh/day → 1 kW may be marginal in low-sun areas or without battery storage.
- Heavy-use shed (heating, continuous compressor, large fridge) >5 kWh/day → consider upsizing to 2 kW or larger; see the 2kW sizing guide.
Energy-efficiency measures lower the required array size: upgrade to LEDs, add insulation, choose a high-efficiency DC fridge, and add passive daylighting like solar tubes to reduce lighting hours—see the install solar tubes guide for lighting options.
Choosing Panels, Inverter, and Mounting for a 1KW Solar System for Shed
Component choice balances cost, space, and resilience. A 1 kW target lets you mix and match common panel sizes.
How Many Panels and What Wattage Works (panel Count Examples)
- Modern 330–375 W panels: 3 panels × 330–350 W = ~990–1,050 W (near 1 kW). This is compact and common.
- Standard 250 W panels: 4 panels × 250 W = 1,000 W. Slightly bulkier roof footprint.
Trade-offs:
- Fewer higher-watt panels reduce racking and labor but cost more per panel.
- More panels of lower wattage increase roof coverage and connection points, raising wiring and mounting complexity.
Refer to our roof compatibility guide for help matching modules to roof geometry: choose panels for your roof.
Inverter Options: Microinverter, String Inverter, or Small Off-grid Inverter
- Microinverters: One per panel, excellent shading tolerance and module-level monitoring, higher upfront cost. Good for odd-shaped roofs.
- Small string inverter: Lower cost, efficient for unshaded small arrays. Size inverter AC rating ≥ PV array nominal DC.
- Off-grid inverter/charger: Needed if not on the grid and you have batteries; choose an inverter with adequate continuous and surge ratings for tools (e.g., 1500–3000 W continuous with 3× surge).
For battery-backed systems, include an MPPT charge controller to convert PV output efficiently to battery charging; PWM controllers are cheaper but less efficient.
Mounting: Roof vs Ground, Tilt and Orientation Best Practices
- Roof mount: Saves space, uses existing structure; verify rafter spacing and roof load. Use flashing kits for waterproofing and follow roof manufacturer guidance.
- Ground mount: Easier tilt adjustment and snow shedding; needs secure footing and theft protection.
- Orientation: South-facing (northern hemisphere) or north-facing (southern hemisphere) with tilt near latitude for year-round balance. For summer-heavy use, slightly flatter tilt helps.
Specs Comparison Table
| Component | Typical options | Pros | Cons | Estimated DIY cost |
|---|---|---|---|---|
| Panels | 330–375 W mono, 250 W poly | Higher W per panel, smaller footprint | Higher per-panel cost | $300–$900 (array total) |
| Inverter | Small string (1–2 kW), microinverters, off-grid inverter/charger | String: lower cost; Micro: shading resistance; Off-grid: battery integration | Micro: cost; Off-grid: complexity | $300–$1,200 |
| Charge controller | MPPT 30–60 A, PWM | MPPT: higher efficiency, better for cold/variable voltage | PWM: cheaper but less efficient | $100–$400 |
| Mounting | Roof rails, tile hooks, ground posts | Roof: uses existing structure; Ground: adjustable tilt | Roof: flashing/detail work; Ground: more site work | $100–$500 |
Check panel safety and quality certifications such as UL and IEC when buying modules; see our explainer on panel certifications.
Battery and Storage Sizing for a 1KW Solar System for Shed
Batteries convert daily production into usable energy when the sun isn’t shining. Sizing depends on desired autonomy and acceptable depth of discharge (DoD).
Sizing Batteries for Days of Autonomy and Common Backup Scenarios
Example math:
- If expected usable PV is 3.2 kWh/day (medium sun) and the user wants 1 day autonomy at 50% DoD:
- Required usable battery = 3.2 kWh
- Nominal battery capacity = 3.2 kWh / 0.5 = 6.4 kWh → choose ~7–8 kWh nominal bank.
- For minimal backup (lights + charging) at ~1 kWh/day, a 2 kWh usable battery (≈4 kWh nominal lead-acid at 50% DoD) might suffice.
Match battery capacity to realistic production: oversizing batteries without enough PV to recharge them wastes capital.
Chemistry Comparison: Lead-acid (agm/flooded) vs Lifepo4
- Lead-acid (AGM/flooded): Lower upfront cost, heavier, limited cycle life, recommended usable DoD ~50% to preserve life. Round-trip efficiency ≈ 80–85%.
- LiFePO4: Higher upfront cost, longer cycle life, can safely use 80–90% DoD, round-trip efficiency ≈ 90–95%. Lighter and safer than older lithium chemistries.
Trade-offs: For long-term DIY installs LiFePO4 often offers lower total cost of ownership despite higher purchase price.
Voltage Systems and Controllers: 12V, 24V, 48V Practical Choices
- 12V systems: Simple, compatible with many components, higher DC currents (requires thicker cable) for higher power.
- 24V/48V systems: Lower currents for same power, better for larger inverters and long cable runs. Most small off-grid inverters and MPPT controllers support 24V or 48V.
Match battery bank voltage with the inverter and charge controller. For detailed guidance on matching, see match panel and battery voltage.
Suggested battery sizes for common uses:
- Minimal lights + charging: 1–2 kWh usable (2–4 kWh nominal lead-acid).
- Fridge + lights occasionally: 4–6 kWh usable (5–8 kWh LiFePO4).
- 1 day autonomy for moderate loads: 6–8 kWh usable (7–10 kWh LiFePO4).
Off-grid, Grid-tied, or Hybrid: Which Setup for a 1KW Solar System for Shed?
Choose configuration based on reliability needs, cost, and whether the shed is connected to the main property grid.
Pros and Cons of Each Configuration for a Shed Application
- Grid-tied without storage: Lowest capital cost, panels offset grid consumption, but no power during grid outages in most setups.
- Grid-tied with battery backup: Provides resilience and can support loads during outages; requires inverter with automatic transfer switch or dedicated backup panel.
- Fully off-grid: Total independence but needs larger PV and battery capacity and possibly a generator for extended low-sun periods.
For an occasional-use shed in a grid-connected yard, grid-tied with a small battery for critical loads is often the best balance between cost and backup capability. For a remote shed without grid access, build for off-grid with larger battery capacity and consider a generator.
When to Pick Grid-tied with Export vs Battery Backup
- Choose grid-tied with export if the priority is lowest cost and you don't need power during outages.
- Choose battery backup if powering a fridge, security system, or charging equipment during outages is important.
For a more detailed comparison of system configurations, see our guide on grid-tied vs off-grid and the costs of hybrid approaches in hybrid systems costs.
Hybrid Systems and Expansion Paths
Plan for expansion: use a charge controller and inverter with capacity headroom, choose a battery system with modular units, and allow extra roof or ground space for additional panels. A common DIY path: install 3 panels initially and leave rail space for a fourth panel when budget allows.
Real-world Layout, Wiring, and Installation Checklist for a 1KW Solar System for Shed
Practical installation planning reduces callbacks and safety risks.
Site Prep and Mounting Checklist (roof Load, Flashing, Grounding)
- Check roof structure: confirm rafters and sheathing can carry panel weight and live loads; reinforce if needed. See framing tips in shed power framing.
- Mounting hardware: use kit compatible with roof material (shingle, metal, tile) and install manufacturer-supplied flashing.
- Grounding: follow NEC or local code for equipment grounding. Use a dedicated grounding conductor and verify bonding of racking and module frames.
- Weatherproofing: seal penetrations and use proper flashings and sealants.
Basic Wiring Diagram and Conductor Sizing Notes
Typical flow for off-grid system: Panels → Combiner (optional) → MPPT charge controller → Battery bank → Inverter/charger → AC loads / Transfer switch
Conductor sizing rules of thumb:
- Keep PV array wiring low-voltage DC runs short where possible. Use PV-rated cable sized to the max current.
- For battery-to-inverter runs, use thicker cable to limit voltage drop; e.g., at 12 V systems, even moderate loads require large cables—favor 24V or 48V to reduce conductor size.
- Always calculate per local code and the inverter/charge controller manual. Use proper fusing at the positive conductor near the battery.
Permits, Inspections, and Safe Installation Practices
- Obtain local electrical and building permits where required. Many jurisdictions require permitting for any rooftop PV or battery installation.
- Install AC and DC disconnects as required by local code; label system components clearly.
- Safety items: DC-rated fuses, AC breakers, surge protection, and an accessible main switch.
- For wiring troubleshooting and complex tasks, consider a licensed electrician for final inspection and connection to the grid.
For a visual demonstration, check out this video on step by step budget solar install with eco-worthy!:
For roof and daylighting choices that reduce electrical load, consult our install solar tubes article.
Costs, Budgeting, and DIY Savings for a 1KW Solar System for Shed
DIYers can keep costs low by sourcing parts, reusing racks, and staging purchases.
Typical Cost Breakdown: Panels, Inverter, Batteries, Mounts, Wiring
Ballpark ranges for a DIY off-grid 1 kW system:
- Panels (array total): $300–$900 depending on panel quality and wattage.
- Inverter/charger: $300–$1,200 (depends on off-grid or grid-tie and surge needs).
- Batteries: lead-acid $400–$1,000; LiFePO4 $2,000–$4,000.
- Mounts and hardware: $100–$500.
- Wiring, breakers, disconnects, conduit, permits: $100–$300.
These numbers are estimates for DIY installs; professional installs add labor and permitting fees.
Where to Save: Reused Parts, Buying Panels in Deals, Scale Economies
- Buy used or refurbished panels and batteries with caution—verify open-circuit voltage and physical condition.
- Look for panel bundle deals or end-of-line models on trusted marketplaces.
- Reuse racking and conduit when in good shape.
- Stage purchases: start with panels and inverter, add batteries later if budget is tight.
If budget is tight, explore our curated list of budget panel options.
Simple ROI Examples and Payback Rough Math
Example: If a 1 kW array offsets 1,200 kWh/year of grid energy and local electricity costs $0.15/kWh:
- Annual savings ≈ $180/year.
- DIY system cost (no batteries) ≈ $1,200 → simple payback ≈ 6–7 years (ignoring maintenance and financing).
Battery-backed off-grid systems raise upfront cost and lengthen payback but provide outage protection and off-grid independence.
Maintenance, Monitoring, and Troubleshooting a 1KW Solar System for Shed
Routine checks extend system life and keep performance near expected output.
Routine Maintenance Tasks and Frequency
- Clean panels seasonally or after heavy dust events; frequency depends on location.
- Inspect mounts, fasteners, and flashings annually.
- Check battery fluid (flooded lead-acid) and terminal tightness monthly; for LiFePO4, monitor state-of-charge and temperature.
- Review inverter and charge controller logs weekly or monthly via local display or cloud monitoring.
Common Issues and Quick Fixes
- Low production: check for shading, dirt, or incorrect tilt; verify open-circuit voltage and charge controller readouts.
- Battery not charging fully: check PV input, MPPT settings, and battery connections; test battery voltage and specific gravity (lead-acid).
- Inverter faults: confirm AC breaker status, battery voltage, and error codes. See our inverter troubleshooting tips for common fault codes and fixes.
Performance Optimization Across Seasons
- Adjust ground-mount tilt seasonally if practical to favor winter or summer production.
- In snowy regions, plan arrays with steeper tilt or use manual snow clearing methods to restore output.
- Track production monthly and compare with expected kWh from PVWatts to spot degradation or faults early.
Useful tools: clamp meter for DC current checks, multimeter for voltage checks, and an infrared thermometer to find hot electrical connections.
Key Points and Quick Sizing Checklist for a 1KW Solar System for Shed
One-page Checklist to Size and Spec Your System
- List essential loads and calculate daily kWh needed.
- Get local PSH from NREL PVWatts or a local insolation map.
- Calculate expected kWh from 1 kW using PSH × 1 kW × derate (0.75–0.85).
- Decide battery days of autonomy and compute usable battery capacity.
- Select inverter type (grid-tied, hybrid, off-grid) and ensure surge capacity for tools.
- Choose panel count (3×330 W or 4×250 W common) and plan mounting.
- Budget components and permits; stage battery purchases if necessary.
Quick Decision Flow: Reduce Load → Check Production → Choose Storage
- Reduce load with LEDs, insulation, and efficient fridge options before buying more PV.
- If expected daily production meets or exceeds loads in medium sun, a 1 kW system will likely work.
- Add battery storage only if outages or nighttime loads require backup.
If a 1 kW setup looks marginal for your needs, compare with a larger option in our 2kW sizing guide for upsizing examples.
The Bottom Line: is a 1KW Solar System for Shed Right for Your Project?
A 1kw solar system for shed is a cost-effective choice for lighting, charging, and occasional tools, and can support a small fridge in medium- to high-sun locations with modest battery storage. For continuous heavy loads or multi-day autonomy, plan to upsize panels and batteries. Start with a measured load worksheet, check local peak sun hours, and pick the inverter and battery chemistry that match your resilience goals.
Frequently Asked Questions
How much energy will a 1 kW solar array produce per day?
It depends on local peak sun hours (PSH). Use the rule: gross kWh/day = 1 kW × PSH, then apply a derate of 0.75–0.85 for system losses. For example, 4 PSH yields ~3.2 usable kWh/day after derate; 2.5 PSH yields ~1.9 usable kWh/day.
How many panels do I need for a 1 kW shed system?
Common options: three 330–350 W panels (~990–1,050 W) or four 250 W panels (1,000 W). Choose based on roof space, shading, and budget. Higher-watt panels reduce the number of mounts and wiring runs.
Do I need batteries for a shed solar system?
Not always. If the shed is grid-connected and you don't need power during outages, a grid-tied system without batteries is cheapest. For backup during outages or off-grid use, add batteries sized to your daily kWh and desired days of autonomy.
Can a 1 kW system run a fridge?
Yes, a small efficient fridge (50–100 W average) can run on a 1 kW array in medium to high sun with adequate battery storage (typically 4–6 kWh usable for reliable 24-hour operation). Insulation and ambient temperature strongly affect fridge energy use.
Are permits required for installing solar on a shed?
Often yes. Many jurisdictions require electrical and building permits for rooftop solar and battery installations. Check local code and get inspections; a licensed electrician can ensure the final AC/grid tie is code-compliant.