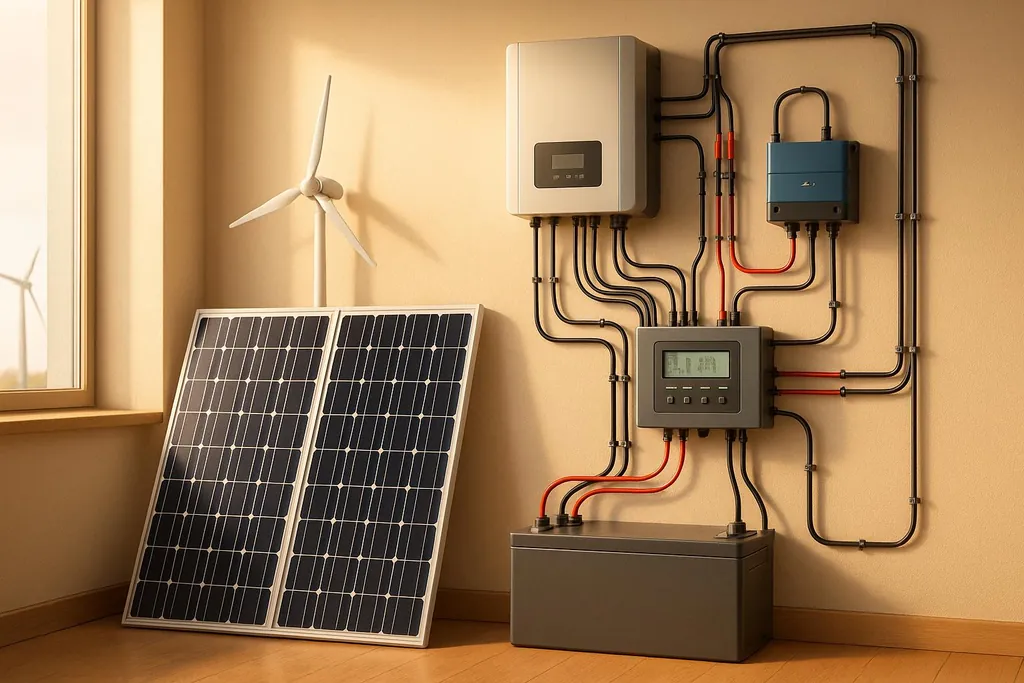
Learn how to safely wire a hybrid energy system with solar panels and wind turbines for reliable, renewable power at home.
Step-by-Step Hybrid Energy System Wiring Guide
If you're looking to set up a hybrid energy system, this guide breaks down everything you need to know - from components like solar panels and wind turbines to safety tips and wiring instructions. Hybrid systems combine renewable energy sources and batteries to provide reliable power for your home. Here's a quick overview:
Key Points
- Components: Solar panels, wind turbines, battery banks, charge controllers, hybrid inverters, and proper wiring.
- Safety First: Disconnect power, wear protective gear, and follow electrical codes.
- Wiring Basics:
- Connect solar panels in series or parallel based on your energy needs.
- Use a rectifier for wind turbines to convert AC to DC.
- Wire batteries in series or parallel to adjust voltage and capacity.
- Install a hybrid inverter to manage energy flow and connect to your home's electrical panel.
- Maintenance: Regular inspections, cleaning, and testing ensure efficiency and safety.
Quick Tip
Follow the power-up sequence: Battery → Inverter → Panels → Electrical Panel to avoid voltage spikes.
This guide simplifies the process, helping you safely install and maintain a hybrid energy system for clean, reliable power.
Complete Hybrid Solar Panel System Wiring Diagram Explained | Step-by-Step Guide
Safety Requirements and Preparation
Before starting any wiring work, it's vital to familiarize yourself with key safety measures and ensure you're fully prepared.
Safety Precautions
The first rule of electrical work: disconnect all power sources. Turn off the main breaker at the electrical panel, disconnect solar panels from charge controllers, and secure wind turbines by braking or locking them. These steps are critical to prevent accidental shocks or system damage.
Wear proper protective gear. This includes insulated gloves rated for electrical work, safety glasses, and non-conductive footwear. Keep a first aid kit within reach, and avoid working alone whenever possible. Electrical burns can happen in an instant and may not always be visible right away, so taking precautions is non-negotiable.
Avoid working on outdoor components in adverse weather conditions like rain, snow, or high winds. Wet surfaces increase the risk of electrical shock, and solar panels can still generate power on cloudy days. Always use insulated tools specifically designed for electrical tasks. For wind turbines, ensure they are fully secured before beginning any maintenance or wiring work.
Before verifying that power is disconnected, test your voltage meter on a live circuit you know is active. This simple check can prevent serious accidents.
Required Tools and Materials
To get the job done right, you'll need a mix of basic electrical tools and specialized equipment designed for renewable energy systems. A digital multimeter capable of reading up to 600V DC is a must for testing solar panels and battery connections. Wire strippers that handle 10 AWG to 14 AWG wires will cover most residential hybrid system needs.
For solar panel wiring, crimping tools and MC4 connectors are essential. These connectors are weatherproof and resist corrosion, ensuring reliable, long-lasting outdoor connections. A torque wrench is also necessary for securing battery terminal connections; loose terminals can lead to dangerous arcing or even system failures.
When it comes to wiring, THWN-2 copper wire is the standard. Use the following gauges:
- 10 AWG for solar panels
- 4–2 AWG for battery banks
- 12 AWG for control systems
Always plan for about 20% extra length to account for routing.
To shield your wiring from the elements, use conduit and electrical boxes. PVC conduit is ideal for underground runs, while EMT (electrical metallic tubing) works for above-ground installations. For outdoor connections, choose weatherproof junction boxes with a NEMA 3R rating or higher.
Additional materials include DC-rated circuit breakers, as standard AC breakers can fail when used with DC current. Grounding equipment is also critical - this includes copper grounding rods and #6 AWG bare copper wire. Finally, use proper labeling materials to clearly mark all circuits.
Electrical Code Compliance
Adhering to the National Electrical Code (NEC), specifically Articles 690 and 694, as well as local codes, is non-negotiable. These regulations often require permits, inspections, and detailed documentation, such as wiring diagrams and equipment specifications.
Grounding is a crucial aspect of hybrid systems. The NEC mandates separate equipment grounding and system grounding for solar installations. Wind turbines, given their height and exposure, must have lightning protection and robust grounding systems. For battery systems, ventilation and spacing are critical, especially for lead-acid batteries that can emit flammable hydrogen gas.
In many cases, a professional inspection is required before connecting to the utility grid. Even off-grid systems may need permits and inspections to comply with local fire and safety codes. Keep detailed records, including wiring diagrams, equipment specifications, and photographs, to streamline inspections and future maintenance.
Additionally, some insurance companies may require professional installation or inspection of renewable energy systems to maintain coverage. Check with your provider before starting work to avoid any surprises. While permitting and inspections may feel like a hassle, they ensure safer operation and protect your investment in the long run.
System Components and Wiring Diagrams
Once safety measures are in place, wiring diagrams become your essential guide to connecting all components correctly. Think of these diagrams as your blueprint for ensuring the hybrid system operates smoothly and safely. Carefully review each component's wiring setup to integrate your system without hiccups.
Solar Panels
Solar panels are the backbone of daytime energy production in a hybrid system. Residential setups typically use monocrystalline or polycrystalline panels, often rated between 300 and 400 watts. The way you wire these panels - series, parallel, or a combination of both - affects system performance.
- Series wiring boosts voltage while keeping the current constant. This setup is useful for longer wire runs or when shading is consistent across all panels.
- Parallel wiring maintains voltage but increases current. In this configuration, all positive terminals connect, and all negative terminals connect. For example, three panels wired in parallel might output 36V at approximately 25A, helping reduce the impact of partial shading.
When designing your solar array, calculate the maximum system voltage by considering the open-circuit voltage of panels wired in series. Factor in temperature variations and ensure compliance with electrical codes, which often limit residential systems to around 600V DC.
Wind Turbine
Wind turbines complement solar panels by generating power when sunlight is limited. Most residential turbines produce AC power, which is converted to DC before reaching the charge controller. Never disconnect a turbine under load, as this can cause it to overspeed and potentially damage the system. To prevent this, wind-compatible charge controllers often include a diversion load feature, safely redirecting excess energy when batteries are full.
Grounding is critical for wind turbines. Properly ground the turbine tower, guy wires, and all related electrical components to ensure safety and reliability.
Battery Bank
The battery bank stores energy and determines your system's voltage. How you wire the batteries - series, parallel, or a combination - directly impacts voltage and capacity.
- Series connections increase voltage while keeping amp-hour capacity the same. For example, wiring four 12V, 100Ah batteries in series results in a 48V, 100Ah system. This reduces current flow and allows for smaller wires over longer distances.
- Parallel connections maintain voltage but increase total capacity. The same four batteries wired in parallel would provide 12V at 400Ah.
- Series-parallel configurations combine these benefits. For instance, wiring eight batteries as two parallel strings of four series-connected batteries creates a 48V system with increased capacity.
When sizing your battery bank, calculate your daily energy needs and add extra capacity to account for inefficiencies and backup requirements.
Charge Controller
The charge controller manages the energy flow from your solar panels and wind turbine to the battery bank. There are two main types to choose from:
- PWM (Pulse Width Modulation) controllers are straightforward and budget-friendly. They work best when the panel voltage closely matches the battery voltage.
- MPPT (Maximum Power Point Tracking) controllers are more advanced, extracting maximum power from the panels. They can improve efficiency by 20–30%, especially when panel voltage exceeds battery voltage.
For hybrid systems, ensure the charge controller is compatible with both solar and wind inputs. To size it correctly, calculate the maximum current by dividing the total wattage by the battery voltage and adding a 25% safety margin.
Hybrid Inverter
The hybrid inverter is the final piece of the puzzle, converting stored DC power into AC for household use. It manages inputs from solar panels, wind turbines, and sometimes even the utility grid.
A grid-tied hybrid inverter can send surplus power back to the grid while providing backup during outages. For off-grid setups, the inverter must produce a stable AC waveform - preferably a pure sine wave - to protect sensitive electronics.
When choosing an inverter, consider its continuous power rating and surge capacity, particularly for appliances with high startup demands like refrigerators or pumps. Connect the inverter to your home panel using a transfer switch, a task that should always be handled by a licensed electrician.
Step-by-Step Wiring Instructions
Once you've set up your components and ensured all safety protocols are in place, it's time to start wiring your hybrid energy system. Before you begin, double-check that all components are secured and the power is completely isolated. Following the correct sequence is critical to avoid damage and ensure everything runs smoothly.
Connecting Solar Panels
Securely mount your solar panels, leaving enough space for airflow and maintenance access. Depending on your design, connect the panels in either a series, parallel, or series-parallel configuration.
- Series connections: Link the positive terminal of one panel to the negative terminal of the next.
- Parallel connections: Connect all positive terminals together and all negative terminals together.
Use MC4 connectors for tight, weatherproof connections to minimize the risk of arcing.
Install a DC disconnect switch between the solar array and the charge controller. This switch allows you to safely isolate the panels during maintenance or in emergencies. Place it in an accessible spot, but keep it shielded from direct exposure to weather. Use appropriately sized DC wiring - typically 10 AWG or 12 AWG copper wire for residential setups - to connect the switch to your charge controller.
Before attaching the panels to the charge controller, use a multimeter to confirm the open-circuit voltage matches your calculations. For instance, on a sunny day, a series connection of four 300W panels might show around 160V, while a parallel setup would display closer to 40V. Once the solar array is connected, you can move on to wiring your wind turbine.
Wiring the Wind Turbine
Wind turbines require extra care because of their variable power output. Never wire a spinning turbine - use a braking mechanism or wait for calm conditions.
Most residential wind turbines generate three-phase AC power, which must be converted to DC using a rectifier before reaching the charge controller. Some turbines come with built-in rectifiers, while others need external units. Connect the turbine's three AC wires to the rectifier inputs, then run the DC output to the dedicated wind input on your charge controller.
Proper grounding is essential for wind turbine wiring. Install a dump load controller or ensure your charge controller has diversion load functionality. This setup diverts excess energy to a resistive load when the batteries are full, preventing the turbine from over-speeding.
Battery Bank Connections
The battery bank is the core of your energy storage system, so take extra care with these connections. Begin by ensuring all batteries have similar voltage levels - within 0.1V of each other - for optimal performance.
- For series connections, use heavy-duty cables (typically 4/0 AWG for 48V systems). Connect the positive terminal of one battery to the negative terminal of the next, continuing this pattern through the string.
- For parallel connections, link all positive terminals together and all negative terminals together using bus bars.
Install a main battery disconnect switch rated for your system voltage and capable of handling at least 125% of the maximum current. Place the switch in a well-ventilated area, away from spots where hydrogen gas might accumulate.
Add a battery monitor shunt between the negative terminal of the battery bank and the negative bus bar. This device tracks current flow, helping you monitor the battery's state of charge and overall performance.
Finally, install fuses or circuit breakers between the battery bank and both the charge controller and inverter. For example, a 3,000W inverter on a 48V system may draw around 75A, so a 100A fuse provides a safe margin. Once the battery bank is set up, you're ready to connect the inverter.
Inverter and Main Panel Integration
Installing the inverter is one of the more complex steps and often requires professional help. Position the inverter in a cool, dry spot with good ventilation, as it generates significant heat during operation.
Connect the inverter's DC input terminals to the battery bank using appropriately sized cables. For a 3,000W inverter on a 48V system, 4/0 AWG cables are generally recommended to handle the high current. Ensure all connections are tight to prevent overheating and fire hazards.
For grid-tied systems, have a licensed electrician handle the connection to your home’s electrical panel.
> "Under no circumstances should you attempt to connect EcoFlow DELTA Pro to your home electrical system on your own. You must use a licensed electrician. If you don't, you may be breaking the law, and you're certainly putting your life and the safety of your home at significant risk."
> "For grid-tied systems, a licensed electrician should handle the connection to your home's electrical panel." - Frank Underdown, PhD
The inverter's AC output should connect to your home’s electrical panel through a dedicated breaker. Install surge protectors on both the DC and AC sides to guard against lightning and grid fluctuations. Ground the inverter properly by connecting its grounding terminal to your home’s grounding system using appropriately sized copper wire.
Testing and Verification
Once all components are wired, it’s time to test everything. Use a digital multimeter to verify that voltage readings align with your calculations. Start with the battery bank, checking the total voltage as well as individual battery readings. For a 48V lithium battery bank, you should see readings between 48V and 54V, depending on the charge state.
Next, test the charge controller by measuring the input voltage from both the solar and wind sources. Confirm that the controller recognizes all sources and displays accurate charging data.
Finally, test the inverter by connecting a small AC load, such as a lamp or fan. Measure the AC output voltage and frequency - U.S. systems should output around 120V (±5%) and 60Hz (±0.1Hz). Pure sine wave inverters will produce clean waveforms, while modified sine wave models may show stepped approximations.
Follow the recommended power-up sequence: Battery → Inverter → Panels → Electrical Panel . This order helps prevent voltage spikes and ensures each component initializes correctly.
Clearly label all wires and components for easier troubleshooting and maintenance in the future. Use weatherproof labels for outdoor connections and consider creating a wiring diagram for reference. Record initial voltage and current readings as a baseline for future checks.
Troubleshooting and Maintenance Tips
Even the most well-designed hybrid energy systems can encounter issues. Being able to spot and resolve common problems is key to keeping your system running efficiently. Regular maintenance also helps prevent minor issues from turning into major headaches.
Common Wiring Problems and Their Fixes
Wiring issues are some of the most common challenges in hybrid energy systems. Here’s how to address them:
- Loose connections can lead to increased resistance and overheating. Check all terminals monthly by gently tugging on the wires to identify any looseness. Always power down the system completely before tightening connections to the torque specifications provided by the manufacturer.
- Polarity errors often happen during installation. If your batteries aren’t charging even though your solar or wind input seems sufficient, double-check the connections. Positive terminals should connect to positive, and negative to negative. Incorrect polarity can stop charging or even damage the charge controller.
- Blown fuses signal deeper issues. Before replacing a fuse, investigate the cause - whether it’s a short circuit, overload, or faulty component. Use a multimeter to check for continuity and inspect the wiring for visible damage. Always replace the fuse with one that matches the correct rating.
- Corrosion at terminals reduces conductivity and can increase fire risk. Clean corroded terminals using a solution of baking soda and distilled water with a battery terminal cleaning brush. Rinse thoroughly and apply a non-hardening sealant to protect the terminals.
- Ground faults can cause erratic system behavior and are a safety hazard. If you suspect a ground fault, use a multimeter to measure resistance between the grounding conductor and each current-carrying conductor. With the system powered off, resistance should ideally be very high or infinite. Lower readings indicate a ground fault that requires immediate attention.
- Improper wire sizing is another common issue. If wires feel warm to the touch, they may be undersized. Upgrade to wires that meet the system’s specifications to avoid overheating and potential damage.
Regular Maintenance Practices
Once wiring issues are addressed, establish a maintenance routine to keep your system performing at its best.
- Monthly visual inspections are crucial for early problem detection. Walk through the system to check for damaged insulation, discolored wires, or unusual sounds from components like inverters or charge controllers. Take photos and notes to document any changes over time.
- Quarterly deep cleaning ensures optimal performance. Before starting, shut down the system completely. Clean battery terminals with a baking soda solution, rinse thoroughly, and reapply a protective coating. Gently clean solar panels with water and a soft cloth to maximize efficiency. Also, verify that mounting hardware remains secure, especially after storms or severe weather.
- Annual electrical testing helps identify potential issues before they escalate. Check voltage at key points and compare readings to baseline measurements from the installation. Test safety disconnects to confirm proper operation and inspect ground fault circuit interrupters (GFCIs) monthly using their test and reset functions.
- Environmental monitoring is vital for outdoor systems. Look for signs of water intrusion in outdoor connections, ensure weatherproof seals are intact, and check that drainage paths in electrical enclosures are clear.
- Performance tracking can reveal gradual declines in efficiency. Monitor daily energy production and compare it to historical data. A slow drop may point to dirty panels or aging parts, while sudden changes could indicate wiring or component failures.
Safe Battery Handling and Updates
Battery maintenance is just as important as wiring care, especially given the risks involved.
> "Battery energy storage systems can fail catastrophically, leading to explosion, fire, or the emission of poisonous gases".
To minimize risks, follow these safety guidelines:
- Wear personal protective equipment (PPE) when working with batteries. This includes thick gloves, protective eyewear, and a hard hat. Remove all metal jewelry and use non-metallic tools near battery terminals. Avoid letting metal tools touch the terminals or allowing both terminals to come into contact with the same object - or your body.
- Ensure proper ventilation in battery storage areas to prevent hydrogen gas buildup, especially with flooded lead-acid batteries. Use vent pipes or fans if natural airflow isn’t sufficient. Keep a baking soda and water solution nearby to neutralize any accidental acid spills.
- Manage battery temperatures carefully. Aim to keep ambient temperatures between 59°F and 77°F (15°C to 25°C) for optimal performance. Protect batteries from direct heat sources, and in cold climates, ensure the battery bank is sized to account for capacity loss.
- Conduct routine battery inspections monthly. Check for cracks, leaks, or deformations in the battery housing. Inspect connections for looseness or corrosion, and confirm that voltage, current, and temperature readings are within normal ranges. For flooded lead-acid batteries, regularly check electrolyte levels and top off with distilled water as needed to keep the plates submerged.
If you face complex issues or safety concerns, always consult a certified technician. Professional expertise is essential for handling high-voltage systems and resolving challenging problems effectively.
Conclusion and Final Thoughts
Creating a hybrid energy system requires careful planning, precise execution, and an unwavering focus on safety. This guide has walked you through the critical steps for combining solar panels, wind turbines, battery banks, and inverters into a unified system capable of reliably powering your home.
The key takeaway here is that safety should always come first. Working with high-voltage electrical systems and battery storage carries inherent risks. Always disconnect power before making any connections, wear the right protective gear, and strictly adhere to local electrical codes. If you're ever uncertain, don't hesitate to consult a licensed electrician - it’s far better than risking injury or damage to your property.
Pay close attention to wiring and connections. Use wires that are correctly sized for your system, ensure all connections are secure, and follow the manufacturer’s torque specifications. Investing in high-quality components that are compatible with your setup is equally important for long-term performance.
A hybrid energy system is a long-term investment that, when installed and maintained correctly, can deliver decades of clean, renewable energy. The troubleshooting and maintenance practices outlined in this guide will help you spot potential issues early and keep your system running efficiently. Regular inspections, proper care of your batteries, and routine testing are essential to protecting your investment and ensuring optimal performance.
If you're new to renewable energy systems, start small. Begin with a basic solar setup to familiarize yourself with the fundamentals. Once you’ve gained confidence, you can expand by adding wind turbines and more complex battery configurations. This gradual approach reduces the risk of mistakes and helps you build the expertise needed for a more advanced system.
Hybrid energy systems go beyond just technical details - they represent a step toward energy independence and a commitment to reducing your environmental impact. Every kilowatt-hour your system produces lessens your reliance on the grid and contributes to a cleaner planet. By mastering the skills discussed here, you'll be better prepared to embrace renewable energy and adapt as technology evolves.
Finally, double-check every connection and don’t shy away from seeking professional help if you’re unsure about any aspect of the installation. A little extra caution now can ensure your system operates safely and reliably for years to come.
FAQs
What makes a hybrid energy system better than relying on a single renewable energy source?
A hybrid energy system blends various renewable energy sources, such as solar and wind, to create a steadier and more dependable power supply. When one energy source isn't available - like during cloudy or windless days - the other can step in to fill the gap, minimizing the chances of power interruptions.
These systems also bring several other benefits. They can help lower energy bills, cut down on carbon emissions, and promote energy self-sufficiency. For [off-grid homes](/blog/how-to-build-a-diy-battery-enclosure-for-off-grid-homes) or those aiming for sustainable living, [hybrid systems](/blog/how-to-build-a-diy-battery-enclosure-for-off-grid-homes) offer a practical and environmentally friendly way to meet consistent energy demands.
How can I decide whether to wire my solar panels and batteries in series or parallel?
When you wire [solar panels](/blog/how-to-choose-solar-panels-that-match-your-roof) in series, the voltage of each panel adds up, creating a higher total voltage. This setup is ideal for systems that need higher voltage or when you want to reduce energy loss over long cable runs. In contrast, wiring panels in parallel keeps the voltage the same but increases the current, making it more suitable for systems designed for lower voltage.
For batteries, wiring in series combines their voltages. For example, connecting two 12V batteries in series results in a 24V system. Wiring in parallel, however, keeps the voltage the same but increases the overall capacity. So, two 12V batteries wired in parallel remain at 12V but provide more amp-hours. The choice between series and parallel depends on your system’s power needs and the specifications of your inverter and charge controller. Always refer to your system’s documentation to ensure everything is compatible and operates safely.
What can I do if my hybrid energy system isn’t generating as much power as expected?
If your hybrid energy system isn’t delivering the results you expected, start by examining a few common culprits. Loose connections, shading issues, or dirty solar panels can often lead to reduced output. Give your panels a good cleaning and double-check that all connections are tight and secure.
Next, take a look at your battery system. Are the batteries charged correctly? It’s important to avoid both overcharging and undercharging, especially during times when wind power is low or the system is relying solely on solar energy. Improper charging can not only affect performance but also shorten the lifespan of your batteries.
Remember, renewable energy sources like solar and wind naturally fluctuate, so some power variation is to be expected. To keep your system running smoothly and efficiently, regular maintenance and occasional fine-tuning are essential.