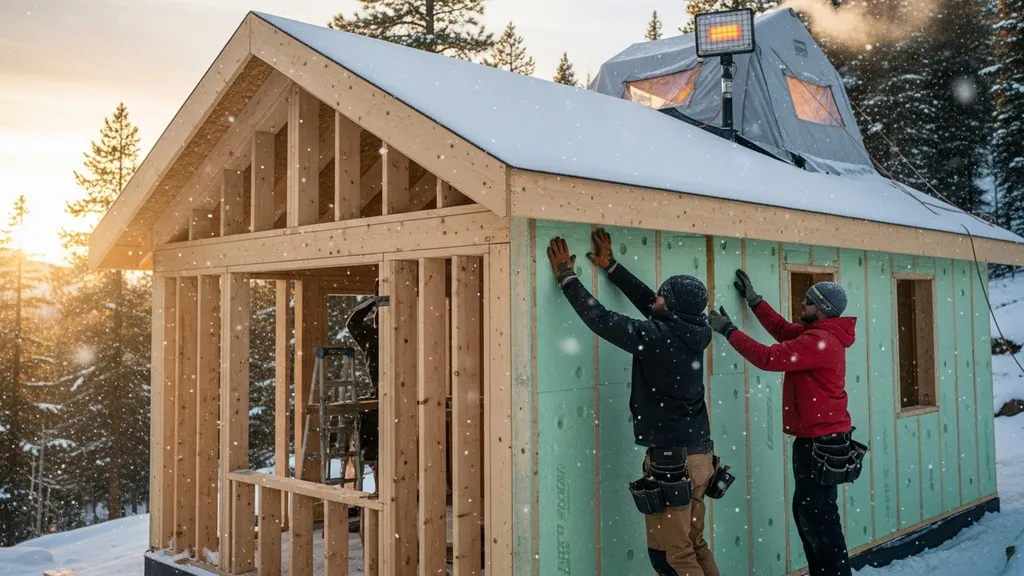
Practical, step-by-step cold-weather construction tips for a winter cabin build — site planning, foundations, insulation, airtightness, heating and off‑grid systems.
Winter Cabin Build: Cold Weather Construction Tips
A winter cabin build brings unique challenges and opportunities: less mud, more available trades in some regions, but also frozen ground, shorter work windows and higher risk of weather damage to materials. This guide on a winter cabin build explains what to plan before breaking ground, frost-aware foundation choices, shell sequencing, insulation and airtightness, window and door detailing, heating and off-grid strategies, and safe on-site workflows so a small DIY crew can move through a cold-season project without costly rework. Read on for step-by-step tactics, numbers you can use in bids and schedules, and specific product and code guidance.
TL;DR:
- Plan site access and permits early — allow 7–21 contingency days and confirm access with local road maintenance; typical frost depths in zones 5–7 run 24–48 inches.
- Prioritize a weather-tight shell and insulation — target wall R-20–R-40 and roof R-40–R-60, use continuous exterior insulation to reduce thermal bridging.
- Design heating redundancy for off-grid winter heating — size PV and batteries with a 20–40% winter derate and use a wood stove or generator backup when temps fall below heat-pump cutoffs.
Planning a Winter Cabin Build: Site Selection, Schedule and Permits
Choosing the right parcel and planning the schedule cut winter risks. For site selection, favor south-facing slopes for solar gain and shorter snowmelt windows; avoid wind-exposed ridgelines unless you plan heavy windbreaks. Road and driveway access is critical: confirm with the county road authority who clears snow, and include staging areas for material delivery and heated tents.
Frozen-ground windows matter. Typical frost depths vary by climate zone; shallow southern sites might see 12–24 inches, while zones 5–7 commonly experience 24–48 inches. That affects foundation depth and plumbing. Build seasons shorten by roughly 30–50% in colder zones; expect fewer workable days and plan 7–21 contingency days into your calendar.
Permitting is another early task. Start a permit review early and request pre-application meetings when possible. For basic permitting requirements, see your local building department guidelines such as the general permitting requirements for building which explain electronic plan submission and signature expectations. Industry resources such as the NIST Manufacturing Extension Partnership can clarify technical requirements for materials and assemblies; see NIST MEP resources. Remote or off-grid cabins can trigger specific zoning checks — check the permitting pitfalls list early to avoid last-minute redesigns.
Trade-offs: building in winter may reduce crew rates and speed permitting in some areas, but costs rise for temporary heat, winterized concrete methods and covered storage. Waiting for spring reduces those costs but may push your schedule and expose excavations to spring runoff and boggy soils. Decide based on access, crew availability and your tolerance for cold-weather logistics.
Cold‑climate Foundations and Groundwork for a Winter Cabin Build
Foundations in freezing soils must prevent frost-heave and keep below-code frost depth or use engineered alternatives. Two common approaches are frost‑protected shallow foundations (FPSF) and conventional deep footings.
Frost‑protected shallow foundations use horizontal insulation to keep ground temperatures near the slab above freezing, allowing shallower excavations and less labor. FPSF is often cost-effective for small cabins on moderate slopes. Conventional deep footings (footings below frost depth) increase excavation and formwork but are straightforward in very cold or poorly insulated sites. Compare costs: for a small cabin, FPSF can reduce excavation by 30–60% versus deep footings, but it requires careful insulation placement and local code approval.
Slab-on-grade, Crawlspace and Pier Options Each Have Trade-offs:
- Slab-on-grade: Good thermal mass and simple air-sealing. Insulate under and around the slab — under-slab rigid insulation of R-10–R-20 is common in cold climates. Use a perimeter insulation skirt when full under-slab insulation isn't feasible.
- Crawlspace: Easier to service utilities but requires conditioned or sealed crawlspace design to avoid moisture and freezing pipes.
- Piers: Fast and low-cost for very small cabins, but add the need for an insulated skirt and careful sill detail to avoid heat loss.
Drainage and frost‑heave mitigation are essential. Use positive drainage paths, crushed stone under slabs, and high-quality geotextile where seasonal thaw creates fines. For rainwater and snowmelt collection design near foundations, see the rainwater system basics for runoff handling and freeze-thaw planning. For high-level climate-zone guidance and frost depth context, consult the cold climate design guide.
Cold pours need extra attention: use heated blankets, insulated formwork and accelerators approved by code to reach proper curing temperatures. Keep additives and methods within manufacturer and code limits. For equipment and data connections used onsite, industry standards such as MTConnect help manufacturers and contractors track material performance during cold operations; see MTConnect manufacturing data standard. When evaluating foundation types, weigh excavation cost, insulation requirements and long-term energy savings — for many DIY cabins, an insulated shallow foundation plus an insulated skirt offers the best balance of cost and thermal performance.
Framing and Exterior Shell Strategies for Cold‑weather Construction
Sequencing matters in cold weather: close the roof and exterior shell quickly to enable interior work in controlled conditions. Start by installing trusses and sheathing so you can erect temporary roofing or heated tents. See a practical example of truss timing in our roof truss sequencing guide.
Temporary enclosures and heated tents let crews work on insulation, electrical and plumbing inside a warm envelope. Use fuel-fired heaters with proper ventilation and CO monitoring. Keep heaters off continuous framing members to avoid localized drying or scorching of wood.
Snow loads drive roof decisions. In many mountain areas, design roof snow loads per IECC and local codes; common solutions include steeper pitches (6:12 or higher) to shed snow and stronger truss bracing. Heavy snow may require reinforced ridge beams and deeper overhang supports. Choose trusses rated for local snow load and follow manufacturer bracing instructions.
Sheathing, weather-resistant barrier (WRB) and air-barrier sequencing should avoid trapping moisture. Install a drying-permissive WRB and ensure flashings are continuous before interior finishes are installed. For common leakage points to inspect during framing and sheathing sequencing, review the air-leakage problem spots guide — pay special attention to roof-wall junctions, window rough openings and rim-joist-to-foundation transitions. Protect exposed timber from freeze-thaw with water-shedding tarps and keep stacked lumber off the ground. Fast-action on close-in reduces the chance of wet framing developing mold or freeze damage.
Insulation and Airtightness: Choosing Materials and Installation Tips for a Winter Cabin Build
Choosing insulation affects both energy use and build workflow. Target ranges for cold-climate cabins typically land at wall R-20–R-40 and roof R-40–R-60, with floor and under-slab R-values adjusted per assembly. Below is a concise comparison table for common insulation types:
| Type | R-value per inch | Cost range (material) | Moisture performance | Permeability | Ideal use-cases |
|---|---|---|---|---|---|
| Spray polyurethane foam (closed-cell) | 6.5–7.0 | $–$$ | Excellent, vapor retarding | Low (vapor barrier) | Rim joists, high-seal walls, under-slab |
| Cellulose (dense-pack) | 3.5–3.8 | $–$ | Good if kept dry | Moderate | Retrofit cavities, attic fill |
| Mineral wool | 3.0–3.3 | $–$ | Non-combustible, resists moisture | Higher (vapor-open) | Framing cavities, sound control |
| Rigid foam board (XPS, polyiso) | 3.5–6.0 | $–$$ | Good as external continuous insulation | Varies (polyiso less permeable) | Continuous exterior insulation, roofs |
| Structural insulated panels (SIPs) | R-4–R-6 per inch | $$ | Good when detailed | Low | Whole-wall system for fast close-in |
Use the off-grid insulation guide for detailed off-grid-specific recommendations and our wall assembly details for cabin framing strategies.
Installation tips for freezing temperatures:
- Work in small bays and close in the roof first so you can create a heated enclosure for spray foam or adhesive work.
- Pre‑warm adhesives, sealants and foam components in a heated trailer to maintain manufacturer temperature windows.
- Consider staged foam application: apply thin lifts and allow cure time rather than attempting a single thick pass in cold tents.
- For batts and cellulose, avoid installing wet or frozen material; keep stock in an insulated, ventilated staging area.
Airtightness strategy and testing:
- Seal early. Install the primary air barrier (sheathing + taped seams, or interior gypsum with taped joints) before insulating.
- Common blower-door targets: 3–5 ACH50 for budget builds, 1–2 ACH50 for high-performance cabins, and Passive House levels (≤0.6 ACH50) for certified projects. Plan blower-door testing after rough mechanicals are complete but before finishes.
- Sequence vapor control by climate: in cold climates, keep the vapor retarder to the warm-in-winter side (interior), but rely on continuous exterior insulation to shift the dew point outward and reduce condensation risk.
For a visual demonstration, check out this video on best way to insulate a cabin floor for:
The video above shows real-world staging, temporary heat tents and spray-foam techniques in snowy conditions — useful for visualizing crew setup and bay-by-bay work.
Windows, Doors and Thermal‑bridge Control on a Winter Cabin Build
Windows and doors are major heat-loss points. For cold-climate cabins, prioritize U-factor over SHGC unless you have reliable passive-solar gain plans. Typical guidance: choose windows with U-factors ≤0.20 for severe cold climates, and SHGC tuned to your site's solar access; use triple-glazed units where budgets allow.
Installation tips in freezing weather:
- Pre-fit units in a warm staging area and bring them to the opening just before installation to avoid cold-sealant failure.
- Use cold-rated sealants and low-temperature-compatible flashing tapes. Avoid back-bedding sill pans in sub-freezing temps unless you can warm the substrate.
- Check visible gaps, flashing continuity and weep path clearances. A consistent approach is to install a sill pan, then flashing at jambs and head, tying into the WRB before sealing the interior.
Thermal-bridge reduction strategies:
- Continuous exterior insulation reduces studs' thermal bridging. See the exterior insulation method for step-by-step installation.
- Use Larsen trusses to provide a thermal break between the structural wall and exterior insulation — detailed guidance is available in the Larsen truss installation tips.
- Pay special attention to headers, rim joists and floor-to-wall connections; use insulating header packs, rigid foam blocking and spray foam at rim joists.
For Passive House-level detailing around windows, follow the window sealing for passive levels checklist: continuous air barrier tapes, layered flashing and a durable exterior trim that sheds water. Doing these details correctly reduces cold-climate condensation risk and aids long-term durability.
Heating, Ventilation and Off‑grid Systems for a Winter Cabin Build
Selecting a heating system depends on grid access and design load. For grid-connected cabins, cold-climate heat pumps (e.g., Mitsubishi Hyper-Heat, Fujitsu Halcyon) work efficiently down to -15°F to -20°F, but their coefficient of performance (COP) drops as outdoor temps fall — expect COPs to fall from ~3 at mild temps to near 1.5 at very low temps. Backup electric resistance or a fossil-fuel furnace may be required in extreme cold.
Compare heat-pump vs furnace: see the heat pump vs furnace comparison for a full cost and performance analysis. Heat pumps win on seasonally averaged efficiency; furnaces may provide reliable high-output heat at very low temps without backup. For off-grid winter heating, common approaches include:
- Primary woodstove with thermal mass and radiant comfort.
- Heat pump as primary with wood or generator backup for deep cold.
- Electric resistance as emergency backup in battery/generator systems.
Off-grid sizing basics:
- Heating drives the largest loads. When sizing PV and batteries, assume a winter derate of 20–40% for solar output and model heating hours conservatively.
- Use the 7 kW solar sizing example to see how heating loads scale PV and battery needs.
- For battery safety and housing, follow the DIY battery enclosure how-to.
Ventilation and Moisture Control:
- In a tight winter cabin, controlled ventilation is critical. Use MVHR (mechanical ventilation with heat recovery) where power exists; ERVs are useful when humidity needs balancing. Duct routing should avoid exposed unconditioned spaces where condensate can freeze.
- Manage condensate in cold ducts with insulated runs and trap design and route drain lines to heated areas or use condensate pumps with freeze protection.
Redundancy: design for at least two independent heat sources in off-grid builds (e.g., heat pump and woodstove) and include generator startup capacity sized for worst-case demand. For troubleshooting common off-grid heating failures, consult the off-grid heating troubleshooting guide.
Cold‑weather Construction Workflows, Materials Handling and Crew Safety
Material storage and handling reduce waste and rework. Store lumber off the ground under breathable tarps, slope stacks for drainage and rotate packages to avoid freeze-thaw cycles. Keep moisture-sensitive items like cellulose and gypsum in heated storage or inside the temporary enclosure until installed. Our sustainable materials guide offers material choices that resist freeze-thaw and lower embodied carbon.
Cold concreting best practices:
- Use heated enclosures, insulated blankets and low-temperature accelerators approved by the cement supplier and code. Maintain curing temperatures per ASTM C1074 guidance and local code requirements.
- Protect forms and rebar from ice. Pour during the warmest daytime window and avoid long cold exposures during the first 24–72 hours.
Adhesives and fasteners:
- Pre-warm adhesives and caulks, and use cold-rated products. Many tapes and low-temp sealants specify a minimum substrate temperature (often 20°F); check data sheets.
- Use stainless or hot-dip galvanized fasteners in exterior exposed locations prone to freeze-thaw to reduce corrosion.
Crew safety and productivity:
- Provide enclosed, heated break shelters with warm fluids and rotating crew schedules to limit frostbite and cold-related slowdowns.
- Assume productivity drops by 10–30% per typical winter day; build that into labor estimates.
- Plan temporary heat logistics carefully: fuel supply, ventilation, CO monitoring and fire safety rules are non-negotiable.
Schedule heavy exterior tasks during warmer winter windows when possible. Where surface freezing is unavoidable, delay finish siding and trim until temperatures rise or employ temporary protective cladding.
Key Checklists and Cost‑saving Tips for a Winter Cabin Build
Priority checklist — what to close in first:
- Roof sealed: Install roof sheathing, underlayment and temporary finish or membrane so interior can be heated.
- Windows and doors installed and flashed: Ensure watertight rough openings before insulating.
- Rough mechanicals inside: Run plumbing and electrical in a heated shell to avoid frozen pipe setbacks.
- Insulation and primary air barrier: Close and seal the air barrier before finish work.
- Commission HVAC and test airtightness: Early blower-door tests catch leaks before finishes.
Budget-saving Material and Phasing Tips:
- Phase insulation purchases to avoid on-site freeze damage; buy sealed packs and store in heated trailers.
- Use reclaimed materials for finish trims and non-structural elements to save cost and reduce waste.
- Prioritize continuous exterior insulation to reduce required cavity R-value and simplify framing.
Commissioning checklist before first winter:
- Heat-run test: Verify primary and backup heating sources perform under a simulated deep-cold run.
- Blower-door result: Record target ACH50 and correct major leaks. Aim for <3 ACH50 for a comfortable cabin.
- Humidity control: Verify MVHR or ventilation settings and ensure condensate drains are frost-protected.
Sample phasing timeline for a 600–800 ft² cabin starting in early winter:
- Week 1–2: Site access, excavation, frost protection measures.
- Week 3–4: Foundation and slab or piers installed with winter curing.
- Week 5–7: Framing and roof close-in.
- Week 8–10: Windows/doors, WRB, exterior insulation.
- Week 11–14: Interior mechanicals, insulation, air sealing.
- Week 15–18: Finishes and commissioning.
Small design choices save long-term money: invest in airtightness and insulation now and reduce ongoing fuel costs and maintenance later.
The Bottom Line
A successful winter cabin build starts with site and permit planning, frost-aware foundations and a priority on a weather-tight shell. Invest in insulation and airtightness, choose heating systems with redundancy for off-grid winter heating, and protect materials and crews with clear logistics. Upfront spending on airtightness and continuous insulation typically pays back through lower fuel bills and fewer winter failures.
Frequently Asked Questions
How late in the season can I start a winter cabin build?
It depends on local frost depth, road access and permit timing. In zones 5–7 expect the practical build season to shorten substantially; allow extra contingency days and confirm county road maintenance and staging access before starting. If soils freeze to full frost depth, you can still build foundations with winter methods, but plan for added costs for heated curing and temporary enclosures. See the site selection and schedule section for permit and access checklist items.
Can I pour concrete in freezing temperatures?
Yes, with precautions. Use insulated blankets, heated enclosures and approved accelerators per your concrete supplier and local code. Maintain curing temperatures recommended in ASTM standards and protect forms and reinforcement from ice. Expect additional cost for heating and slower initial strength gain; schedule pours during the warmest part of the day where possible and plan for quality control testing.
What insulation type performs best in a small cold cabin?
There is no single best option — performance depends on assembly. Closed‑cell spray foam offers high R per inch and acts as an air and moisture barrier, making it good for rim joists and tight assemblies. Continuous rigid foam reduces thermal bridging and pairs well with wood framing. Dense-pack cellulose is cost-effective in cavities but must stay dry. Target wall R-20–R-40 and roof R-40–R-60 and select materials based on moisture risk, budget and installation logistics; see the comparison table in the insulation section and the off-grid insulation guide for deeper detail.
Is it cheaper to build in winter or wait until spring?
It depends. Winter can reduce site mud and sometimes labor rates, but it adds costs for temporary heat, winterized concrete, enclosed storage and possibly slower productivity. Spring avoids cold-weather handling but risks boggy sites and delayed schedules. Evaluate site access, crew availability and the cost of winter logistics. Many DIY builders choose winter when access is reliable and they can stage materials in heated storage.
How do I keep an off-grid cabin reliably heated in deep cold?
Design redundancy: combine a primary efficient heat source (cold‑climate heat pump or woodstove) with a backup (wood, generator or electric resistance). Size PV and battery systems with a winter derate and plan for generator start-up capacity. Include a manual override for heating systems and ensure fuel and wood supplies are accessible. See the heating section for off-grid sizing basics, the 7 kW solar example and battery enclosure guidance to plan reliable winter operations.