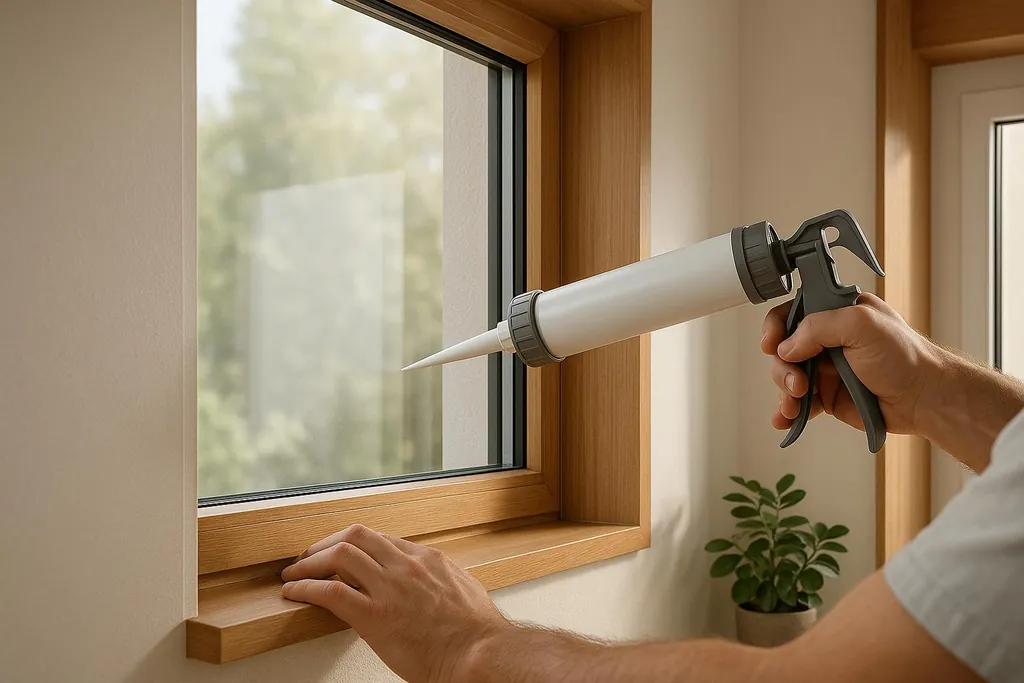
Learn how to effectively seal windows to meet Passive House standards and significantly reduce energy loss in your home.
How to Seal Windows for Passive House Standards
Want to save up to 90% on heating and cooling energy? Properly sealing your windows is key to meeting Passive House standards. Here's how:
- Why Seal Windows? Windows are major culprits for energy loss - up to 30% of a home's heating energy escapes through them. Proper sealing improves airtightness, reduces heat loss, prevents moisture issues, and enhances indoor comfort.
- Passive House Requirements: Buildings must achieve less than 0.6 air changes per hour (ACH50) during a pressure test at 50 Pascals.
- Common Window Leak Areas: Gaps at the frame-to-wall connection, damaged caulking, or poor insulation around the rough opening.
- Best Sealing Materials:
- Acrylic Tapes: Durable and weather-resistant.
- Liquid Membranes: Great for complex shapes.
- Specialized Caulks: Ideal for small gaps and details.
- Step-by-Step Process:
- Inspect and clean the window opening.
- Fill gaps with caulk, foam, or backer rods.
- Apply airtight tapes or liquid membranes.
- Connect the window seal to the building's air and vapor barriers.
- Testing & Maintenance: Perform blower door tests to ensure airtightness and inspect seals annually for wear.
Quick Tip: Start with high-quality tapes for easier application and consider liquid membranes for irregular surfaces. Proper sealing not only saves energy but also keeps your home comfortable year-round.
Airtight Window Sealing with Contega Solido SL
Passive House Window Airtightness Standards
When it comes to Passive House construction, understanding airtightness requirements is crucial - especially for window installations. These standards demand precision and care, going well beyond conventional building practices.
Passive House Airtightness Requirements
The Passive House standard sets a strict limit: buildings must not exceed 0.6 air changes per hour at 50 Pascals (ACH50). To put that into perspective, this equates to an opening no larger than the size of a nickel for every 54 square feet of surface area .
Real-world projects show that these airtightness levels are achievable with the right approach. For instance, Lentel Construction achieved 0.44 ACH50, Red Stag Contracting reached 0.47 ACH50, and Prime Habitat Builders recorded 0.45 ACH50 .
Passive House-certified windows also need to meet strict thermal performance standards. Specifically, they must have a U-value below 0.8 W/(m²K), while the entire installed assembly cannot exceed 0.85 W/(m²K). This makes these windows approximately twice as efficient as standard ones .
In the next section, we'll look at the common culprits behind air leakage in window installations.
Where Windows Leak Air
To improve airtightness, it's essential to understand where windows typically lose air. Leakage often occurs in predictable areas, making it easier to target these weak points.
One major issue is the frame-to-wall connection, where gaps between the window frame and the rough opening allow air infiltration. Additionally, missing or damaged caulk around interior trim and molding can create further pathways for air leaks .
The type of window you choose also plays a significant role. Fixed windows offer the best airtightness, while compression-sealed operable windows, like casement or tilt-and-turn styles, generally perform better than double-hung or slider windows. Operable windows with sliding seals tend to be the least airtight .
Installation quality is another critical factor. Windows that aren't installed square, level, and plumb can leave gaps that compromise airtightness. Similarly, inadequate or poorly applied insulation around the rough opening can lead to thermal bridging and additional leakage . Damaged or improperly installed weatherstripping is another common issue that undermines a window's sealing effectiveness .
It's worth noting that residential windows are held to an industry standard, allowing no more than 0.3 cubic feet of air to pass through per minute, per square foot . Even with a perfectly sealed building envelope, leaky windows can undermine overall performance.
Now that we've identified the problem areas, let's explore the best materials for sealing windows to meet Passive House standards.
Materials for Passive House Windows
Choosing the right sealing materials is key to achieving airtightness. These materials must maintain their performance over decades and under various weather conditions.
Here are some of the most effective materials:
- Acrylic Tapes: High-quality options like the Coroplast RPX series are ideal for window-to-frame sealing and seam connections. They offer excellent adhesive strength, weather resistance, and can withstand extreme temperatures .
- Liquid Membranes: Products like Pro Clima Aerosana Visconn Fibre are perfect for sealing complex geometries and large areas. They provide cost-effective coverage and adhere well to a variety of surfaces .
- Specialized Caulks: Options such as Pro Clima Contega HF are great for sealing penetrations, small gaps, and detailed areas. They ensure precise application and long-term durability .
| Material Type | Best Applications | Key Benefits |
|---|---|---|
| Acrylic Tapes | Window-to-frame sealing, seams | Strong adhesion, weather-resistant, durable |
| Liquid Membranes | Complex shapes, large areas | Cost-effective, excellent surface adhesion |
| Specialized Caulks | Small gaps, detailed work | Precise application, long-lasting performance |
These materials not only provide airtight seals but also contribute to healthier indoor environments. Pressure-sensitive adhesives in modern tapes are solvent-free, formaldehyde-free, and environmentally friendly .
Proper sealing can significantly reduce energy loss. Air leakage alone can account for 15–25% of winter heat loss in buildings .
Joe Fitzgerald, Technical Specification Manager at Ecological Building Systems, highlights the importance of understanding airtightness:
> "The main cause of poor airtight quality comes from poor understanding, which in turn leads to poor detailing."
For the best results, surface preparation and priming are essential when applying tapes . Also, spray foam alone is not enough to meet Passive House airtightness standards - it should only be used as part of a comprehensive sealing strategy .
Preparing the Window Opening
Getting the window opening ready is a crucial step in meeting Passive House airtightness standards. How well you prepare the opening directly impacts the long-term success of your sealing efforts.
Inspecting and Cleaning the Opening
Start by inspecting the rough opening for any signs of rot, structural issues, or misalignment. Pay special attention to areas prone to moisture exposure. If you find any rot or deterioration, replace the affected wood with a durable material .
Tom Silva, a general contractor for _This Old House_, underscores the importance of this step:
> "Rot around windows, even in relatively new houses, is one of the biggest problems I see. You can't depend on just the trim and the housewrap to stop water."
Make sure the opening is square and level. If measurements vary by more than an inch, adjustments are necessary . Also, check that the wall is perfectly vertical (plumb) and that the window sill is slightly angled downward. This slope helps prevent water from pooling during rainfall .
After confirming the structural soundness, clean the opening thoroughly. Remove any old insulation and damaged drywall . For concrete projects, apply a waterproof and air-sealant where the concrete meets gypsum sheathing . To manage water effectively, install a sill seal between the concrete and the bottom plate, and seal the exterior with tape or liquid flashing that bonds to both the wall sheathing and underlying material .
With a clean and stable opening, you're ready to align and shim the window for a proper air barrier.
Aligning and Shimming the Window
Getting the window plumb, level, and square in the opening is essential for airtightness and to avoid thermal bridging . Even small alignment issues can lead to gaps that compromise performance.
Before shimming, protect the window frame and edges with frame guards and edge protection to prevent damage during installation . Clean the window and frame using a non-abrasive cleaner, and make sure all surfaces are completely dry before applying protection materials .
Carefully shim the window, checking alignment as you go to ensure it remains plumb, level, and square. Once the shimming is complete, trim the shims so they sit behind the interior face of the wall and jambs . This allows sealant to be applied over the shims, creating a continuous air barrier.
Timing is another key factor. Air-sealing around windows and doors is often done by the insulation contractor, window installer, or finish carpenter before the trim is added . For concrete construction, seal the interior concrete wall, slab, or subfloor to the framing using acoustical caulking, applied just before installing the vapor control layer or drywall .
How to Seal Windows Step-by-Step
Creating an airtight seal around your windows is essential for energy efficiency, especially when aiming for Passive House standards. As Tim Healey explains:
> "Air-sealing is the cheapest way to reduce energy use in homes. Without airtightness, insulation is useless."
The goal is to establish a continuous air barrier, with each step carefully executed to ensure a comprehensive and effective sealing system.
Filling Gaps with Insulation
Start by addressing the gaps between the window frame and the rough opening. Fibrous insulation alone isn't enough - it doesn't block airflow effectively. For narrow gaps (less than 1/2 inch), use caulk. Silicone or polyurethane sealants are preferable to acrylic products, as they offer better performance. For larger gaps, insert a closed-cell backer rod slightly wider than the space, then apply caulk over it. Smooth the caulk to ensure flexibility and a proper seal.
Low-expansion spray foam is another solid option, but it's crucial to apply it evenly. Keep the spray nozzle moving to avoid overfilling, which can distort the jambs and might even void warranties. Avoid using regular expanding foam for this reason. Once the gaps are filled, apply sealant at the interior edge to secure the shims.
With the gaps filled, move on to airtight tapes and sealants.
Installing Airtight Tapes and Sealants
Airtight tapes form the primary air barrier around your window. Brands like Siga Corvum are designed specifically for this purpose. To ensure the tape adheres properly, clean and dry all surfaces before application. Pay extra attention to corners - these are common trouble spots for leaks. Use a roller to press the tape firmly into place for a reliable seal.
For an added layer of protection, consider using a Silyl-Terminated-Poly-Ether (STPE) sealant instead of traditional silicone or polyurethane. A handy way to check your work is with the "red pen test": trace a continuous line around your installation. Any breaks in the line indicate areas that need further sealing.
For irregular surfaces, liquid membranes are a great solution.
Applying Liquid Airtight Membranes
Liquid airtight membranes are ideal for sealing uneven or complex surfaces. These membranes create a seamless, elastic barrier that conforms to the surface, making them perfect for intricate window geometries or areas where tape isn't practical. Depending on the product, you can apply them with a brush, roller, or sprayer. While liquid membranes are cost-effective for larger areas, they may be less precise in tight spots. Always ensure the surface is clean, dry, and compatible with the membrane, following the manufacturer's instructions.
Once the window is sealed, connect it to the wall's air and vapor barriers.
Connecting to Wall Air and Vapor Barriers
Seamlessly integrating your window sealing system with your home's air and vapor barriers is crucial to prevent thermal bridges and air leaks. For example, in a Passive House project, Montpelier Construction used Pro Clima DB+ as both the air barrier and vapor-control layer. They pre-drilled joists, applied Pro Clima's Contega HF caulk to each hole, and fastened to the DB+ membrane. All seams were then sealed with Tescon Vana tape for a complete connection.
If your home uses an exterior air control method, extend the sealing product into the window opening. Managing water ingress is just as important as air leakage, so ensure all seals are watertight. For electrical penetrations near windows, the "one hole, one wire" method simplifies sealing and reduces potential leak points.
Finally, inspect all seals visually. Look for uniformity and ensure there are no gaps. Proper sealing is essential for achieving Passive House performance, including a U-Value below 0.8 W/(m²K) .
Tools, Materials, and Products
Once your windows are prepped, having the right tools and materials is essential for creating airtight seals that meet Passive House standards. Using high-quality tools and products ensures a durable and reliable seal.
Tools You'll Need for Window Sealing
To get the job done right, here are some of the tools you'll want to have on hand:
- Basic sealing tools: Utility knife, measuring tape, and caulk gun for precise application.
- Application tools: A roller or squeegee to press airtight tapes firmly into place, and brushes, rollers, or sprayers depending on the product instructions.
- Testing tools: A blower door or smoke pencil to check for any air leaks.
Preparation Tools
Before sealing, proper surface preparation is key:
- Scrapers and sandpaper: To remove old caulk or paint.
- Cleaning solvents: To degrease surfaces and ensure strong adhesion.
- Primer: Necessary for some tapes, especially on tricky surfaces like concrete or metal.
Once the surfaces are prepped and tools are ready, it's time to choose the right sealing products for your project.
Best Sealing Products
Siga Rissan tape is a favorite among builders for its strong adhesion. For example, Montpelier Construction opted for Siga Rissan tape during a Passive House project after finding the tape provided with their Stego Wrap vapor barrier insufficient.
Coroplast RPX tapes are another solid choice, offering UV cross-linked acrylic adhesive known for its strength, shear resistance, and weather durability.
Pro Clima products are often regarded as top-tier by Passive House builders. Their Contega HF caulk and Tescon Vana tape work seamlessly together as a complete system. To ensure your materials meet Passive House standards, check the Passive House Institute's database of certified airtightness systems.
When selecting sealing products, look for Passive House Institute certification. This certification guarantees that the materials meet the strict airtightness requirements of Passive House standards, which allow no more than 0.6 air changes per hour at a 50 Pascal pressure differential.
Once you've chosen your tools and materials, you'll need to decide between using tapes or liquid membranes based on your project's specifics.
Tapes vs. Liquid Membranes
The choice between tapes and liquid membranes largely depends on the application and installer preference. Joe Fitzgerald of Ecological Building Systems notes:
> "The good news is that it is difficult to go wrong with airtightness and it's still right to use either option - airtight window sealing tape or liquid airtight membrane. In fact, it often depends on user preference."
Here's a quick comparison of the two:
| Feature | Airtight Tapes | Liquid Membranes |
|---|---|---|
| Best Use | Straight window perimeters | Complex shapes and junctions |
| Ease of Application | Easier to control around windows | Requires more precision |
| Cost Effectiveness | Higher cost per linear foot | Better coverage per dollar |
| Weather Limitations | Can be applied in colder temperatures | Temperature restrictions may apply |
| Skill Level Required | Beginner-friendly | Intermediate to advanced |
| Cleanup | Minimal mess | Can be messy if not careful |
Tapes are ideal for window applications because they're easy to control, even for beginners, and can be applied in colder weather. However, they are typically more expensive per linear foot and may require a primer on certain surfaces.
Liquid membranes, on the other hand, are better suited for complex shapes, such as floor-to-wall junctions or service penetrations. They tend to be more cost-effective for large areas but require more skill to apply neatly and may not cure properly in low temperatures.
Fitzgerald stresses that application quality matters more than the product type:
> "The main cause of poor airtight quality comes from poor understanding, which in turn leads to poor detailing. Regardless of which option you choose, never underestimate the importance of using high quality airtight material like the Pro Clima suite of solutions."
When considering costs, remember that material prices are just one part of the equation. While liquid membranes may seem less expensive per square foot, additional costs like primer and labor can add up. Tapes are often faster to install around windows, whereas liquid membranes require more preparation and cleanup.
For most DIY builders, starting with high-quality tapes is a smart choice. They're easier to use and more forgiving, making them ideal for first-time applications around windows. Liquid membranes can then be reserved for areas where tapes might not conform as well or for larger, irregular surfaces. Choose the method that best suits your project to ensure an airtight seal throughout your window system.
Testing and Maintenance
Once you've sealed your windows, the next steps - testing and maintenance - are crucial to maintaining the airtightness required for Passive House standards. Testing ensures your work meets the strict 0.6 air changes per hour requirement, while regular maintenance protects against leaks that could compromise energy efficiency.
Testing for Air Leaks
Start with a visual inspection of your sealed windows. Look closely at the window frames for visible gaps, such as daylight peeking through, and check the caulking and weather stripping for cracks or signs of wear. This step helps identify the most obvious problem areas.
For a more detailed check, try a simple smoke test. Light a smoke pencil or an incense stick and run your exhaust fans to create negative pressure in your home. Watch how the smoke behaves - if it's drawn toward the window edges, you've found a leak.
For the most precise results, consider a professional blower door test. In this test, a technician depressurizes your home and measures air leakage across the building envelope. Tools like thermal cameras or additional smoke testing can pinpoint exactly where air is infiltrating around your windows.
A great example of success comes from a Korean project by Plantree, which used Rothoblaas sealing solutions. Their blower door test recorded an impressive 0.14 air changes per hour, far below the Passive House maximum of 0.6.
Once you've identified and addressed any leaks, ongoing maintenance will help ensure your seals remain effective.
Maintaining Your Window Seals
Even the best window seals require care to stay effective over time. Annual inspections are a must - look for cracks in the caulking or deterioration in the weather stripping. These small issues, if left unchecked, can lead to larger air leaks.
Cleaning is another key step. Wash seals yearly with mild soap and water, then dry them thoroughly to prevent mold growth. Reapply caulk or replace weather stripping every few years or whenever you notice a drop in performance.
Seasonal checks are also essential. Windows endure different stresses depending on the weather. For instance, inspect your seals before winter to ensure they're ready to maximize heating efficiency, and check them again after severe storms.
Simple DIY checks can also help you catch early signs of trouble. Use a lit candle or a piece of paper to detect air movement near the seals.
Finally, keep a log of when you installed sealing materials and when you last inspected or repaired them. This record will help you stay ahead of maintenance needs, ensuring your Passive House windows perform optimally for years to come. Regular testing and upkeep are key to maintaining the energy efficiency that Passive House standards demand.
Summary and Best Practices
Sealing windows to meet Passive House standards boils down to one key principle: creating a continuous air barrier. This airtight layer is critical for achieving the 0.6 ACH50 standard at 50 Pascals pressure difference .
Start by defining the boundaries of your air barrier early in the design phase. Share airtightness goals with everyone involved in the project to ensure alignment . As building expert Tim Healey puts it:
> "Air-sealing is the cheapest way to reduce energy use in homes. Without airtightness, insulation is useless."
When it comes to materials, choose those with a proven track record. Products like Siga's Corvum tapes, airtight membranes, and specialized caulks may come with a higher upfront cost, but their durability ensures the long-term performance needed for Passive House standards .
The principle of a continuous air barrier is non-negotiable. UK Building Compliance highlights its importance:
> "The key principle for achieving airtightness is to create a single, continuous, and robust airtight layer (or air barrier). This layer surrounds the thermal envelope of the building."
Pay special attention to key areas like foundation-to-wall and window-to-wall connections. Use firm pressure when rolling tapes to ensure adhesives fill all voids. Seal these junctions early, before they become difficult to access .
Air sealing also goes hand-in-hand with water protection. Details like head flashing and sill-pan flashing are your first defense against water intrusion, safeguarding both the air seals and the building structure . This integration of air and water management builds on earlier sealing techniques to create a more resilient structure.
The benefits of proper sealing are enormous. Passive House buildings typically use 40% to 80% less energy than conventional ones. Space heating and cooling demands drop by 80–90%, far outperforming current building code minimums . Considering that buildings account for 76% of electricity use and 40% of total U.S. primary energy consumption, the energy savings from airtight construction are hard to ignore .
Finally, regular maintenance and testing are crucial. Keeping seals in top condition ensures they continue to meet Passive House standards for years to come. By combining high-quality materials, meticulous installation, and ongoing care, you can create the airtight envelope that makes Passive House performance a reality.
At [DIY Eco Homes](/), we believe that dedicated DIY builders can achieve Passive House window sealing by following these tried-and-true methods. With a focus on creating that all-important continuous air barrier, the goal is well within reach.
FAQs
What mistakes should I avoid when sealing windows to meet Passive House standards?
When sealing windows to meet [Passive House](/blog/cost-breakdown-for-passive-house-construction) standards, there are a few common pitfalls to watch out for:
- Overlooking edges and corners: These spots are especially vulnerable to leaks if not sealed with care.
- Choosing improper materials: Using airtight tape or membranes specifically designed for Passive House construction is a must.
- Skipping airtightness testing: Without a blower door test, unnoticed gaps can undermine energy efficiency.
To ensure success, focus on sealing window frames tightly with reliable, high-quality materials. Follow up by conducting airtightness tests to confirm your work meets the necessary energy efficiency and comfort standards.
How can I check if my windows are sealed tightly enough for Passive House standards?
To determine whether your windows meet Passive House airtightness standards, you'll need to perform a blower door test. This test works by creating a pressure difference of 50 Pascals between the inside and outside of your home, measuring how much air leaks out. To comply with Passive House standards, the air change rate must be 0.6 air changes per hour or less.
If you're tackling window sealing as a DIY project, prioritize using high-quality materials like specialized sealants, tapes, and gaskets designed for airtight construction. Properly sealing your windows not only helps you meet Passive House standards but also boosts energy efficiency and makes your home more comfortable.
What are the advantages of using liquid membranes versus tapes for sealing windows, and when should you choose each option?
Liquid membranes provide a smooth, airtight seal that adapts effortlessly to irregular window shapes and uneven surfaces. This makes them a go-to option for areas where maintaining an uninterrupted seal is essential, especially around complex or non-standard window frames. While they effectively minimize the chance of gaps, they tend to be pricier and demand precise application for the best results.
Tapes, by contrast, are fast and simple to use, making them perfect for flat, straightforward surfaces like standard window perimeters. They're an affordable and practical solution for simpler sealing jobs. However, using overlapping pieces might create weak spots that could compromise the airtight seal.
If you're working on intricate or high-stakes areas where durability and accuracy matter most, liquid membranes are your best bet. For jobs where speed and ease take priority, tapes are a smart and efficient choice.