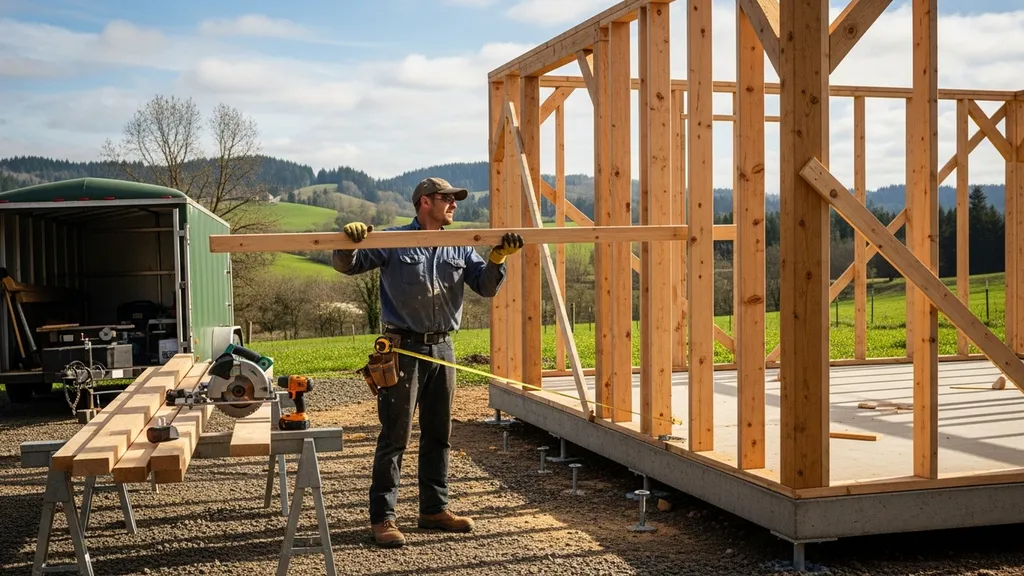
Step-by-step guidance to choose, plan, and build workshop shed plans that fit your workflow, budget, and site — with foundation, insulation, and power tips.
Workshop Shed Plans: Design Your Ideal Workspace
Choosing the right workshop shed plans is the first step toward a functional, efficient workspace that fits your workflow and budget. This guide walks through how to match workshop shed plans to specific uses—woodworking, metalworking, hobby studios—then covers siting, foundation choices, layouts, framing, insulation, ventilation, and electrical planning so you can move from idea to build-ready materials list. Read on to learn practical sizing rules, foundation trade-offs, insulation strategies for year-round comfort, and a copyable materials checklist.
TL;DR:
- Pick a plan sized to the equipment: most small workshops are 100–400 sq ft; allow 36–48 in circulation and 8–10 ft headroom for power tools.
- Use the right foundation for site conditions: slab-on-grade or pier & beam for level sites, skids for mobility, and engineered footings on slopes/flood zones.
- Plan power and ventilation early: reserve dedicated 240V circuits for heavy tools, lay conduit for future solar, and design mechanical exhaust for dust and fumes.
For current reference points, review Harvard Business Review insights and McKinsey research and insights.
How to Choose the Right Workshop Shed Plans for Your Needs
Start by listing the primary activities and the largest tools. A hobby woodworking shop centered on a table saw and planer needs a different plan than a metal shop with a hydraulic press and welding area. Typical small workshop sizes range from about 100 sq ft (10x10) for hobby benches to 400 sq ft (20x20) for a serious home shop. Recommended clearances:
- Table saw: 8–10 ft in feed and outfeed direction, 36–48 in clear aisles to side stations.
- Drill press: 36 in workshop clearance around the tool.
- Bandsaw: 36 in front clearance; 8–10 ft headroom for resawing on some models.
Include these planning items in your brief:
- Door type: sliding or roll-up doors save swing space; standard man-door (36 in) for personnel traffic; overhead garage doors better for vehicle/tool access.
- Headroom: minimum 8 ft; 10–12 ft for crane or hoist use.
- Overhead hoist/crane: if moving heavy items, plan rated structure and beam support in framing.
- Permit triggers: many jurisdictions exempt small accessory structures under a size threshold; check local zoning and the International Residential Code (IRC) definitions for accessory buildings before finalizing plans.
Research shows that upfront planning for tool layout and access reduces retrofit costs. For simple storage sheds and workshop shells, the EPA provides basic construction guides that are useful for non-combustible storage and layout ideas: Burn Wise: How to Build a Wood Shed | US EPA. Use that as a quick checklist when planning material storage and clearances.
Site Selection and Foundation Options for Workshop Sheds
Pick a site with stable drainage, easy access, and appropriate sunlight. Key siting criteria:
- Drainage: avoid low spots; provide 6–12 in of grade away from the building.
- Access: allow truck or trailer access for materials and waste removal.
- Sun and wind: position windows for daylight but limit prevailing wind exposure for doors and ventilation stacks.
- Neighbors and setbacks: confirm property lines and minimum setback distances in local zoning.
Below is a quick comparison table of common foundation types:
| Foundation type | Pros | Cost range | Climate suitability | Insulation/connectivity | DIY difficulty |
|---|---|---|---|---|---|
| Slab-on-grade | Durable, solid floor for heavy tools | Medium | Moderate to warm (with proper edge insulation) | Works with under-slab insulation; good for ducts | Medium |
| Concrete footings + stem wall | Strong, good for heavier loads | High | Cold climates when combined with frost protection | Easier to insulate walls; good utilities access | High |
| Pier & beam | Minimal excavation, good ventilation under floor | Low–Medium | Most climates; raise above minor flooding | Easier to run wiring under floor; can add insulated floor deck | Medium |
| Skid / timber runners | Mobile, low-permit in some areas | Low | Mild climates or non-permanent workshops | Harder to insulate; best for unconditioned shops | Low |
When flood, frost, or slope are present you must adjust the foundation. FEMA recommends avoiding floodplains when possible and elevating structures or using flood-resistant materials if unavoidable; consult FEMA guidance on building in flood-prone areas: https://www.fema.gov/floodplain-management. For frost-prone sites, consider a frost-protected shallow foundation or deeper footings; local code and climate (IECC zones) guide required depths.
If you favor a solid workshop floor for heavy machinery, read our detailed how-to on slab footing basics and the trade-offs in our slab-on-grade pros and cons article before finalizing layout and utilities routing.
Workshop Floor Plans & Layout Ideas for Efficient Workflow
Three common layouts work well for small shops:
- Linear layout: tools and benches along one wall, circulation on the opposite side—good for narrow footprints like 10x12.
- Island layout: central tool island (table saw) with surrounding benches—ideal for 12x20 and larger where multiple operators may work.
- Peripheral workbench: workbenches around the perimeter with central open space for assembly—suits finishing and storage-heavy shops.
Example footprints and suggested zones:
- 10x12 (120 sq ft): Prep bench, small tool bank (drill press, scroll saw), and wall storage. Keep a 36 in minimum aisle.
- 12x20 (240 sq ft): Table saw island, benchtop tools along one wall, finishing corner with ventilation. Allow 8–10 ft for table saw outfeed.
- 16x24 (384 sq ft): Dedicated machine bay, lumber storage, finishing room separated by a partition, and a small dust collection room if needed.
Door, Window, and Flow Considerations for Dust and Fumes:
- Locate doors to create cross-ventilation and to move large stock in and out.
- Use high windows for daylighting without direct glare on work surfaces; skylights with operable vents help with heat and fume removal.
- For metalworking or welding, create a dedicated, vented welding bay with exterior exhaust or a downdraft table to prevent fumes migrating.
Circulation clearances to use:
- Aisles: 36–48 in for single operator; 48–72 in for two-operator aisles or cart access.
- Tool service space: reserve an additional 24–36 in behind stationary tools for maintenance.
- Doorway sizing: at least 36 in for personnel doors; 8 ft wide by 7–8 ft high for overhead doors to accommodate trailers or large stock.
This video provides a helpful walkthrough of the key concepts:
Compare woodworking vs metalworking layouts: woodworking prioritizes dust control and storage for long stock, while metalworking requires stronger floors, fire-safe surfaces, and fume exhaust. Consider passive-house daylighting and thermal mass where natural light and consistent temperatures help finishing work, especially in conditioned shops.
Structural Materials, Framing, and Roof Choices
Wall Framing and Sheathing Choices:
- Platform framing with 16 in stud spacing is common for small shops; 24 in spacing saves lumber but reduces load capacity for heavy shelves.
- Sheathing: plywood offers higher nail-holding and moisture resistance; OSB is less expensive and suitable for many builds. See our comparison in OSB vs plywood guide and the deeper guide to wall sheathing.
- For airtightness, continuous exterior sheathing combined with taped seams improves performance over interior-only air barriers; the passive-house airtightness guide covers best practices in more detail.
Roof types and pitch:
- Gable roofs are simple and shed water easily; a 4:12 to 6:12 pitch is common for shed-style buildings.
- Skillion (single-slope) roofs maximize solar access on one side and simplify rainwater collection; ideal for south-facing solar arrays.
- For long-span roofs or heavy snow loads, consider prefabricated engineered trusses rated for local loads.
Roofing materials and eco options:
- Metal roofing (recycled steel or aluminum) offers durability and is recyclable; see our recycled metal roofing installation guide for installation tips.
- Composite and recycled shingle products reduce embodied carbon; review our eco-friendly roofing options for comparisons.
- Use the sustainable materials guide when selecting siding and finish materials to reduce lifecycle impact.
Quick specs to plan:
- Stud spacing: 16 in O.C. for typical loads; use 12 in O.C. or structural studs where heavy equipment hangs from walls.
- Typical rafter spans for sheds: up to 12–14 ft common with 2x10s; use engineered trusses for larger clear spans.
- Engineered beams or steel may be required when planning overhead hoists or long, unobstructed work bays.
Refer to our framing techniques article for step-by-step framing scaled to shed projects.
Insulation, Airtightness, and Ventilation for Year-round Use
Choosing insulation and target R-values depends on climate and whether the space will be conditioned. For an unheated workshop in mild climates, R-13 walls and R-19 roof batts may suffice. For a conditioned space or cold climates, aim for:
- Walls: R-20 to R-30 (combination of cavity insulation and continuous exterior insulation).
- Roof/ceiling: R-30 to R-60 depending on roof type and attic depth.
- Floor: R-10 to R-30 when over unheated crawl space.
Insulation types and trade-offs:
- Fiberglass batts: low cost, easy to install, moderate performance.
- Mineral wool: better fire resistance and sound control, slightly higher cost.
- Foam boards (polyiso, EPS, XPS): higher R per inch and useful for continuous exterior insulation; compare types in our foam board comparison.
- Spray foam: excellent airtightness but higher cost and considerations for proper installation.
Airtightness basics:
- Use tape and gaskets at panel joints, insulated headers, and rough openings.
- Install a continuous exterior air barrier or a dedicated interior air barrier depending on climate strategy; our airtightness best practices article explains sealing and blower-door testing concepts.
- In cold climates, follow our cold-climate design tips to place insulation and vapor control layers correctly.
Ventilation Strategies for Fumes, Dust, and Humidity:
- For woodworking: set up a dust collection system with a single-point collector and appropriate ductwork; locate the collector near major dust sources.
- For metalworking/welding: install local exhaust ventilation or a downdraft table and ensure proper makeup air to avoid negative pressure.
- For conditioned workshops, consider an ERV/HRV to control humidity while exchanging stale air; for simple hobby shops, an axially mounted exhaust fan with intake vents can be adequate.
- OSHA’s indoor air quality guidance provides recommended approaches for controlling airborne contaminants: https://www.osha.gov/indoor-air-quality.
Match insulation approach to budget and climate with this quick mapping:
- Low-cost: cavity batts only — good for mild climates but higher heat loss.
- Mid-range: cavity batts + modest exterior foam — balances cost and performance.
- High-performance: continuous exterior foam + airtight detailing — best for cold climates and conditioned workshops.
For step-by-step shed insulation methods see our shed insulation methods article and our ventilation adaptation ideas in ventilation strategies for cabins which can be applied to small workshops.
Power, Lighting, and Basic Electrical Planning
Electrical planning should begin with a list of tools and their motor ratings. Common rules of thumb:
- Reserve dedicated 240V circuits for heavy tools such as table saws, air compressors, and welders. Typical heavy tool circuits are 30A–50A depending on equipment nameplate ratings.
- Install GFCI protection in all outlets near work areas and any exterior-facing circuit runs.
- Outlet spacing: place receptacles every 6–10 ft along workbench walls; avoid long extension cord runs by planning bench outlets and ceiling-mounted retractable reels.
Circuit sizing and conduit:
- Add a 50% buffer to calculated loads for future expansion; for example, a 30A tool plus lighting and small tools may require a subpanel with a 60A feed depending on expected simultaneous loads.
- Use conduit for underground or exterior runs; schedule 40 PVC conduit for typical buried runs and follow local depth and fill requirements.
- For off-grid or solar-ready systems, run 2" conduit from the planned inverter/battery location to the proposed solar array roof location to allow future upgrades.
Lighting Layout:
- Task lighting: 3,000–5,000 lumens focused over benches and machine stations.
- Ambient lighting: 300–500 lux for general workshop areas; use LED fixtures for long life and low heat.
- Daylighting: place north-facing windows for consistent light without glare; skylights and clerestory windows add usable daylight but require detailing to avoid heat loss.
Solar-ready Wiring and Off-grid Options:
- If planning for partial or full solar, use our solar cost calculator to estimate array size and battery needs.
- Pre-run conduits and allocate space in the subpanel for inverter and battery disconnects.
- For troubleshooting and commissioning of small solar systems, consult our solar troubleshooting tips.
Always consult a licensed electrician for final plans and code compliance; our basic electrical safety guide outlines what DIYers can safely do and when to hire a pro. The National Electrical Code (NEC) provides the legal framework and minimum requirements for wiring and is enforced via local jurisdictions: https://www.nfpa.org/NEC.
Cost-saving Tips, Materials Checklist, and Tools
Key points to guide spending:
- Save on non-structural finishes: use reclaimed lumber for interior trim, shelving, and jigs.
- Invest in the shell: spend more on airtightness, insulation, and a durable floor if tools or finishes require stable conditions.
- Stage upgrades: build a simple shell first and add dust collection, heating, or AC later when budget allows.
Build-ready Materials Checklist (copy This Into a Shopping List):
- Foundation: concrete mix, rebar, gravel, form lumber (if slab/footing)
- Framing: pressure-treated sill plates, 2x6 or 2x4 studs, headers, rim joists
- Sheathing: OSB or plywood for walls and roof deck
- Roofing: underlayment, metal panels or shingles, flashing
- Insulation: cavity batts, foam board (polyiso/EPS/XPS), tape, sealants
- Airtightness: membrane/tape, gaskets for windows/doors, can of low-expansion foam
- Exterior finish: siding of choice, housewrap
- Doors/windows: insulated personnel door, overhead or roll-up door as required
- Electrical: subpanel, breakers, wiring, GFCI outlets, conduit, lighting fixtures
- Finishes and hardware: hinges, fasteners, screws, anchors
Essential Tools for a First-time Shed Builder:
- Circular saw and miter saw for cutting framing
- Corded drill/driver with impact driver
- Level (4 ft and torpedo), framing square
- Air compressor with finish nailer (optional but speeds siding and trim)
- Post-hole digger and concrete finishing tools for footings
- Personal protective equipment: eye protection, dust masks/respirator, hearing protection
When to hire help:
- Structural concrete footings or frost-protected foundations: hire an experienced contractor if unfamiliar with forms and reinforcement.
- Main electrical service and final inspection: a licensed electrician should sign off on work requiring service changes or permanent service meters.
- Complex roofing or large truss installations: recommend professional crews for safety and speed.
Use our DIY vs hiring comparison to decide which tasks to DIY and which to subcontract. For framing step-by-step help, see framing techniques. Prioritize airtightness and a durable floor—these deliver long-term savings by reducing heat loss and maintenance.
The Bottom Line
Select workshop shed plans that match the primary function, then pick a foundation suited to site conditions and future equipment loads. Invest in a sound envelope (insulation and air-sealing) and pre-plan electrical and ventilation so upgrades are simple. Start with a clear materials list and staged budget: build the shell well, add systems as your workflow and funds allow.
Frequently Asked Questions
How big should my workshop shed be for woodworking?
The short answer: plan from the largest machine’s space needs. For a basic hobby woodworking bench and portable tools, 100–200 sq ft (10x12 to 12x16) is typical. If you center the shop around a table saw and planer, aim for 240–400 sq ft (12x20 to 16x24) to allow 8–10 ft outfeed and 36–48 in aisles. Include lumber storage in the footprint rather than tacking it onto the end of the shop to avoid blocking workflow.
Do I need a permit to build a workshop shed?
Permit requirements vary by jurisdiction and depend on size, use, and whether the shed is conditioned or contains plumbing/electrical service. Many areas exempt small accessory structures under a set square-foot threshold, but you should check local planning and building departments and the International Residential Code (IRC) definitions for accessory buildings. When in doubt, submit a plan; inspections help ensure safety and insurability.
What foundation is best if my site is on a slope?
On a slope, pier & beam or stepped concrete footings are common solutions. Piers allow the building to sit level while minimizing earthwork; stepped footings and a retaining stem wall work for moderate slopes. In flood-prone sloped sites, elevate the structure above the base flood elevation per FEMA guidance. Soil testing and a geotechnical recommendation are advisable for significant slopes or weak soils.
Can I insulate a workshop cheaply and still work year-round?
Yes, with trade-offs. Low-cost strategies like cavity batt insulation combined with targeted weather-sealing at doors and windows can make the space usable in shoulder seasons. For true year-round comfort in cold climates, combine cavity insulation with continuous exterior foam and a sealed, insulated door, plus a small heater and controlled ventilation. For specifics on options and R-value targets by climate, see our shed insulation methods guide.
How do I plan electrical needs for heavy tools?
Make a list of all motors and their nameplate amperage, then calculate likely simultaneous loads. Reserve dedicated 240V circuits for table saws, welders, and large compressors; place convenient 120V bench outlets every 6–10 ft. Provision space in your subpanel for future expansion and run conduit for future solar or additional circuits. Consult a licensed electrician to size feeders and breakers and to ensure compliance with the NEC and local code.